

Hello World!
As we know installing Python isn’t a big task and requires minimal time and effort.
Today in this article, you are going to learn the most elementary step required to work in Python, the Python installation. We here are going to see how to install the latest version of Python 3 on both Windows and Ubuntu operating systems.
Python Installation on Windows
Odds are, your Windows system didn’t come with Python already installed on it. Fortunately, Python installation doesn’t require much work. We just need to download the Python installer and run it.
As Python is free, we can download the Python Installer from Python’s original website at no cost. Let’s have a look at the step-by-step procedure of Python installation on Windows:
We just need to follow 2 major steps in order to install Python:
Step 1 – Downloading the Python 3 installer
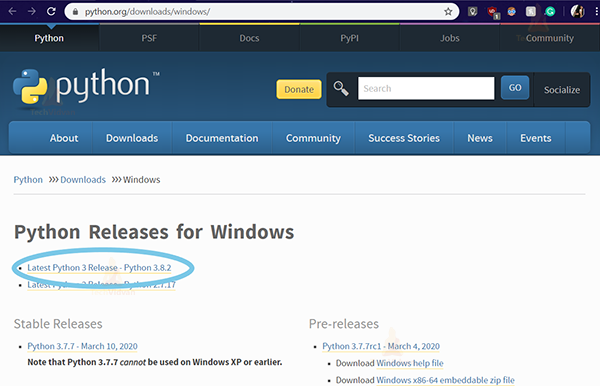
1. Open a new tab on your browser and go to the link: Python’s Download page for Windows.
2. You’ll see under the heading of Python Releases for Windows, the link for the Latest Python 3 Release – Python 3.x.x. (The latest right now is Python3.8.2).
Clicking on this link will redirect you to the Python 3.x.x download page.
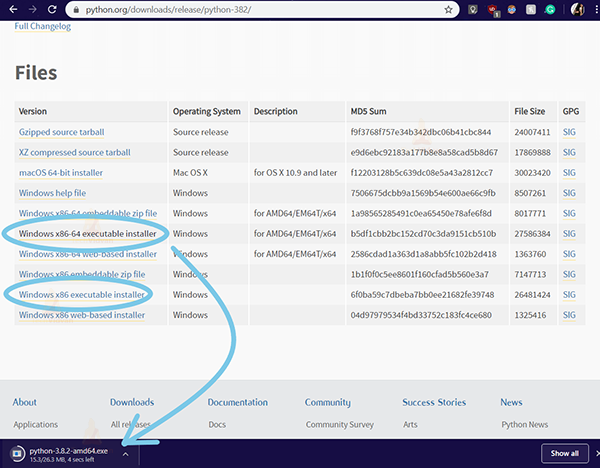
3. Scroll to the bottom and under the Files section, you’ll find links for various operating systems and their versions.
Select Windows x86-64 executable installer for 64-bit or Windows x86 executable installer for 32-bit.
Confused whether you need 32-bit or 64-bit installer?
- If your system has a 32-bit processor, go for the 32-bit installer.
- If your system has a 64-bit processor, you can choose either installer.
- The difference is that the 32-bit version will generally use less memory.
- Whereas, the 64-bit version provides better performance.
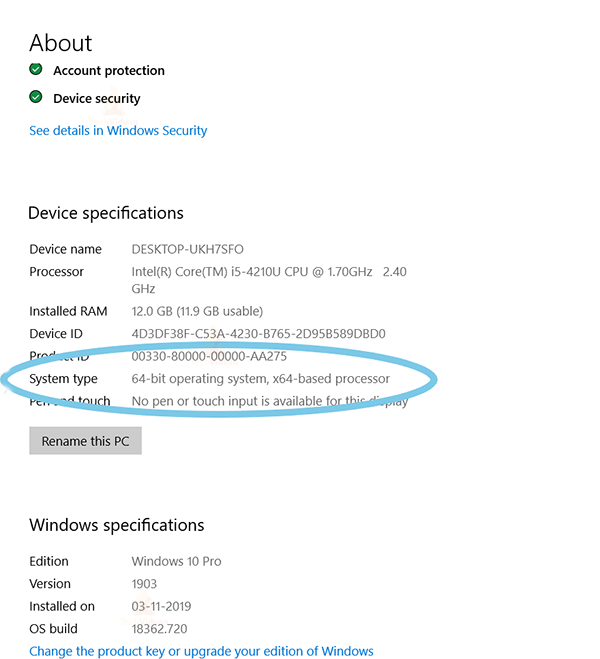
Not sure which processor your system has?
In the windows search bar below, search for Device Specifications. You’ll see the system specifications against the System Type title.
Step 2 – Run the installer
1. After downloading the installer, all you need to do is to run it by double-clicking on the downloaded file. Next, a dialog box appears.
2. Make sure to check the 2 boxes at the bottom of the dialog box.

3. Click Install Now. Now you’ll have Python 3 installed on your system. Search for IDLE on your windows search bar and open up IDLE (Python 3.8.2).
A window appears on your screen, this is your Python Shell. This is where you’ll run your code.

Python Installation on UBUNTU
The very first step before installing Python 3 on Ubuntu is to check your system’s Ubuntu version. The version of your operating system determines the steps you need to follow for Python Installation.
You can check the version of Ubuntu you use by running the following command in your terminal:
~$ lsb_release - a
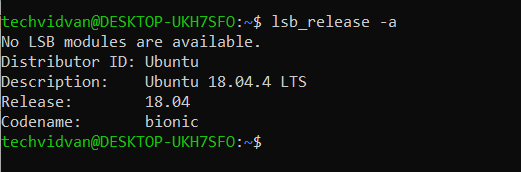
You can see your version number against Release in the output.
Depending on the version number do the following:
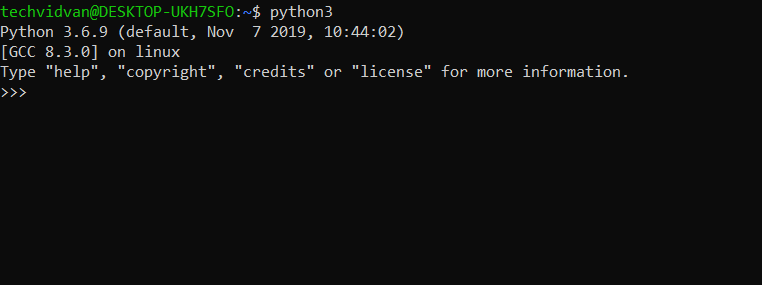
- For Ubuntu version 17.10, Ubuntu 18.04 (and above), Python 3.6.9 comes installed.
- You can invoke it by running the command python3.
As the latest version of Python 3 is Python 3.8, we can update it by running the following commands given under the next section, that is, Python installation for Ubuntu 16.10 and 17.04.
- For Ubuntu version 16.10 and Ubuntu 17.04, Python 3.6 doesn’t come installed.
- But, it is available in the universe repository from where you can download it.
- Install Python by running the following commands:
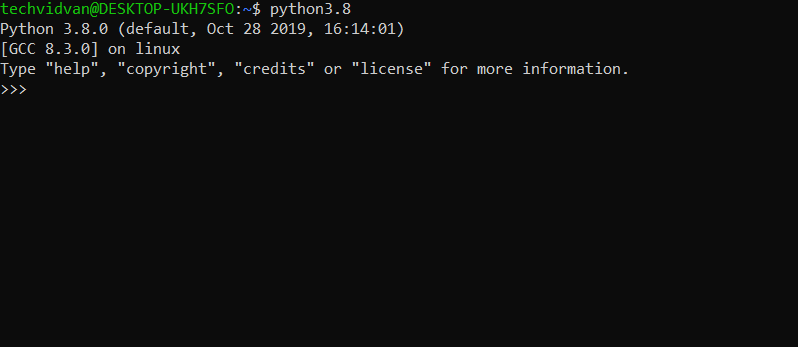
$ sudo apt-get update
$ sudo apt-get install python3.8
You can now invoke it using the command python3.8.
- For Ubuntu 14.04 and 16.04, Python 3.6 needs to be installed from the Personal Package Archive(PPA).
- The following command will work while installing Python 3.6.
$ sudo add-apt-repository ppa:deadsnakes/ppa
$ sudo apt-get update
$ sudo apt-get install python3.8
Now, invoke it using python3.8.
Summary
Here we come to the end of our article.
In this, we went through the step by step python installation processes for different browsers that is, Windows and Ubuntu. These are tried and tested processes that require less effort.
Now that you have Python installed on your system, go ahead and make some cool Python programs.