


Node.js is a powerful platform for building web applications and server-side software. One of the key tools in the Node.js ecosystem is NPM, or Node Package Manager. In this article, we’ll take a closer look at NPM and how it can be used by students to manage dependencies and build Node.js applications.
What is NPM?
NPM is a package manager for Node.js that makes it easy to install and manage external libraries and packages. It provides a centralized repository of modules that can be easily installed and included in a Node.js application with a simple command. NPM also provides tools for managing versioning and dependencies, making it easier to keep track of changes and ensure compatibility across different packages.
Install NPM
To use NPM, you first need to have Node.js installed on your computer. Once you have Node.js installed, you can use the NPM command-line tool to install, update, and manage packages.
To install a package, you simply need to run the following command:
npm install <package-name>
This will download and install the specified package, along with any dependencies that it requires. NPM will also update your package.json file to include the new package in your project’s dependencies.
To update a package to the latest version, you can use the following command:
npm update <package-name>
This will download and install the latest version of the specified package.
NPM also provides a variety of other commands for managing packages and dependencies, such as:
1. npm list: Lists all installed packages and their dependencies.
2. npm outdated: Lists all packages that are outdated and need to be updated.
3. npm search: Searches the NPM registry for packages.
4. npm init: Creates a new package.json file for your project.
Using a package.json file
One of the key features of NPM is the ability to use a package.json file to manage your project’s dependencies. This file is a JSON file that includes information about your project, such as its name, version, and dependencies.
To create a new package.json file, you can run the following command:
npm init
This will prompt you for information about your project, such as its name, version, and description. It will also create a basic package.json file that you can customize with additional information and dependencies.
Once you have a package.json file, you can easily install and manage dependencies using the npm install command. When you install a new package, NPM will automatically update your package.json file to include the new dependency.
Features of NPM
As a student learning Node.js, you already know about NPM (Node Package Manager), but there are additional features and concepts you should know to get the most out of it.
1. NPM scripts automate tasks like running tests or deploying to a server.
2. It uses semantic versioning to indicate changes in a package, so you can make informed decisions about updating dependencies.
3. The NPM registry is a centralized database of packages that makes it easy to find and use third-party packages, but be sure to only install packages from reputable sources to avoid security vulnerabilities.
4. NPM provides security features like automatic vulnerability scanning and two-factor authentication, so you can minimize the risks of using third-party packages.
By understanding these additional features and concepts, you can use NPM more effectively and securely in your Node.js projects.
Using a Package
1. Install the package: You can install a package using the npm command with the package name. For example, to install the “lodash” package, you can run the following command:
npm install lodash
2. Import the package: After installing the package, you need to import it into your project. You can do this by adding the following code at the top of your JavaScript file:
const_=require('lodash');
3. Use the package: Once you have imported the package, you can use its functions and features in your code. Here is an example of how to use the “lodash” package to sort an array:
const unsortedArray = [3,1,4,1,5,9,2,6,5,3,5];
const sortedArray =_.sortBy(unsortedArray);
console.log(sortedArray);
This code will output the sorted array:
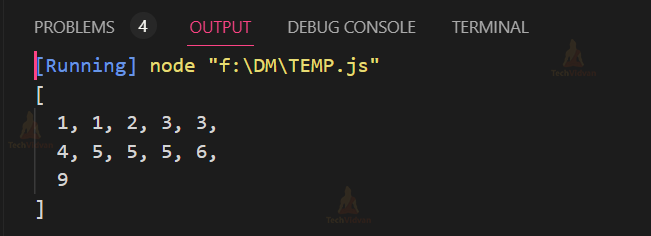

In this example, we used the “lodash” package to sort an array of numbers. We first installed the package using the “npm install” command, then imported it into our code using the “require” function, and finally used its “sortBy” function to sort the array.
NPM Global vs Local Installation
When you install an npm package, you have the option of installing it globally or locally. Here is an explanation of the difference between the two and how to install packages globally and locally with the required code:
NPM Global Installation:
When you install a package globally, it is installed in a system directory and can be used by any project on your system. Global packages are typically used for command-line tools and utilities that you want to be able to run from anywhere in your terminal.
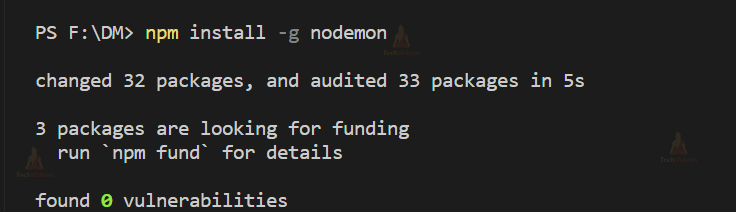
To install a package globally, use the “-g” flag with the “npm install” command. For example, to install the “nodemon” package globally, you can run the following command:

NPM Local Installation:
When you install a package locally, it is installed in your project directory and is only available to that project. Local packages are typically used for project-specific dependencies that are not needed by other projects.
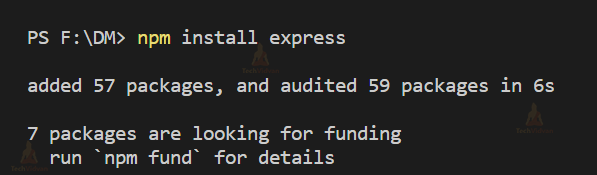
To install a package locally, run the “npm install” command without the “-g” flag in your project directory. For example, to install the “express” package locally for your project, you can run the following command:

Using the Installed Packages:
After installing the packages, you can use them in your project by importing them into your code. Here is an example of how to use the “express” package installed locally:


And here is an example of how to use the “nodemon” package installed globally:
nodemon app.js
In this example, we used the “express” package to create a simple web server, and the “nodemon” package to automatically restart the server whenever we make changes to the code. The “express” package was installed locally, while the “nodemon” package was installed globally.
Using Semantic Versioning to manage packages
Semantic Versioning is a way to manage versions of npm packages by assigning a version number with three digits separated by dots, such as “1.2.3”. Each digit has a specific meaning:
- The first digit represents a major version change that includes breaking changes and new features.
- The second digit represents a minor version change that includes new features but is backwards compatible with the previous version.
- The third digit represents a patch version change that includes bug fixes and minor changes that are backwards compatible with the previous version.
To manage packages using semantic versioning, you need to specify the version number when installing or updating the package. Here is an example of how to install a specific version of the “lodash” package using semantic versioning:


In this example, we specified version “4.17.21” of the “lodash” package. If we just run “npm install lodash” without specifying the version, it will install the latest version of the package.
You can also use semantic versioning to update a package to a new version. Here is an example of how to update the “lodash” package to the latest minor version:
npm update lodash@^4.17.0
In this example, we used the “^” symbol to indicate that we want to update to the latest minor version that is compatible with the current major version (which is “4”). If we want to update to the latest major version, we can use the “~” symbol instead:
npm update lodash@~4.0.0
In this example, we used the “~” symbol to indicate that we want to update to the latest minor version that is compatible with the current major and minor versions (which are “4.0”)
Conclusion:
NPM is a powerful tool for managing dependencies and building Node.js applications. Whether you’re building a simple web application or a complex server-side system, NPM provides a centralized repository of packages that can help you get your project up and running quickly. By learning how to use NPM effectively, you can streamline their development process and focus on building great software.