Android Broadcast Receivers
This article will help you understand what a broadcast receiver is and why it is used in Android Development. First, you will know the various types of Broadcast Receivers. Further, you will notice the system-generated intents and how they are implemented.
Let’s start!!!
What are Broadcast Receivers in Android?
Broadcast Receivers’ task is to receive any kind of intents from other applications. They respond to such intents with some behavior. Usually, broadcast receivers help to notify users of any process or application.
They can notify the user either through notification, status bar, or even through the user’s application(if active).
It’s not always necessary for your applications to be active to receive some notifications. Most of the time, these broadcasts are system originated and don’t require the app’s user interface.
The most common example is your alarm application. Whenever you keep an alarm, you leave that application or simple terms, close that application. Still, at that particular time, you receive the ring of your alarm.
Another pervasive example is your low battery reminders. Whenever your device has insufficient charge left, your device notifies you to keep charge or on battery saver mode.
These all happen because of the presence of broadcast receivers. It helps the system and the user’s applications to communicate.

Types of Broadcast Receiver in Android
Broadcast Receivers can be classified into two types:
1. Static Broadcast Receivers
All the declarations of static broadcast receivers are present in the manifest file. These broadcasts work both when the app is active and even if the app is inactive or closed. Static broadcast receivers are registered at the time of app installation and can respond to system-wide broadcast intents, such as boot completed or network changes. They are useful for handling events even when the app is not running, ensuring the app can respond to critical system-wide events.
2. Dynamic Broadcast Receivers
Dynamic Broadcast receivers run only when the app is running. If the app is closed, then you won’t be able to have any dynamic broadcast receivers. These receivers are registered in the code, typically in an activity or service, and they are unregistered when the app is no longer running. Dynamic receivers provide more flexibility and control, as they can be registered or unregistered based on specific conditions within the app, and they help conserve system resources by only being active when necessary.
Classes of Broadcast Receivers
Broadcast receivers can be divided into two subclasses:
1. Ordered Broadcast Receiver in Android
Ordered broadcasts are ordered and synchronous. The broadcast that has the highest priority is executed first and then the others. If two broadcasts have the same priority, then they won’t follow any order.
You can assign priority to the broadcast by using the android: priority attribute.
2. Normal Broadcast Receiver in Android
Normal broadcasts are unordered and asynchronous. The broadcasts don’t have any priority and follow a random order. You can run all the broadcasts together at once or run each of them randomly. These broadcasts are sent by using the Context:sendBroadcast.
To understand the above two, you can see the below example.
Usually, you get notifications from most applications. These notifications are customizable. You can set priority to these notifications. A notification with higher priority will come with a tone and will also occupy the system notification tray.
The notifications which have low priority may not give you a tone or vibration. You can even mute notifications of applications.
System Generated Intents in Android
The system generates several intents to show various system events. Some of them are described below:
SL No |
Intent Name |
Description |
| 1 | android.intent.action.CALL | It helps to call the person whose data is mentioned in the data provided to the intent. |
| 2 | android.intent.action.BOOT_COMPLETED | It is displayed when the device boots up successfully. |
| 3 | android.intent.action.BATTERY_LOW | This is used to notify the user that his device battery is pretty low. |
| 4 | android.intent.action.BATTERY_CHANGED | It notifies the user whenever there is a change in the state of the battery of the device. For example, Charging or battery level changing, etc. |
| 5 | android.intent.action.DATE_CHANGED | It updates the user that his device date has changed to some other day. |
| 6 | android.intent.action.BUG_REPORT | This is used to notify the user if some bugs have occurred while executing a task. |
| 7 | android.intent.action.POWER_CONNECTED | It makes the user aware that his device has connected to charge. |
| 8 | android.intent.action.POWER_DISCONNECTED | It indicates to the user that his device has got disconnected from the power supply. |
| 9 | android.intent.action.CONNECTIVITY_CHANGE | This indicated to the user that his device connectivity has changed. For example, The user has shifted from the cellular network to a WIFI. |
| 10 | android.intent.ACTION_AIRPLANE_MODE_CHANGED | It notifies the user if the airplane mode is turned on or off. |
Custom Intents in Android
Apart from the system-generated intents, you can also generate custom intent using the sendBroadcast() method. This allows our application to create intent by itself. You can achieve it by creating your Receiver class and sending broadcasts to that receiver class from your main activity.
To send a broadcast you can use the sendBroadcast() method in your activity class.
Implementation of Broadcast Receivers in Android
To make our app interactive we need to handle the broadcast receivers nicely. There are two ways to implement broadcast receivers that are as follows:
1. Context-Registered
This method is used to register a broadcast receiver dynamically. This is done using the registerReceiver() method.
Below is an example of the same.
registerReceiver(batteryBroadcastReceiver, IntentFilter(Intent.ACTION_BATTERY_CHANG
2. Manifest-Registered
Using this method, you can register your broadcast receivers in your manifest file. For this, you require to use the <receiver> tag in the manifest file.Below is an example of the same.
<receiver android:name="TehhVidvanReceiver" >
             <intent-filter>
                 <action android:name="android.intent.action.BATTERY_CHANGED" />
             </intent-filter>
</receiver>
Following are the steps using which you can implement broadcast receivers in Android. We will show you how to create a battery level indicator application that displays your device’s battery current level.
1: Open your Android Studio.
2: Click on Create New Project.
3: Select Empty Activity and proceed.
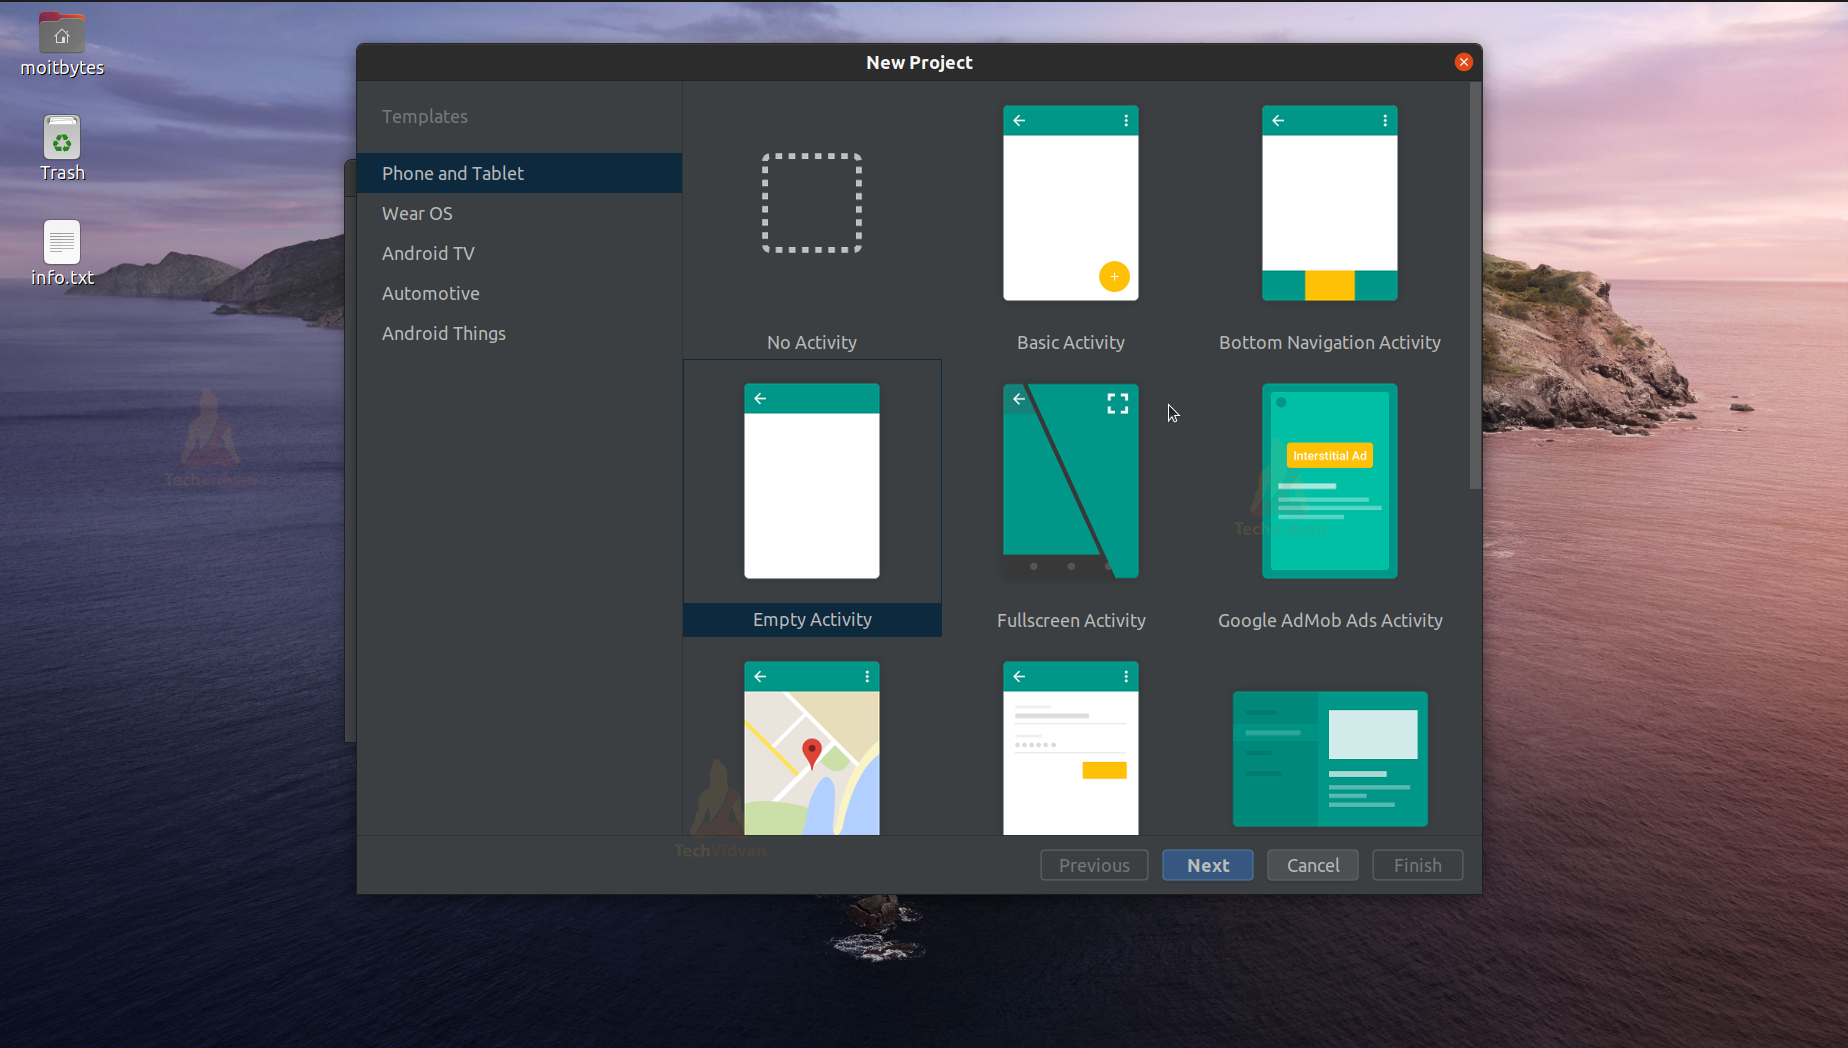
4: Enter your application name. In my case, it’s “TechVidvanBroadcast.” Next, select Kotlin from the dropdown. For the API level, select API 22 for now.

5: Now go to the app –> res –> layout –> activity_main.xml and add a text view to display the battery level. You can copy the activity_main.xml code from below
Code: (activity_main.xml)
<?xml version="1.0" encoding="utf-8"?>
<androidx.constraintlayout.widget.ConstraintLayout
    xmlns:android="http://schemas.android.com/apk/res/android"
    xmlns:app="http://schemas.android.com/apk/res-auto"
    xmlns:tools="http://schemas.android.com/tools"
    android:layout_width="match_parent"
    android:layout_height="match_parent"
    tools:context=".MainActivity">

    <TextView
        android:id="@+id/title"
        android:layout_width="wrap_content"
        android:layout_height="wrap_content"
        android:text="TechVidvan"
        android:textColor="@color/teal_700"
        android:textStyle="bold"
        android:textSize="35sp"
        app:layout_constraintVertical_bias=".1"
        app:layout_constraintBottom_toBottomOf="parent"
        app:layout_constraintLeft_toLeftOf="parent"
        app:layout_constraintRight_toRightOf="parent"
        app:layout_constraintTop_toTopOf="parent" />

    <TextView
        android:id="@+id/level_title"
        android:layout_width="wrap_content"
        android:layout_height="wrap_content"
        android:text="Your battery level is"
        android:textColor="@color/black"
        android:textSize="25sp"
        app:layout_constraintVertical_bias=".4"
        app:layout_constraintBottom_toBottomOf="parent"
        app:layout_constraintLeft_toLeftOf="parent"
        app:layout_constraintRight_toRightOf="parent"
        app:layout_constraintTop_toTopOf="parent" />
    <TextView
        android:id="@+id/battery_level"
        android:layout_width="wrap_content"
        android:layout_height="wrap_content"
        android:textColor="@color/black"
        android:textStyle="bold"
        android:textSize="50sp"
        app:layout_constraintBottom_toBottomOf="parent"
        app:layout_constraintLeft_toLeftOf="parent"
        app:layout_constraintRight_toRightOf="parent"
        app:layout_constraintTop_toTopOf="parent" />
</androidx.constraintlayout.widget.ConstraintLayout>
6: After coding the activity_main.xml, come to the MainActivity.kt file and paste the below code.
Code: (MainActivity.kt)
package com.example.techvidvanbroadcast

import android.annotation.SuppressLint
import android.content.BroadcastReceiver
import android.content.Context
import android.content.Intent
import android.content.IntentFilter
import android.os.BatteryManager
import android.os.Bundle
import android.util.Log
import android.widget.TextView
import androidx.appcompat.app.AppCompatActivity

class MainActivity : AppCompatActivity()
{
    private lateinit var displayBatteryLevel:TextView;
    override fun onCreate(savedInstanceState: Bundle?)
    {
        super.onCreate(savedInstanceState)
        setContentView(R.layout.activity_main)

        //Binding the text view with variable
        //to display the current battery level
        //of your phone
        displayBatteryLevel = findViewById(R.id.battery_level);

        //Registering broadcast receiver
        //to receive the changes in battery level
        registerReceiver(batteryBroadcastReceiver, IntentFilter(Intent.ACTION_BATTERY_CHANGED));
    }

    private val batteryBroadcastReceiver:BroadcastReceiver = object:BroadcastReceiver()
    {
        //Called whenever there is a change in battery level
        @SuppressLint("SetTextI18n")
        override fun onReceive(context: Context?, intent: Intent?)
        {
            if(intent?.action == "android.intent.action.BATTERY_CHANGED")
            {
                //Fetching the current battery level
                val battery_level = intent.getIntExtra(BatteryManager.EXTRA_LEVEL, 0);

                //Setting the battery level on display
                displayBatteryLevel.setText("$battery_level %");

                //Making a log statement
                //to show th battery level changed
                Log.d("TechVidvan", "Battery Level changed to : $battery_level");
            }
        }

    }

    override fun onDestroy() {
        super.onDestroy()

        //unregister the battery broadcast receiver
        //whenever the application is closed

        unregisterReceiver(batteryBroadcastReceiver);
    }
}
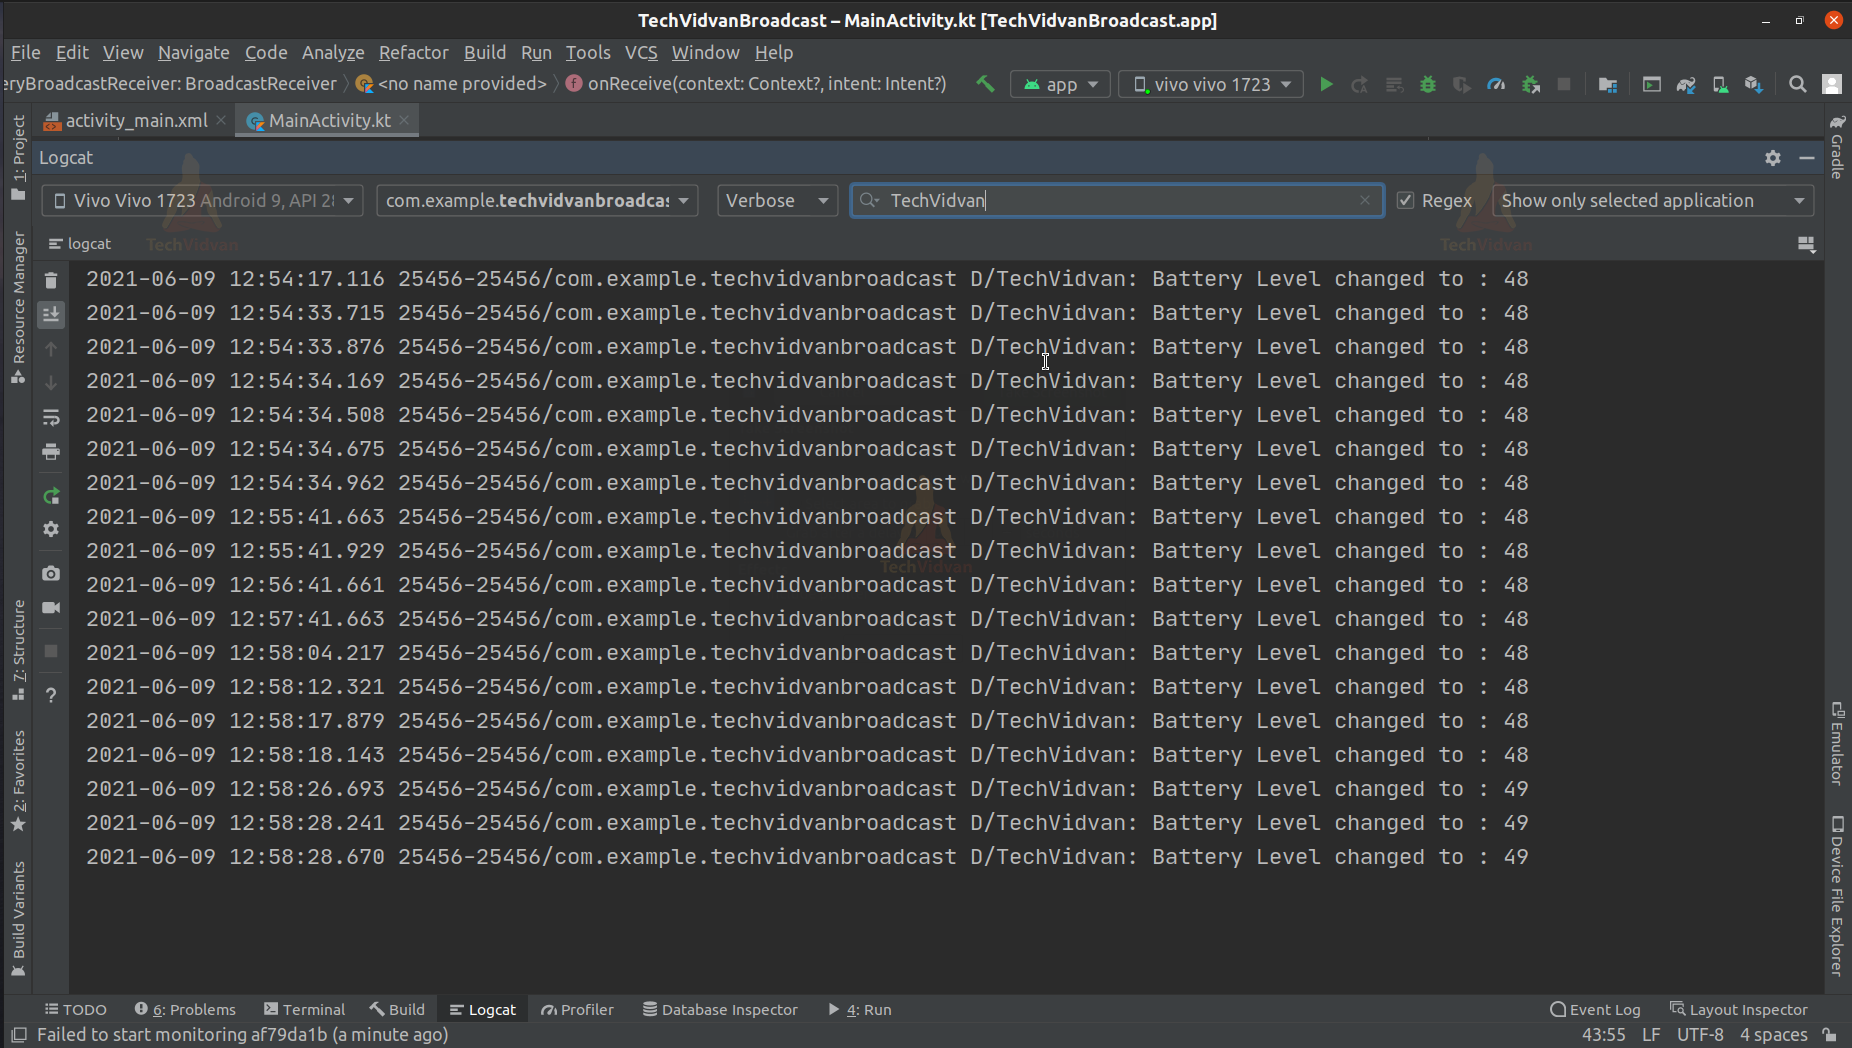
After you are done with the above steps, just build your application and run it on your device or emulator. Open your Logcat at your bottom left and then type TechVidvan in the tag. You can see your Logcat as follows.
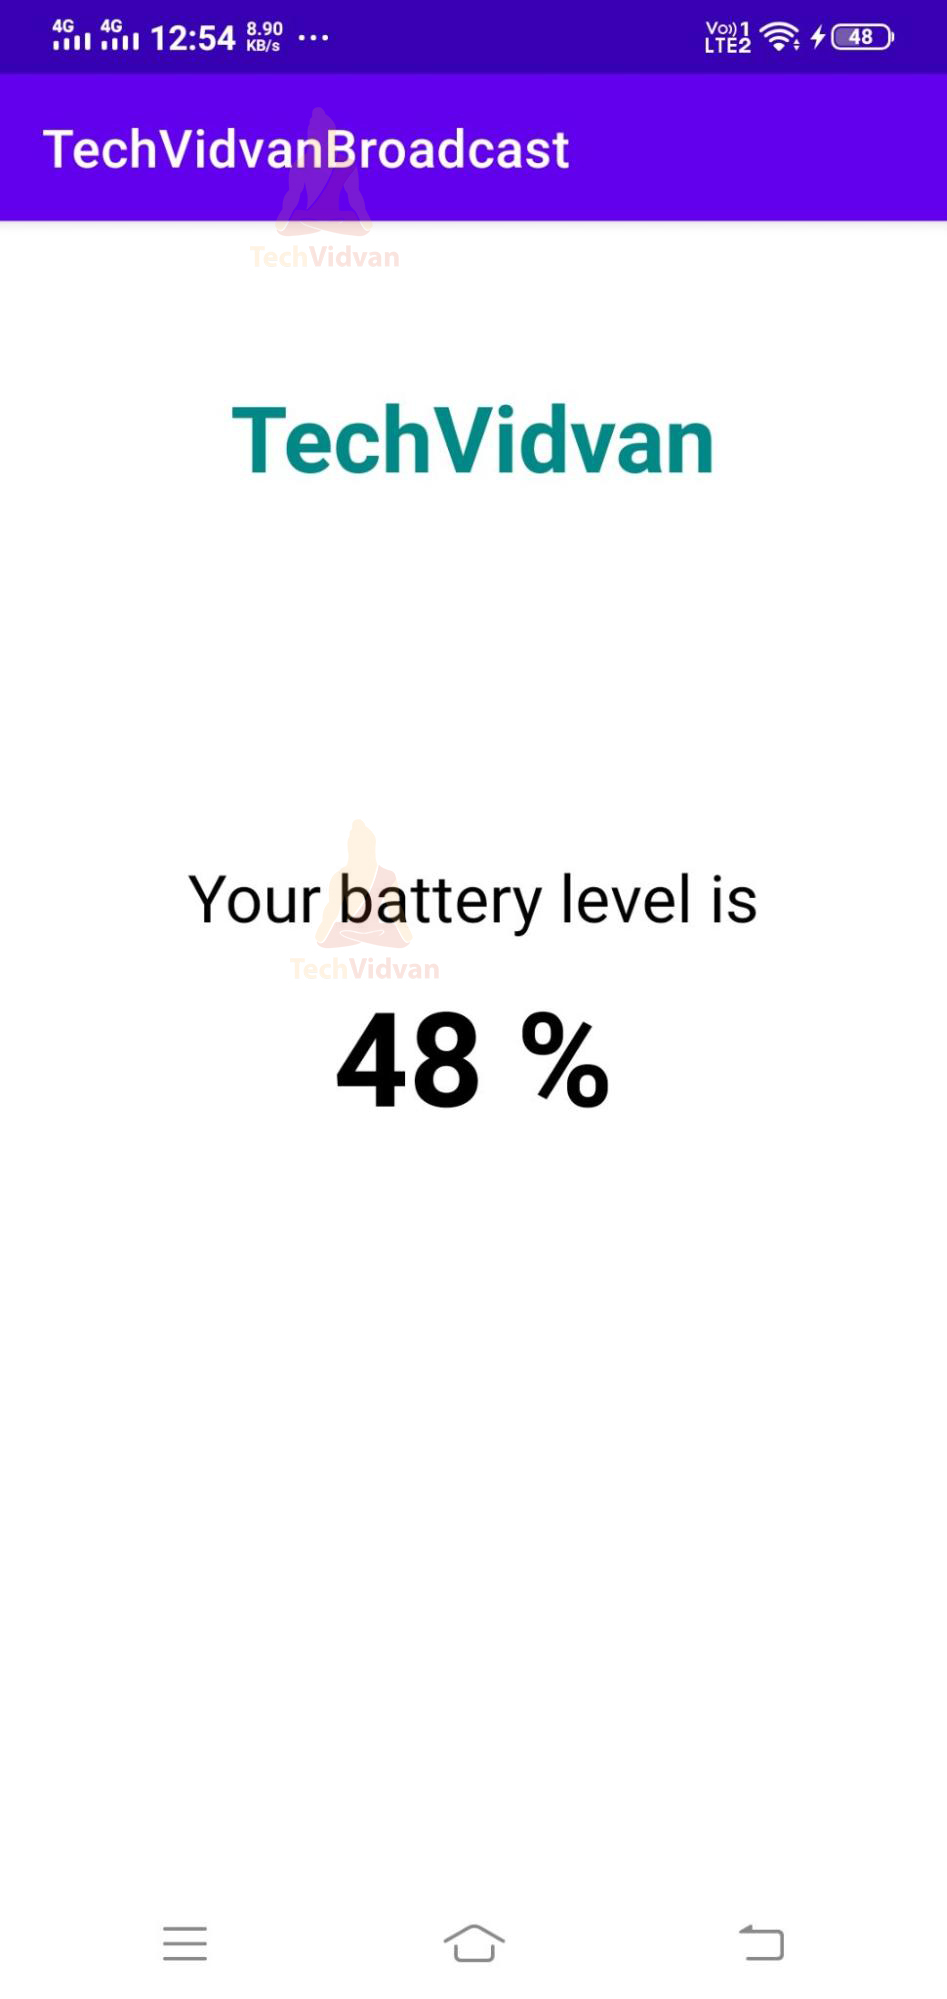
In your device, you can see the application displaying your battery levels and updating the levels whenever there is a drop or rise in the battery level.
Summary
Through this article, you understood what broadcast receivers are in android and why they are used. Then, going further, you saw the two types of broadcast receivers. You also came across the various system-generated intents which are used according to your requirements.
Lastly, you saw an implementation of broadcast receivers through a battery level displaying application.