Install Node.js in Easy Steps
Node.js is an open-source, cross-platform, server-side JavaScript runtime environment that allows developers to build scalable and high-performance web applications using JavaScript. Setting up a Node.js development environment is the first step in getting started with Node.js development. In this article, we will walk you through the steps required to install Node.js development environment on your machine. By following these steps, you can start building Node.js applications and take advantage of the many benefits that Node.js has to offer.
How to setup an Environment for NodeJs
Setting up Node.js for development can be a simple process with just a few steps. In this article, we will discuss how to set up the environment for Node.js
Step 1: Download and Install Node.js
- Go to the official Node.js website and download the recommended LTS (Long-Term Support) version for Windows.
- Once the download is complete, double-click on the downloaded .msi file to launch the installer.
- Follow the on-screen instructions to complete the installation. You can choose the default installation settings or customize them as needed.

Step 2: Verify Installation
- Once the installation is complete, open the command prompt by pressing the Windows key + R and then typing “cmd” in the Run dialog box.
- Type “node -v” in the command prompt to check if Node.js is installed correctly. If it is installed, the version number will be displayed.

Step 3: Create a Project
- Open your terminal or command prompt and create a new directory for your project. You can do this by typing the following command: ‘mkdir my-nodejs-project’.
- Change into the newly created directory by typing ‘cd my-nodejs-project’.
- Initialize a new Node.js project by typing ‘npm init’ in the terminal. This will prompt you to provide some information about your project, such as the name, version, and description.
- Follow the prompts and fill in the necessary information. You can use the default settings or customize them as needed.
- Once the initialization is complete, a ‘package.json’ file will be created in your project directory. This file contains information about your project, as well as a list of dependencies that your project requires to run.
- Install any necessary dependencies by typing ‘npm install <package-name>’ in the terminal. For example, if you need to install the Express.js framework, you would type ‘npm install express’.
Step 4: Install Dependencies
To install dependencies for your project, use the “npm install” command followed by the name of the package you want to install. For example, “npm install express” will install the Express.js package.
Step 5: Create a Server
To create a basic server in Node.js, create a new JavaScript file in your project folder and add the following code:
const http = require('http');
const hostname = '127.0.0.1';
const port = 8000;
const server = http.createServer((req, res) => {
res.statusCode = 200;
res.setHeader('Content-Type', 'text/plain');
res.end('Hello, World!\n');
});
server.listen(port, hostname, () => {
console.log(`Server running at http://${hostname}:${port}/`);
});
This code creates a server that listens on port 3000 and responds with a “Hello, World!” message.
Step 6: Run the Server
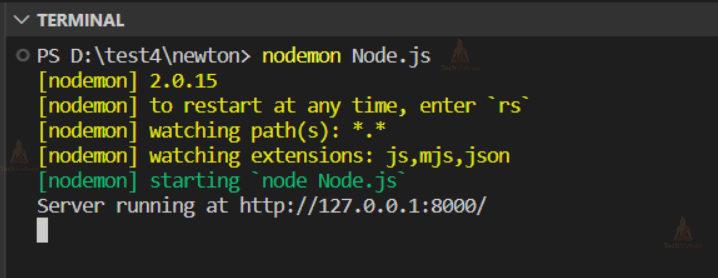
To run the server, type “node” followed by the name of your JavaScript file. For example, “node server.js”. This will start the server and you should see a message in the terminal that says “Server running at http://127.0.0.1:8000/ “. something like this
Setting up NodeJS for MAC:
1. Open your web browser and go to the official Node.js website.
2. Download the recommended LTS (Long-Term Support) version for Mac by clicking on the “macOS Installer” button.
3. Once the download is complete, open the downloaded .pkg file to launch the installer.
4. Follow the on-screen instructions to complete the installation. You can choose the default installation settings or customize them as needed.
5. Once the installation is complete, open your terminal and type node -v to check if Node.js is installed correctly. If it is installed, the version number will be displayed.
6. To set up the Node.js environment variables, open the Terminal app and type nano ~/.bash_profile to open the bash profile file.
7. Add the following line at the end of the file to set the PATH variable to the location of the Node.js binary:
export PATH="/usr/local/bin:$PATH"
8. Save the changes by pressing CTRL + X, then Y, and then Enter.
9. To apply the changes to the current terminal session, type source ~/.bash_profile in the terminal.
10. Verify that the environment variables have been set correctly by typing echo $PATH in the terminal. The output should include the path to the Node.js binary.
Supporting browser:
When building a web application, it’s important to consider the browsers that your users will be using. Different browsers have different capabilities and support for web standards. To ensure your application works well across a variety of browsers, it’s important to test it in multiple browsers.
The most commonly used browsers are Google Chrome, Mozilla Firefox, Microsoft Edge, and Apple Safari. These browsers have a large user base and are regularly updated to support the latest web standards. It’s important to test your application in these browsers to ensure it works well for the majority of your users.
In addition to these popular browsers, it’s also important to consider less common browsers, such as Opera, Brave, and Vivaldi. While they may have a smaller user base, it’s still important to ensure your application works well in these browsers to provide the best experience for all users.
Installing the Express Application Generator in Node.js:
The Express Application Generator is a command-line tool that helps you quickly create an Express.js web application. To install the generator, you need to have Node.js installed on your system. If you don’t have Node.js installed, you can download it from the official website.
Once you have Node.js installed, you can install the Express Application Generator using npm, the Node.js package manager. Open your terminal or command prompt and run the following command:
npm install -g express-generator
This will install the generator globally on your system. Once the installation is complete, you can use the express command to generate a new Express.js application.
To create a new application, navigate to the directory where you want to create the application and run the following command:
express myapp
This will create a new directory called myapp with the basic structure of an Express.js application. You can then navigate into the directory and install the dependencies using the following commands:
cd myapp
npm install
This will install all the required dependencies for the application. You can then start the application using the following command:
npm start
Conclusion:
Setting up a Node.js development environment is an essential step for building server-side applications using JavaScript. In this article, we walked you through:
- The steps required to set up a Node.js development environment
- Including installing Node.js.
- verifying the installation.
- Installing a text editor.
- Creating a new Node.js project
By following these steps, you can start building Node.js applications and take advantage of the many benefits that Node.js has to offer.