Detect Objects of Similar Color using OpenCV in Python
In this project, we are going to make a basic Object Detector by color using OpenCV python. Here, we will create this using an image processing technique called Color Detection and Segmentation.
OpenCV is an open-source computer vision library. OpenCV is used in many real-time applications also. OpenCV has some built-in functions to perform Color detection and Segmentation operations.
So what are Color Detection and Segmentation Techniques in Image Processing?
- Color detection is a technique of detecting any color in a given range of HSV (hue saturation value) color space.
- Image segmentation is the process of partitioning digital image and labeling every pixel, where each pixel having the same label shares certain characteristics.
Project Prerequisites
- Python – 3.x (We used 3.7.10 for this project)
- OpenCV – 4.5. Run “pip install opencv-python” to install OpenCV.
- Numpy – 1.20.3
Download Project Code
Please download the source code of detecting objects of similar color in an image: Detect Objects of Similar Color Project Code
Ok, now we have everything we need to get started. So let’s start.
Steps to Detect Objects of Similar Color using OpenCV
- Import necessary packages and read the image.
- Detect the color from the input image and create a mask.
- Removing unnecessary noise from masks.
- Apply the mask to the image.
- Draw a Boundary of the detected objects.
Step 1 – Import necessary packages and Initialize the camera:
# TechVidvan Object detection of similar color

import cv2
import numpy as np

# Reading the image
img = cv2.imread('image.jpg')

# Showing the output

cv2.imshow("Image", img)

cv2.waitKey(0)
cv2.destroyAllWindows()
Explanation:
- In the first line, we imported the OpenCV module by calling it cv2.
- cv2.imread function reads an image from the local path.
- cv2.imshow function shows the image.
- waitKey(0) means the image window will be opened until any key is pressed.
Output:

Step 2 – Detect the color from the input image and create a mask:
At first, we’ll detect green objects in this image and then we’ll detect yellow objects. OpenCV reads the frame as BGR colorspace. But to detect any color, first, we have to convert the frame to HSV colorspace using cv2.cvtColor function.
So why HSV?
HSV color space is useful when we’re working with color information. It stands for HUE, SATURATION, and VALUE (or brightness). It is a cylindrical color space.
- HUE: The hues are modeled as an angular dimension that encodes color information.
- SATURATION: Saturation encodes the intensity of color.
- VALUE: Value represents the amount to which that respective color is mixed with black.
# convert to hsv colorspace
hsv = cv2.cvtColor(img, cv2.COLOR_BGR2HSV)

# lower bound and upper bound for Green color
lower_bound = np.array([50, 20, 20])
upper_bound = np.array([100, 255, 255])

# find the colors within the boundaries
mask = cv2.inRange(hsv, lower_bound, upper_bound)
Explanation:
- cv2.cvtColor() function converts colorspace.
- The lower and upper bounds are the boundaries of the color.
- inRange() function returns a binary mask of the frame where the green color is present.
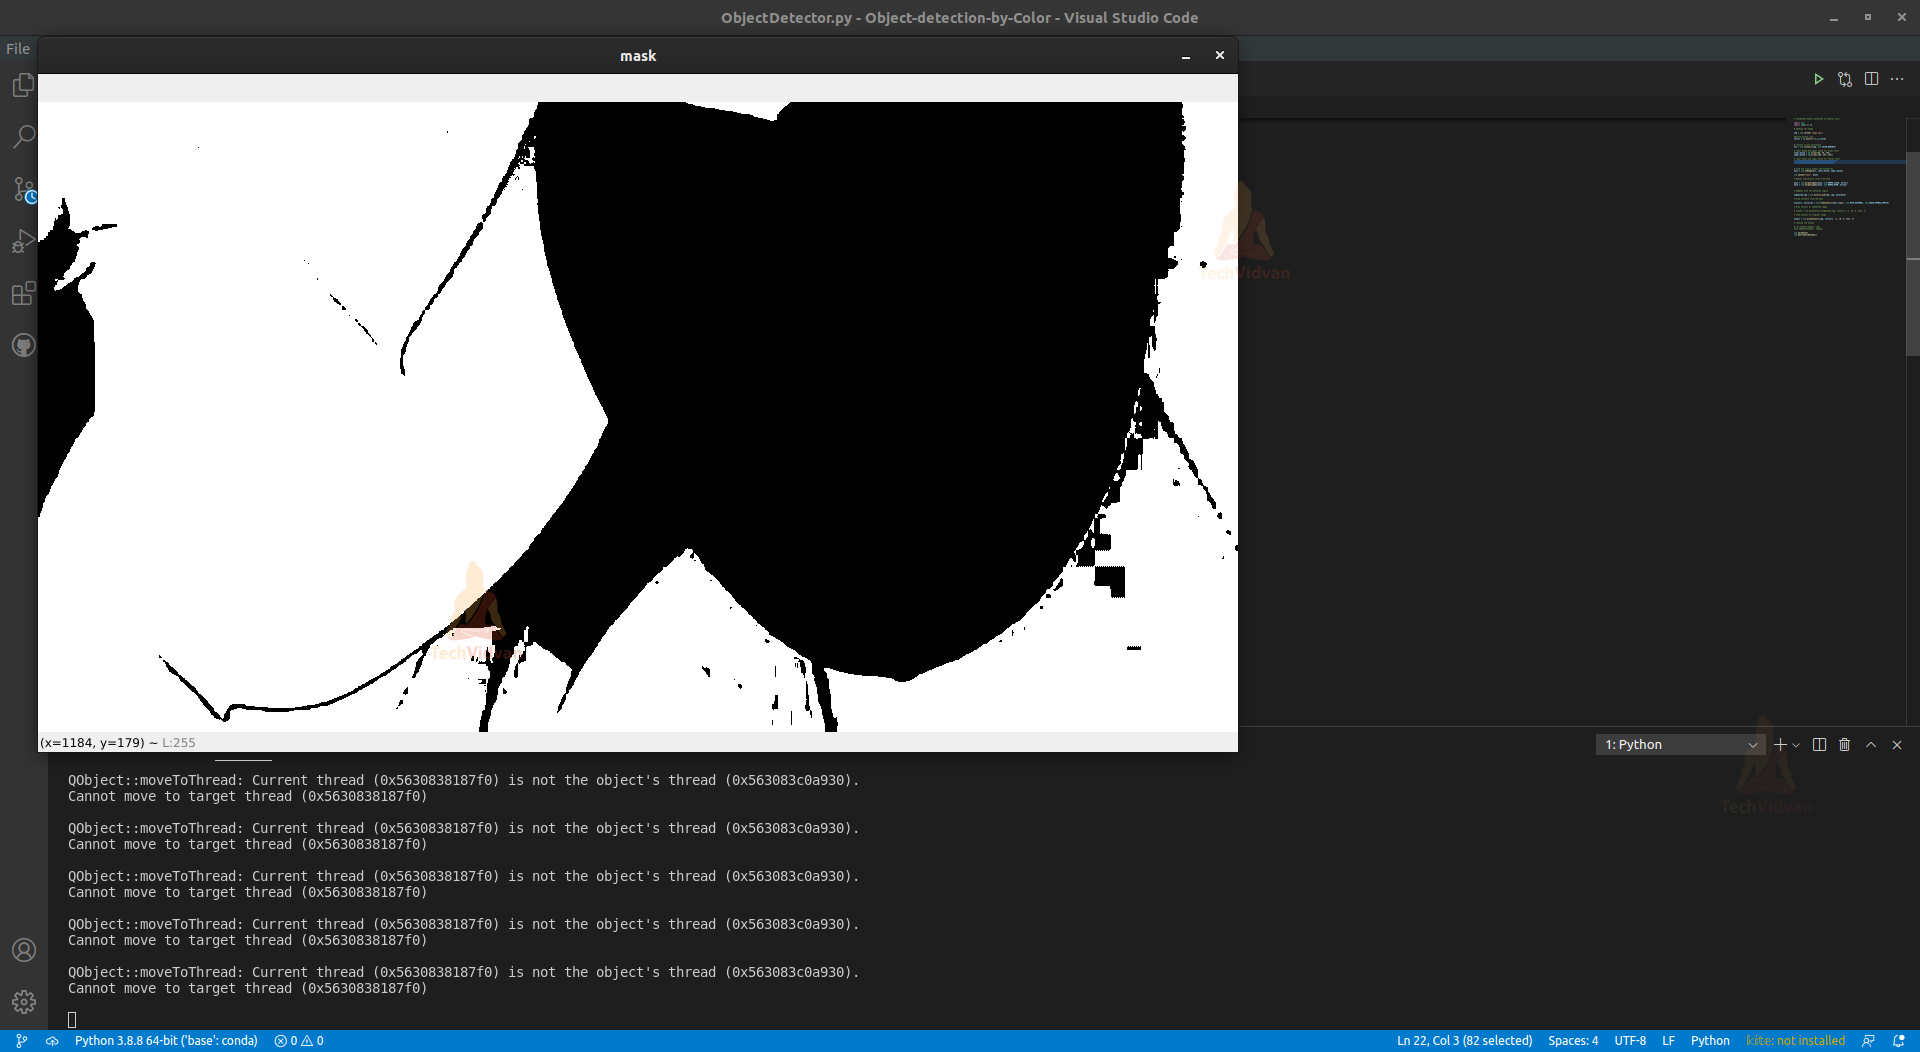
Here we can see that in the frame wherever the green color is detected the mask shows that as white and the rest of the region as black.
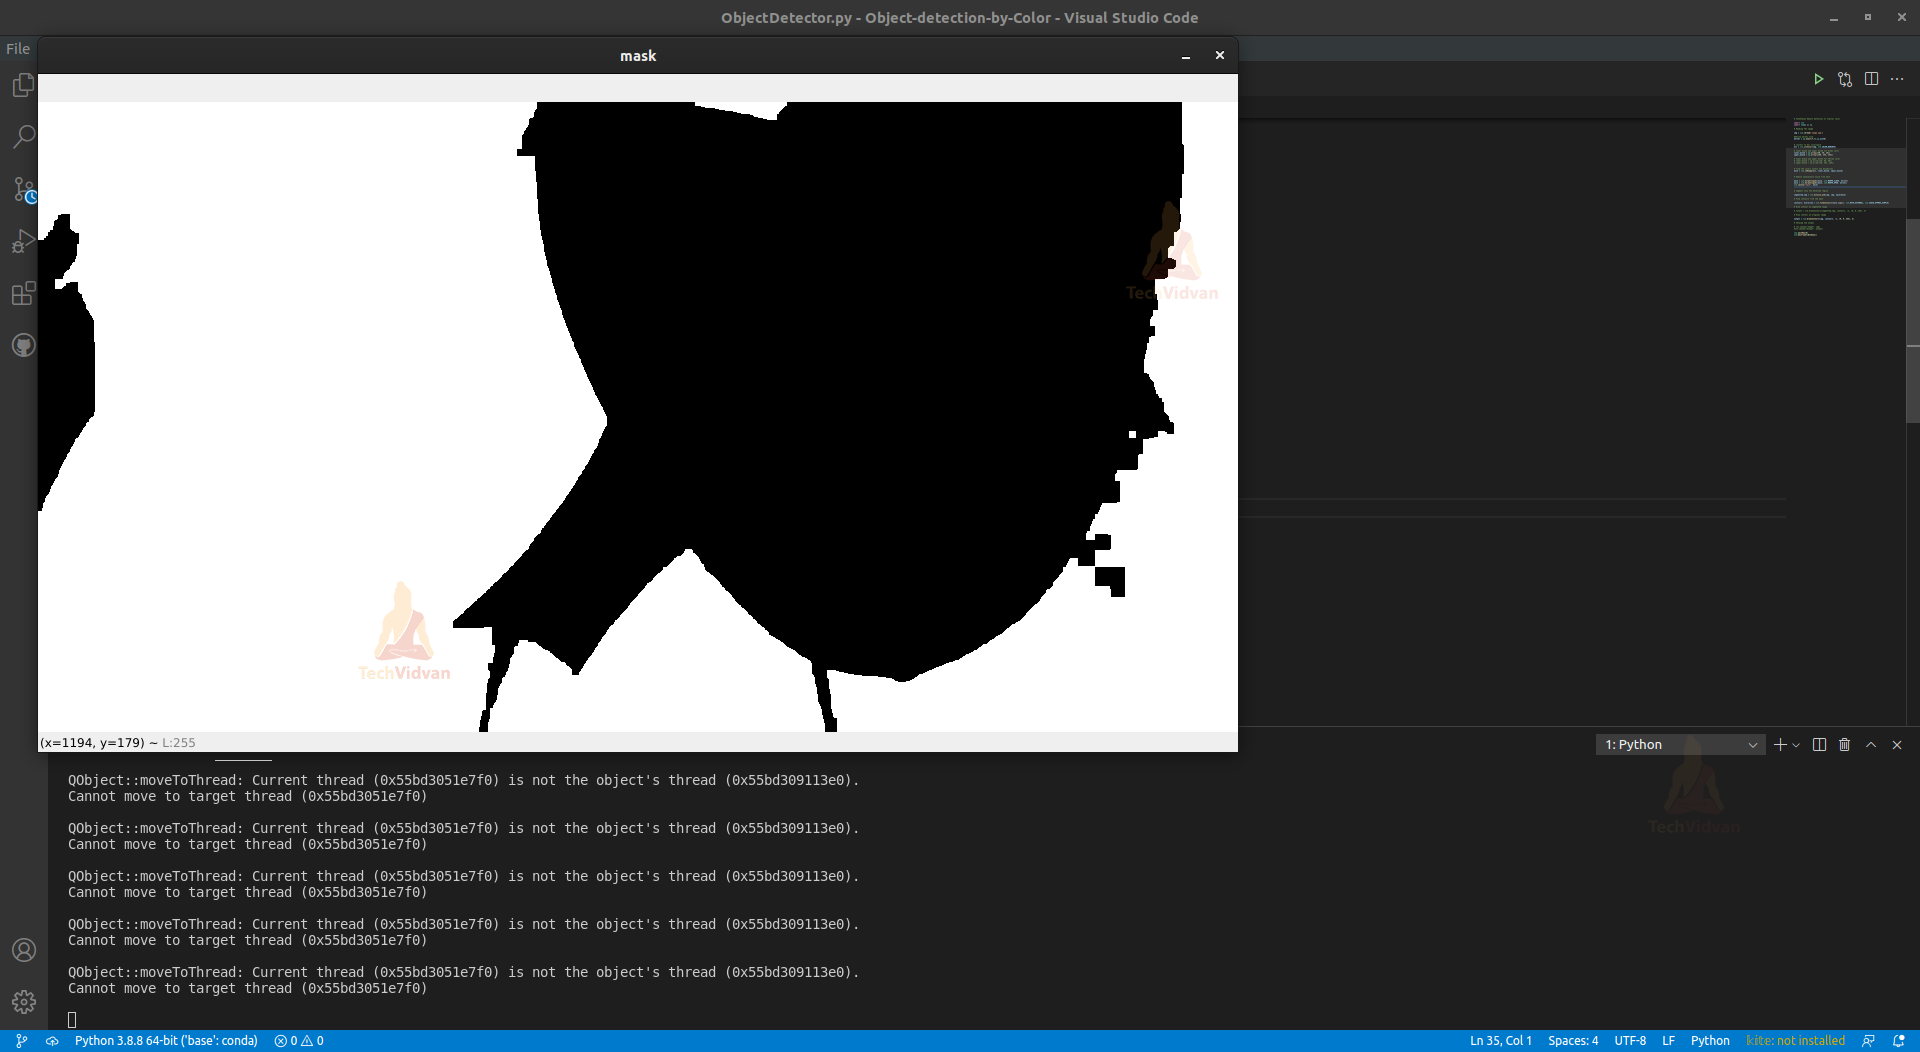
Step 3 – Removing unnecessary noise from masks:
In the mask, we can see that there is lots of unnecessary noise. So we have to remove it to get a better result.
#define kernel size
kernel = np.ones((7,7),np.uint8)

# Remove unnecessary noise from mask

mask = cv2.morphologyEx(mask, cv2.MORPH_CLOSE, kernel)
mask = cv2.morphologyEx(mask, cv2.MORPH_OPEN, kernel)
Explanation:
- np.ones((7,7),np.uint8) create a 5×5 8 bit integer matrix.
- cv2.MORPH_CLOSE removes unnecessary black noises from the white region.
- cv2.MORPH_OPEN removes white noise from the black region of the mask.
Step 4 – Apply the mask on the image:
Now we’ll segment the green region from the image.
# Segment only the detected region
segmented_img = cv2.bitwise_and(img, img, mask=mask)
cv2.bitwise_and() applies mask on frame in only that region where the mask is true means white.

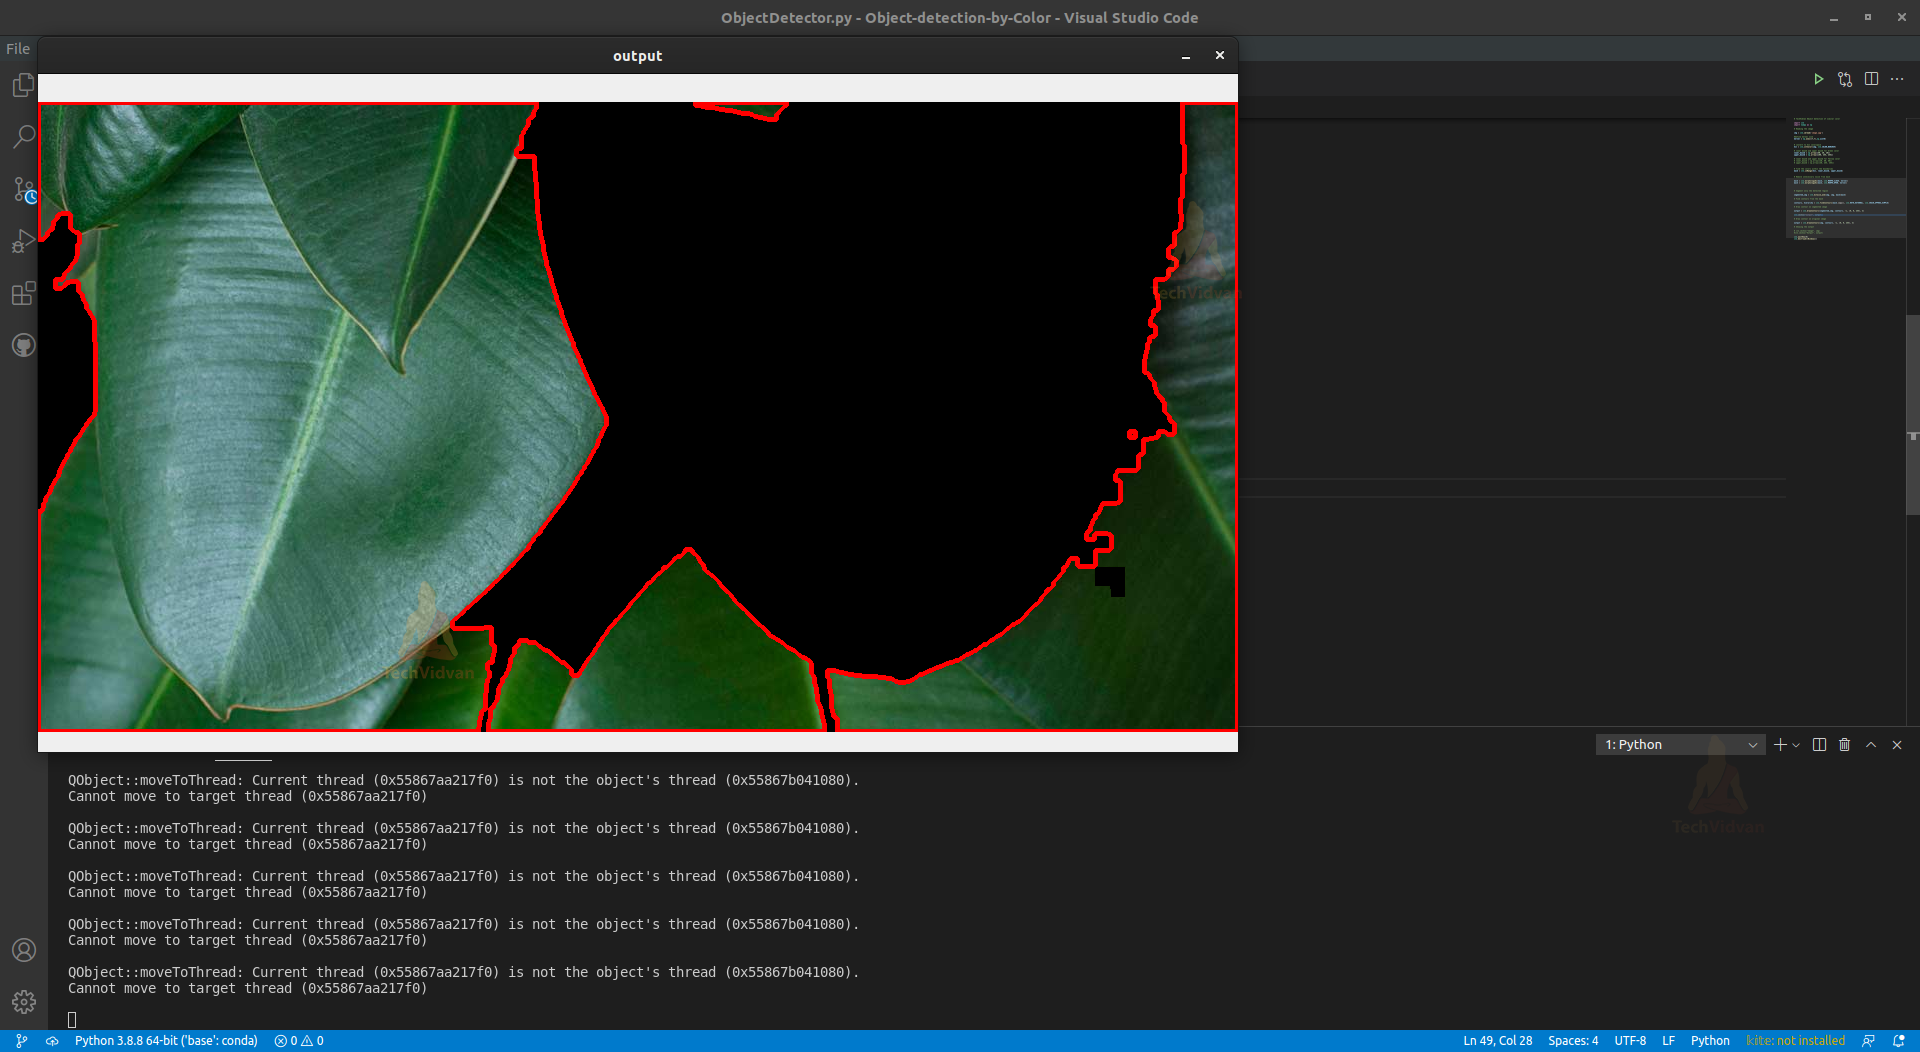
so we have successfully detected all the green objects from the image. Now we’ll draw boundaries over the detected regions.
Step 5 – Draw a Boundary of the detected objects:
# Find contours from the mask

contours, hierarchy = cv2.findContours(mask.copy(), cv2.RETR_EXTERNAL, cv2.CHAIN_APPROX_SIMPLE)

output = cv2.drawContours(segmented_img, contours, -1, (0, 0, 255), 3)

# Showing the output

cv2.imshow("Output", output)
Explanation:
- cv2.findcontour finds all the continuous points along the boundary.
- cv2.drawContours draws all the contour points
Let’s detect yellow objects in the image.
# lower bound and upper bound for Yellow color

lower_bound = np.array([20, 80, 80])
upper_bound = np.array([30, 255, 255])
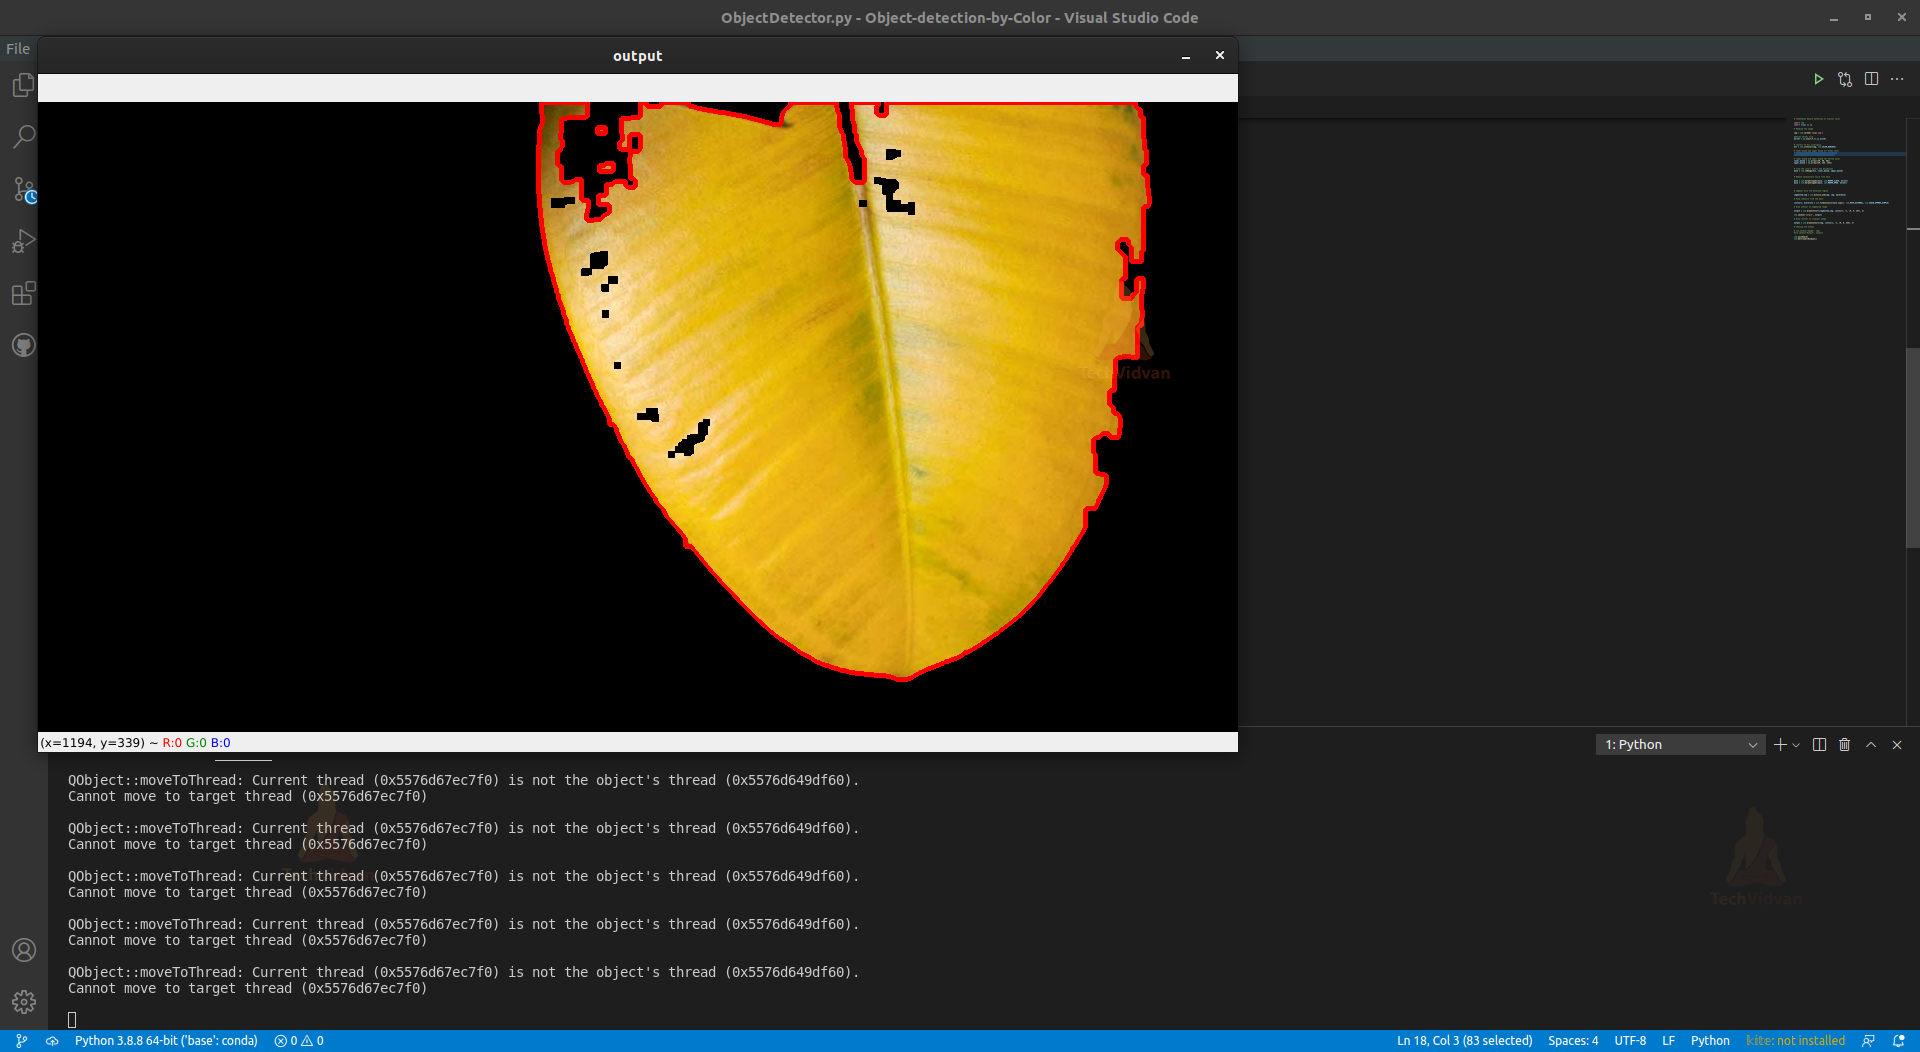
Finally, we’ll draw boundaries in the main image.
# Draw contour on original image

output = cv2.drawContours(img, contours, -1, (0, 0, 255), 3)

Summary
In this project, we’ve created a basic object detector using OpenCV Python. Here we implemented the Color detection and Segmentation Technique. We learned about colors, color filtering techniques, contour detection, and some segmentation techniques.