Dog’s Breed Identification using Deep Learning
Once I went to a park and came across a very cute dog. I was unaware of its breed and was very curious to know that the dog belongs to which family? Are you also anxious to know about the varieties of dog breeds? Then you are at the right place. Let’s together create a Deep Learning model for the dog’s breed identification just by looking at its image.
About the Dog’s Breed Identification Project
In this Python machine learning project, we will build a model for dog’s breed identification. We will convert all Images of Dog’s to number format using ‘OpenCV’ and then feed them into the Resnet50V2, a special type of neural network under the Transfer Learning technique, which will help us to identify dog’s breed.
Dataset for Dog’s Breed Identification Project
You can download the Dataset for this project from here: Dog’s Breed Identification Dataset
The Model Architecture
What is Transfer Learning?
In the Transfer Learning process, a pre-trained model’s layer having weights and parameters are used to train another model. Pretrained model layer’s are trained on Millions of datas of different categories. This process is very useful as it decreases neural networks training time and also results in low generalization error.
In this project, we are going to use Residual Network (ResNet) which has a pre-trained network layer. So let’s see what Resnet is.
What is ResNet?
Residual Network (ResNet) is a specific type of neural network which is used for many computer vision problems. ResNet contains convolutional, pooling, activation and fully-connected layers stacked one of the other. A convolutional neural network is a type of deep neural network, which is used for image processing and its classification. As the name suggests, Convolutional Network helps for classifying complex images by multiplying pixel value with weights and then summing them.
These layers of ResNet are pre-trained on more than a million of images from the ImageNet database. Due to many layers, ResNet solves complex problems and increases model accuracy and performance.
Every ResNet uses an initial filter or kernel of 3×3 and 7×7 size with a stride of 2. There are many versions of ResNet. In this project, we will be using Resnet50V2 (version 2) which is 50 layers deep and applies Batch Normalization, RELU activation function before the input is multiplied by convolutional operations(weight matrix).
Prerequisite for this project
You can install all the modules for this project using the following command:
pip install numpy, pandas, opencv-python , tensorflow, matplotlib , sklearn
The versions which are used in this project for python and its corresponding modules are as follows:
1) python: 3.8.5 (or 3.x)
2) tensorflow: 2.3.1 *Note*: TensorFlow version should be 2.2 or higher in order to use keras or else install keras directly
3) opencv: 4.1.2
4) sklearn: 0.24.2
5) numpy: 1.19.5
6) pandas: 1.1.5
7) matplotlib : 3.2.2
I am going to use Google’s Colab Platform for model training as it provides a free GPU utility.
Download Dog Breed Classification Project Code
Please download the source code of dog breed classification with deep learning: Dog Breed Classification Project Code
Project Structure
train.csv: This folder contains images that we will use to train our model. There are 10,222.images in this folder.
test.csv: This folder contains images that we will use to test our trained model. There are 10,357 images in this folder.
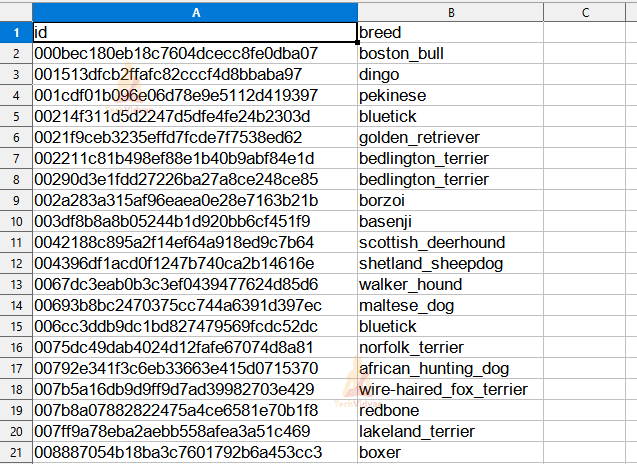
labels.csv: This file contains images named ‘id’ column and ‘breed’ column containing respective breed names.
model/: This directory contains the optimizer, metrics, and weights of our trained model.
dogbreed_identification.py: This is the file where we will write our code to train our model and for prediction.
Steps for Dog Breed Identification Project:
1) Import the Libraries
Firstly we will create a file called ‘dogbreed_identification.py’ and import all the libraries which have been shared in the prerequisites section.
Code:
#TechVidvan
# load all required libraries for Dog's Breed Identification Project
import cv2
import numpy as np
import pandas as pd
from tensorflow.keras.preprocessing.image import ImageDataGenerator
from sklearn.model_selection import train_test_split
from sklearn.preprocessing import LabelEncoder
from tensorflow.keras.models import load_model, Model
from tensorflow.keras.optimizers import RMSprop
from tensorflow.keras.layers import Dense, GlobalAveragePooling2D, Dropout, BatchNormalization
from tensorflow.keras.applications.resnet_v2 import ResNet50V2, preprocess_input
2) Parse the Dataset file.
We will traverse the ‘labels.csv’ and convert it to a Dataframe. Our ‘train_file’ variable will store the location of the train folder which contains training images and ‘test_file’ variable will store the location of the test folder containing testing images.
Code:
#read the csv file
df_labels = pd.read_csv("labels.csv")
#store training and testing images folder location
train_file = 'train/'
test_file = 'test/'
Dataset File :
Let’s check how many types of dog breeds are present in our dataset.
Code:
#check the total number of unique breed in our dataset file
print("Total number of unique Dog Breeds :",len(df_labels.breed.unique()))
Output :

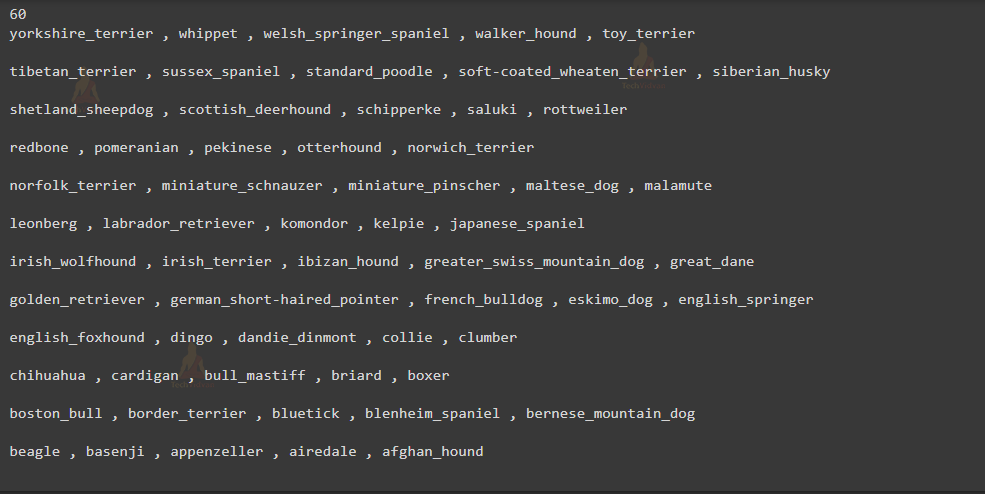
As you can see there are 120 unique types of dog breeds. For this project we will be using 60 types of dog breeds. According to your system specification, you can increase or decrease this value.
Code:
#specify number
num_breeds = 60
im_size = 224
batch_size = 64
encoder = LabelEncoder()
Output :
3) Preprocessing the Data
As we have discussed earlier we will be using 60 different types of dog breeds. So we will choose those breeds which are more in number and have more images. For this, we will take help from the pandas ‘value_counts()’ function. After that, change the data Frame having records of only those 60 breeds.
Code:
#get only 60 unique breeds record
breed_dict = list(df_labels['breed'].value_counts().keys())
new_list = sorted(breed_dict,reverse=True)[:num_breeds*2+1:2]
#change the dataset to have only those 60 unique breed records
df_labels = df_labels.query('breed in @new_list')
With the help of the id column, we will create another column ‘img_file’ which will have an image name with extensions. This will be very helpful, otherwise, we have to append the extension after every iteration.
Code:
#create new column which will contain image name with the image extension
df_labels['img_file'] = df_labels['id'].apply(lambda x: x + ".jpg")
Output :
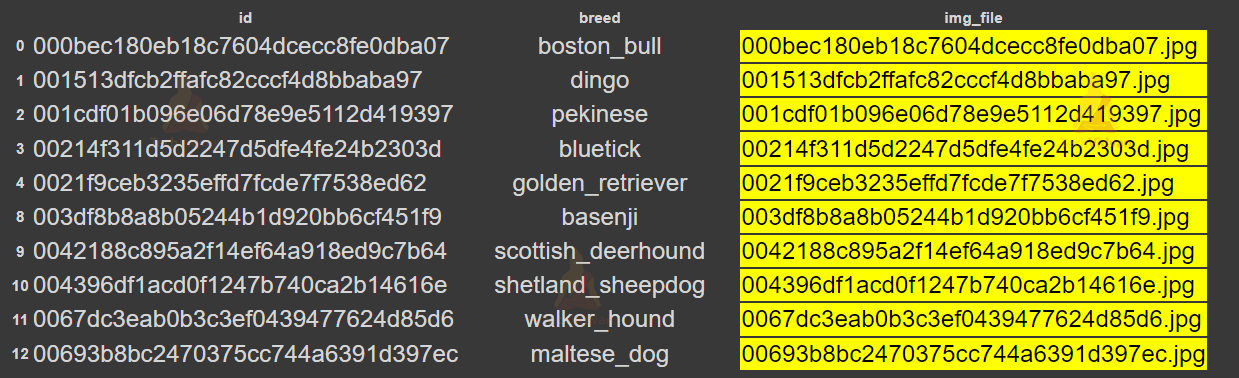
As you can see we have a new column ‘img_file’ which is highlighted.
4) Encoding and Scaling the Data
Now our dataset is ready, we will perform operations on records for training and testing purposes.
We humans can see the image and easily tell what’s inside it, but machine’s require numerical data to recognize everything.

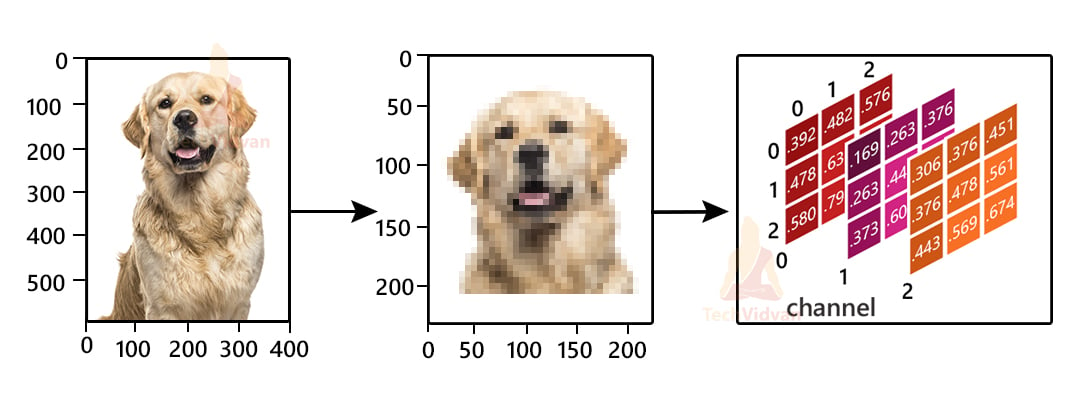
For this, we will be converting our image into the numerical format. So let’s understand how it is done.
Images are collections of small pixels (or picture elements) which is the smallest information about the image. As you know, all colored images are a combination of three primary colors, that is ‘RED’, ‘GREEN’ and ‘BLUE’. So accordingly, for colored images there are three Matrices or channels.
Every element of this Matrix is called pixels. The size of the matrix depends on the number of pixels. Pixel value denotes the intensity or brightness of the pixel and ranges from 0-255. A smaller pixel value that is closer to zero represents black and a larger value closer to 255 represents white.
There are various formats like Grayscale, RGB, HSV, CMYK in which images are stored. RGB is one of the most popular and we will use it in our project.
With the help of ‘opencv’ library we will read our images using the ‘imread()’ function.
It will return Numpy Array in Height, Width and Channel format. All images in our dataset are in different shapes, so resize all images to the same width and height i.e. in our case 224×224. Also we will scale all values of our array in the range of -1 and 1 using the ‘preprocess_input()’ function.
Code:
#create a numpy array of the shape
#(number of dataset records, image size , image size, 3 for rgb channel ayer)
#this will be input for model
train_x = np.zeros((len(df_labels), im_size, im_size, 3), dtype='float32')

#iterate over img_file column of our dataset
for i, img_id in enumerate(df_labels['img_file']):
  #read the image file and convert into numeric format
  #resize all images to one dimension i.e. 224x224
  #we will get array with the shape of
  # (224,224,3) where 3 is the RGB channels layers
  img = cv2.resize(cv2.imread(train_file+img_id,cv2.IMREAD_COLOR),((im_size,im_size)))
  #scale array into the range of -1 to 1.
  #preprocess the array and expand its dimension on the axis 0
  img_array = preprocess_input(np.expand_dims(np.array(img[...,::-1].astype(np.float32)).copy(), axis=0))
  #update the train_x variable with new element
  train_x[i] = img_array
We need to encode our Breed column also because it is in the text format. After encoding, our breed column will have a value from 0 to total number of column length minus 1. These numbers are assigned alphabetically.
Code:
#This will be the target for the model.
#convert breed names into numerical format
train_y = encoder.fit_transform(df_labels["breed"].values)
5) Training and Testing Sets
After our input and target sets are ready, we will split our model into training and testing sets in the ratio of 80:20, where 80% of total data will be used for training and remaining 20% for testing purposes.
Code:
#split the dataset in the ratio of 80:20.
#80% for training and 20% for testing purpose
x_train, x_test, y_train, y_test = train_test_split(train_x,train_y,test_size=0.2,random_state=42)
6) Augmentation
Augmentation is basically a technique that can be used to artificially expand the size of images in real-time by creating various modified versions. This will help the model to generalize and also it will improve performance.
Some of the most used Augmentation techniques for images are :
-
Position Augmentation : Changes the position of pixels (elements in our matrix) by using Scaling, Translation, Rotation, Flipping, and Cropping techniques.
- Color Augmentation: Changes the value of pixels(elements in our matrix) by changing the Brightness, Contrast, Hue, and Saturation levels.
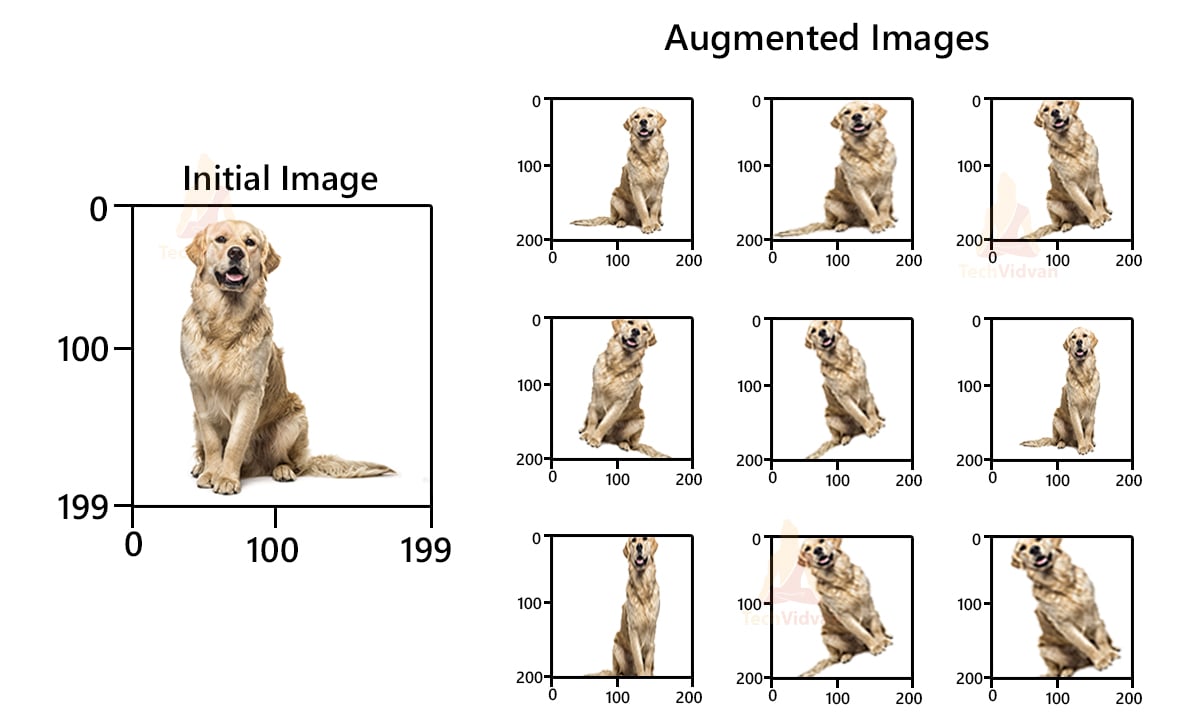
We will take the help of ‘ImageDataGenerator()’ to create different types of training and testing images by modifying the original images.
Code:
#Image augmentation using ImageDataGenerator class
train_datagen = ImageDataGenerator(rotation_range=45,
                                   width_shift_range=0.2,
                                   height_shift_range=0.2,
                                   shear_range=0.2,
                                   zoom_range=0.25,
                                   horizontal_flip=True,
                                   fill_mode='nearest')

#generate images for training sets
train_generator = train_datagen.flow(x_train,
                                     y_train,
                                     batch_size=batch_size)

#same process for Testing sets also by declaring the instance
test_datagen = ImageDataGenerator()

test_generator = test_datagen.flow(x_test,
                                     y_test,
                                     batch_size=batch_size)
7) Build the Model
As we have discussed earlier, we will be using ResNet50V2 having trained parameters from Imagenet Dataset to build our model. We will not include the top layer which is the output of the pretrained network, instead, we will replace it with our input having the shape of mxnx3 dimensions. The layer expects input shape of 224×224.
Code:
#building the model using ResNet50V2 with input shape of our image array
#weights for our network will be from of imagenet dataset
#we will not include the first Dense layer
resnet = ResNet50V2(input_shape = [im_size,im_size,3], weights='imagenet', include_top=False)
#freeze all trainable layers and train only top layers
for layer in resnet.layers:
    layer.trainable = False

#add global average pooling layer and Batch Normalization layer
x = resnet.output
x = BatchNormalization()(x)
x = GlobalAveragePooling2D()(x)
x = Dropout(0.5)(x)
#add fully connected layer
x = Dense(1024, activation='relu')(x)
x = Dropout(0.5)(x)
And finally, create a Dense(fully connected) layer for output with the shape equal to the number of breeds and ‘softmax’ activation function. Then Initialize Model Class with network input and Dense layer as output
Code:
#add output layer having the shape equal to number of breeds
predictions = Dense(num_breeds, activation='softmax')(x)

#create model class with inputs and outputs
model = Model(inputs=resnet.input, outputs=predictions)
#model.summary()
Output:
Downloading data from https://storage.googleapis.com/tensorflow/keras-applications/resnet/resnet50v2_weights_tf_dim_ordering_tf_kernels_notop.h5
94674944/94668760 [==============================] – 1s 0us/step
7) Train the Model
For training the data we will be using an ‘RMSprop’ optimizer with learning rate of 1e-3(0.001) on a batch size of 64 (group of 64 images for every iteration) for 20 epochs.
Save the model in order for the prediction process.
Code:
#epochs for model training and learning rate for optimizer
epochs = 20
learning_rate = 1e-3

#using RMSprop optimizer to compile or build the model
optimizer = RMSprop(learning_rate=learning_rate,rho=0.9)
model.compile(optimizer=optimizer,
              loss='sparse_categorical_crossentropy',
              metrics=["accuracy"])

#fit the training generator data and train the model
hist = model.fit(train_generator,
                 steps_per_epoch= x_train.shape[0] // batch_size,
                 epochs= epochs,
                 validation_data= test_generator,
                 validation_steps= x_test.shape[0] // batch_size)

#Save the model for prediction
model.save("model")
Output:
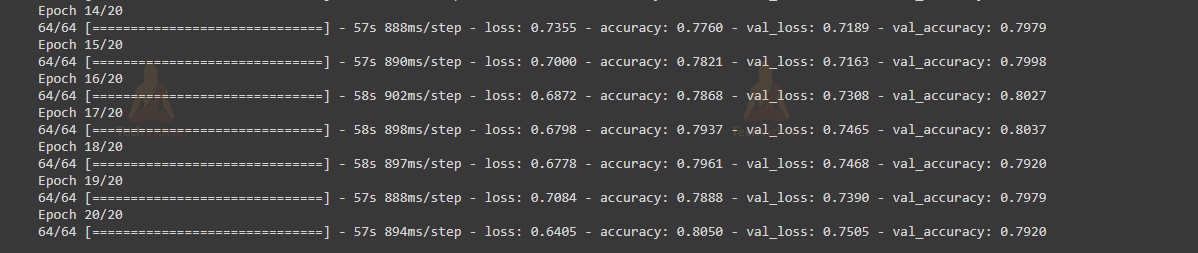
As you can see we got an accuracy of 80.50% which is good as we are taking only 60 breeds of dogs.
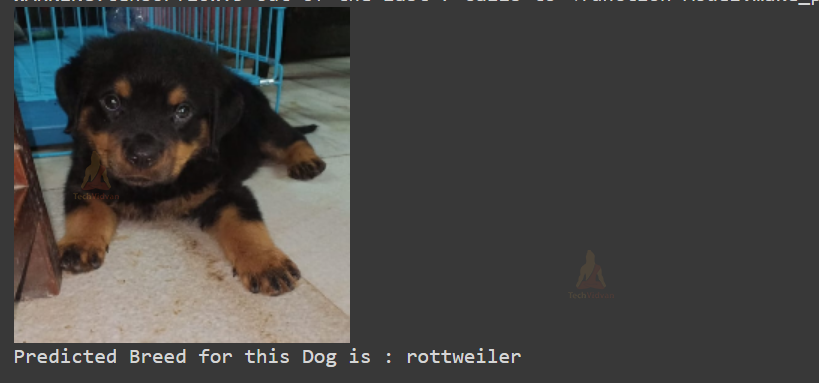
8) Prediction
Finally, we will predict the breed of our image using the trained model. For prediction, I am using one of my friend’s Dog Images, a ‘Rottweiler’ breed which was taken from his phone.
Code:
#load the model
model = load_model("model")

#get the image of the dog for prediction
pred_img_path = 'rottweiler.jpg'
#read the image file and convert into numeric format
#resize all images to one dimension i.e. 224x224
pred_img_array = cv2.resize(cv2.imread(pred_img_path,cv2.IMREAD_COLOR),((im_size,im_size)))
#scale array into the range of -1 to 1.
#expand the dimension on the axis 0 and normalize the array values
pred_img_array = preprocess_input(np.expand_dims(np.array(pred_img_array[...,::-1].astype(np.float32)).copy(), axis=0))

#feed the model with the image array for prediction
pred_val = model.predict(np.array(pred_img_array,dtype="float32"))

#display the image of dog
cv2.imshow(“TechVidvan”,cv2.resize(cv2.imread(pred_img_path,cv2.IMREAD_COLOR),((im_size,im_size))))

#display the predicted breed of dog
pred_breed = sorted(new_list)[np.argmax(pred_val)]
print("Predicted Breed for this Dog is :",pred_breed)
Dog’s Breed Identification Output
Summary
In this project, we have developed a model which predicts the breed from the Dog’s image using the Pretrained Residual Neural Network, ResNet50V2. We got an accuracy of 80.50% which is good as we have taken only 60 unique classes of breeds for training and testing sets and only 20 epochs. You can increase the number of breed classes and epochs to increase the model accuracy.