Real-Time Face Detection & Recognition using OpenCV
Nowadays face detection is a very common problem. Face detection is also called facial detection. It is a computer vision technology used to find and identify human faces in digital images. Face detection technology can be applied to various fields such as security, surveillance, biometrics, law enforcement, entertainment, etc.
Today we’ll build a Face Detection and face recognition project using Python OpenCV and face_recognition library in python. Face_recognition library uses on dlib in the backend.
What is OpenCV?
OpenCV is a real-time Computer Vision framework. It is used in many image processing and computer vision tasks. OpenCV is written in C/C++, but we can use it in python also using opencv-python.
What is dlib?
Dlib is a Open Source C++ toolkit. It contains various machine learning algorithms and tools for creating complex software. Dlib used to solve real-world problems. It is useful in industry and academia including robotics, embedded devices, mobile phones, and large high-performance computing environments.
How does Dlib work in facial recognition?
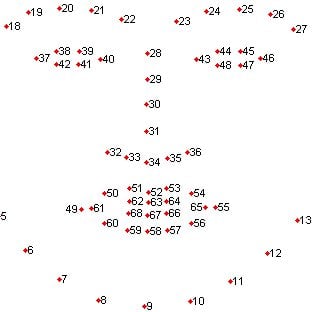
At first, it detects faces from the input image and then generates 68 landmarks of faces – The outside of the eyes, nose, top chin, etc.
Source: dlib
And using those landmarks it rotates the face to the center position. In this way no matter how much the face is tilted, it is able to center position the detected face.
After correction, the corrected face is fed into a CNN (Convolution Neural Network) and generates 128 points. And using those 128 points later it compares with another face and recognizes that the detected face is same or not.
So let’s build this opencv project
Prerequisites for OpenCV Face Recognition Project:
1. Microsoft Visual Studio 2019
You’ll need Visual Studio C++ for compiling dlib during face-recognition python package installation.
- https://cutt.ly/MnGCiFV – Go to this link to download the Visual Studio installer.
- After downloading, install the C++ package from Visual Studio.
Install the Desktop development with c++ package.
2. Python – 3.x ( We used python 3.7.10 for this project
3. OpenCV – 4.5
- Run “pip install opencv-python opencv_contrib-python” to install the package.
4. Face-recognition
- Run “pip install face_recognition” to install it.
-
- During face_recognition package installation dlib will automatically install and compile, so make sure that you set up visual studio c++ correctly.
-
5. Numpy – 1.20
Download Face Recognition OpenCV Python Code
Please download the source code of python face detection & recognition project: Face Detection & Recognition OpenCV Project Code
Steps to solve the project:
We’ll write two different programs for this OpenCV face recognition project. The first one will be for capturing training images, and the 2nd one will be for detecting and recognizing the face.
Steps for the First Program:
- Import necessary packages and read video from webcam.
- Capture a training image and save it in a local folder.
Step 1 – Import necessary packages and read video from webcam:
import cv2

# Take input of the person name
name = input("Enter name:  ")

# Create the videocapture object
cap = cv2.VideoCapture(0)

while True:
    # Read each frame
    success, frame = cap.read()
    # Show the output
    cv2.imshow("Frame", frame)
- First, we import the opencv library as cv2.
- The input function takes the input from the user, in this case, we’ll take an input of the person’s name.
- Using the VideoCapture function we initialize the webcam and set the capture object as cap.
- cv2.read() function reads each frame from the image.
- The Imshow method shows the video frames in a new window.
Note – If you don’t wanna use your webcam then you can directly drag and drop any image in the faces folder.
Step 2 – Capture a training image and save it in a local folder:
# If 'c' key is pressed then click picture
   	 if cv2.waitKey(1) == ord('c'):
        		filename = 'faces/'+name+'.jpg'
        		cv2.imwrite(filename, frame)
    print("Image Saved- ",filename)
- waitKey function waits until we press any Key.
- ord(‘c’) means if the key ‘C’ is pressed then a frame will be saved as an image.
- The Imwrite function saves the fame as an image in the local folder.
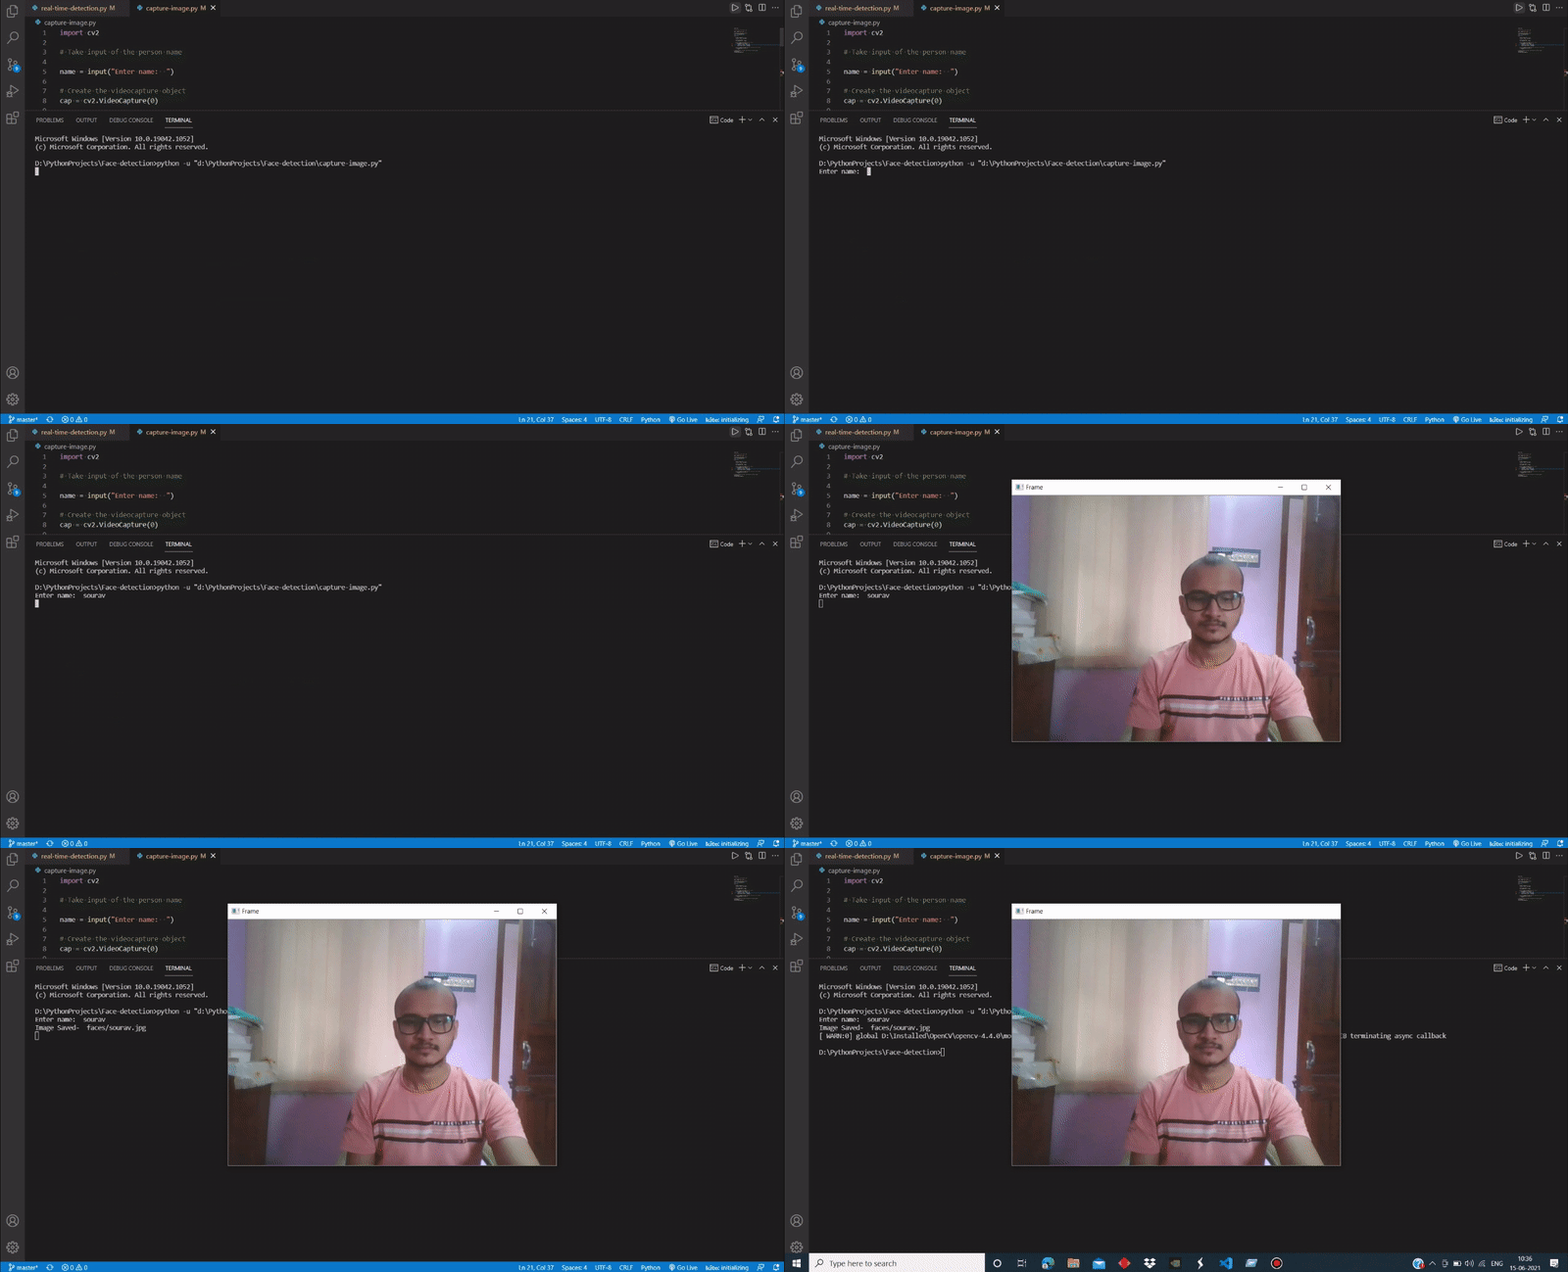
Output
Steps for the 2nd Program:
- Import necessary packages and read the train images.
- Encode faces from the train images.
- Detects and encodes faces from the webcam.
- Find the matches between the detected faces and the Training images face.
- Draw the detection and show the identity of the person.
Step 1 – Import necessary packages and reading the train images:
import cv2
import numpy as np
import face_recognition
import os

# Define the path for training images for OpenCV face recognition Project

path = 'faces'

images = []
classNames = []
- At first, we imported all the necessary packages.
- Define the path for the training image.
- We define two empty lists for storing training images and the classNames, which means the person’s name.
# Reading the training images and classes and storing into the corresponding lists
for img in os.listdir(path):
    image = cv2.imread(f'{path}/{img}')
    images.append(image)
    classNames.append(os.path.splitext(img)[0])

print(classNames)
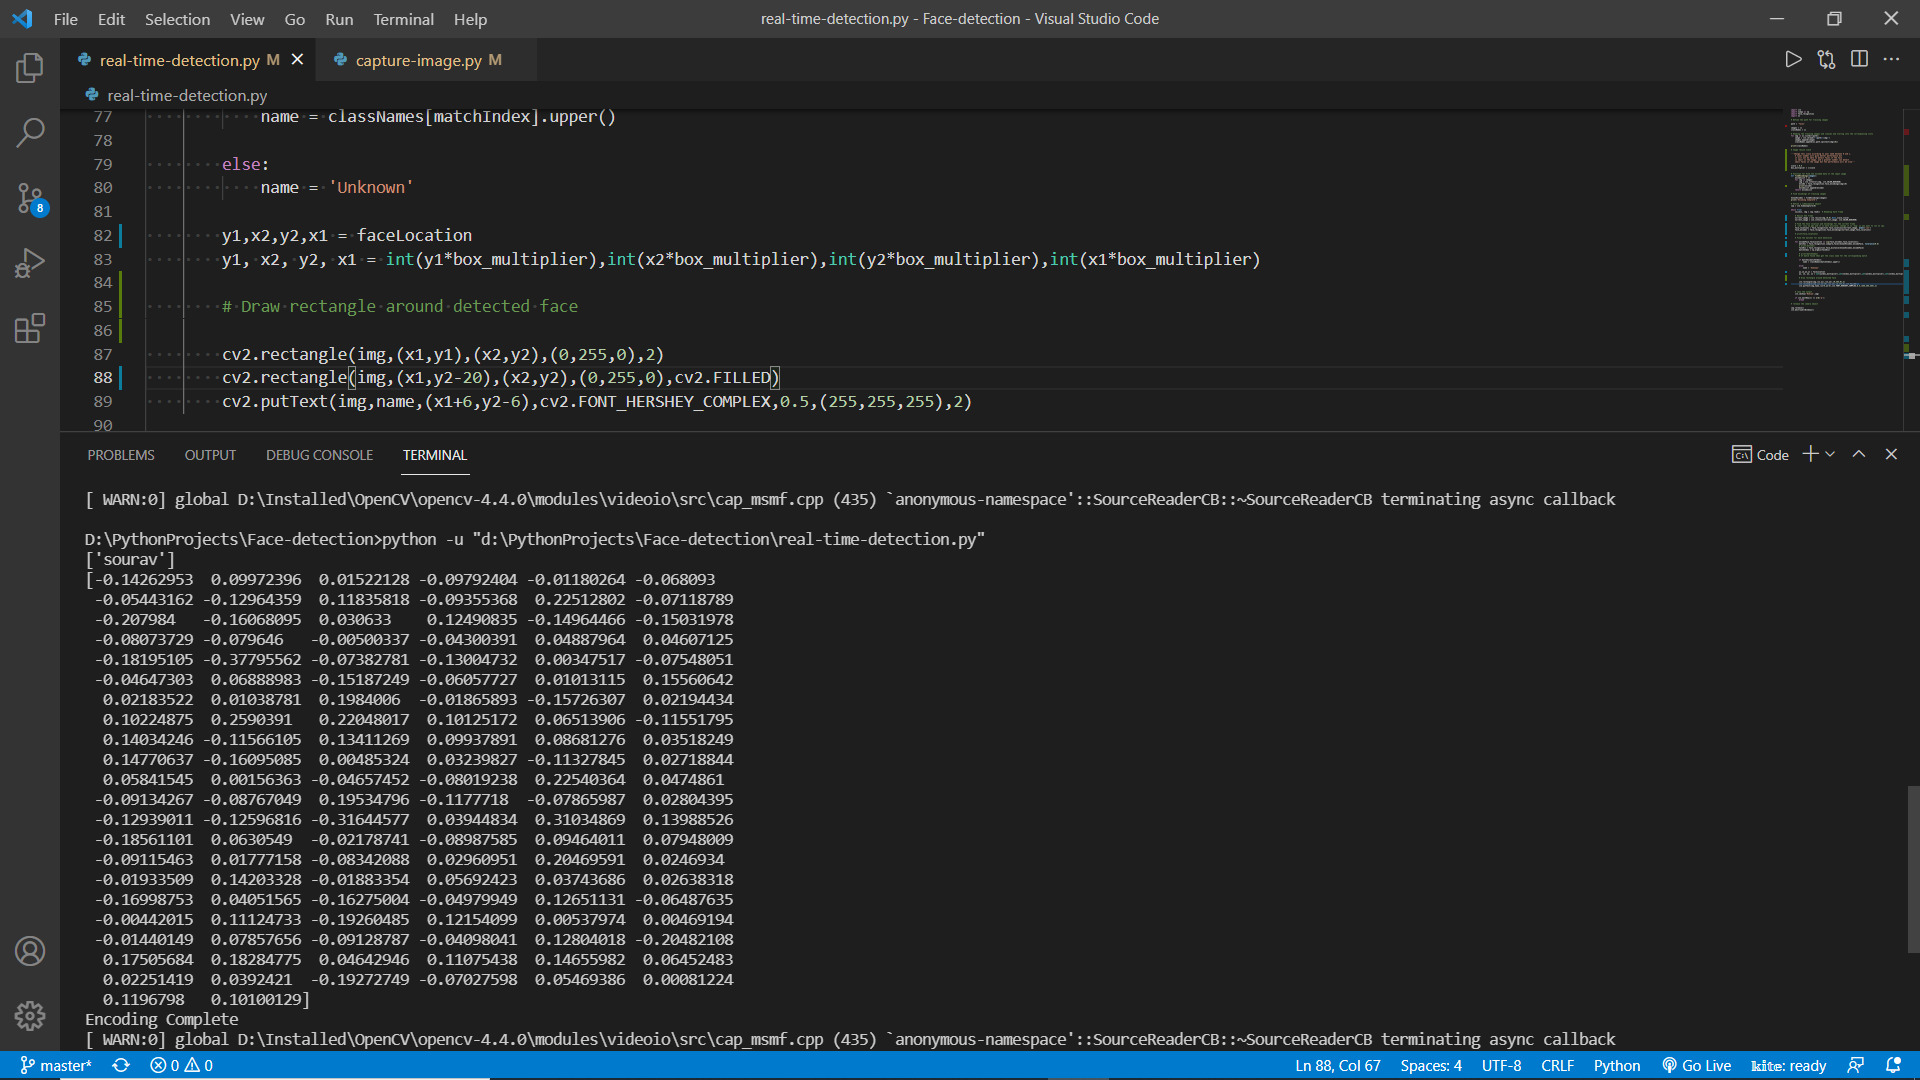
Output:
[‘sourav’]
- Using os.listdir we take each file inside the defined path.
- The Imread function reads the files from the local path.
- Using the splittext function we split the image filename and take only the filename as className and ignore the file extension.
Step 2 – Encode faces from the train images:
# Function for Find the encoded data of the input image
def findEncodings(images):
    encodeList = []
    for img in images:
        img = cv2.cvtColor(img, cv2.COLOR_BGR2RGB)
        encode = face_recognition.face_encodings(img)[0]
        print(encode)
        encodeList.append(encode)
    return encodeList

# Find encodings of training images

knownEncodes = findEncodings(images)
print('Encoding Complete')
- Dlib works with RGB images and OpenCV reads images in BGR format, so using the cvtColor function we convert the images to RGB images.
- Face_recognition.face_encodings function detects the face and returns a list containing 128 points.
Step 3 – Detect and encode faces from the webcam:
scale = 0.25
box_multiplier = 1/scale


# Define a videocapture object
cap = cv2.VideoCapture(0)

while True:
    success, img = cap.read()  # Reading Each frame

   # Resize the frame
    Current_image = cv2.resize(img,(0,0),None,scale,scale)
    Current_image = cv2.cvtColor(Current_image, cv2.COLOR_BGR2RGB)

    # Find the face location and encodings for the current frame

    face_locations = face_recognition.face_locations(Current_image,  model='cnn')
    face_encodes = face_recognition.face_encodings(Current_image,face_locations)
- After reading the frame resize the frame to 1/4th of the original size for better performance.
Note – Change this scale according to your need between 0 and 1. A lower number will give better performance but it will not be able to detect faces if the face is small in the image, and a greater number can detect small faces in the image but the performance will be slow
- Face_recognition.face_locations function returns the location of the detected faces.
- By default model=’hog’. If you want to run on CPU then change it to ‘hog’, because hog runs faster on CPU and ‘cnn’ runs faster on GPU and it is also more accurate.
Step 4 – Find the matches between the detected faces and the Training images face:
 for encodeFace,faceLocation in zip(face_encodes,face_locations):
        matches = face_recognition.compare_faces(knownEncodes,encodeFace,
tolerance=0.6)
        faceDis = face_recognition.face_distance(knownEncodes,encodeFace)
        matchIndex = np.argmin(faceDis)


        # If match found then get the class name for the corresponding match

        if matches[matchIndex]:
            name = classNames[matchIndex].upper()

        else:
            name = 'Unknown'
- We used the zip function in for loop because we want to iterate through each list at the same time.
- Face_recognition.compare_faces returns a list containing True or false . If the face is matched with the trained image then it will return true in the position of the detected class name.
- Face_recognition.face_distance returns a list containing distance between current face vs training face key points. Lower distance means better match
- Np.argmin returns the index of the lowest distance face point and stores it in the matchIndex variable.
- Now if the element of the matches list in the matchIndex position is true then grab the element from the className list of the same index.
Step 5 – Draw the detection and show the identity of the person:
y1,x2,y2,x1=faceLocation
y1,x2,y2,x1=int(y1*box_multiplier),int(x2*box_multiplier),int(y2*box_multiplier),
int(x1*box_multiplier)

# Draw rectangle around detected face

cv2.rectangle(img,(x1,y1),(x2,y2),(0,255,0),2)
cv2.rectangle(img,(x1,y2-20),(x2,y2),(0,255,0),cv2.FILLED)
      cv2.putText(img,name,(x1+6,y2-6),cv2.FONT_HERSHEY_COMPLEX,0.5,(255,255,255)
,2)
- We scaled down the frames 1/4th times that’s why we multiplied box_multiplier to each coordinate point.
- Cv2.rectangle draws a rectangle in a frame.
- Cv2.putText draws text in a frame.
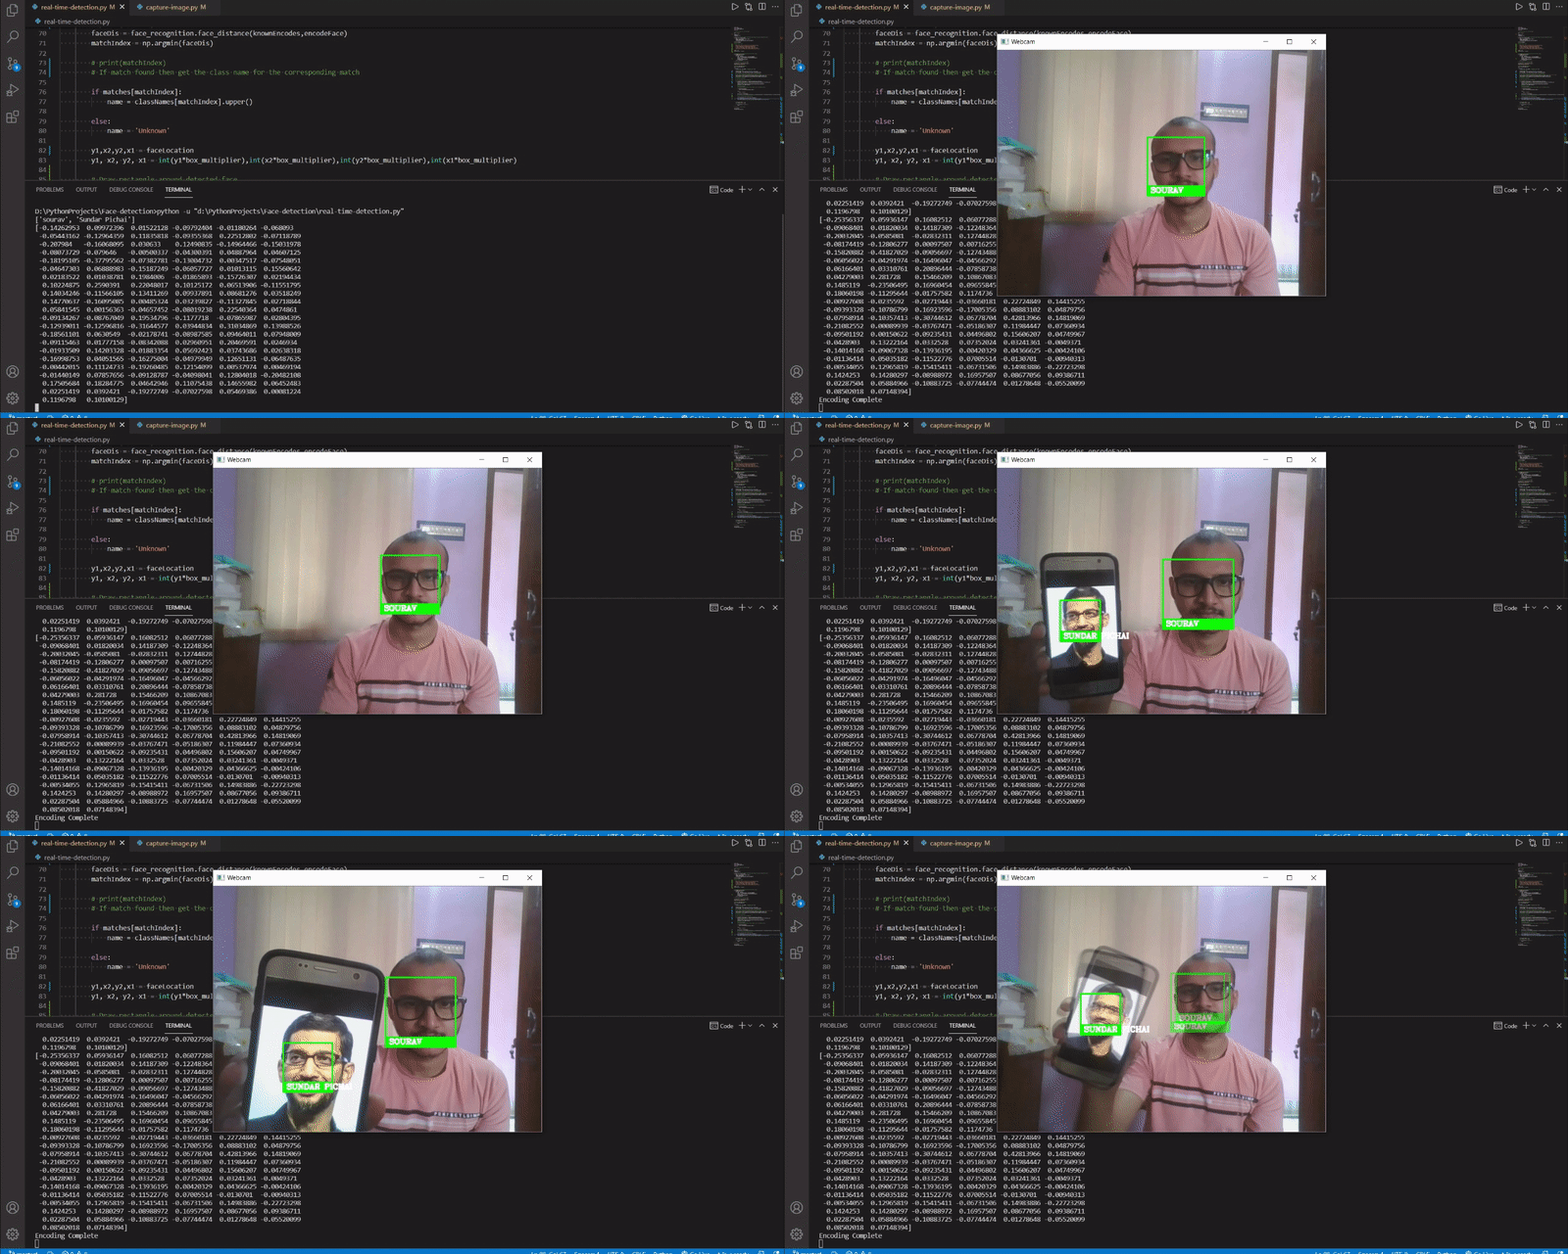
OpenCV Face Detection & Recognition Output
Summary
In this project, we built a face detection and recognition system using python OpenCV. We used the face_recognition library to perform all the tasks. We’ve learned about how the face detection system works and how the face recognition system works through this project.

