Handwritten Digit Recognition with Python & CNN
Hello friends, ‘Digits’ are a part of our everyday life, be it License plate on our cars or bike, the price of a product, speed limit on a road, or details associated with a bank account. In the case of a text which is unclear, it is easier to guess the digits in comparison to the alphabets
Machine Learning and Deep Learning are reducing human efforts in almost every field. Moreover, a solution achieved using ML and DL can power various applications at the same time, thereby reducing human effort and increasing the flexibility to use the solution. One such solution is a handwritten digit recognition system that can be used in postal mail sorting, bank check processing, form data entry, etc.
Convolution Neural Network
A Convolutional Neural Network or CNN is a Deep Learning Algorithm which is very effective in handling image classification tasks. It is able to capture the Temporal and Spatial dependencies in an image with the help of filters or kernels.

The kernel is just like a small window sliding over the large window in order to extract the spatial features and in the end, we get feature maps.
MNIST Dataset
Source: MNIST
We are going to use the famous MNIST dataset for training our CNN model. The MNIST dataset was compiled with images of digits from various scanned documents and then normalized in size. Each image is of a dimension, 28×28 i.e total 784 pixel values.
You do not need to download the dataset from any external source as we will import it from keras.datasets
Layout of the basic idea
- Firstly, we will train a CNN (Convolutional Neural Network) on MNIST dataset, which contains a total of 70,000 images of handwritten digits from 0-9 formatted as 28×28-pixel monochrome images.
- For this, we will first split the dataset into train and test data with size 60,000 and 10,000 respectively.
- Then, we will preprocess the input data by reshaping the image and scaling the pixel values between 0 and 1.
- After that, we will design the neural network and train the model.
- After the model is trained, we will save it for future use.
- Next, we are going to use a webcam as an input to feed an image of a digit to our trained model.
- Our model will process the image to identify the digit and return a series of 10 numbers corresponding to the ten digits with an activation on the index of the proposed digit.
Download Handwritten Digit Recognition Code
Please download project source code: Handwritten Digit Recognition in Python
File Structuring
1. Train.py
We utilize the MNIST dataset to train our CNN model and then save the model in the current working directory.
2. RecognizeDigit.py
We load the saved model and use appropriate functions to capture video via webcam and pass it as an input to our model. Our model produces a prediction which is displayed to the user.
Libraries Required
Make sure that the following libraries are installed on your working machine before proceeding further
- Keras
- Tensorflow
- OpenCV
- Sklearn
- Numpy
Training the Model (Train.py)
Before we begin training, I would suggest you to train the model on Google colab as it offers training the model on GPU if your computer does not have one. It speeds up the training process by manifold and helps you achieve the final results much quicker.
Simply open a Google Colab Notebook > Edit > Notebook Settings > Hardware Accelerator > GPU > Save and Done..!!
1. Import the necessary libraries and modules
import keras
from keras.datasets import mnist
from keras.models import Sequential
from keras.layers import Dense, Dropout, Flatten
from keras.layers import Conv2D, MaxPooling2D
from keras import backend as K
2. Splitting the MNIST dataset into Train and Test
(x_train, y_train), (x_test, y_test) = mnist.load_data()
3. Preprocessing the input data
num_of_trainImgs = x_train.shape[0] #60000 here
num_of_testImgs = x_test.shape[0] #10000 here
img_width = 28
img_height = 28

x_train = x_train.reshape(x_train.shape[0], img_height, img_width, 1)
x_test = x_test.reshape(x_test.shape[0], img_height, img_width, 1)
input_shape = (img_height, img_width, 1)

x_train = x_train.astype('float32')
x_test = x_test.astype('float32')
x_train /= 255
x_test /= 255
4. Converting the class vectors to binary class
num_classes = 10
y_train = keras.utils.to_categorical(y_train, num_classes)
y_test = keras.utils.to_categorical(y_test, num_classes)
5. Defining the model architecture
model = Sequential()
model.add(Conv2D(32, kernel_size=(3, 3),
                 activation='relu',
                 input_shape=input_shape))
model.add(Conv2D(64, (3, 3), activation='relu'))
model.add(MaxPooling2D(pool_size=(2, 2)))
model.add(Dropout(0.25))
model.add(Flatten())
model.add(Dense(128, activation='relu'))
model.add(Dropout(0.5))
model.add(Dense(num_classes, activation='softmax'))
6. Compiling the model
model.compile(loss=keras.losses.categorical_crossentropy,
              optimizer=keras.optimizers.Adadelta(),
              metrics=['accuracy'])
7. Fitting the model on training data
model.fit(x_train, y_train,
          batch_size=128,
          epochs=12,
          verbose=1,
          validation_data=(x_test, y_test))
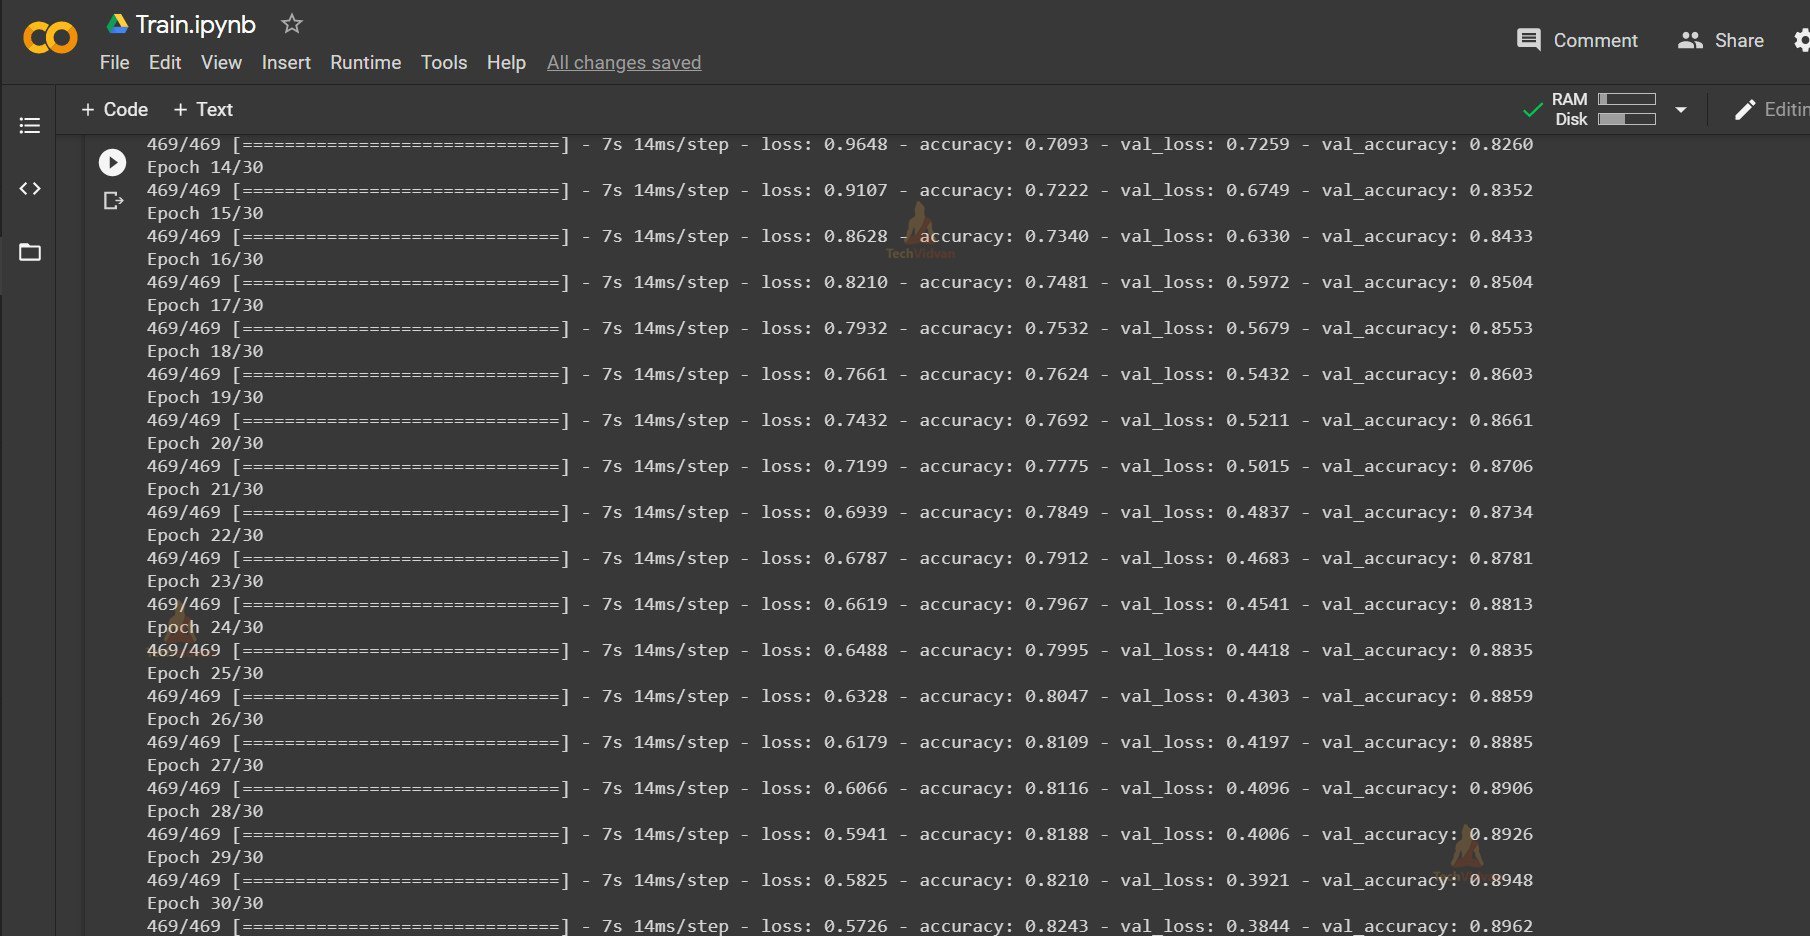
Output :
8. Evaluating the model on test data
score = model.evaluate(x_test, y_test, verbose=0)
print('Test loss:', score[0])
print('Test accuracy:', score[1])
Output :
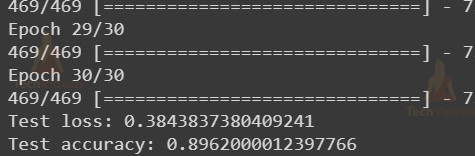
You might have observed that with the training, our test loss decreased significantly as we ran our model for 30 epochs and accuracy improved to over 89%. I may not sound like a good figure but let’s test out our model on the real-world input.
9. Saving the Model
model.save('trained_model.h5')
Note : If you trained your model on Google Colab, then make sure you download the model in the project directory.
Digit Recognition
1. Importing the necessary libraries
import numpy as np
import cv2
from skimage import img_as_ubyte
from skimage.color import rgb2gray
from keras.models import load_model
2. Setting up the videoCapture
width = 640
height = 480
cameraNo = 0

cap = cv2.VideoCapture(cameraNo)
cap.set(3,width)
cap.set(4,height)
3. Loading our pretrained model
model = load_model('trained_model.h5')
Note : Steps D to N will be in the infinite while loop
4. Reading the Image
while True:
  success, im_orig = cap.read()
5. Converting the image to grayscale
img_gray = rgb2gray(img_original)
6. Converting the result to uint8 range
img_gray_u8 = img_as_ubyte(img_gray)
7. Thresholding
(thresh, im_binary) = cv2.threshold(img_gray_u8, 128, 255, cv2.THRESH_BINARY | cv2.THRESH_OTSU)
8. Resizing the image
img_resized = cv2.resize(im_binary,(28,28))
9. Inverting the image colours
im_gray_invert = 255 - img_resized
  cv2.imshow("invert image", im_gray_invert)
10. Reshaping the image for final transmission
im_final = im_gray_invert.reshape(1,28,28,1)
11. Transmitting the image to our model
ans = model.predict(im_final)
12. Extracting the result from the array returned and printing the predicted value
ans = np.argmax(ans,axis=1)[0]
  print(ans)
13. Putting the predicted value as a text on webcam feed
cv2.putText(img_original,'Predicted Digit : '+str(ans),
                    (50,50),cv2.FONT_HERSHEY_COMPLEX,
                    1,(0,0,255),1)
  cv2.imshow("Original Image",img_original)
14. Handling the exit
if cv2.waitKey(1) and 0xFF == ord('q'):
    break
15. Releasing the camera control and destroying all the windows
cap.release()
cv2.destroyAllWindows()
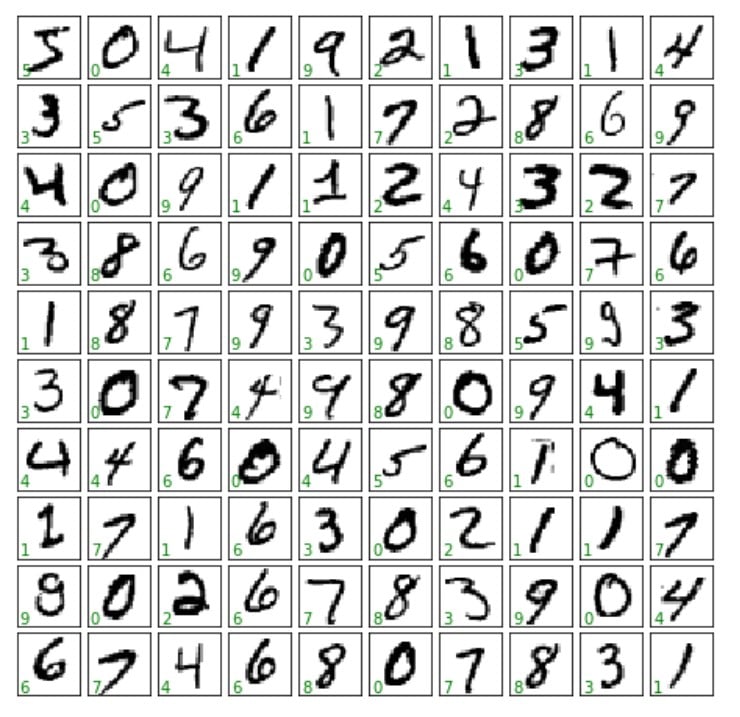
Plotting the Collage of Images of Digits from Dataset
Just in case, if you are curious and do not know how I made the above collage of images from the train dataset, let me show
(x_train, y_train),(x_test, y_test) = mnist.load_data()

import matplotlib.pyplot as plt
fig, axes = plt.subplots(10, 10, figsize=(8, 8), subplot_kw={'xticks':[], 'yticks':[]}, gridspec_kw=dict(hspace=0.1, wspace=0.1))
for i, ax in enumerate(axes.flat):
    ax.imshow(x_train[i], cmap='binary', interpolation='nearest')
    ax.text(0.05, 0.05, str(y_train[i]),transform=ax.transAxes, color='green')
plt.show()
Explanation:
Just after we load our data via mnist.load_data(), we need to import matplotlib. The image we see is the collection of various subplots hence we define a 10×10 subplot, meaning there are 100 images to be accommodated in the plot. You can see we have disabled both the xticks and yticks. In order to relate the image to its target we value, we also put a small text in the bottom left corner of the image. Gridspec_kw basically helps specify the gaps in between the plots, both horizontally and vertically. In the end, we display the plot using plot.show() method.
Summary
Hooray..!! You have successfully made a handwritten digit recognition system. Honestly, the intention was to make it work on real-life data, apart from the test dataset. Hence, you built something different from the usual tutorials. You can extend this project by adding the functionality of multi-digit recognition or you can completely create a new project from scratch. In this new project, you can ask the user to draw the digits with gestures and then detect them. Happy coding and all the best for great projects ahead.