Android Activity Lifecycle
This article will help you understand what an activity is and why it is used in Android Development. You will also know that every device has limited resources. Android as an operating system needs to distinguish which process it should keep and which to destroy. Further, we will discuss the activity Lifecycle, its methods, and how to declare the manifest files.
Let’s start!!!
What is an Activity in Android?
Activity is the single screen that is available to any user whenever he starts the application. This screen allows the user to interact with his application. There can be several such screens in one application. Every activity consists of UI elements that help the user find out the task he wants to perform.
Each activity has a specific lifecycle and is independent of other activities. In simple terms, you can think of an activity as a layout that provides the user interface.
Activity can be of two types:
1. Main Activity – This is the activity that loads first when the application is started.
2. Child Activity – This activity is accessible from the primary(or main) activity or other child activities.
Every application must have at least one activity(i.e., The Main Activity) so that the user can interact with the application whenever he opens it. However, an application can have various activities for various purposes. Therefore, each Activity of the application has to extend the Activity Class to behave as an activity.
Creating an Activity in Android
There are few steps that you need to follow to create an activity using Android Studio. These are as below:
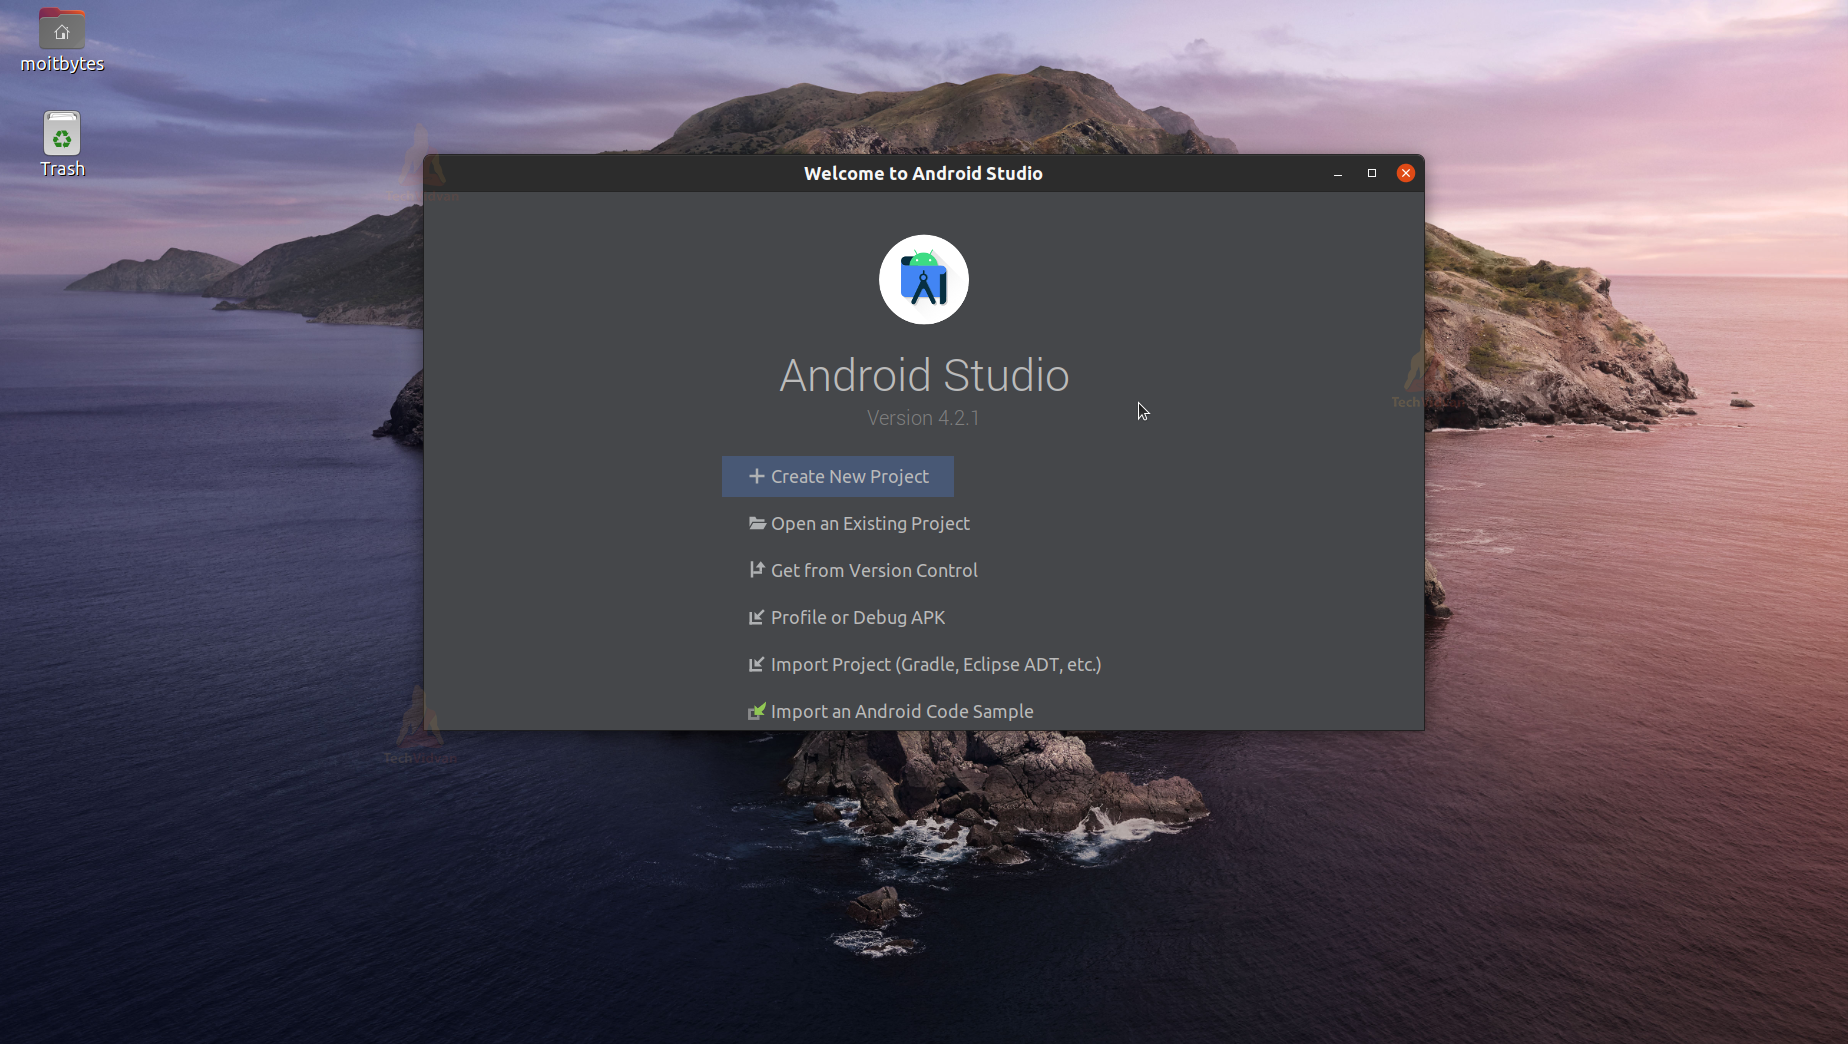
1: Open your Android Studio.
2: Click on Create New Project.
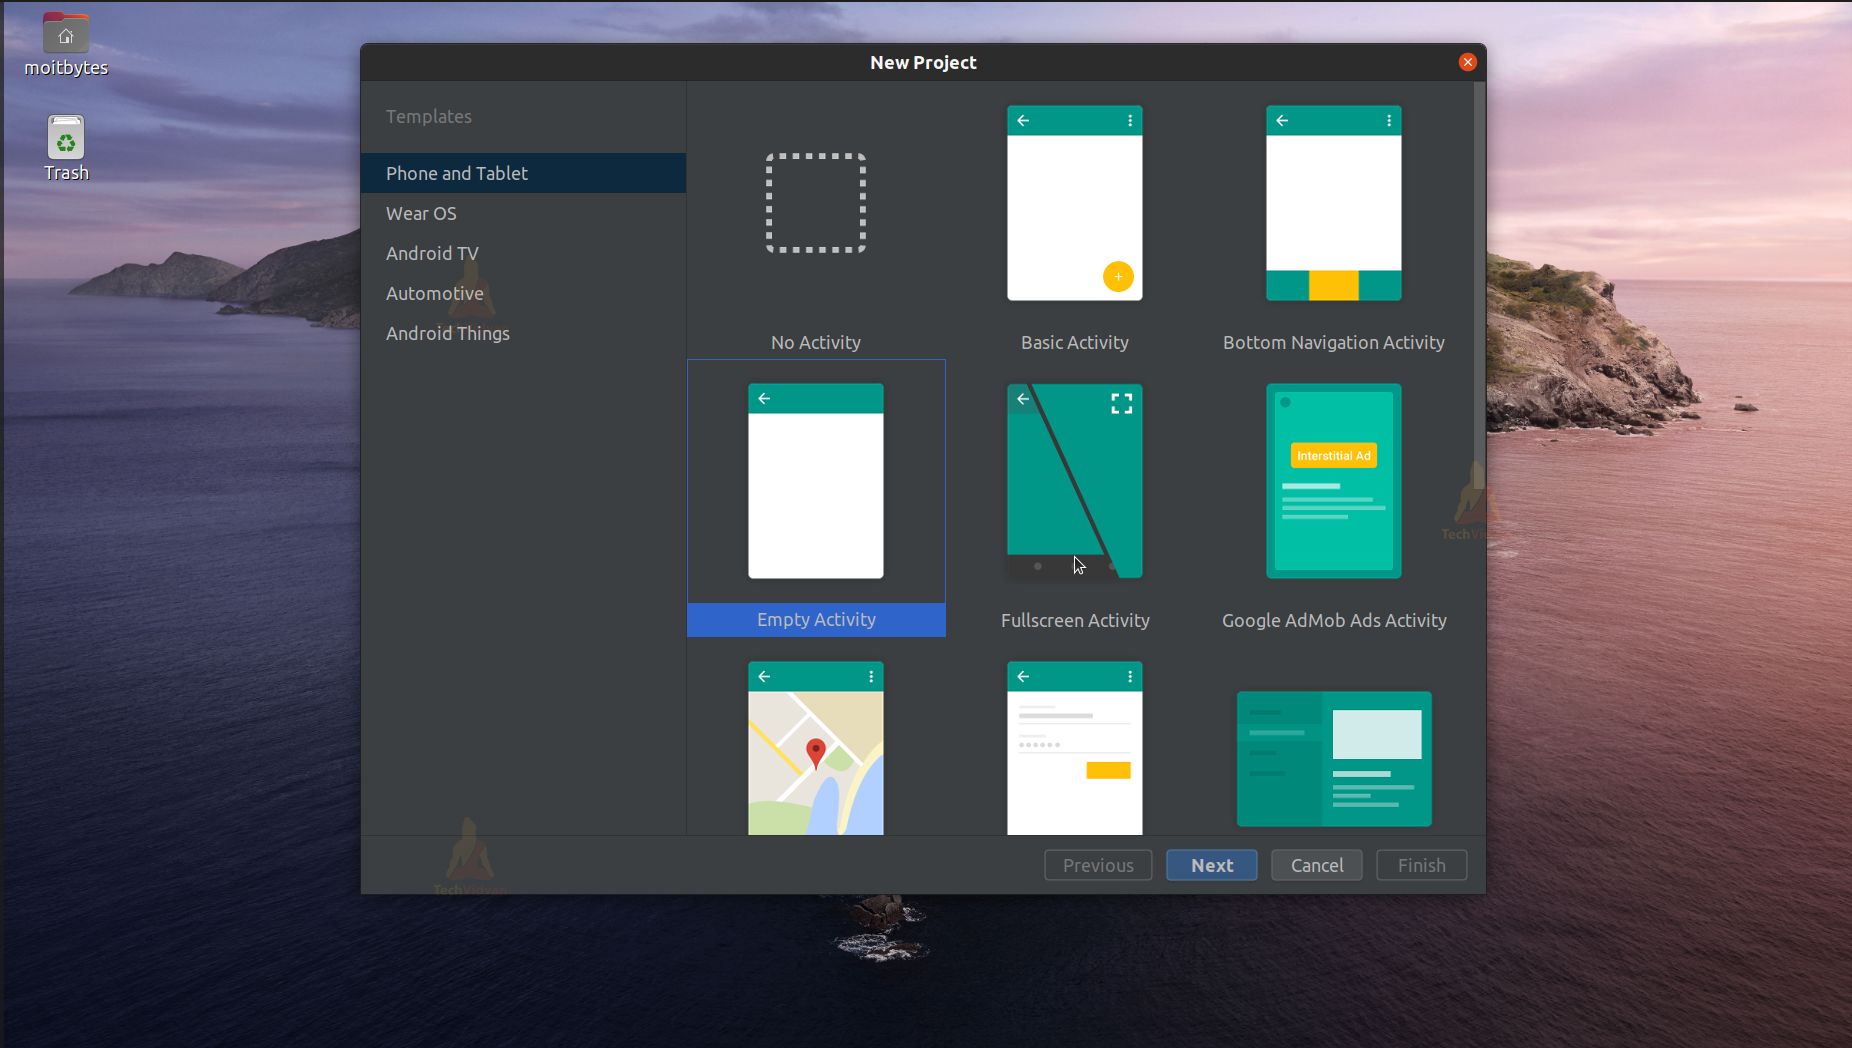
3: Select Empty Activity and proceed.
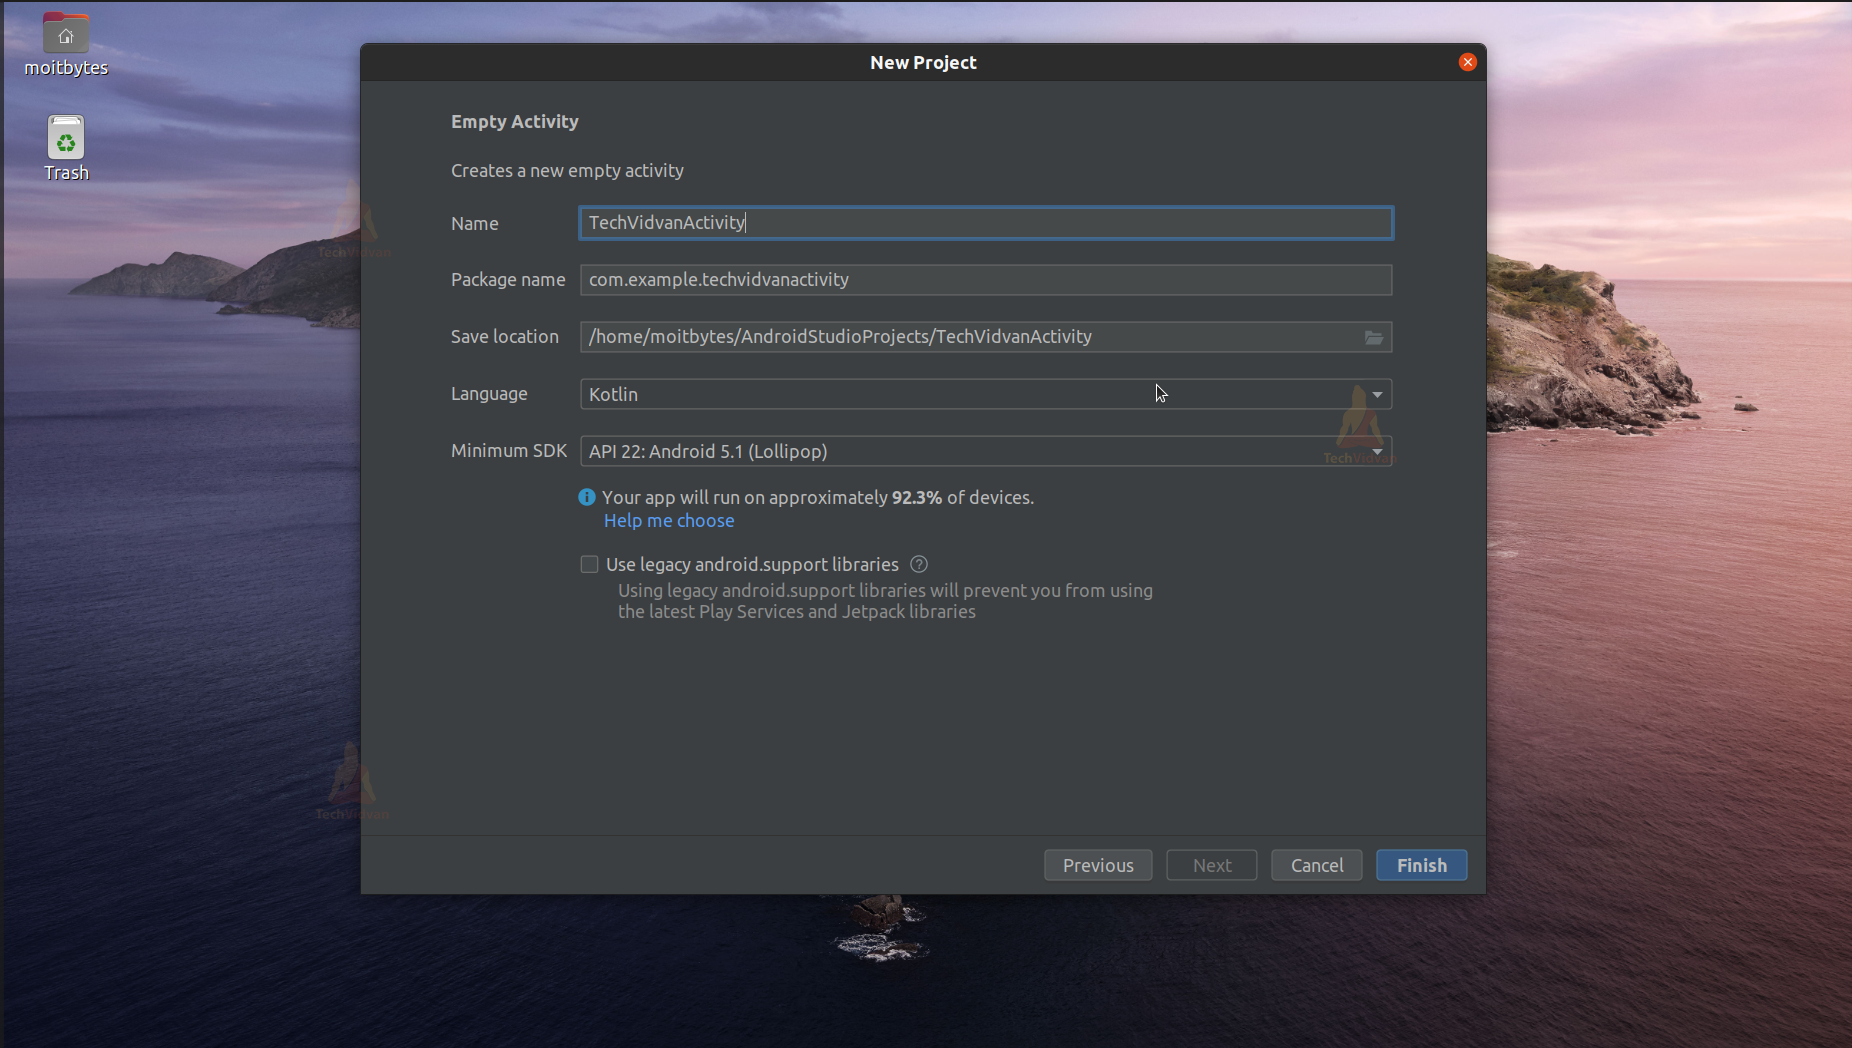
4: Enter your application name. In my case, it’s “TechVidvanActivity.” Next, select Kotlin from the dropdown. For the API level, select API 22 for now.
5: Wait for some time till your Gradle builds and loads the files for you.
6: Now, you can see the Main Activity of your app created for you.
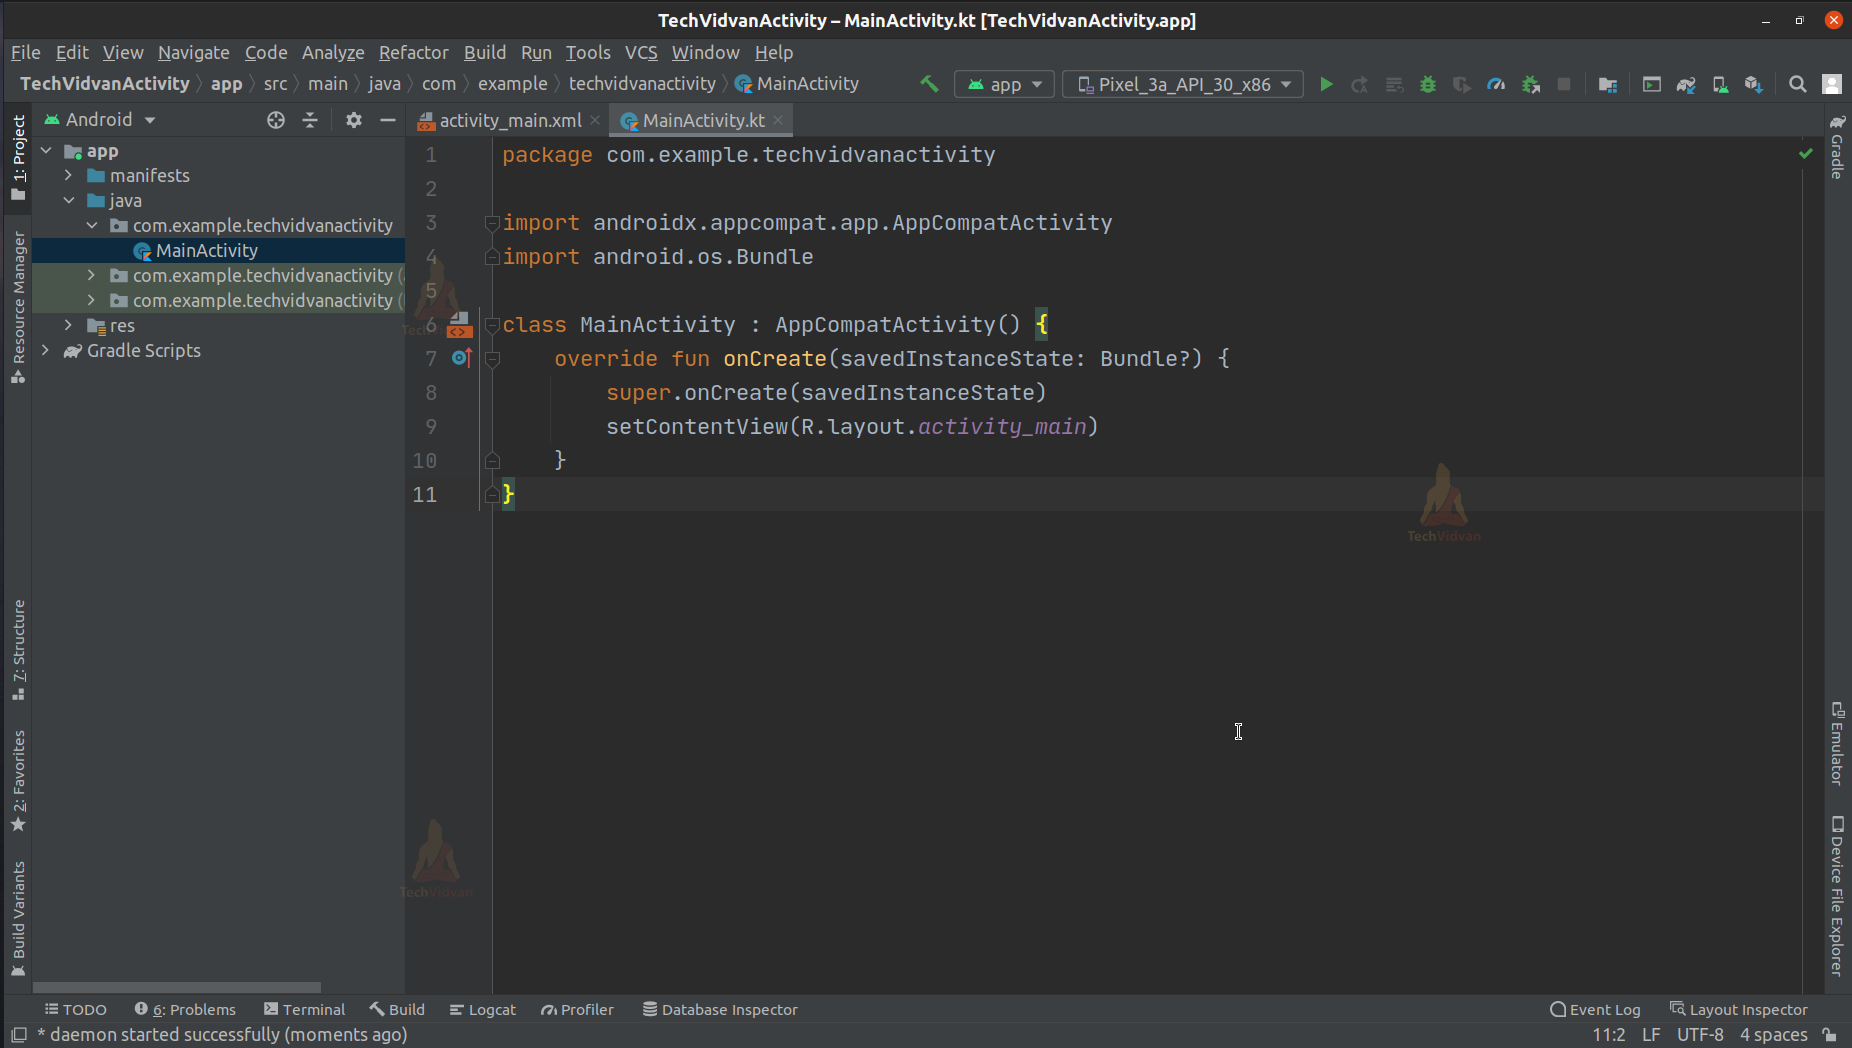
Your activity is now created, and the code for the main activity is below.
package com.example.techvidvanactivity

import androidx.appcompat.app.AppCompatActivity
import android.os.Bundle

class MainActivity : AppCompatActivity() {
    override fun onCreate(savedInstanceState: Bundle?) {
        super.onCreate(savedInstanceState)
        setContentView(R.layout.activity_main)
    }
}
Uses of Android Activities
There are several uses of an activity which are listed as follows:
1. User Interaction
From the activity, a user can easily interact with the application.
2. Displays Data
An activity can display essential data to the user whenever required.
3. Takes input
Whenever you need to take input from the user, then you can use the activity.
4. Control
From the activity, the user can control his application and can perform his tasks.
Android Process States
Several processes keep on running on any device. So now it’s the job of Android to decide which processes to keep and which to destroy. Some processes have higher priorities, whereas some have lower priorities.
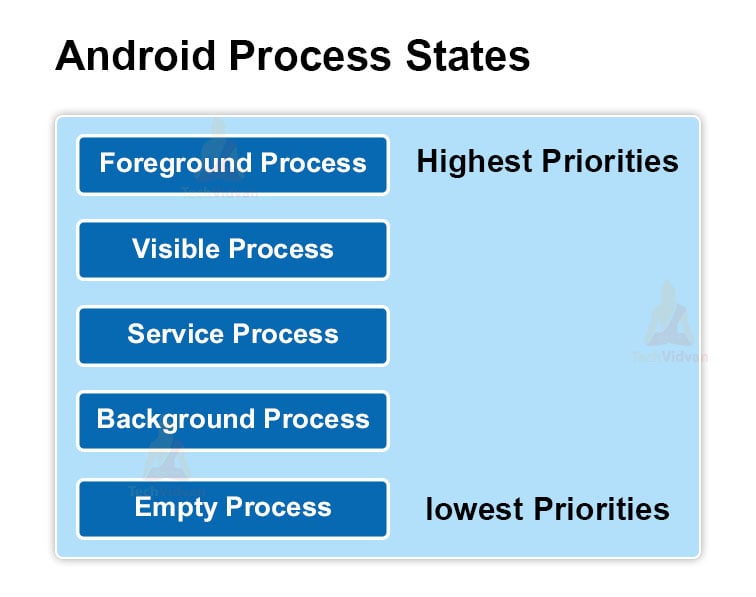
The processes which we usually find are:
1. Foreground Process
2. Visible Process
3. Service Process
4. Background Process
5. Empty Process
The first three processes have a higher priority compared to the last two. Hence, the last two are more likely to be destroyed by android whenever the operating system requires extra resources.
Foreground process and visible processes are the active processes where the user is actively performing some tasks. The service process is going on in the system, which is also quite crucial for the applications.
Background processes and empty processes are those processes which are inactive for a long time.
Android Activity Lifecycle
Any activity has its distinct activity lifecycle. We have an activity stack that maintains all the activities in it. The most recent activity is at the top of the stack.
The activity lifecycle shows the four fundamental states an activity goes through.
1. Running State
Starting the activity or user interaction with an activity keeps the activity in a running state. The running state activity is at the top of the activity stack. In this state, the activity is fully visible and interactive, responding to user inputs.
2. Paused State
Whenever the activity becomes out of focus, you can say that the activity is paused. In this state, the activity is active, but the user has not interacted with the activity for a long time. It still retains its state and member information but may be partially obscured by another activity.
3. Resumed State
Whenever any out-of-focus activity comes into focus, we call the activity present in the resumed state. This state signifies that the activity is now fully visible and at the forefront, ready for user interaction once again.
4. Stopped State
Whenever we close activity and move somewhere else, it is in a stopped state. So whenever the activity is in the stopped state, it won’t be present in the activity stack anymore. In this state, the activity is no longer visible, and resources used by the activity may be reclaimed by the system.
Android Activity Lifecycle Methods
There are a total of seven methods present in the activity lifecycle of any activity. These methods are known as callback methods. They must be overridden to perform a specific task when the state is reached or when the method is called.
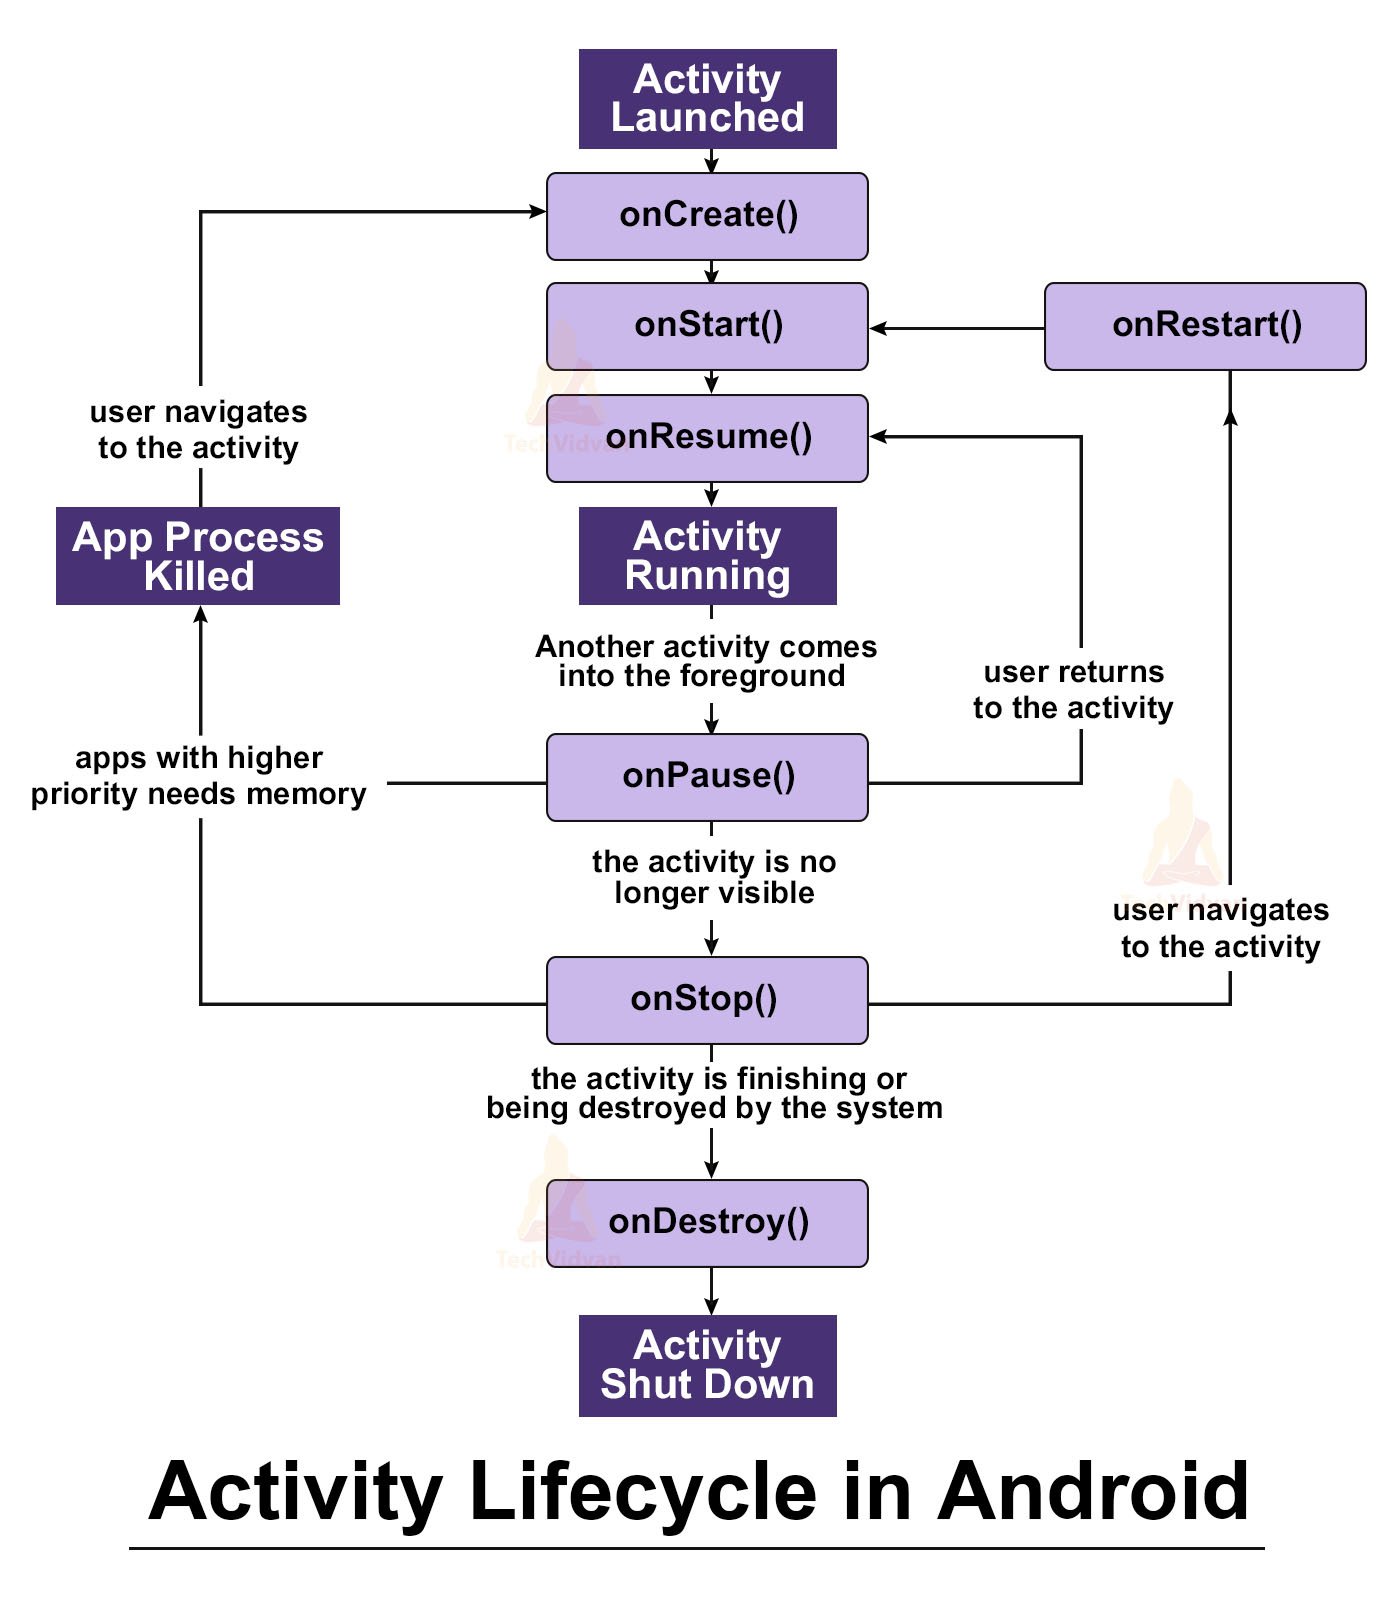
Following are the methods and their implementation:
1. onCreate()
This method is invoked when the app is opened. It signifies that the activity has been created and is ready for use. Following is the way to implement the onCreate() method.
override fun onCreate(savedInstanceState: Bundle?)
{
super.onCreate(savedInstanceState)
setContentView(R.layout.activity_main)

//To check if onCreate() method is invoked.
Log.d(TAG, "OnCreate method is invoked");
}
2. onStart()
This method is called when the activity is visible to the user. This method signifies that the activity has loaded successfully and is running in the foreground. It is called after the onCreate() method has been called. Following is the way to implement the onStart() method.
override fun onStart()
{
super.onStart()
//To check if onStart() method is invoked.
Log.d(TAG, "OnStart method is invoked");
}
3. onPause()
This method is invoked when the activity is not focused for a long duration. Therefore, the user has no user interaction for a long time. From onPause() state, the activity can either go to onResume() or onStop() state. Below is an implementation of the same.
override fun onPause()
{
super.onPause()
//To check if onPause() method is invoked.
Log.d(TAG, "OnPause method is invoked");
}
4. onRestart()
This method is invoked when we find an activity starting back from its stopped state. Sometimes we don’t use an activity for a longer time, and in such scenarios, android tries to stop that activity to free resources and the activity stack.
After that, whenever we start that activity again, then onRestart() is called. This method is invoked after the onStart() method because it’s pretty evident that it can’t restart an activity if it has never been started before. Following is its implementation.
override fun onRestart()
{
super.onRestart()
//To check if onRestart() method is invoked.
Log.d(TAG, "OnRestart method is invoked");
}
5. onResume()
This method is invoked when the user tries to bring an out-of-focus activity to focus. It means that the activity was visible, but the user won’t be interacting for a long time. When he interacts, it invokes the onResume() method.
Usually, this method is invoked after the onPause() method. Below is an implementation for the same.
override fun onResume()
{
super.onResume()
//To check if onResume() method is invoked.
Log.d(TAG, "OnResume method is invoked");
}
6. onStop()
The onStop() method is invoked when the activity becomes inactive or invisible from the application. It can happen for several reasons, such as a current activity being replaced by a new activity or getting destroyed. Following is an implementation of the same.
override fun onStop()
{
super.onStop()
//To check if onStop() method is invoked.
Log.d(TAG, "OnStop method is invoked");
}
7. onDestroy()
This method is invoked when the activity has finally stopped and is no more available to the user. In simple terms, the user no longer needs the activity and has stopped using it. Following is the implementation of the same.
override fun onDestroy()
{
super.onDestroy()
//To check if onDestroy() method is invoked.
Log.d(TAG, "OnDestroy method is invoked");
}
Declaring Activity in Manifest File in Android
Manifest File in android contains all the declarations of the activities, permissions, app icon, app name, resources, etc. The manifest file and its attributes are crucial for a developer to know so as to edit and make changes in his activity, app name, or permissions.
Usually, the android studio handles all activity creations, and you need not manually create an entry of the activity in the manifest file.
However, most often, you need to add permissions or change the app name or change the starting activity of the application. For such use cases, you need to understand the manifest file very nicely.
Below you can see the various syntax in the manifest file.
1. Activities
You can locate that activity in the manifest file enclosed within the <activity></activity> tags whenever you create a new activity. The android: name attribute contains the name of the activity.
2. Intent-Filter
The job of the intent filter is to recognize which activity is the first activity that will be created when the application starts. Therefore, the Intent filter is usually present inside the activity tags, and it signifies that the activity containing it is the first activity of the application.
3. App Icon
You can change your app icon by editing the android: icon attribute.
4. Permissions
You can add permissions in the manifest file, which you feel might be required for your application.
For Example
<?xml version="1.0" encoding="utf-8"?>
<manifest xmlns:android="http://schemas.android.com/apk/res/android"
package="com.example.techvidvanactivity">

<uses-permission android:name="android.permission.INTERNET" />

<application
android:allowBackup="true"
android:icon="@mipmap/ic_launcher"
android:label="@string/app_name"
android:roundIcon="@mipmap/ic_launcher_round"
android:supportsRtl="true"
android:theme="@style/Theme.TechVidvanActivity">
<activity android:name=".MainActivity">
<intent-filter>
<action android:name="android.intent.action.MAIN" />

<category android:name="android.intent.category.LAUNCHER" />
</intent-filter>
</activity>
</application>

</manifest>
Android Activity Lifecycle App Demo
So, after you have created your activity by following the above steps mentioned, you are all set to develop an app to test the activity lifecycle.
Below are the steps you need to follow:
1: Open your Main Activity.
2: Override the seven methods mentioned above, and inside each method, mention a Log statement. Log statements are usually used to display output in the app – logs.
Below is an implementation of the same.
package com.example.techvidvanactivity

import androidx.appcompat.app.AppCompatActivity
import android.os.Bundle
import android.util.Log

class MainActivity : AppCompatActivity()
{
    val TAG = "TechVidanActivity";
    //TAG is used to easy locate the output in logcat

    override fun onCreate(savedInstanceState: Bundle?)
    {
        super.onCreate(savedInstanceState)
        setContentView(R.layout.activity_main)

        //To check if onCreate() method is invoked.
        Log.d(TAG, "OnCreate method is invoked");
    }

    override fun onStart()
    {
        super.onStart()
        //To check if onStart() method is invoked.
        Log.d(TAG, "OnStart method is invoked");
    }

    override fun onPause()
    {
        super.onPause()
        //To check if onPause() method is invoked.
        Log.d(TAG, "OnPause method is invoked");
    }

    override fun onRestart()
    {
        super.onRestart()
        //To check if onRestart() method is invoked.
        Log.d(TAG, "OnRestart method is invoked");
    }

    override fun onResume()
    {
        super.onResume()
        //To check if onResume() method is invoked.
        Log.d(TAG, "OnResume method is invoked");
    }

    override fun onStop()
    {
        super.onStop()
        //To check if onStop() method is invoked.
        Log.d(TAG, "OnStop method is invoked");
    }

    override fun onDestroy()
    {
        super.onDestroy()
        //To check if onDestroy() method is invoked.
        Log.d(TAG, "OnDestroy method is invoked");
    }
}
The above code shows you that all the seven methods taught are overridden, and inside each method, we have kept a Log statement to check which method is invoked and why it was invoked.
You can open the Logcat, which is located at the bottom of your android studio, to see the output. The output will be as follows.
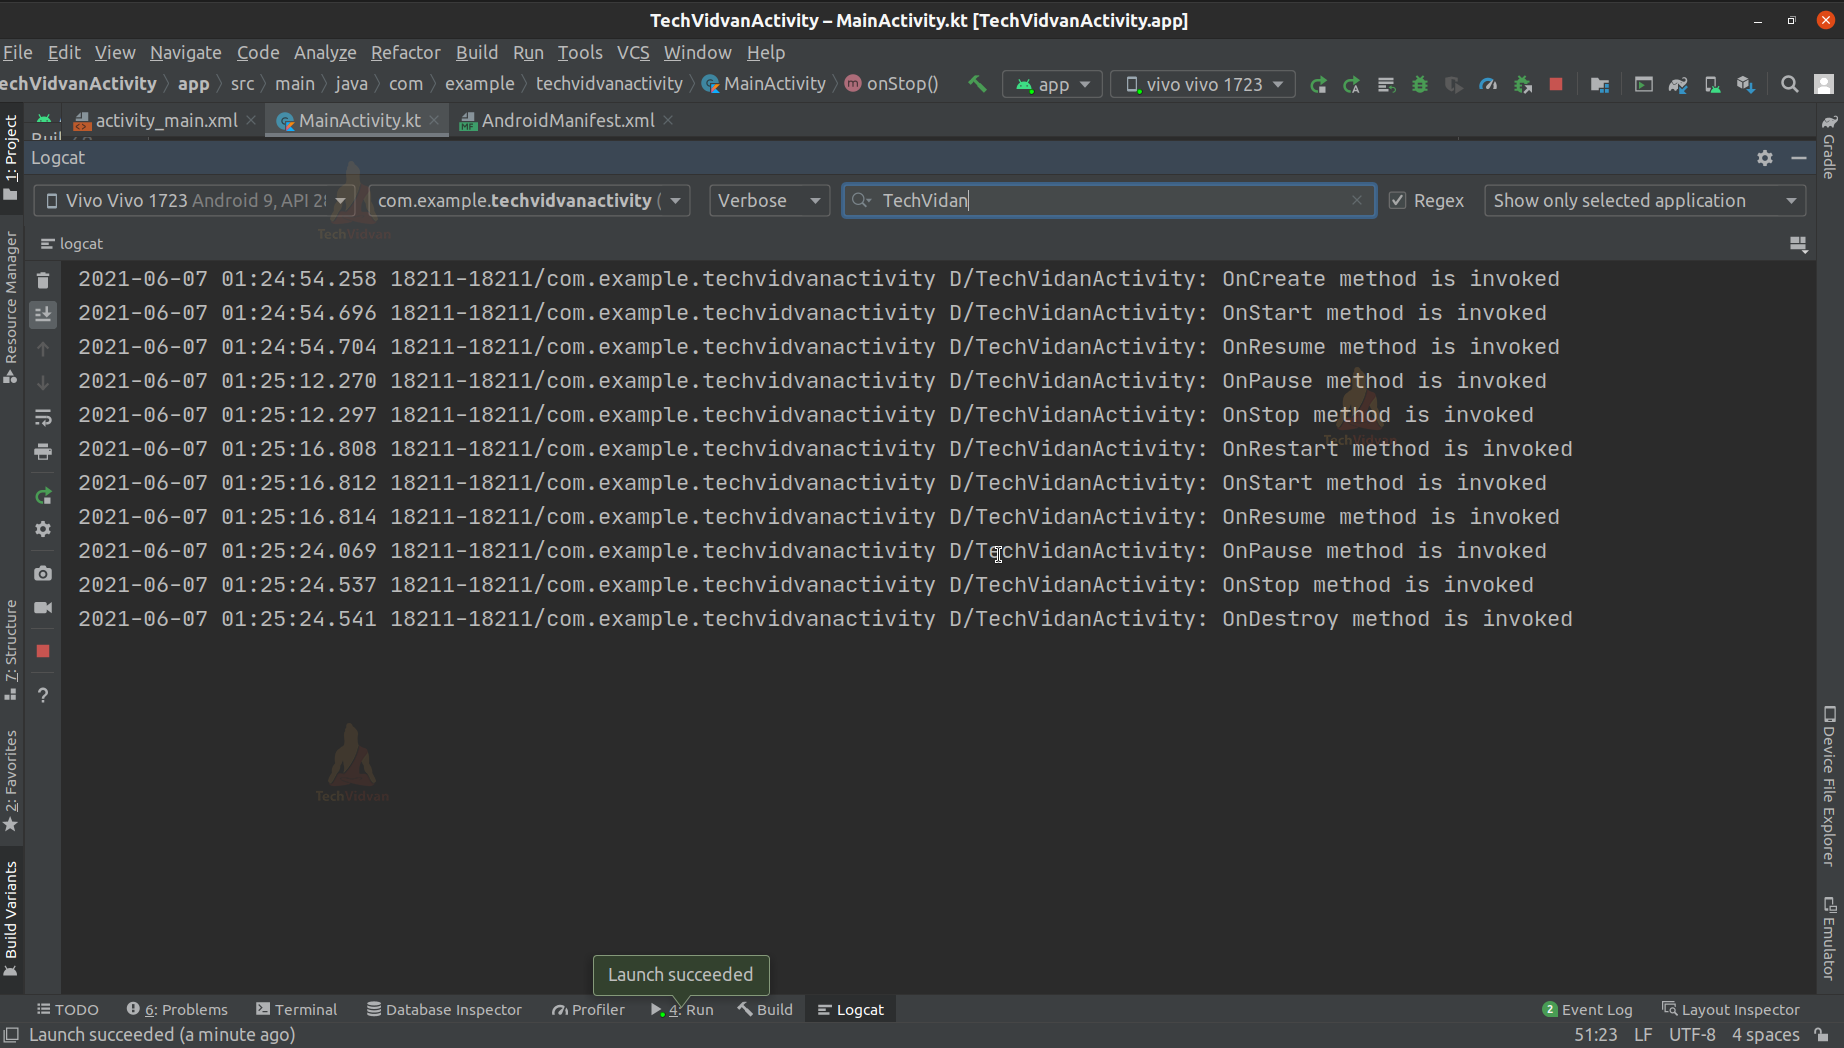
You are suggested to copy the above code and try the same with your device and notice how the activity lifecycle works.
Summary
So from this article, you understood what an activity is and how we can create activities in android. Further, you saw the various processes and states in android. Moving further, you understood about android activity lifecycle, the methods involved, and the manifest file. Lastly, you saw an example implementation of Activity Lifecycle and its methods.