Android Alarm Manager
Waking up early in the morning can be a challenging task for many. Most of us rely on someone or something to wake us up, usually an alarm. While you’re probably familiar with setting alarms on your device, have you ever wondered how they actually work? It’s all thanks to the AlarmManager in Android.
In this article, we’ll explore every aspect of AlarmManager and guide you on how to develop your own alarm app to schedule alarms effortlessly. Sounds exciting? Yes, it is! So, let’s dive in and uncover the magic behind Android alarms.
About Alarm Manager
Alarm Manager is a class provided by Android to access the system’s alarm services. The AlarmManager class allows you to schedule your application to run at a particular time. Even if you close your application or if your device goes to sleep still the alarm triggers at that particular time. Even if your device goes off, the alarm can wake up your device. But if you power off and reboot your system, then the intent gets deregistered, and you don’t get the alarm triggered.
You need to register an Intent to access the system’s alarm service. Whenever a particular time is reached, then a broadcast is made to make the intent active. After the alarm is off, then the intent is deregistered from the broadcast.
The AlarmManager holds on to your device’s CPU Clock and releases it when it receives the onReceive() method.
Characteristics of AlarmManager:
1. AlarmManager schedules the intents to trigger at a specific time or time intervals. This is useful for setting reminders, notifications, or performing time-based operations in your app, ensuring they run at the precise time you intend.
2. AlarmManager provides the application with the ability to run at a specific time. Even if the application is not running or your device falls asleep still the alarm can trigger to start your application. This feature is crucial for tasks like sending timely notifications or initiating background processes without user intervention.
3. AlarmManager is used to minimise the requirement of many resources. By scheduling tasks efficiently, it reduces the need for constant background activity, thus conserving battery and system resources.
4. AlarmManager allows you to operate with the broadcast receivers to start or stop specific services. This makes it easy to manage and automate service operations, enhancing the functionality and responsiveness of your application.
5. AlarmManager holds your CPU clock and waits until we force it to stop or reboot our device. This ensures that the scheduled alarms are reliable and are executed as expected, providing a consistent user experience.
Now let’s see an example of how you can initialise AlarmManager and use it in your project.
Code:
//creating the AlarmManager object
       val alarmManager = getSystemService(Context.ALARM_SERVICE) as AlarmManager

       //Creating an intent to the MyAlarm Class
       val intent = Intent(this, MyAlarm::class.java)

       //setting up a pending intent
       val yourPendingIntent = PendingIntent.getBroadcast(this, 999, intent, 0)
       alarmManager.setRepeating(
           AlarmManager.RTC,
           timeInMillis,
           AlarmManager.INTERVAL_DAY,
           yourPendingIntent
       )
Methods involved in Alarm Manager
There are several methods that we can use to implement the AlarmManager properly in our projects. Each method has its significant use, and you are recommended to look at the purpose of each method before proceeding with the implementation.
| Method Name | Purpose of the Method |
| set(type: Int, triggerAtMillis: Long, operation: PendingIntent!) | The set() method is used for setting alarms. |
| setExact(type: Int, triggerAtMillis: Long, operation: PendingIntent!) | The setExact() method is used to set alarms specifically at a specific time. |
| setRepeating(type: Int, triggerAtMillis: Long, intervalMillis: Long, operation: PendingIntent!) | The setRepeating() method is used to set repeating alarms on your device. |
| setTimeZone(timeZone: String!) | The setTimeZone() method is used to set a new or default timezone for your alarms. |
| setWindow(set_type: Int, StartMillis: Long, LengthMillis: Long, task_operation: yourPendingIntent!) | The setWindow() method is used to set a specific time slot during which your alarm should trigger. |
| setAndAllowWhileIdle(type: Int, triggerAtMillis: Long, operation: PendingIntent!) | The setAndAllowWhileIdle() method sets alarms that can trigger even in low battery idle modes. |
| getNextAlarmClock() | The getNextAlarmClock() gives us the details of the next alarm that is scheduled. |
| cancel(operation: PendingIntent!) | The cancel method is used to discard the alarm matching the specified pending intent. |
Implementation of Alarm Manager in Android
Now let’s see how you can implement AlarmManger and the above-seen concepts through an android app. We will try to develop an app using which you can schedule alarms for a particular time. Follow the below steps:
1: Start your Android Studio and click on Create a new Project.
2: Select an empty activity, provide project name, select API level 22 and then click finish.
3: First of all, open your AndroidManifest.xml file and then paste the below code.
Code: AndroidManifest.xml
<?xml version="1.0" encoding="utf-8"?>
<manifest xmlns:android="http://schemas.android.com/apk/res/android"
    package="com.techvidvan.techvidvanalarm">

    <application
        android:allowBackup="true"
        android:icon="@mipmap/ic_launcher"
        android:label="@string/app_name"
        android:roundIcon="@mipmap/ic_launcher_round"
        android:supportsRtl="true"
        android:theme="@style/Theme.TechVidvanAlarm">
        <activity android:name=".MainActivity">
            <intent-filter>
                <action android:name="android.intent.action.MAIN" />

                <category android:name="android.intent.category.LAUNCHER" />
            </intent-filter>
        </activity>
    </application>

</manifest>
4: Open your activity_main.xml file and paste in the below code there.
Code: activity_main.xml
<?xml version="1.0" encoding="utf-8"?>
<LinearLayout xmlns:android="http://schemas.android.com/apk/res/android"
    xmlns:tools="http://schemas.android.com/tools"
    android:layout_width="match_parent"
    android:layout_height="match_parent"
    android:orientation="vertical"
    tools:context=".MainActivity">

    <TextView
        android:layout_width="match_parent"
        android:layout_height="wrap_content"
        android:text="TechVidvan Alarm App"
        android:textStyle="bold"
        android:textSize="30sp"
        android:gravity="center"
        android:textColor="#000000"
        android:layout_marginBottom="30dp"
        android:layout_marginTop="20dp"
        android:id="@+id/title"/>
    <TimePicker
        android:id="@+id/timePicker"
        android:layout_width="match_parent"
        android:layout_margin="20dp"
        android:layout_marginTop="50dp"
        android:headerBackground="#8BC34A"
        android:numbersBackgroundColor="#000"
        android:numbersTextColor="#ffffff"
        android:numbersSelectorColor="#8BC34A"
        android:layout_height="wrap_content" />
    <Button
        android:id="@+id/setAlarmButton"
        android:layout_width="wrap_content"
        android:layout_height="wrap_content"
        android:layout_marginTop="30dp"
        android:layout_gravity="center"
        android:backgroundTint="#000000"
        android:textColor="#8BC34A"
        android:textStyle="bold"
        android:text="Schedule Alarm" />

</LinearLayout>
5: Now, in your MainActivity.kt you need to set up the AlarmManager and the pending intent.
Code: MainActivity.kt
package com.techvidvan.techvidvanalarm

import android.app.AlarmManager
import android.app.PendingIntent
import android.content.BroadcastReceiver
import android.content.Context
import android.content.Intent
import android.os.Build
import android.os.Bundle
import android.util.Log
import android.widget.Button
import android.widget.TimePicker
import android.widget.Toast
import androidx.appcompat.app.AppCompatActivity
import java.util.*
class MainActivity : AppCompatActivity()
{
    //declaring variables
    lateinit var setAlarmButton: Button
    lateinit var timePicker: TimePicker

    override fun onCreate(savedInstanceState: Bundle?)
    {
        super.onCreate(savedInstanceState)
        setContentView(R.layout.activity_main)

        //binding the timePicker variable with the TimePicker View
        timePicker = findViewById(R.id.timePicker)
        //binding the setAlarmButton variable with the Schedule Alarm Button
        setAlarmButton = findViewById(R.id.setAlarmButton)

        //adding on click listener on our setAlarmButton
        setAlarmButton.setOnClickListener {

            //creating an instance of the calendar class
            val calendar: Calendar = Calendar.getInstance()

            //setting up the calendar
            if (Build.VERSION.SDK_INT >= 23)
            {
                calendar.set(
                    calendar.get(Calendar.YEAR),
                    calendar.get(Calendar.MONTH),
                    calendar.get(Calendar.DAY_OF_MONTH),
                    timePicker.hour,
                    timePicker.minute,
                    0
                )
            }
            else
            {
                calendar.set(
                    calendar.get(Calendar.YEAR),
                    calendar.get(Calendar.MONTH),
                    calendar.get(Calendar.DAY_OF_MONTH),
                    timePicker.currentHour,
                    timePicker.currentMinute, 0
                )
            }

            //calling the setAlarm method with time in milliseconds
            setAlarm(calendar.timeInMillis)
        }
    }
    private fun setAlarm(timeInMillis: Long)
    {
        //creating the AlarmManager object
        val alarmManager = getSystemService(Context.ALARM_SERVICE) as AlarmManager

        //Creating an intent to the MyAlarm Class
        val intent = Intent(this, MyAlarm::class.java)

        //setting up a pending intent
        val yourPendingIntent = PendingIntent.getBroadcast(this, 999, intent, 0)
        alarmManager.setRepeating(
            AlarmManager.RTC,
            timeInMillis,
            AlarmManager.INTERVAL_DAY,
            yourPendingIntent
        )

        //displaying the user that the alarm is scheduled
        Toast.makeText(this, "You Alarm is Scheduled", Toast.LENGTH_SHORT).show()
    }

    //creating the MyAlarm class extending properties from BroadcastReceiver
    private class MyAlarm : BroadcastReceiver()
    {
        //calling the onReceive Method when the alarm is triggered
        override fun onReceive(
            context: Context,
            intent: Intent
        ) {
            Log.d("TechVidvan", "Your Alarm is triggered")
        }
    }
}
Run your application by using the top right play button and then notice the output.
The TechVidvan Alarm App will look like below.
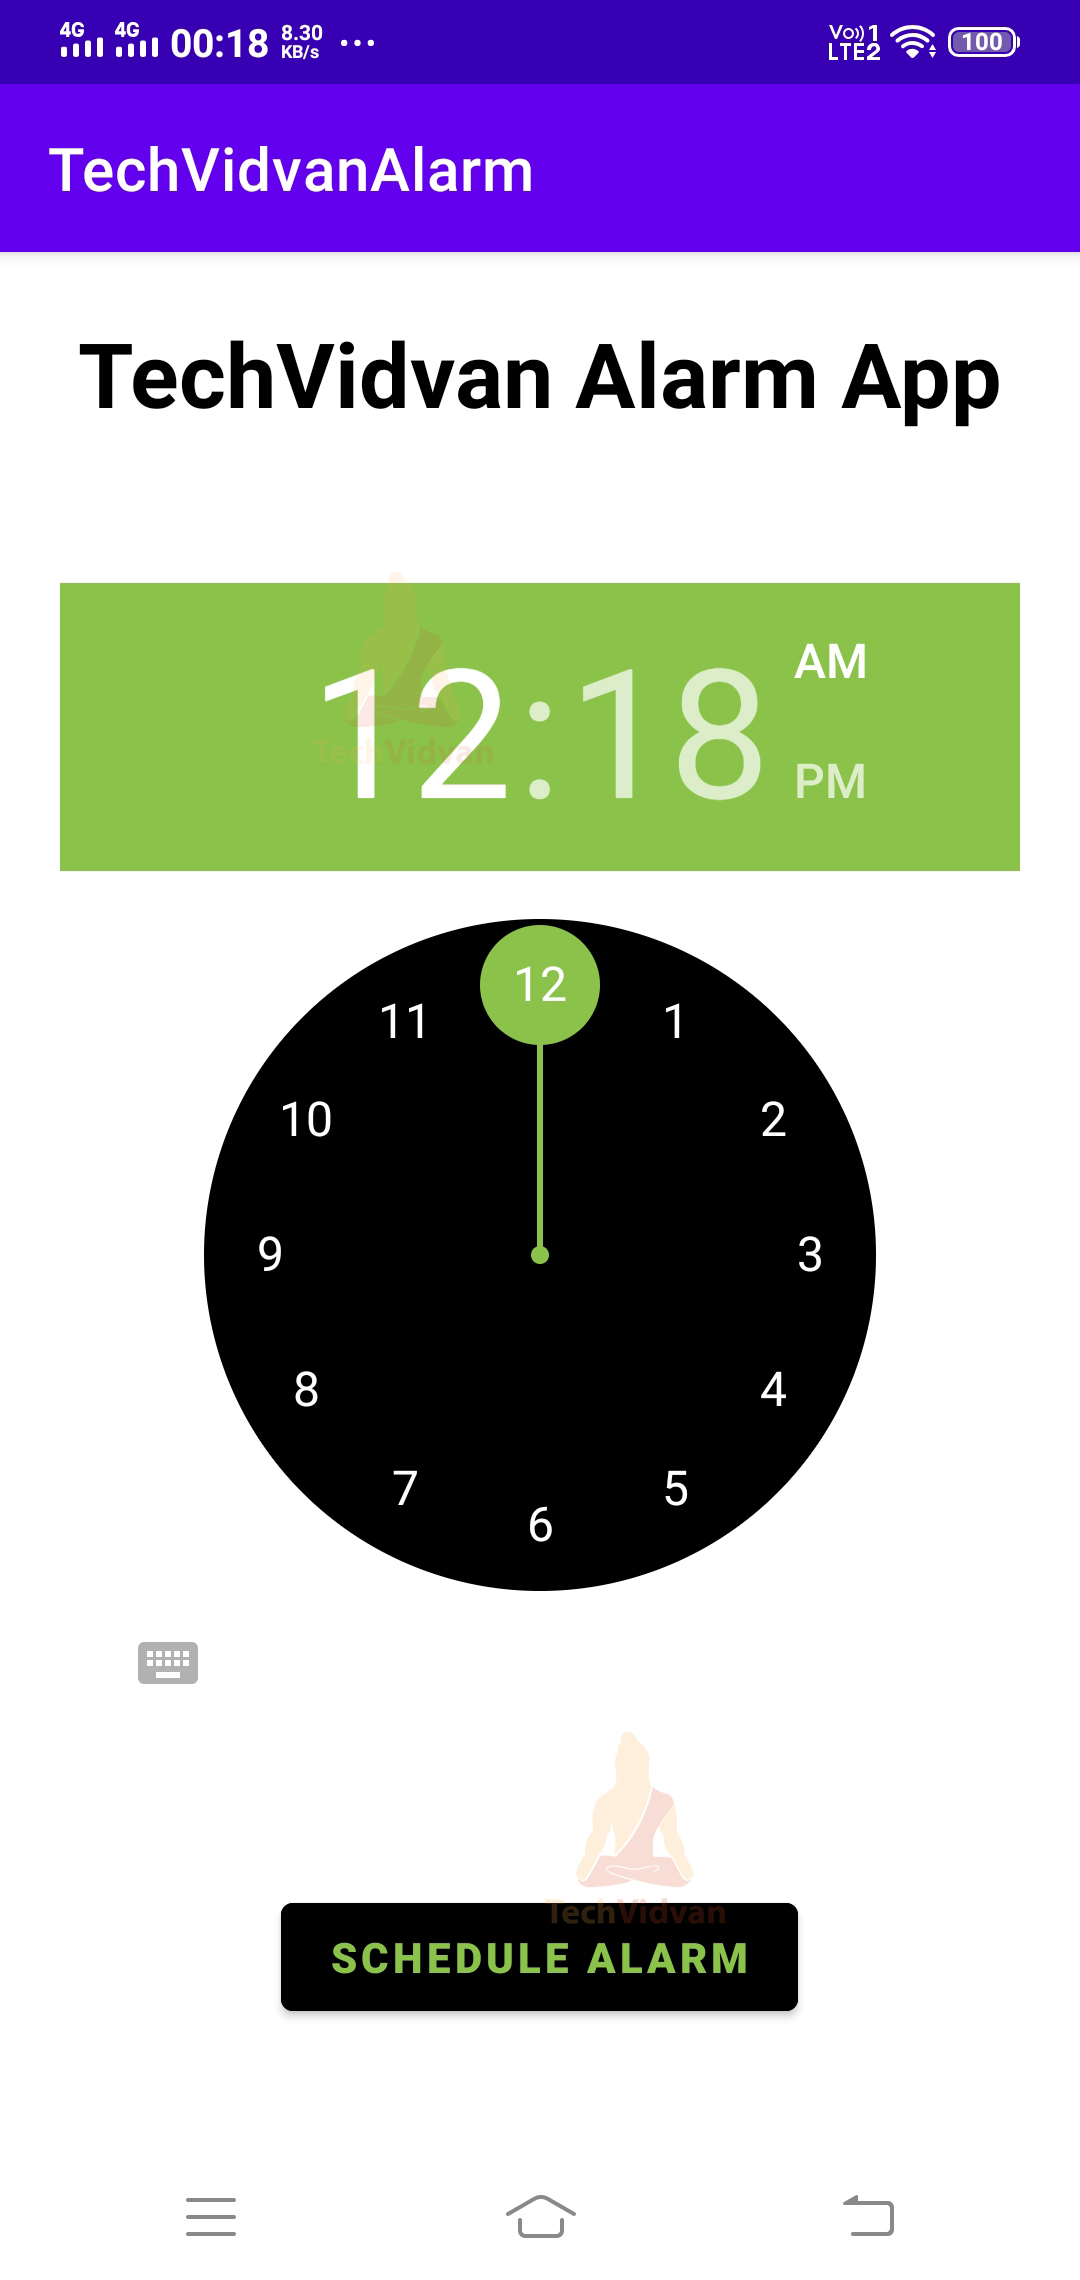
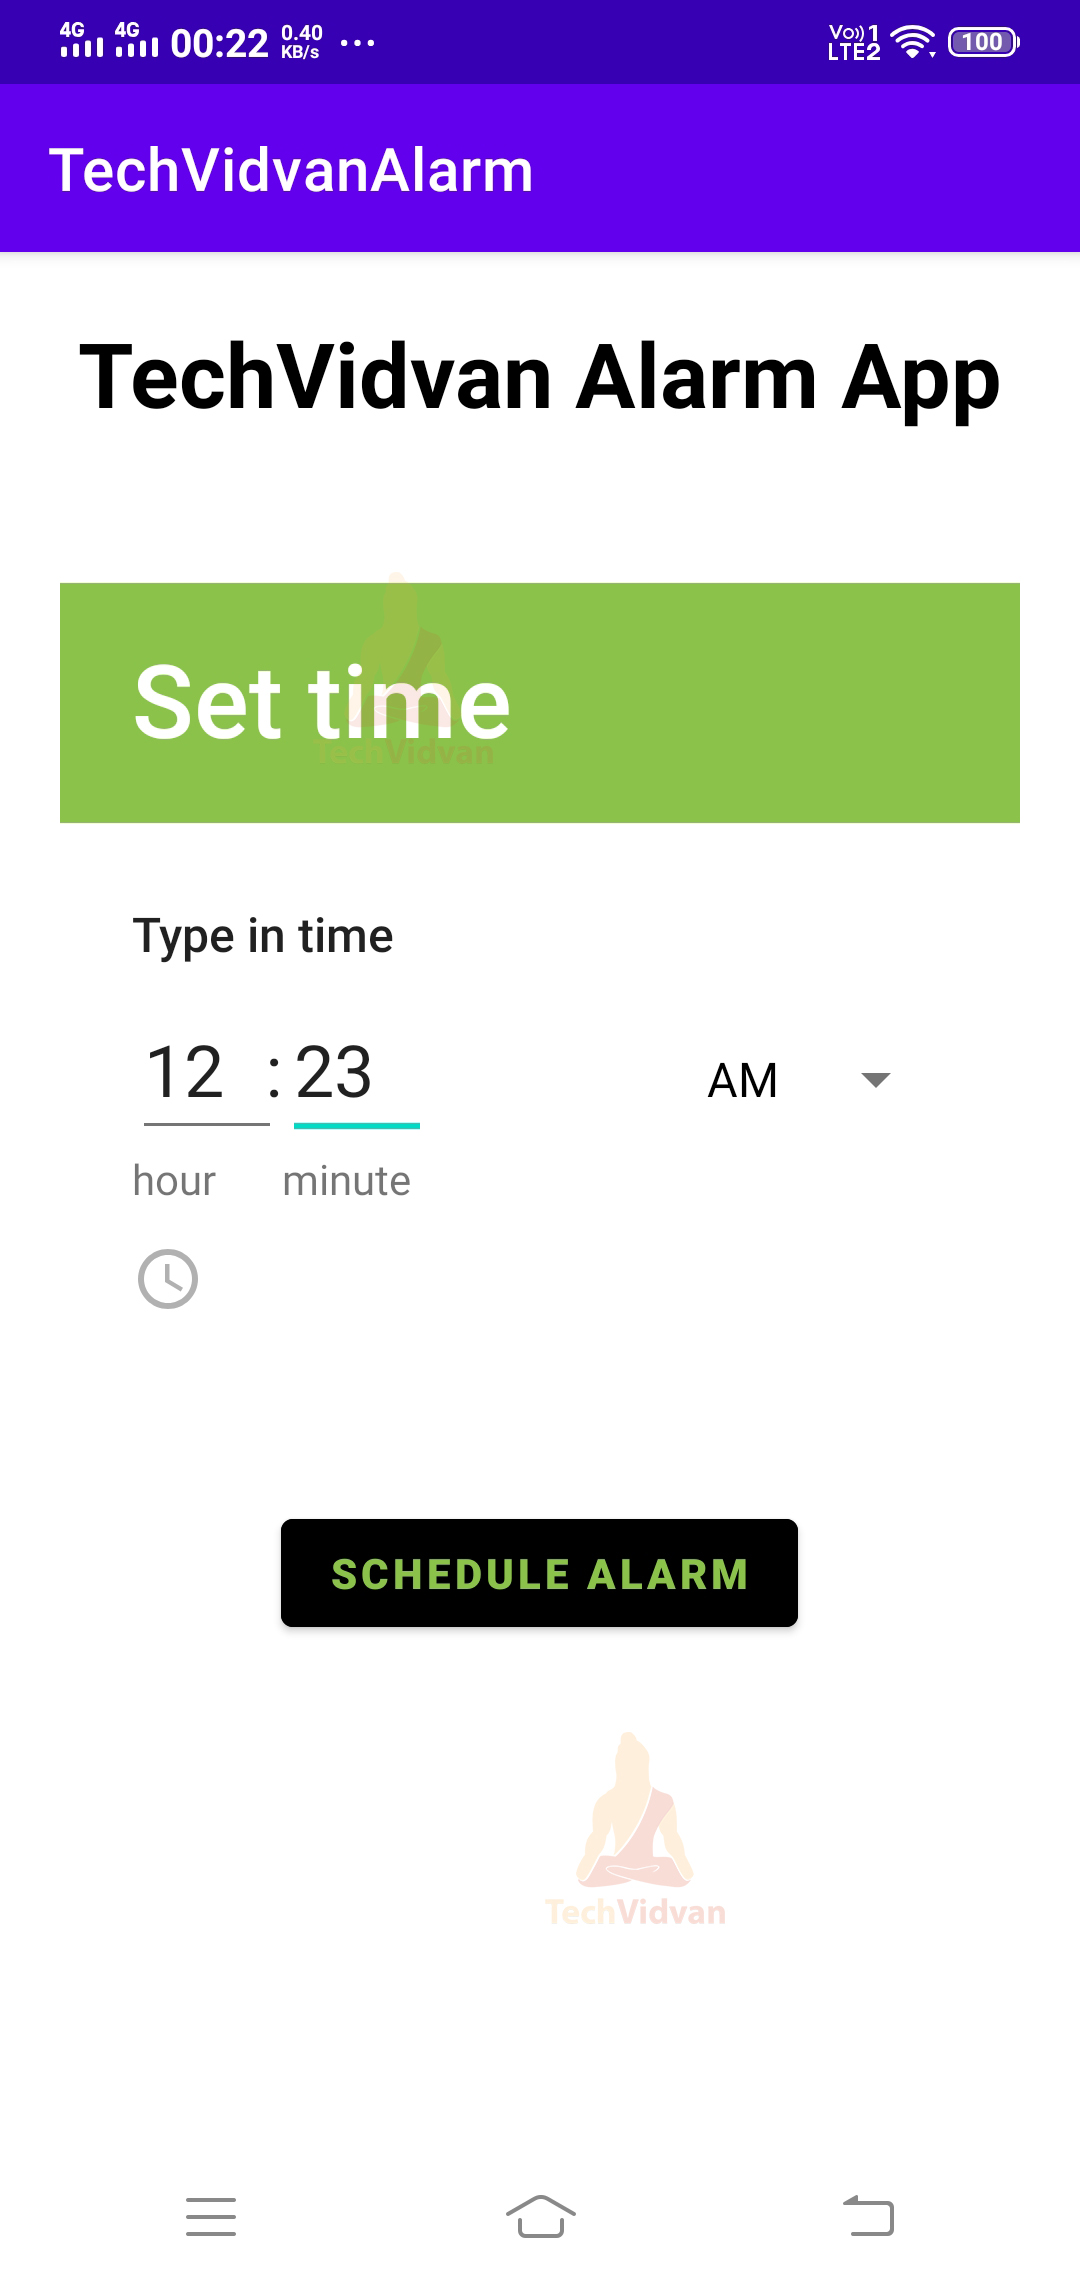
You can now select the time where you want your alarm to get scheduled.

Now when you schedule your alarm, you get a Toast stating, “Your Alarm is Scheduled.”
Summary
Through this article, you came across AlarmManager and saw how it is used to schedule alarms. You saw the various characteristics of using an AlarmManager and also got to know how you could create an AlarmManager object in your Kotlin class. Later on, you saw several methods that can be used to implement the AlarmManager in your project. Finally, you saw an app implementation of the AlarmManager and came across scheduling the alarms.