Install Android – Easiest Step by Step Tutorial for Beginners
In this article, you will get to know about Android studio and its uses. Along with this, you will get to see how you can install Android Studio on your PC. You can find the installation procedure for the following operating systems:
- Windows
- Mac
- Linux
Let’s first understand what the android studio and its features are.
Android IDE’s
There are several integrated development Environments(IDE’s) that are used for android development. The most common among them are as follows:
- Android IDE
- Eclipse IDE
Eclipse IDE is not much used for android development in the current scenario, and people have shifted to Android Studio for development purposes.
Several other frameworks are also used for Android Development, such as React Native, Ionic, Vue Js, etc.
What is Android Studio?
Android studio, in simple terms, is a tool that helps you build apps that can run on any android device. It is an integrated development environment (IDE) that provides us with a software development kit(SDK) that helps us build apps for android. It is based on JetBrains IntelliJ IDEA. The whole Android studio is quite similar and follows most parts from the JetBrains IntelliJ IDEA.
Features of Android Studio
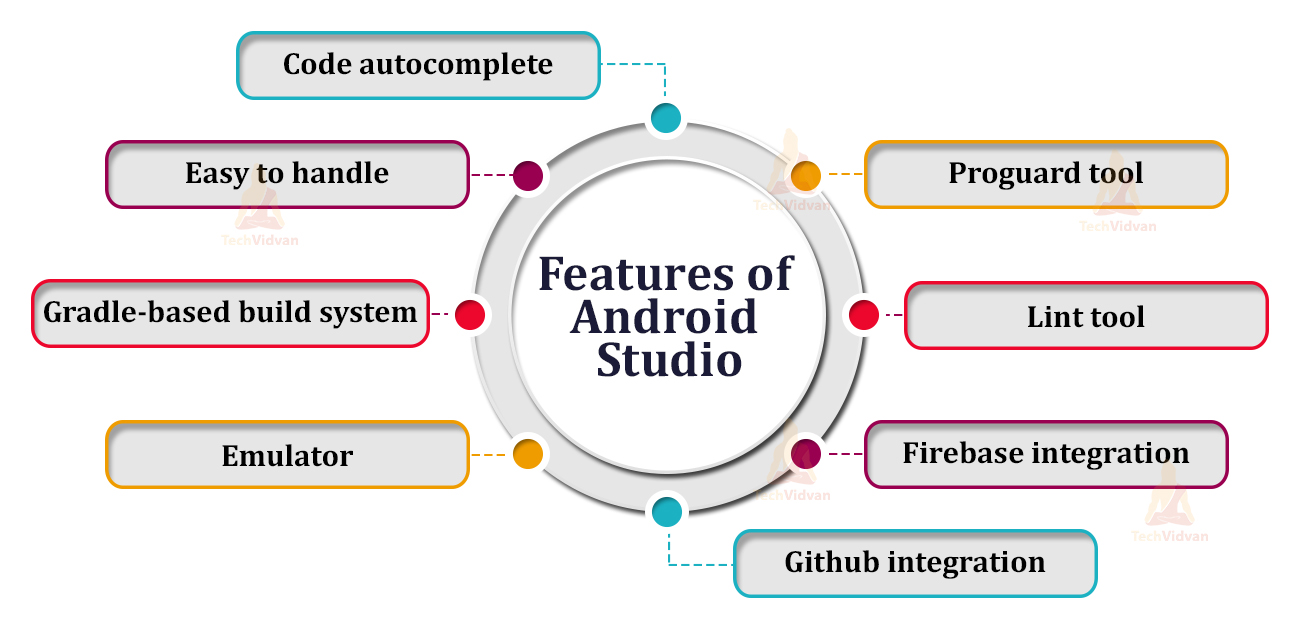
Android studio provides several remarkable features to offer a hassle-free development process. Some of those features are as follows:
1. Code Autocomplete
You get features like code autocomplete and auto error suggestions due to IntelliJ IDEA. This significantly speeds up development by predicting your next lines of code and highlighting errors in real-time, making coding more efficient.
2. Easy to handle
Android Studio is built in such a way that you can quickly locate the tools and settings you need for development. Its intuitive interface makes it easy to navigate, ensuring that developers can focus more on coding rather than searching for options.
3. Gradle-based build system
Android Studio supports a Gradle-based build system. It helps us to automate, build, and test our application. Gradle also provides features like debugging and APK build, streamlining the deployment process.
4. Emulator
No need to worry if you don’t have an android phone nearby to test your applications. Android studio provides you to select your emulator where you want to run your applications. The emulator is very versatile because you can choose any version of android to make a virtual device(or emulator).
5. Proguard Tool
It’s a tool provided by java, which creates some rules for your app while developing. It looks in your app structure and also helps to minify your code by removing all the unnecessary parts. Thereby it also provides security for your applications.
6. Lint Tool
This tool in Android Studio helps you locate any syntactic or programmatic mistakes in your code. It also helps structure and format your code to ensure it is clean and efficient, adhering to best practices.
7. Firebase Integration
You can even directly connect your app to Firebase using the firebase tool in android studio. Firebase provides many features like real-time database, authentication, cloud messaging, etc., which gives more power to your applications.
8. Github Integration
You can integrate your Github repository with your application and directly push files through the Android studio itself.
Because of the above features, the android studio becomes one of the developer’s choices to develop apps for android.
Before you start installing android studio on your PC, you need a Java SE development kit installed on your PC. So let’s begin by establishing that first.
Installing Java SE Development Kit
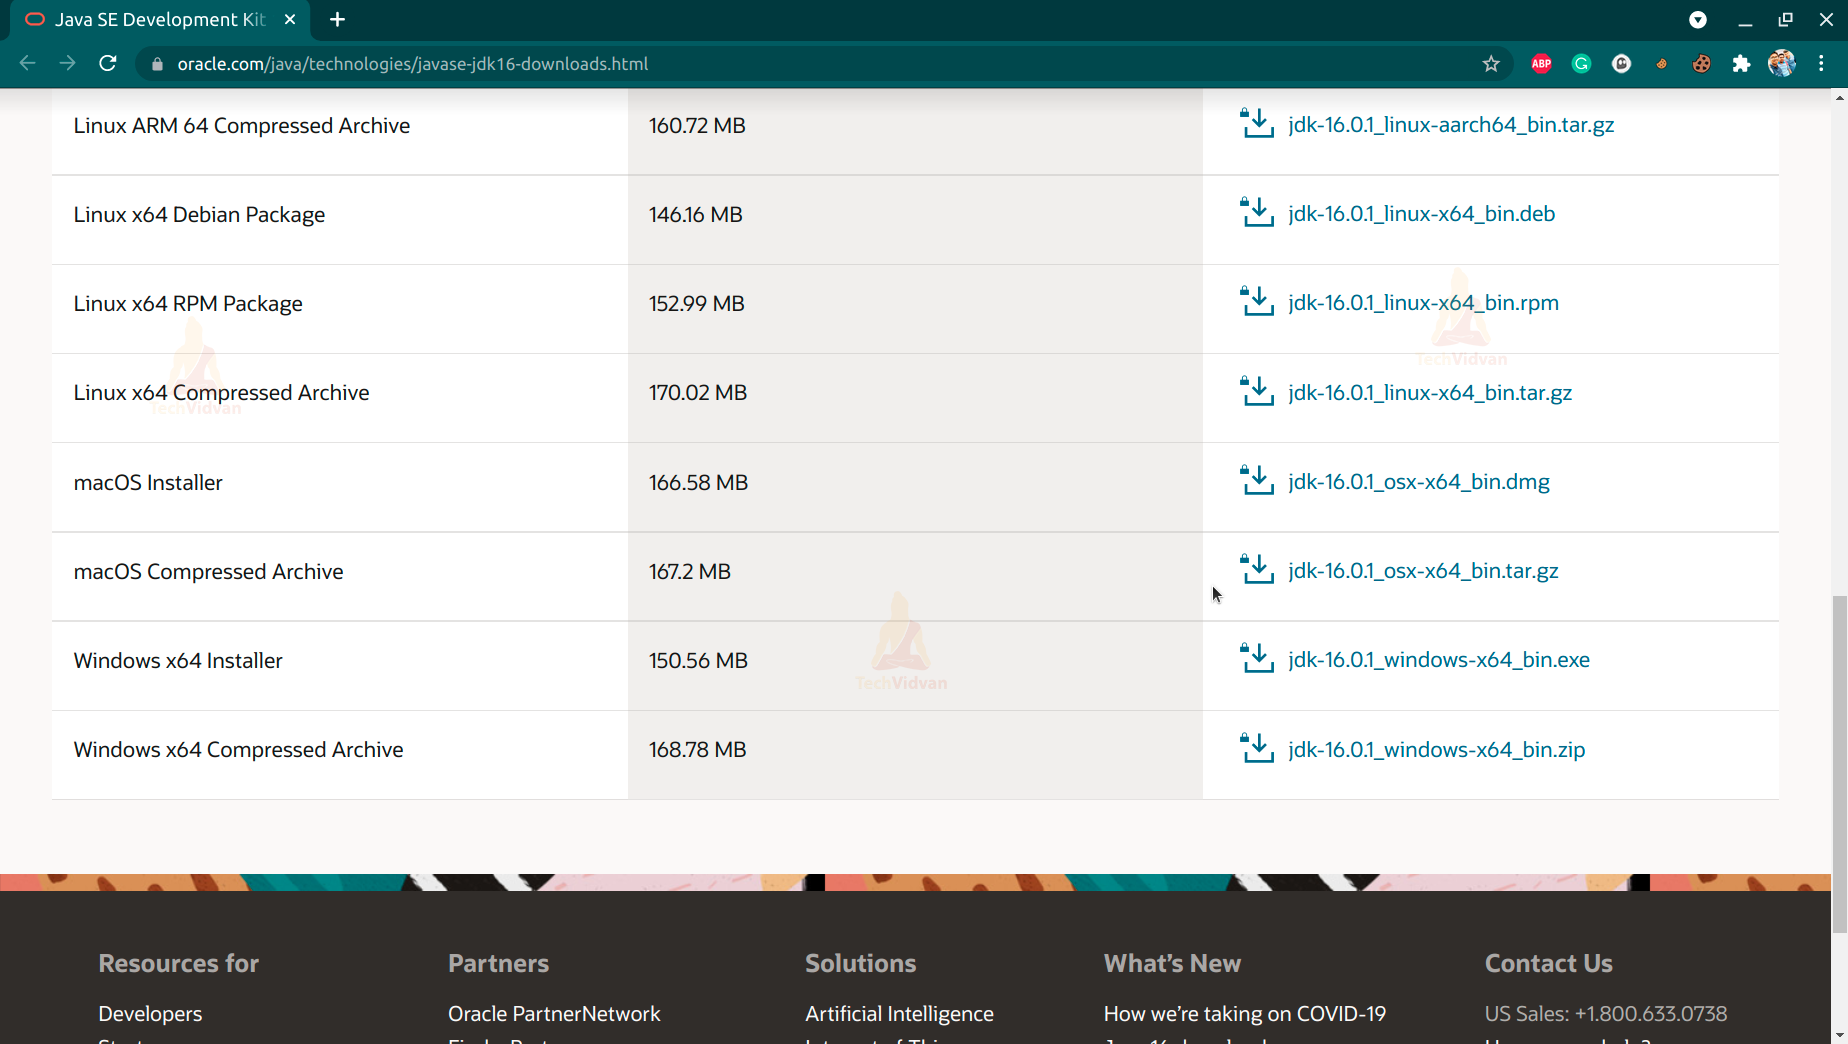
It is mandatory to have Java Development Kit(JDK) installed on your PC before proceeding with Android Studio Installation. Below are the steps to install the JDK.
1. Download Java corresponding to your operating system. (Windows, Mac, Linux)
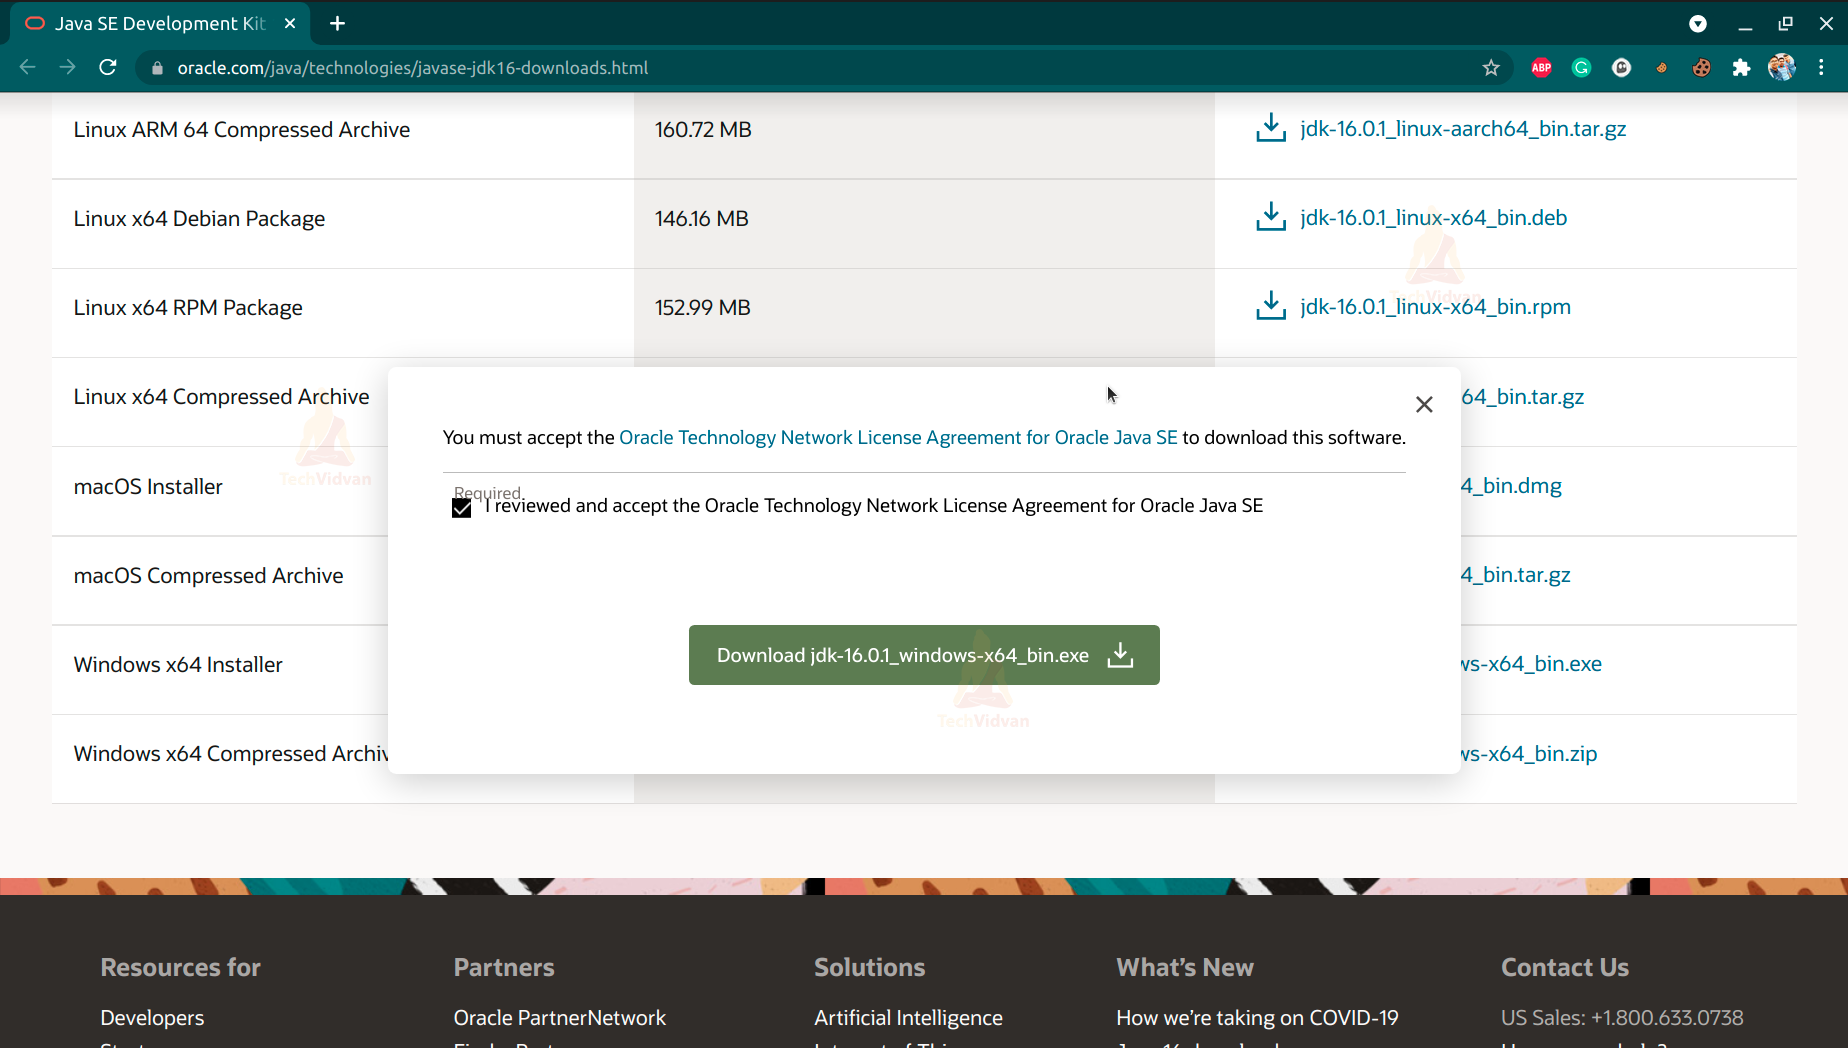
2. Then you will see a popup asking you to agree on the terms and conditions. Just click on the checkbox and then start your download.
3. After the file gets downloaded, click on it and run the installer.
4. Now, after java installation, you need to set the environment variable.
5. To set the environment variable, you need to go to Control Panel->System and Security-> System-> Advanced setting->Environment variable -> Add a new path.
After setting these things up, you are ready to install Android Studio on your system. Let’s start by installing Android Studio on Windows.
Installing Android Studio on Windows
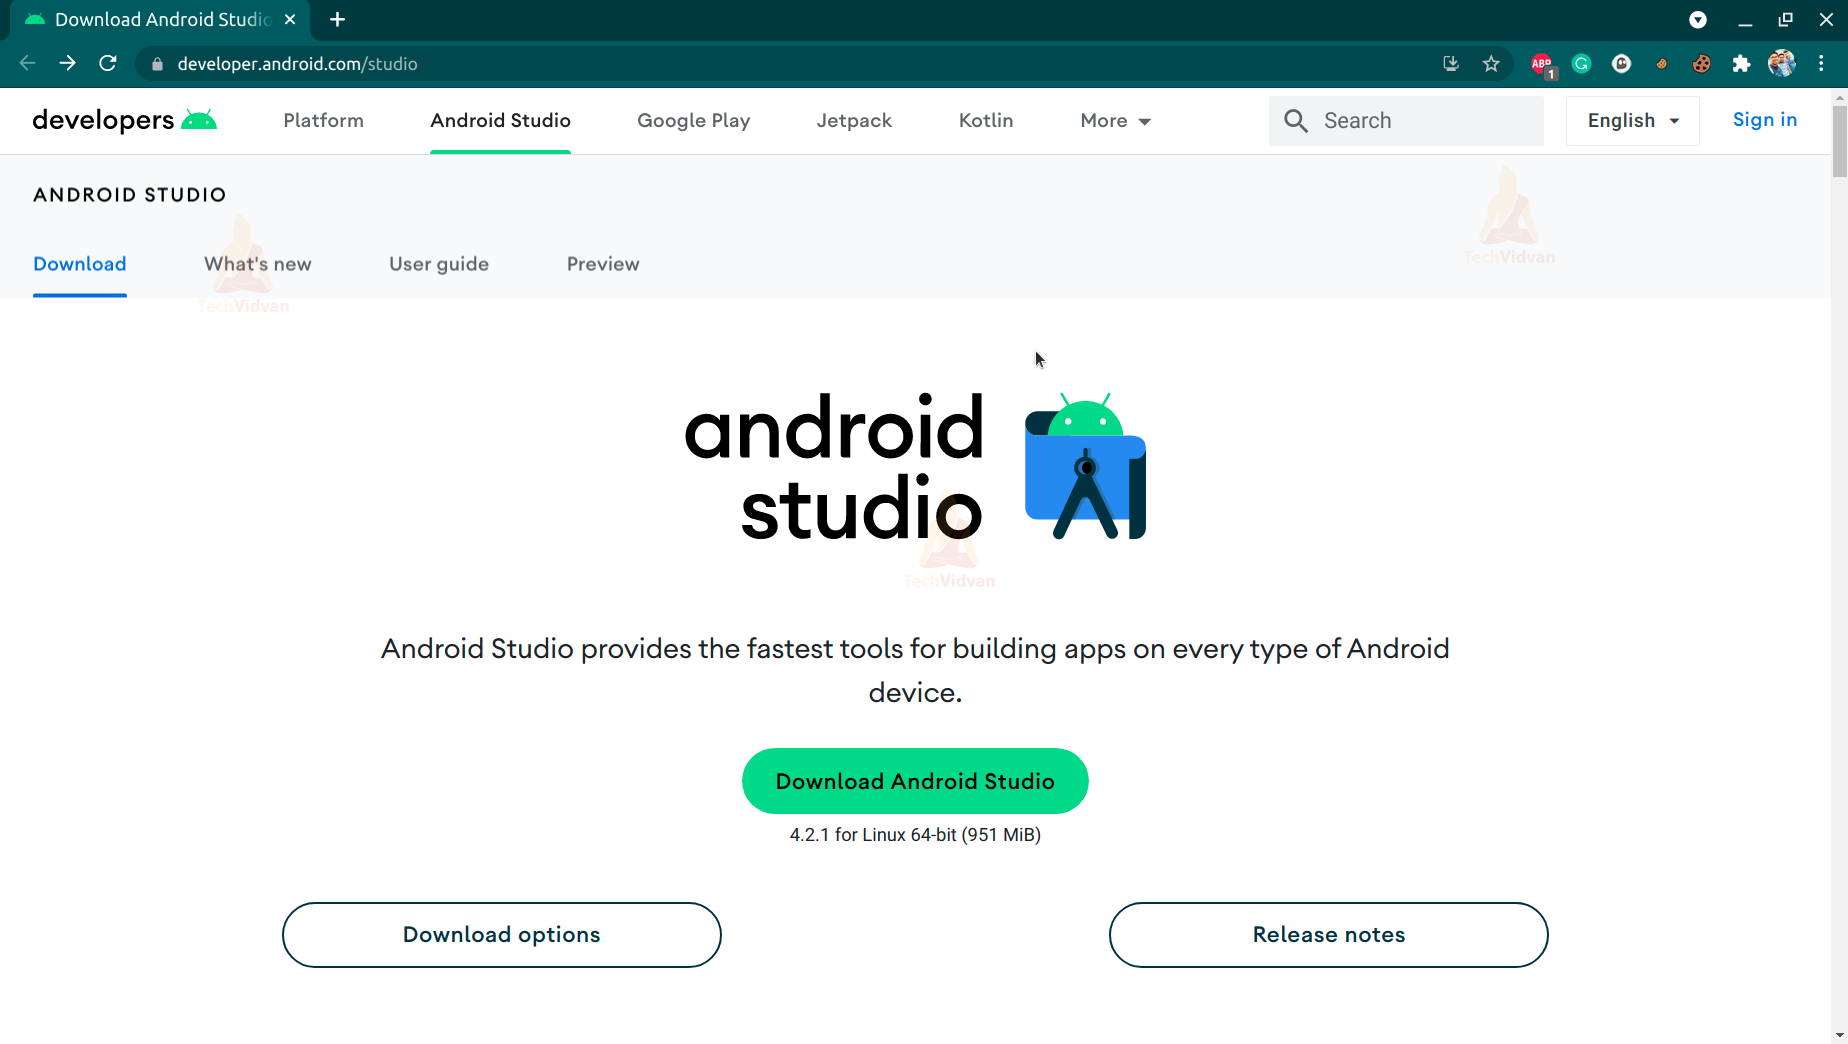
1. Download Android Studio installer
You will be redirected to the official website of android, from where you can download android studio.
2. Then, click on download Android Studio as shown below.
3.Now, just click on the downloaded file and then wait for all the packages to be installed successfully.
That’s it. Once you are done installing on windows, you are now ready to create your android applications.
Installing Android Studio on MAC
By going through the following steps, you can install Android Studio on your Mac.
1. Download the Android Studio installer
2. You can locate the option for MAC. Just click on it.

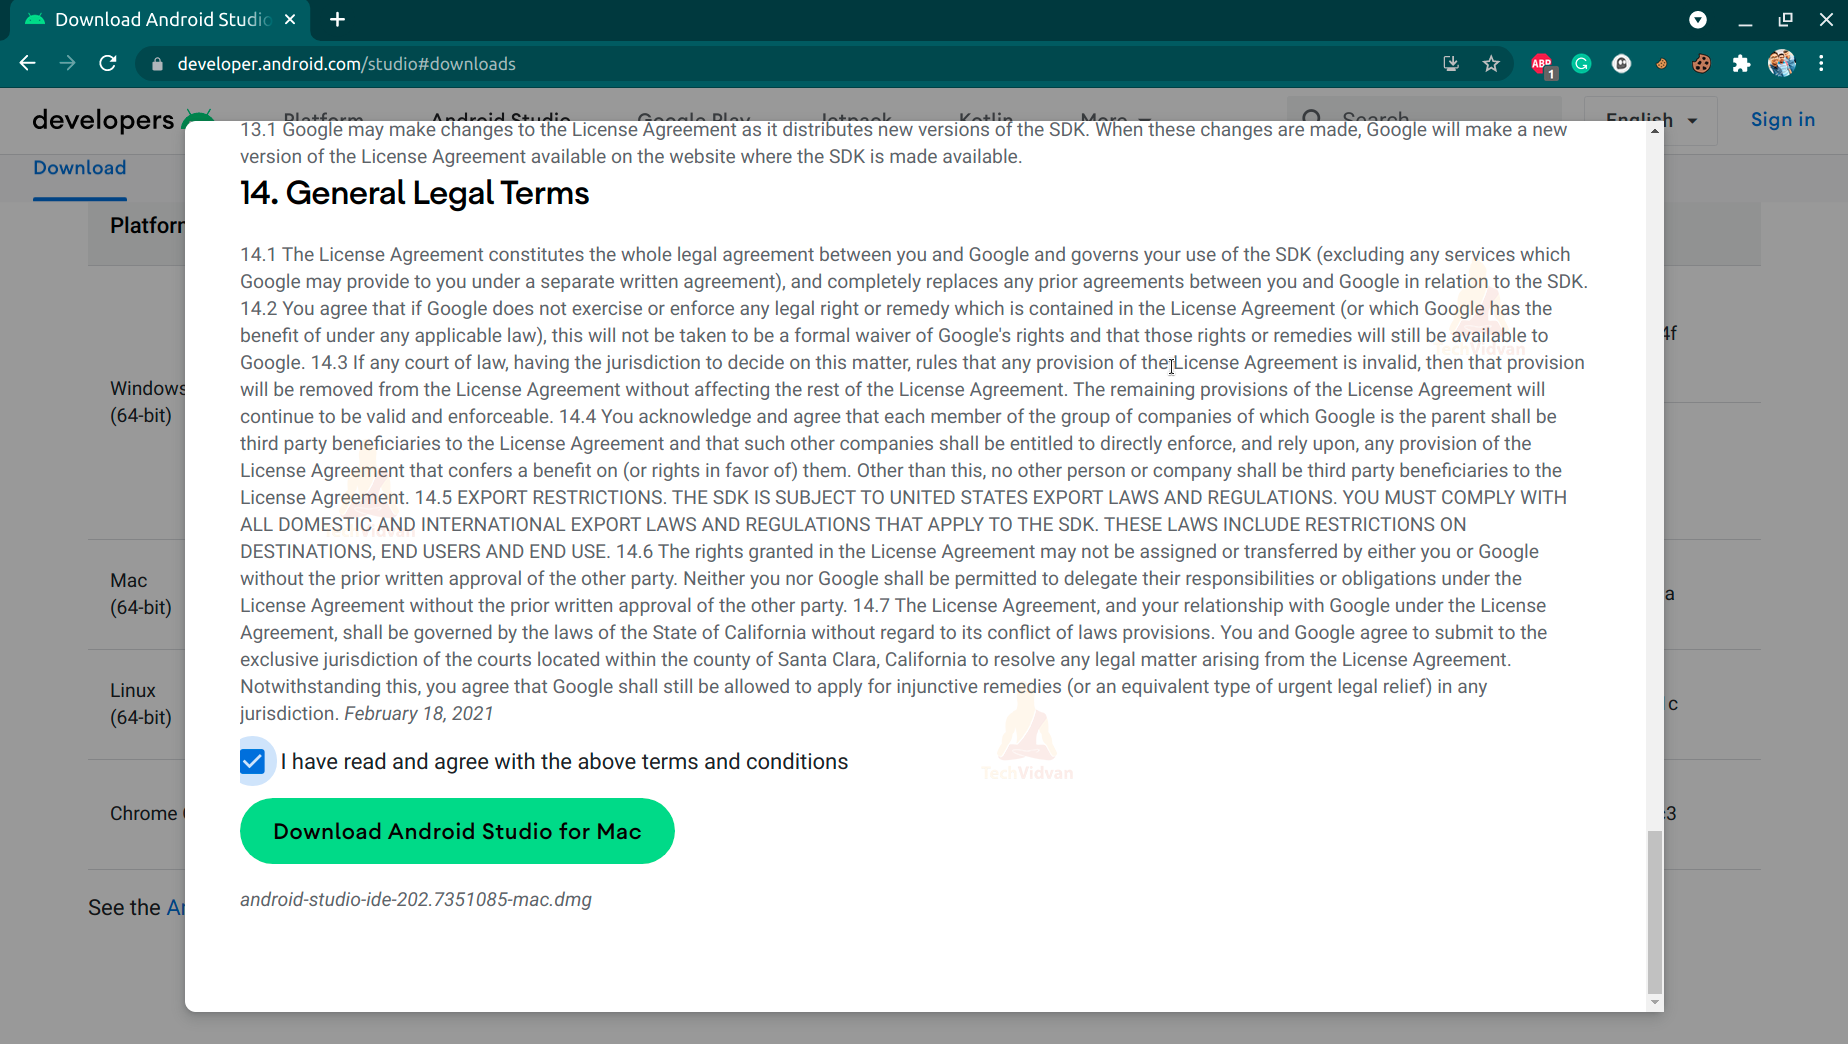
3. It will ask you to accept the terms. Just accept it and click on download.
4. Now, after the file gets downloaded, just locate the file and double click on it.
5. Then, drag and drop the Android Studio icon in the application folder. This will copy all the Android Studio files in the Applications folder, and you will be able to see the Android Studio icon in the application.
That’s it; now your android studio is installed on Mac. So you can go ahead and develop your applications.
Installing Android Studio on Linux
Following are the steps to install android studio on Linux:
1. Download the Android Studio installer
2. Locate the option for Linux. Just click on it.
3. Accept the terms and conditions and click on the download option.

4. Now, unzip and extract the downloaded file.
5. To run Android Studio on your system, just open your terminal and then open the bin directory and type studio.sh. This will make your android studio start.
That’s it; now your android studio is installed on Linux. So you can go ahead and develop your applications.
Summary
So in this tutorial, you saw what android studio is and what its features are. Moreover, you understood how android studio makes your task easier while developing android applications. After this, you saw how you could install JDK on your system, and following that, how can you install Android Studio on your PC, whether it’s Windows, Mac, or Linux.
I hope now you are all set with your android studio ready for developing some excellent android applications.