Android Project – Library Management System
A library is a place where you get various books that you can borrow for some time. I still remember the way library management used to be in the earlier days.
In earlier days, libraries used to maintain registers and book passes for every reader. Whenever we wish to borrow a book, we first search the books manually on every shelf and then go to the library desk and then write our name, roll number, duration, and then we used to borrow it.
If we think about this, we would feel how much time and hectic task the library management was. This article will try to build a library management system in Android that makes the above job more manageable and smoother.
About Library Management App:
Library Management App is a tool for both users and library management people. Using the app, the admin of the library can upload book details and where it is located. Then the user can see the available books and can request to borrow them. Now let’s see the key features of the library management app.
Features of Android Library Management System App:
1. Library Management App allows both user and admin to operate this app.
2. It allows the admin to add books and their details.
3. The users can look for the books they wish to collect and send a request to the admin.
4. The admin can accept or reject book collection requests from users.
5. Users need to provide complete information along with their phone number to borrow a book.
6. Users need not search every shelf to find a book. The admin can keep a record of the book’s location, which helps the user quickly locate it.
The flow of the application:
The library management system application needs you to build several screens and provide various functionalities. So, let’s have a look at the screens, which would be helpful to implement the library application.
- Welcome Screen: You need to design a welcome screen having the title “Welcome to Library Management’.
- Login Screen: You need to design a login screen to allow both users and admin to log in to the library management app.
- Add Book Details Screen: You need to design an add book details screen using which the admin can upload details of any book and its location.
- Books Edit Screen: You need to design a screen for the admin to select and edit details of an existing book.
- User Home Screen: In the user’s home screen, you need to display the categories of books available in the library.
- User Books Screen: The users can see the books and request the admin to collect that book.
- Admin dashboard: The admin dashboard contains all the notifications from the user who wishes to borrow a book. The admin can accept their request or reject it.
- User Notifications Screen: The user gets the notifications on this screen stating whether or not the admin accepted his request.
- User Profile Screen: The user profile contains the user’s details and the sign-out and updates details option.
- Admin Profile Screen: The admin profile shows the details of the library admin and has a button to sign out the admin.
Project Requirements:
Android library management system requires you to know both the frontend and backend. To do so in android, the following are the topics with which you should do better.
1. Android Studio and its tools
2. Android Activities and lifecycle
3. Firebase Realtime Database, Authentication, and RecyclerView.
4. Android Fragments
5. Android XML layout designing
6. Android Event Handling
7. Android UI elements
8. Java and Object-Oriented Programming
Download Library Management System Android App Code
Please download the source code of android library management system: Library Management System Android App Code
Getting Ready for the Android Project:
To set up the library management project in Android, you need to have some knowledge about the below files. These files make you understand better how the application works, and you find it easy to understand the source code we will provide in the implementation.
1. Manifest: The AndroidManifest.xml file contains declarations of the various activities, services, broadcast receivers, and intent filters. The app’s manifest file is used to define the permissions you require from the user. Below are the permissions that play an essential role in building the library management app.
Code:
<uses-permission android:name="android.permission.INTERNET" />
2. Gradle File: The app-level Gradle file of the project consists of android library dependencies. To accomplish the library management app, we need the following dependencies.
Dependencies:
//Firebase database
implementation 'com.google.firebase:firebase-database:20.0.0'

//gmail sign in
implementation 'com.google.android.gms:play-services-auth:19.0.0'
implementation platform('com.google.firebase:firebase-bom:27.1.0')
implementation 'com.google.firebase:firebase-auth'

//Circular Image View
implementation 'de.hdodenhof:circleimageview:3.1.0'

//Firebase recycler view
implementation 'com.firebaseui:firebase-ui-database:7.1.1'

//Loads image into imageview form a link
implementation 'com.squareup.picasso:picasso:2.71828'
3. Firebase: Firebase is used to develop the backend for the library management app. We need Firebase authentication, a real-time database, cloud messaging, and a recycler view. You can find the integration of the backend in the implementation.
4. Android Resources: Android Resources are an important section of your Library management app. The graphical-based assets or colors or static string declarations are present in the resource. Along with you have also had themes to style or customize your app’s theme.
5. Third-Party Libraries: You can see two third-party libraries: Picasso and Circular Image library that are used to display the profile picture and book picture.
Steps to implement the Project:
I hope you got the essence of the project we are going to develop. So now, to implement the library management system app, you need to follow the below steps.
1: Download the android library management app source code from the above link.
2: Now extract the project files and open the library management project from your Android Studio.
3: After the project files are loaded, we need to set up the backend using Firebase. Click on Tools —–> select Firebase ——>Enable both Firebase Auth and Firebase Real-Time Database.
4: Use the below link, which will take you to the Firebase console, and here you need to open the project settings and paste the SHA key of your project. Link: https://console.firebase.google.com/u/0/
5: Now, in the same Firebase console, you need to open Firebase Authentication and then enable Google Sign In Authentication.
6: Now, come back to your Android and then rebuild your library management project.
After completing the above steps, you are ready to test the library management app on your device and emulator.
Android Library Management System Output
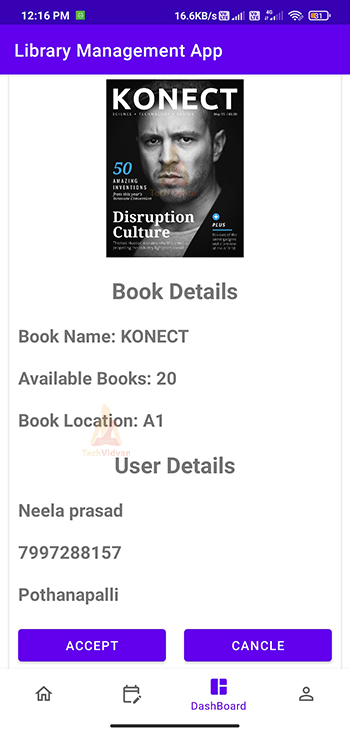
Admin Dashboard of the Android Library Management Application:
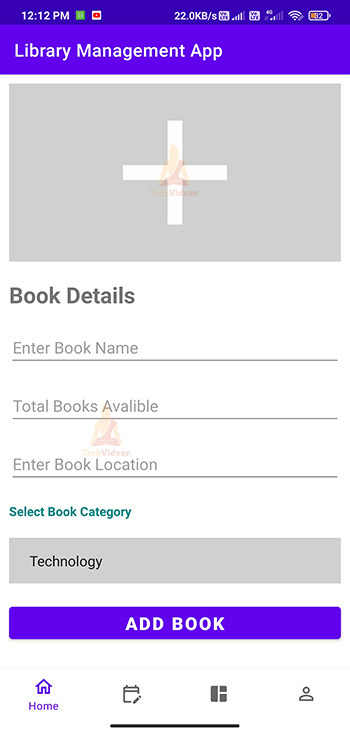
Add Books Screen of the Library Management Application:
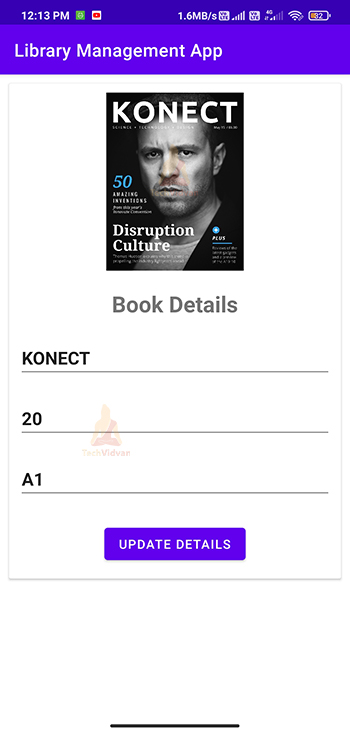
Update Books Screen of the Library Management System Application in Android:
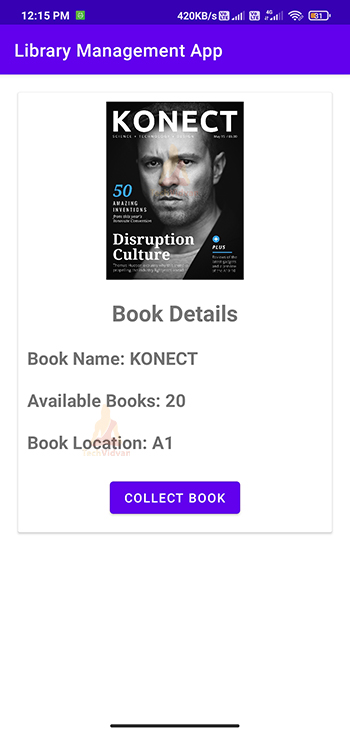
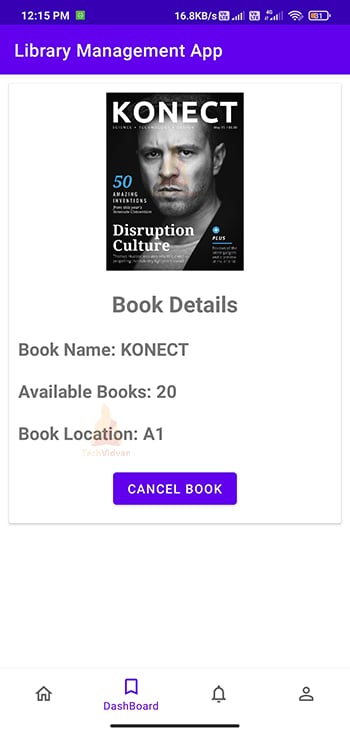
User Books Screen of the Library Management Application:
User Dashboard Screen of the Library Management Application:
Summary
From this article, you came across yet another interesting project called the library management app. You got to know the problems with the old methods of library management and how our app overcomes those problems. You later saw the flow and the requirements to build the application. Finally, you saw the implementation of the library management app along with its source code.