Android ListView
In this article, we’ll dive deep into Android ListView and its implementation. ListView is an essential component for displaying a large number of items in a scrollable, vertical list. Each item in a ListView is arranged in horizontal rows, making it easy to browse through your data by simply scrolling.
To populate your ListView with items, you’ll need to use an Android Adapter. If you’re unfamiliar with Android Adapter, I recommend exploring it before continuing with this article. An adapter acts as a bridge between the View Group and your data source, enabling you to fetch data items from a database or any other data source and display them efficiently in the ListView.
To add items to the ListView, you need to use the Android Adapter. If you don’t know Android Adapter, you must see it before reading this article. Android Adapter acts as a medium between the View Group and the data source. It allows you to fetch the data items from the database or a known data source and then put that up on the ListView.
Android ListView
As discussed earlier, Android ListView is used to display items in the form of a list. The list is vertically scrollable and contains items in the form of rows.
Beyond just displaying items, ListView enables you to add interactive functionalities to each row. For example, when a user clicks on an item, you can display detailed information about it. This is particularly useful in applications like Swiggy and Zomato, where ListView is used to showcase available restaurants. Users can scroll through the list to find their desired restaurant and, upon clicking, view the menu and other details of that restaurant.
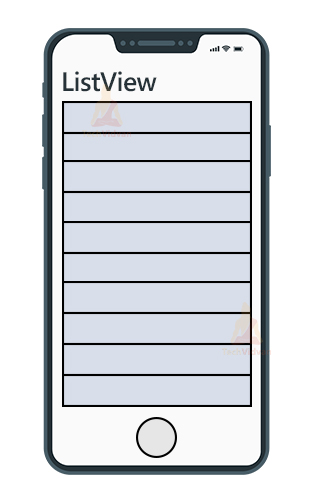
You can look at the below image to understand how a listview looks in android. You can see three types of list views:
- The first one shows you a ListView containing both image and text.
- The second ListView is a simple one having just a normal TextView.
- The third ListView shows list items having a heading and a brief description.

To create your ListView first, define its styling in the XML layout and then attach the adapter to provide items into your list.
XML Code:
<ListView
        android:layout_width="match_parent"
        android:layout_height="wrap_content"
        android:layout_marginTop="20dp"
        android:padding="10dp"
        android:divider="#E91E63"
        android:dividerHeight="10dp"
        android:id="@+id/your_list_view"
        />
Kotlin Code:
// binding the list view with our variable
 mListView = findViewById(R.id.your_list_view)

//creating the array adapter object
arrayAdapter = ArrayAdapter(this,android.R.layout.simple_list_item_1, your_array)

//setting the adapter to your list view
mListView.adapter = arrayAdapter
Android ListView Attributes
ListView has some of its attributes that are used to set up the characteristics of your ListView. Let’s see each of those attributes below.
| Attribute Name | Description |
| android:id | The “id” attribute is used to identify ListView uniquely among other views present in the layout. |
| android:divider | The “divider” attribute is used to add a drawable item or put a color to separate two rows in the list. |
| android:dividerHeight | The “dividerHeight” is used to define the height of the divider we wish to have between two rows. |
| android:background | The “background” attribute is used to set a color or an image as the background of the ListView. |
| android:entries | The “entries” attribute is used to specify the array source from where the elements are coming. |
| android:choiceMode | The “choiceMode” attribute is used to specify the number of items that can be selected at once from the list. |
| android:textSize | The “textSize” is used to set the font size of the data items visible in the list. |
| android:footerDividersEnabled | The “footerDividersEnabled” has two values: true or false. By default, it’s true, but when set to false, the ListView won’t draw any divider before each footer. |
| android:headerDividersEnabled | The “headerDividersEnabled” has two values: true or false. By default, it’s true, but when set to false, the ListView won’t draw any divider after each header. |
Implementation of Android ListView
To implement the Android ListView, you need to use Android Adapters. Android Adapters’ task is to bring data from the data source and then put it into the ListView. Now to do this, we are available with two kinds of Adapters. We will see the implementation using each of the adapters and understand the difference in using them.
A. Using Array Adapter
When your data is in the form of an array, and you don’t require much custom styling over the items of the list, then you use ArrayAdapter. It’s pretty easy to implement, and we have provided you with the code for your better understanding.
1: First, open your Android Studio and create a project and name it. In my case, the name of the project is “ArrayListView.”
2: Now open your activity_main.xml of your project and paste the below code there.
Code: activity_main.xml
<?xml version="1.0" encoding="utf-8"?>
<LinearLayout xmlns:android="http://schemas.android.com/apk/res/android"
    xmlns:tools="http://schemas.android.com/tools"
    android:layout_width="match_parent"
    android:layout_height="match_parent"
    android:orientation="vertical"
    tools:context=".MainActivity">

    <TextView
        android:id="@+id/title"
        android:layout_width="match_parent"
        android:layout_height="wrap_content"
        android:text="Array Adapter ListView"
        android:textSize="30sp"
        android:gravity="center"
        android:layout_marginTop="30dp"
        android:textColor="#E91E63"
        />

    <ListView
        android:layout_width="match_parent"
        android:layout_height="wrap_content"
        android:layout_marginTop="20dp"
        android:padding="10dp"
        android:divider="#E91E63"
        android:dividerHeight="10dp"
        android:id="@+id/array_list_view"
        />


</LinearLayout>
3: Now open your MainActivity. Here you need to define the ListView and attach the ArrayAdapter to it.
Code: MainActivity.kt
package com.techvidvan.arraylistview

import android.os.Bundle
import android.widget.ArrayAdapter
import android.widget.ListView
import androidx.appcompat.app.AppCompatActivity

class MainActivity : AppCompatActivity()
{
    //declaring variables
    lateinit var arrayAdapter: ArrayAdapter<*>
    lateinit var mListView: ListView

    override fun onCreate(savedInstanceState: Bundle?)
    {
        super.onCreate(savedInstanceState)
        setContentView(R.layout.activity_main)

        //creating 30 items to add into the ListView
        var item_list = ArrayList<String>();

        for (i in 1..30 step 1) {
            item_list.add("Tech Vidvan Item $i ")
        }

        // binding the list view with our variable
        mListView = findViewById(R.id.array_list_view)

        //creating the array adapter object
        arrayAdapter = ArrayAdapter(this,
            android.R.layout.simple_list_item_1, item_list)

        //setting the adapter to our list view
        mListView.adapter = arrayAdapter
    }
}
Now, test your application on your device or emulator and experience the ListView.
[Keep App_Video_1 here]
B. Using Base Adapter
Base Adapter is another way to provide data items to your ListView. Let’s see how you can use BaseAdapter to implement the ListView.
1: Open your android studio and create a project called “BaseListView.”
2: You now need to add a ListView in your activity_main.xml file.
Code: activity_main.xml
<?xml version="1.0" encoding="utf-8"?>
<LinearLayout xmlns:android="http://schemas.android.com/apk/res/android"
    xmlns:tools="http://schemas.android.com/tools"
    android:layout_width="match_parent"
    android:layout_height="match_parent"
    android:orientation="vertical"
    tools:context=".MainActivity">

    <TextView
        android:id="@+id/title"
        android:layout_width="match_parent"
        android:layout_height="wrap_content"
        android:text="Base Adapter ListView"
        android:textSize="30sp"
        android:gravity="center"
        android:layout_marginTop="30dp"
        android:textColor="#FF9800"
        />

    <ListView
        android:layout_width="match_parent"
        android:layout_height="wrap_content"
        android:layout_marginTop="20dp"
        android:padding="10dp"
        android:divider="#FF9800"
        android:dividerHeight="5dp"
        android:id="@+id/base_list_view"
        />


</LinearLayout>
3: Now, you need to create a custom layout for each row in the list. For this, you can go to res —> select layout and create a new layout file. Name it as each_item.xml.
Code: each_item.xml
<?xml version="1.0" encoding="utf-8"?>
<androidx.cardview.widget.CardView xmlns:android="http://schemas.android.com/apk/res/android"
    android:layout_width="match_parent"
    xmlns:app="http://schemas.android.com/apk/res-auto"
    app:cardElevation="5dp"
    android:layout_margin="10dp"
    android:layout_height="wrap_content">

    <LinearLayout
        android:layout_width="match_parent"
        android:layout_height="match_parent"
        android:padding="20dp"
        android:orientation="vertical">

        <TextView
            android:layout_width="match_parent"
            android:layout_height="wrap_content"
            android:text="Item1"
            android:textSize="20sp"
            android:id="@+id/heading_of_item"/>


        <TextView
            android:layout_width="match_parent"
            android:layout_height="wrap_content"
            android:text="Item Description"
            android:textSize="16sp"
            />

    </LinearLayout>


</androidx.cardview.widget.CardView>
4: Now, you need to create a Base Adapter. For this, right-click on the package name, click on the new Kotlin Class file, and then name it MyAdapter.
Code: MyAdapter.kt
package com.techvidvan.baselistview

import android.content.Context
import android.view.LayoutInflater
import android.view.View
import android.view.ViewGroup
import android.widget.BaseAdapter
import android.widget.ImageView
import android.widget.TextView

internal class MyAdapter
    (
    //getting the context and the items list
    //from MainActivity
    private val context: Context,
    private val itemList:ArrayList<String>
) :
    BaseAdapter() {

    //declaring variables
    private var layoutInflater: LayoutInflater? = null
    private lateinit var headingItem:TextView

    override fun getCount(): Int
    {
        //getting the count of the data items
        return itemList.size
    }
    override fun getItem(position: Int): Any? {
        return null
    }
    override fun getItemId(position: Int): Long {
        return 0
    }
    override fun getView(
        position: Int,
        convertView: View?,
        parent: ViewGroup
    ): View? {

        //creating the view
        var baseView = convertView
        if (layoutInflater == null) {

            //creating a layout inflater
            layoutInflater =
                context.getSystemService(Context.LAYOUT_INFLATER_SERVICE) as LayoutInflater
        }
        if (convertView == null)
        {
            baseView = layoutInflater!!.inflate(R.layout.each_item, null)
        }

        //fetching the heading TextView of each card
        headingItem = baseView!!.findViewById(R.id.heading_of_item)
        //setting the text on the TextView
        headingItem.setText(itemList[position])

        return baseView
    }
}
5: Finally, you need to add your MainActivity file and attach the adapter with your ListView as shown below.
Code: MainActivity.kt
package com.techvidvan.baselistview

import androidx.appcompat.app.AppCompatActivity
import android.os.Bundle
import android.widget.ListView

class MainActivity : AppCompatActivity()
{
    lateinit var itemListView:ListView
    override fun onCreate(savedInstanceState: Bundle?)
    {
        super.onCreate(savedInstanceState)
        setContentView(R.layout.activity_main)

        //binding the ListView with our created variable
        itemListView = findViewById(R.id.base_list_view)

        //creating 30 items to add into the ListView
        var item_list = ArrayList<String>();

        for (i in 1..30 step 1) {
            item_list.add("Tech Vidvan Item $i ")
        }

        //creating the object of our BaseAdapter
        val adapterObj = MyAdapter(this@MainActivity, item_list)

        //setting the adapter to our ListView
        itemListView.adapter = adapterObj
    }
}
Now, test your application on your device or emulator and experience the ListView.
[Keep App_Video_2 here]
Summary
Through this article, you came across ListView and saw how you could display data items in the form of a list. Later on, you came across several attributes present in the ListView. Moving further, you saw the two different ways to implement Android ListView. I hope you understand ListView clearly and will use it in your projects whenever required.