Android Media Player Project
Music drives our mood, and android is one of the most popular operating systems that allows you to play various media on your device. The media can be videos, songs, images etc. Android provides you with Media Player API, using which we can integrate any of the above-stated media files. The only thing we need to do is to create a raw folder in the res directory and then use this API to play that media.
Android Media Player is one of the most widely used features in android and can be helpful to develop apps like Music or Video Player.
So through this article, we will try to understand what Media Player is and how we can use it to make our own Music Player app.
Prerequisites for the Proiect
Before we proceed further, you must ensure that you are ready with the following tools and know the topics mentioned below.
Tools: Android Studio
Topics:
1. Android UI Controls
2. Android Activities
3. Android Event Handling
What is Android Media Player?
Media Player is a class provided by Android to manage audio/video files and streams. Android Media Player provides you with an API to manage several audio/video present on the device or the network. Even the media player provides you with playback controls such as play/pause/stop.
To work with Android Media Player, you first need to create an object of the Media Player, as shown below.
Code:
lateinit var mediaPlayerObj: MediaPlayer
mediaPlayerObj = MediaPlayer.create(this, R.raw.my_music_file)
mediaPlayerObj.isLooping = true
The point to note is that Android Media Player is not thread-safe, and whatever you wish to access or control should be in the same thread.
Now let’s see a few of the essential methods for us to know to work with the Android Media Player class.
- getDuration(): The getDuration() method provides us with the length of a particular song or media in milliseconds.
- isPlaying(): The isPlaying() method is used to know whether or not a media is playing. It returns true if the media is playing and false if not playing.
- pause(): The pause() method is used to pause a current media if it’s playing.
- stop(): The stop() method completely stops the media, and if you play it again, then it starts from the beginning.
- reset(): The reset() method is used to play a media from its beginning.
- getTrack(): The getTrack() method is used to get the track of the media.
- release(): The release() method is used to release all the resources used by the Media Player.
- setVolume(): The setVolume() method is used to set the volume of your media files.
Configuring your Manifest File
Before proceeding to the actual implementation, we need to provide a few permissions in the Manifest file.
To make your work easier, we have kept the permissions below, and you can copy them and paste them into your AndroidManifest.xml file.
Code:
<uses-permission android:name= “android.permission.WAKE_LOCK” />
The above permission is used to keep a hold on your processor and screen. It doesn’t allow your device to go to sleep while the media is playing.
The other permission which we can add is your Internet permission. Internet permission is required whenever you require to play some online music. Since we won’t be playing online music in our app so we can avoid providing internet permissions.
Implementation of Media Player in Android
I hope you are all set and ready to implement Android Media Player in your android app. To implement this, we will try to develop our music player app. We would go for a basic music player application to play/pause songs and adjust the volume. So, let’s see the steps how we can develop the app without much delay.
1: Start your Android Studio and click on create a new project.
2: Select Empty Activity, provide an application name, select API level 22, and proceed.
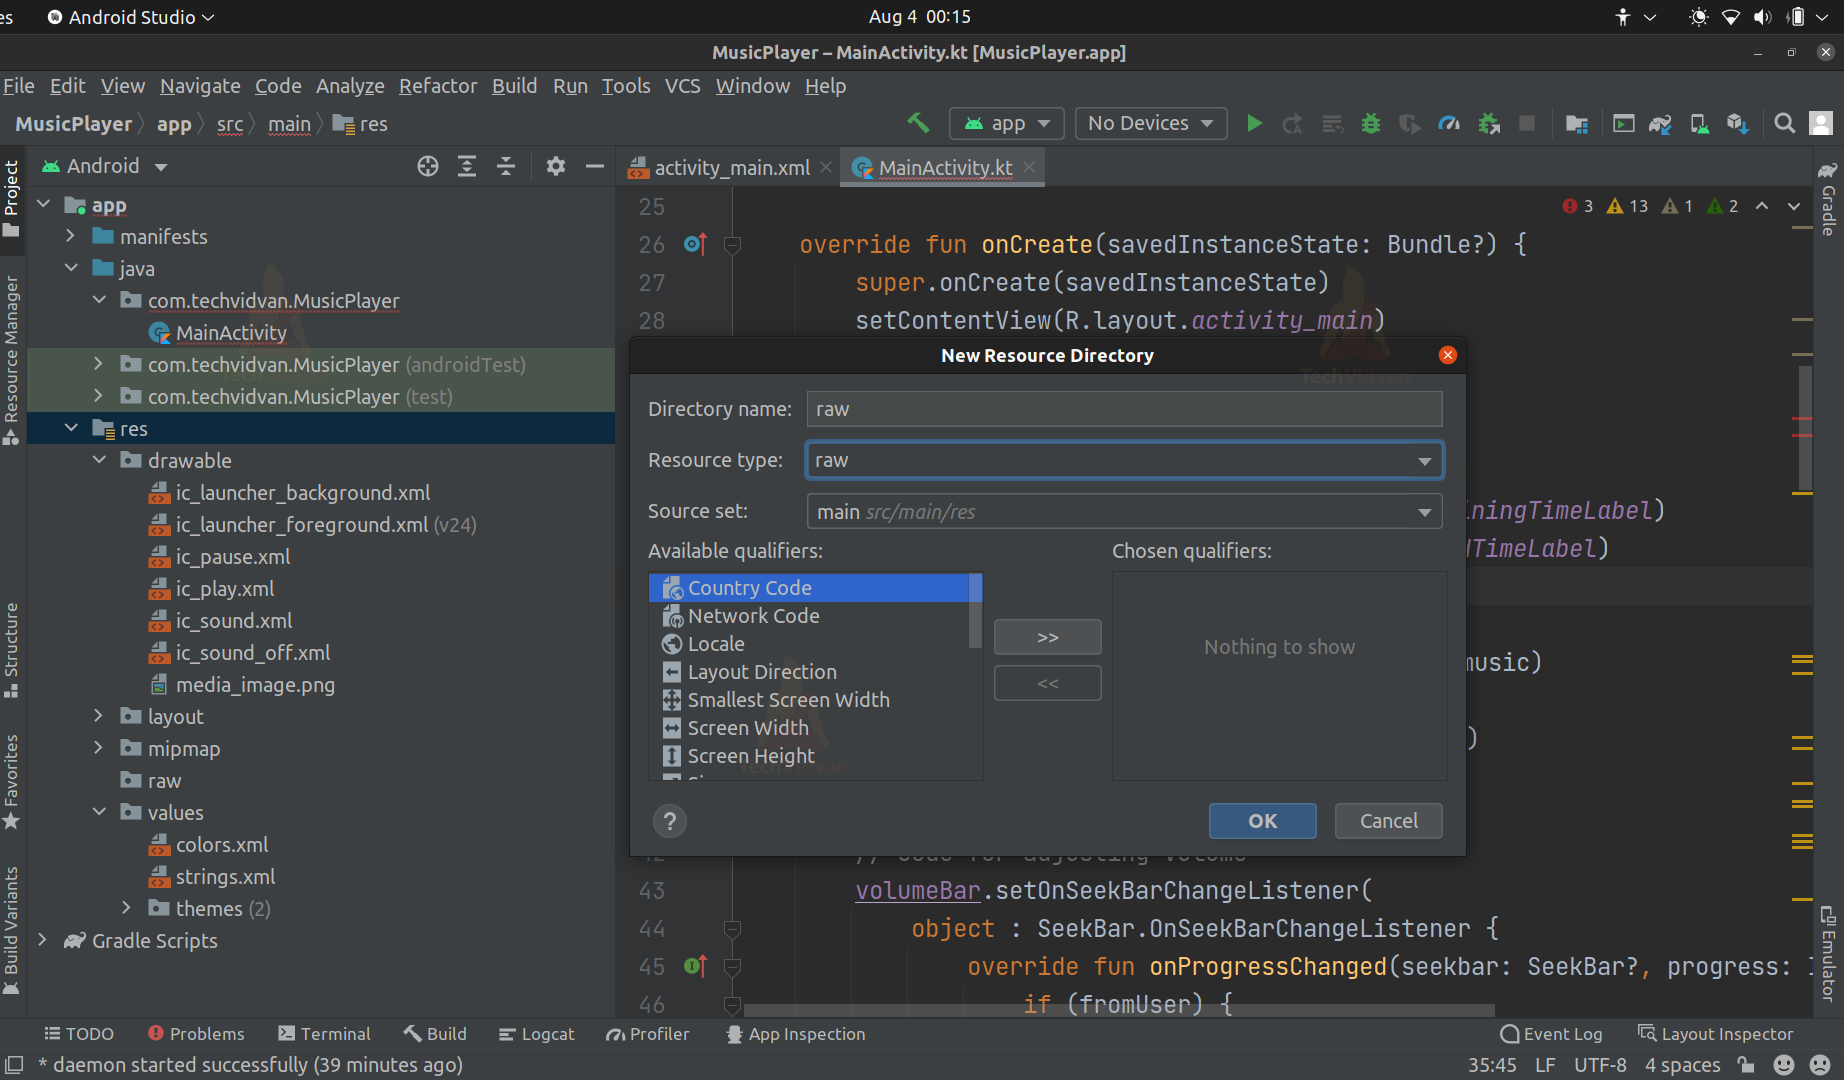
3: Right-click on your resource directory, click on new, and select Android resource Directory. Now create a directory called raw and change its type to raw as shown below. In this directory, you can add the music.
4: Now open your activity_main.xml file present in res/values/layout and paste the code below. Using this code, we are creating the design and appearance of our music app.
Code: activity_main.xml
<?xml version="1.0" encoding="utf-8"?>
<LinearLayout xmlns:android="http://schemas.android.com/apk/res/android"
    xmlns:tools="http://schemas.android.com/tools"
    android:background="@color/black"
    android:layout_width="match_parent"
    android:layout_height="match_parent"
    tools:context=".MainActivity"
    android:orientation="vertical"
    android:gravity="center">

    <ImageView
        android:layout_width="wrap_content"
        android:layout_height="wrap_content"
        android:src="@drawable/media_image"/>

    <SeekBar
        android:id="@+id/musicBar"
        android:layout_width="300dp"
        android:layout_height="wrap_content"
        android:layout_marginTop="30dp"/>

    <LinearLayout
        android:layout_width="match_parent"
        android:layout_height="wrap_content">
        <TextView
            android:id="@+id/elapsedMusicTime"
            android:layout_width="wrap_content"
            android:layout_height="wrap_content"
            android:text="0:00"
            android:textColor="@color/white"
            android:layout_marginLeft="40dp"/>

        <TextView
            android:id="@+id/remainingMusicTime"
            android:layout_width="wrap_content"
            android:layout_height="wrap_content"
            android:text="-3:14"
            android:textColor="#FFEB3B"
            android:layout_marginLeft="240dp"/>
    </LinearLayout>

    <Button
        android:id="@+id/playBtn"
        android:layout_width="50dp"
        android:layout_height="50dp"
        android:background="@drawable/ic_play"
        android:layout_marginTop="40dp"
        android:onClick="playBtnClick"/>

    <LinearLayout
        android:layout_width="match_parent"
        android:layout_height="wrap_content"
        android:orientation="horizontal"
        android:layout_marginTop="40dp"
        android:gravity="center">
        <ImageView
            android:layout_width="24dp"
            android:layout_height="24dp"
            android:src="@drawable/ic_sound"/>
        <SeekBar
            android:id="@+id/volumeBar"
            android:layout_width="300dp"
            android:layout_height="wrap_content"
            android:progress="50"
            android:max="100"/>
        <ImageView
            android:layout_width="26dp"
            android:layout_height="26dp"
            android:src="@drawable/ic_sound_off"/>
    </LinearLayout>
</LinearLayout>
5: Now come back to your MainActivity.kt file and paste in the code below. You are provided with comments to understand what is happening at each line of the MainActivity code.
Code: MainActivity.kt
package com.techvidvan.MusicPlayer

import android.annotation.SuppressLint
import android.media.MediaPlayer
import android.os.Bundle
import android.os.Handler
import android.os.Message
import android.view.View
import android.widget.Button
import android.widget.SeekBar
import android.widget.TextView
import androidx.appcompat.app.AppCompatActivity

class MainActivity : AppCompatActivity()
{
    //Declaring variables
    lateinit var volumeBar:SeekBar
    lateinit var musicBar:SeekBar
    private var totalTime: Int = 0
    lateinit var remainingMusicTime:TextView
    lateinit var elapsedLabel:TextView
    lateinit var techMediaPlayerObj: MediaPlayer
    lateinit var playBtn:Button


    override fun onCreate(savedInstanceState: Bundle?) {
        super.onCreate(savedInstanceState)
        setContentView(R.layout.activity_main)

        //binding our variables with our views
        volumeBar = findViewById(R.id.volumeBar)
        musicBar = findViewById(R.id.musicBar)
        remainingMusicTime = findViewById(R.id.remainingMusicTime)
        elapsedLabel = findViewById(R.id.elapsedMusicTime)
        playBtn = findViewById(R.id.playBtn)

        //Creating Media Player Object
        //here music is the name of my music file you can change it to something else

        techMediaPlayerObj = MediaPlayer.create(this, R.raw.music)
        techMediaPlayerObj.isLooping = true
        techMediaPlayerObj.setVolume(0.5f, 0.5f)
        totalTime = techMediaPlayerObj.duration

        // Code for adjusting Volume
        volumeBar.setOnSeekBarChangeListener(
            object : SeekBar.OnSeekBarChangeListener {
                override fun onProgressChanged(seekbar: SeekBar?, progress: Int, fromUser: Boolean) {
                    if (fromUser) {
                        val volumeNum = progress / 100.0f
                        techMediaPlayerObj.setVolume(volumeNum, volumeNum)
                    }
                }
                override fun onStartTrackingTouch(p0: SeekBar?) {
                }
                override fun onStopTrackingTouch(p0: SeekBar?) {
                }
            }
        )

        // Code for adjusting the Music seek bar
        musicBar.max = totalTime
        musicBar.setOnSeekBarChangeListener(
            object : SeekBar.OnSeekBarChangeListener {
                override fun onProgressChanged(seekBar: SeekBar?, progress: Int, fromUser: Boolean) {
                    if (fromUser) {
                        techMediaPlayerObj.seekTo(progress)
                    }
                }
                override fun onStartTrackingTouch(p0: SeekBar?) {
                }
                override fun onStopTrackingTouch(p0: SeekBar?) {
                }
            }
        )

        // Creating thread
        Thread(Runnable {
            while (true) {
                try {
                    val msg = Message()
                    msg.what = techMediaPlayerObj.currentPosition
                    handler.sendMessage(msg)
                    Thread.sleep(1000)
                } catch (e: InterruptedException) {
                }
            }
        }).start()
    }

    @SuppressLint("HandlerLeak")
    var handler = object : Handler() {
        @SuppressLint("SetTextI18n")
        override fun handleMessage(msg: Message) {
            val currentPosition = msg.what

            // Update music seekbar
            musicBar.progress = currentPosition

            // Update remaining and elapsed Labels
            val elapsedTime = createTimeLabel(currentPosition)
            elapsedLabel.text = elapsedTime

            val remainingTime = createTimeLabel(totalTime - currentPosition)
            remainingMusicTime.text = "-$remainingTime"
        }
    }

    fun createTimeLabel(time: Int): String {
        var timeLabel = ""
        val min = time / 1000 / 60
        val sec = time / 1000 % 60

        timeLabel = "$min:"
        if (sec < 10) timeLabel += "0"
        timeLabel += sec

        return timeLabel
    }

    fun playBtnClick(v: View) {

        if (techMediaPlayerObj.isPlaying) {
            // Stop
            techMediaPlayerObj.pause()
            playBtn.setBackgroundResource(R.drawable.ic_play)

        } else {
            // Start
            techMediaPlayerObj.start()
            playBtn.setBackgroundResource(R.drawable.ic_pause)
        }
    }

}
Now, just go ahead and run your application on your device or emulator and notice the output.
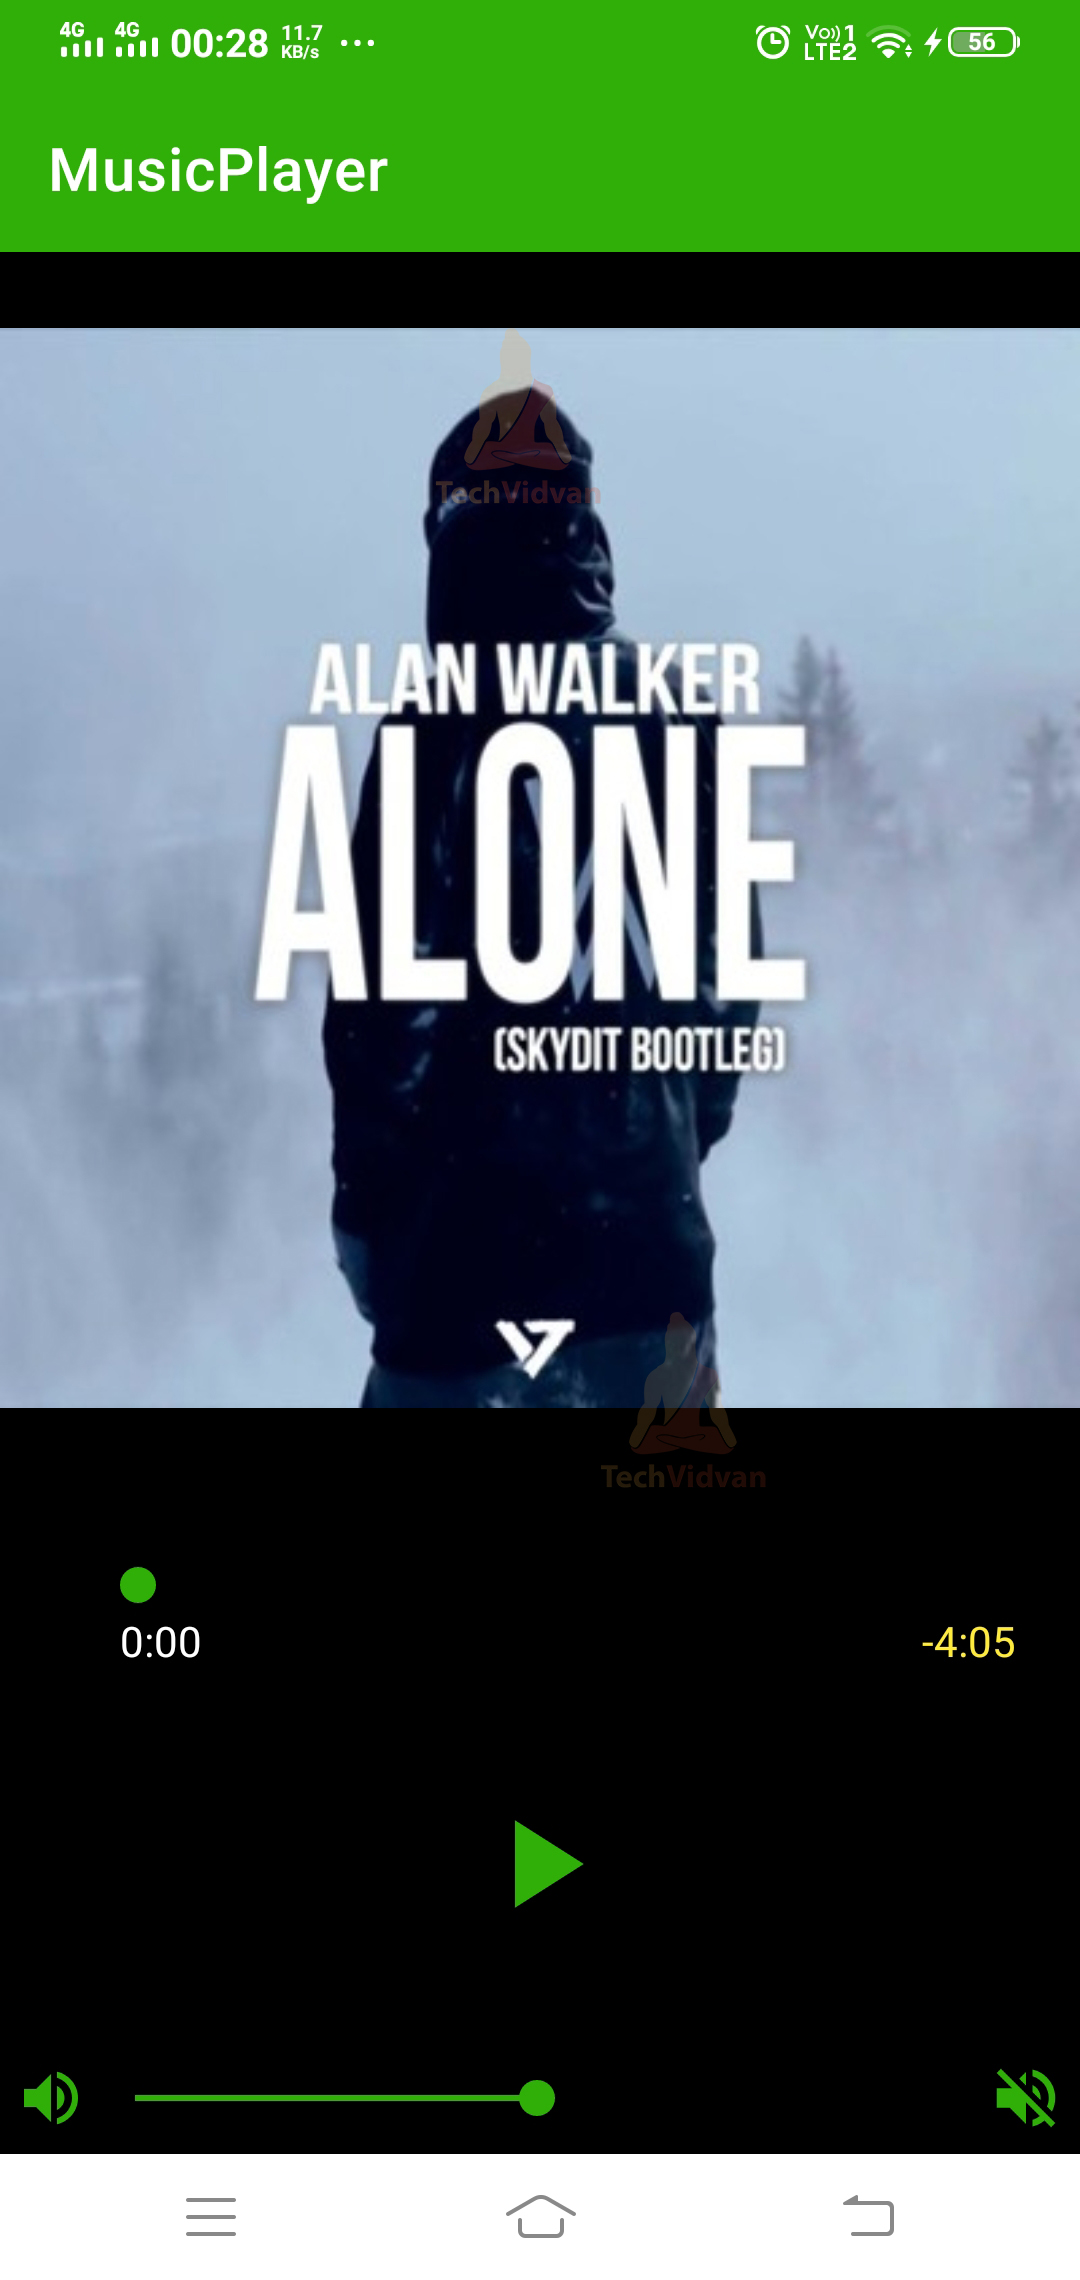

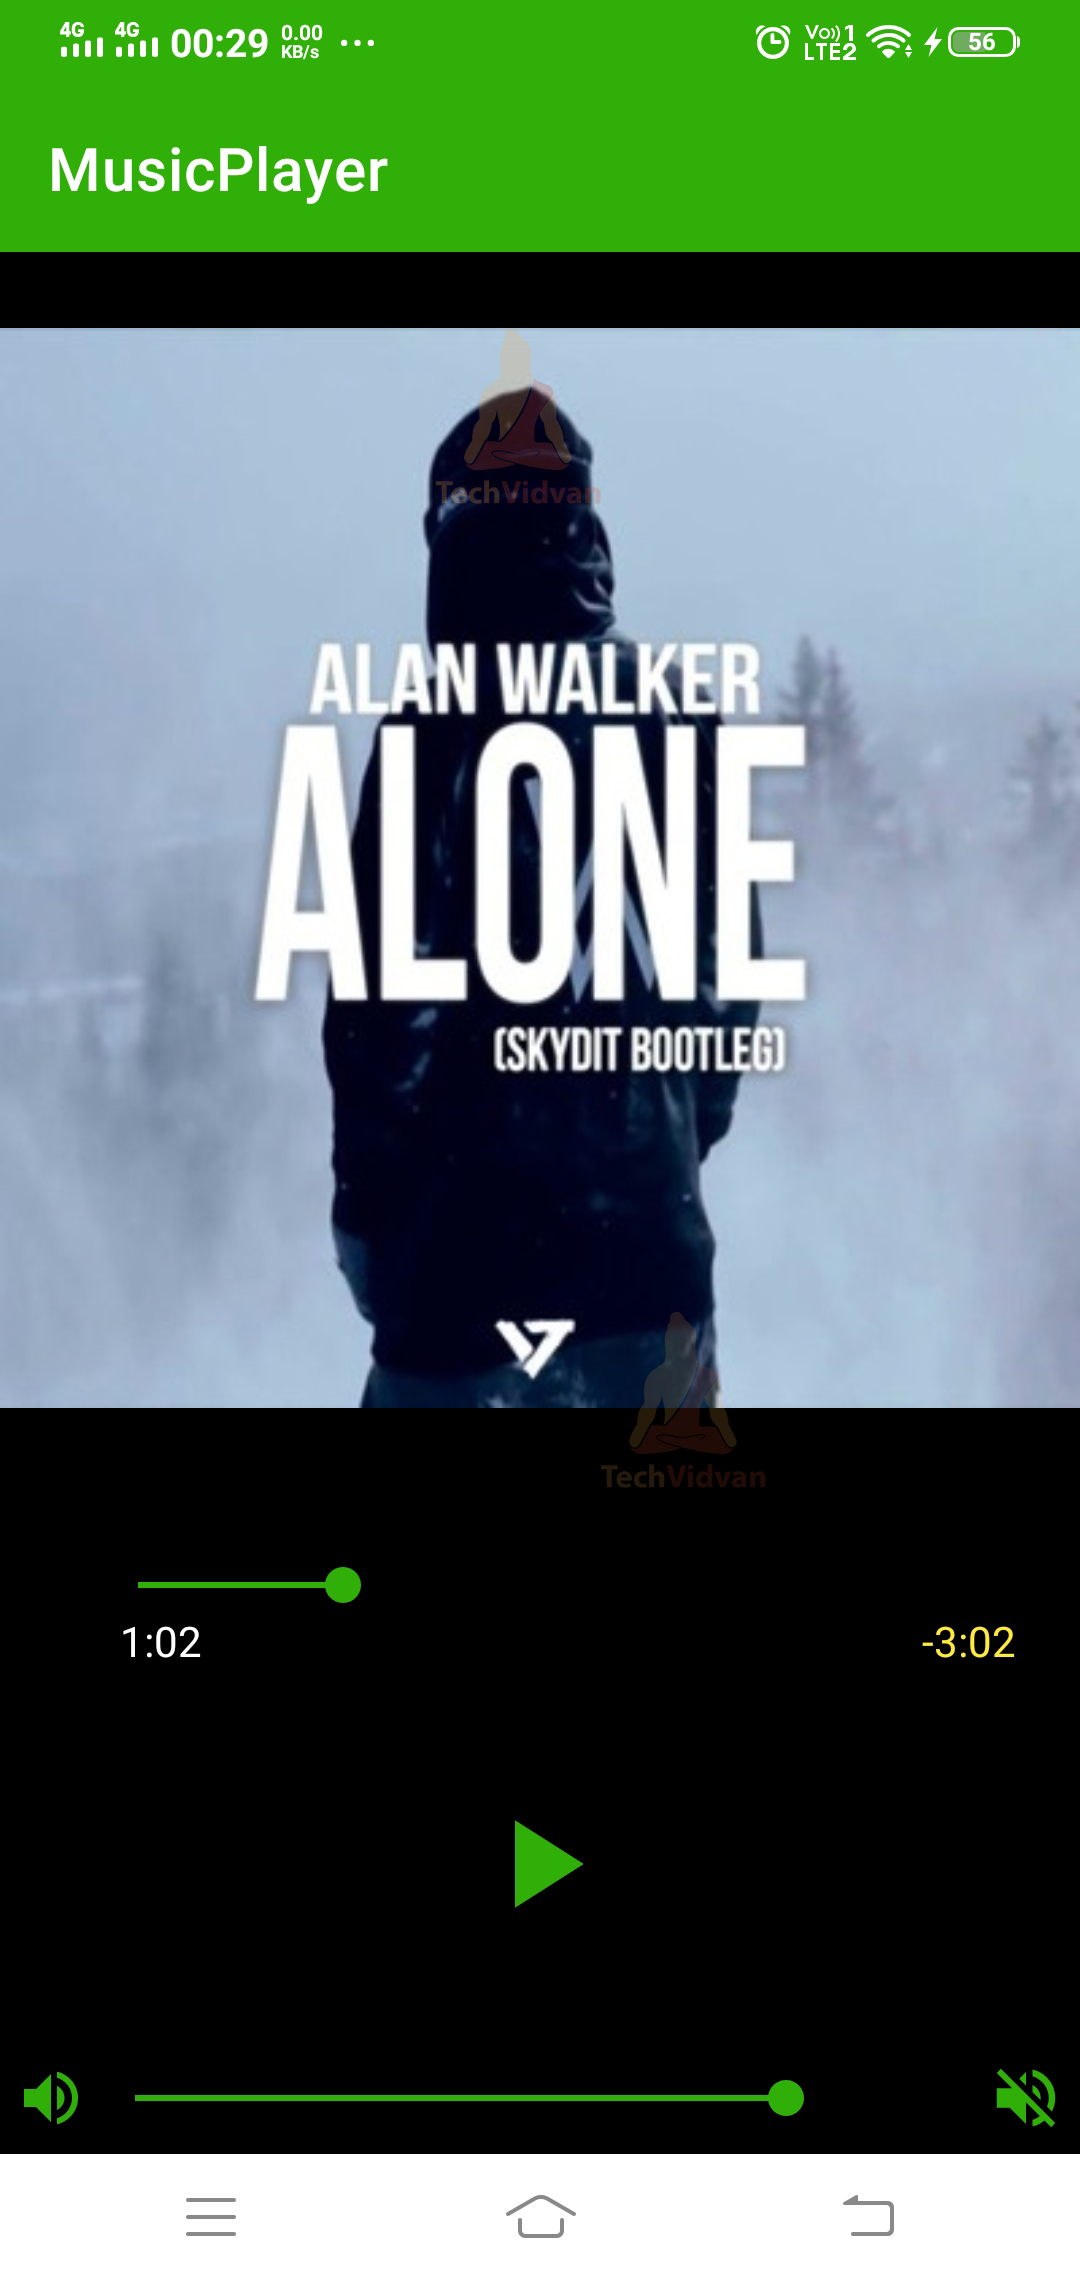
While you play the music, even if you go to the background still the music keeps on playing.
Summary
Through this article, you understood what Android Media Player is and how it allows you to play multiple media formats on your device. You came across all the required steps which you need to follow to implement. Finally, you saw a mini Music Player Project build using the above implementation. I hope you enjoyed it and would go further to develop more incredible apps.