Android News App Project with Source Code
In this tutorial, you will understand how to build a basic public news app using Android Studio.
What is a News App?
This app is a news application. This application will show the news about the world. This is better than old conventional newspapers as you can see news anytime and anywhere now. This will also have live updates. This app will have some other features like adding your own news as an editor and people can see your published news too.
Flow of the Application
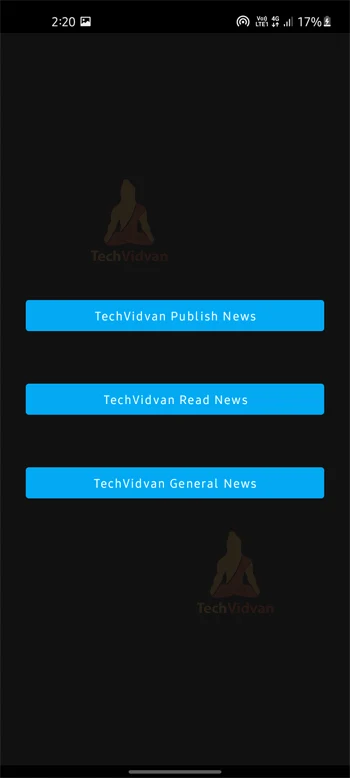
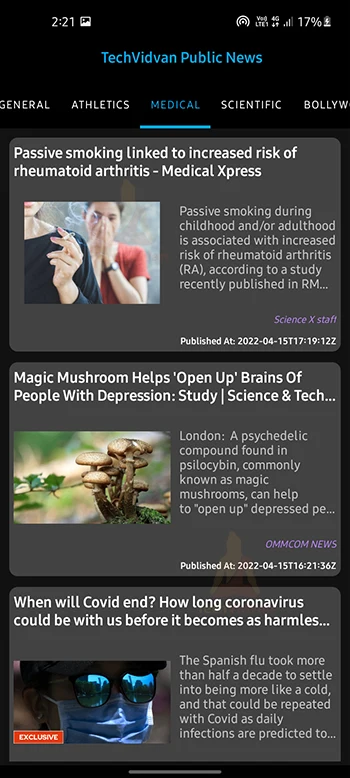
There is a login signup screen. On the dashboard of the app, there will be 3 buttons. There will be a button for publishing your own news, for seeing the general news, and for seeing the news published in the app. In general news, this will fetch news from API and will show it in the app. This app will show the news category-wise. There are a lot of categories.
- The users can publish their own news or articles in the app itself very easily.
- He can also add photos to their articles to make them look more attractive.
- He can also see the articles of other people.
Features of the Public News app
1. There is the main screen in this app.
2. Login and sign up are required in the app.
3. Users can see the real news with real-time updates.
4. The app will show category-wise news.
5. Auto update news because it fetch news from API
6. Users can see the news according to their interests.
7. Users can publish their own articles.
8. Users can add images to their articles.
9. Users can see the articles published by other users.
Project Prerequisites
The project requires the following technologies/tools.
- Java – Java is used for writing the coding part.
- XML – XML is used for designing parts and design the screens
- Firebase – Firebase will be used for storing the published articles and publishing the news
Developing the Android Public News app
Let’s look at the files that we created for the public news app before we implement it. Let us see them one by one-
1. Activity_main.xml is the dashboard file. This screen will contain three buttons.
2. There is a MainActivity.java to write the logic part.
3. We have to create different XML files for all three different screens and also their corresponding files for the writing of the logic part.
4. The following files are also used :
- Colors.xml : This file is used for defining the colors of our app.
Files Required
Activity_main.xml :
<com.google.android.material.tabs.TabLayout
        android:id="@+id/include"
        android:layout_width="match_parent"
        android:layout_height="?attr/actionBarSize"
        android:layout_below="@id/toolbar"
        android:layout_marginTop="0dp"
        android:backgroundTint="@color/black"
        app:tabIndicatorColor="#03A9F4"
        app:tabIndicatorHeight="3.5dp"
        app:tabMode="scrollable"
        app:tabSelectedTextColor="#03A9F4"
        app:tabTextColor="@color/white">

        <com.google.android.material.tabs.TabItem
            android:id="@+id/health"
            android:layout_width="wrap_content"
            android:layout_height="wrap_content"
            android:text="Medical" />

    </com.google.android.material.tabs.TabLayout>
This is the code for the tab layout. The tab layout will be used to show different categories. The screen will have different tabs for different categories.
<androidx.viewpager.widget.ViewPager
       android:id="@+id/fragmentcontainer"
       android:layout_width="match_parent"
       android:layout_height="match_parent"
       android:layout_below="@id/include"
       android:layout_marginTop="0dp">
This code will be used for view pager. View Pager will be used to show different content based on different categories.
Activity_main.java :
ViewPager viewPager = findViewById(R.id.fragmentcontainer);
tabLayout = findViewById(R.id.include);

pagerAdapter = new PagerAdapter(getSupportFragmentManager(),6);
viewPager.setAdapter(pagerAdapter);

tabLayout.addOnTabSelectedListener(new TabLayout.OnTabSelectedListener() {
    @Override
    public void onTabSelected(TabLayout.Tab tab) {
        viewPager.setCurrentItem(tab.getPosition());
        if (tab.getPosition()==0 || tab.getPosition() == 1 || tab.getPosition()==2 || tab.getPosition() == 3 || tab.getPosition()==4 || tab.getPosition() == 5 ){
            pagerAdapter.notifyDataSetChanged();
        }
    }

    @Override
    public void onTabUnselected(TabLayout.Tab tab) {

    }

    @Override
    public void onTabReselected(TabLayout.Tab tab) {

    }
});

viewPager.addOnPageChangeListener(new TabLayout.TabLayoutOnPageChangeListener(tabLayout));
This java code will be used to add different tabs on the screen. This code also attach view pager to tab layout.
Download Android News App Code
Download the android news app code for implementation from the following link: Android News App Project
Once you have downloaded the TechVidvan Public News project, you need to extract the source code to the desired folder.
Steps to implement the Project:
TechVidvan Public News App can be implemented by downloading the source code and following the steps:
1. Obtain the source code by unzipping it to your desktop.
2. Open Android Studio, navigate to the folder where you unzipped the app and then select that app.
3. You will see a green run button at the top. Selecting it will activate the application for your Virtual Device.
Android Public News App Output
The Android News App will look like this.
Medical news
Summary
This article helps you understand how the public news app works. This will give you a basic idea of how to build a basic public news app. You can also add even more features to this like saving news, sharing the news, adding more features for publishers, etc.