Android Notifications
So, I hope your android journey is going quite well. We are here with another exciting topic called android notifications. Most often, you have seen your apps sending you updates about new messages, upcoming sales or upcoming events etc. But, we can’t expect users to visit your app daily and check for new updates or sales or other info.
Therefore, it becomes essential for us to come up with the feature of notifications in our app. So, through this article, we will try to cover all aspects of notifications and show you a demo.
Android Notifications and their uses
Notifications are like a message which are used to update users about something. The update can be related to any event, sale, reminder, message, news or warning.
Android Notifications occur outside the app’s interface. All your notifications are available on your status bar.
Notifications are an essential part of any application because of the following:
1. Updating users timely about any updates.
2. The users can get the updates without even opening their apps.
3. They can decide whether to react to the notification or remove it from the status bar.
4. The users can customize the notifications. For example, they can mute or mark a notification as important.
So, the above were some of the uses of the notifications. There are many more which we will explore while we proceed.
Android Notifications Annotations
The notifications don’t come just with the content of the update but have many other things. For example, it has information about the app from which it is triggered, when it appeared and the content. You can look at the below figure to get the hang of what comes along with a notification.
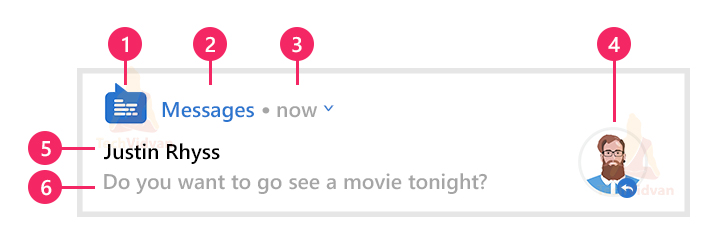
So in the above picture, you can notice a few things. Let’s see what each of them signify in detail:
1. Small Icon
The small icon is usually used to display the app icon. It is a required field, and you need to set it using the setSmallIcon() method. This icon is displayed in the notification area and helps users quickly identify which app the notification is from.
2. App Name
This field shows the name of your application and is automatically generated by the system based on the application’s manifest. To change the name displayed here, you must update your app’s name in the manifest file. It helps users recognize the source of the notification at a glance.
3. Time
It is used to display the time when the notification appeared. It’s also system generated, but you can change it. To do so, you can call the setWhen() method. If you wish not to show the time and notification, setShowWhen() with false as a parameter.
4. Large Icon
It is an optional field and can display some contact pic or product pic, etc. For setting up the large icon, you can call the setLargeIcon() method. It is not encouraged to display the app icon using the large icon.
5. Title of Notification
This optional field shows the title of the notification and is set using the setContentTitle() method. It generally provides a brief overview of the notification’s purpose or content, making it easy for users to understand the context quickly.
6. Body of the Notification
The body of the notification, set using the setContentText() method, contains the main message or content of the notification. This field is also optional and provides additional details or context related to the notification, helping users understand the significance of the alert.
Methods to set Notification Properties
The NotificationBuilder.Compat class object is used to set the properties. You can use these methods to set properties for your notification.
Below are some of the commonly used methods to set the properties.
- setSmallIcon() – The setSmallIcon() method is used to display the icon of the notification. Usually, it’s the app’s icon.
- setLargeIcon() – The setLargeIcon() method is used to display contact pictures or any other picture.
- setContentTitle() – The setContentTitle() method is used to set a title for your notification.
- setContentText() – The setContentText() method is used to set a description for your notification.
- setPriority() – The setPriority() is used to set the importance of your notifications.
- setAutoCancel() – The setAutoCancel() is used to make a notification cancellable or not auto cancellable.
You can find an example below describing the methods.
builder = Notification.Builder(this,channelId)
                    .setContent(contentView)
                    .setSmallIcon(R.mipmap.ic_launcher_round)
                    .setLargeIcon(BitmapFactory.decodeResource(this.resources,R.mipmap.ic_launcher))
                    .setContentIntent(pendingIntent)
Status Bar and Notifications
Notifications don’t occur inside the app interface. Instead, they have their particular place, and that is the status bar. The notifications can appear as an image, expandable notifications, text notifications, action-based notifications, etc.
Let’s see each of them in detail.
1. Icon-Based Notifications
The icon-based notifications appear simply on the status bar. We can locate them by observing the app icon on the left side of the status bar. These notifications are concise and mainly serve as a quick alert or reminder, which users can tap to view more details or take action.
![]()
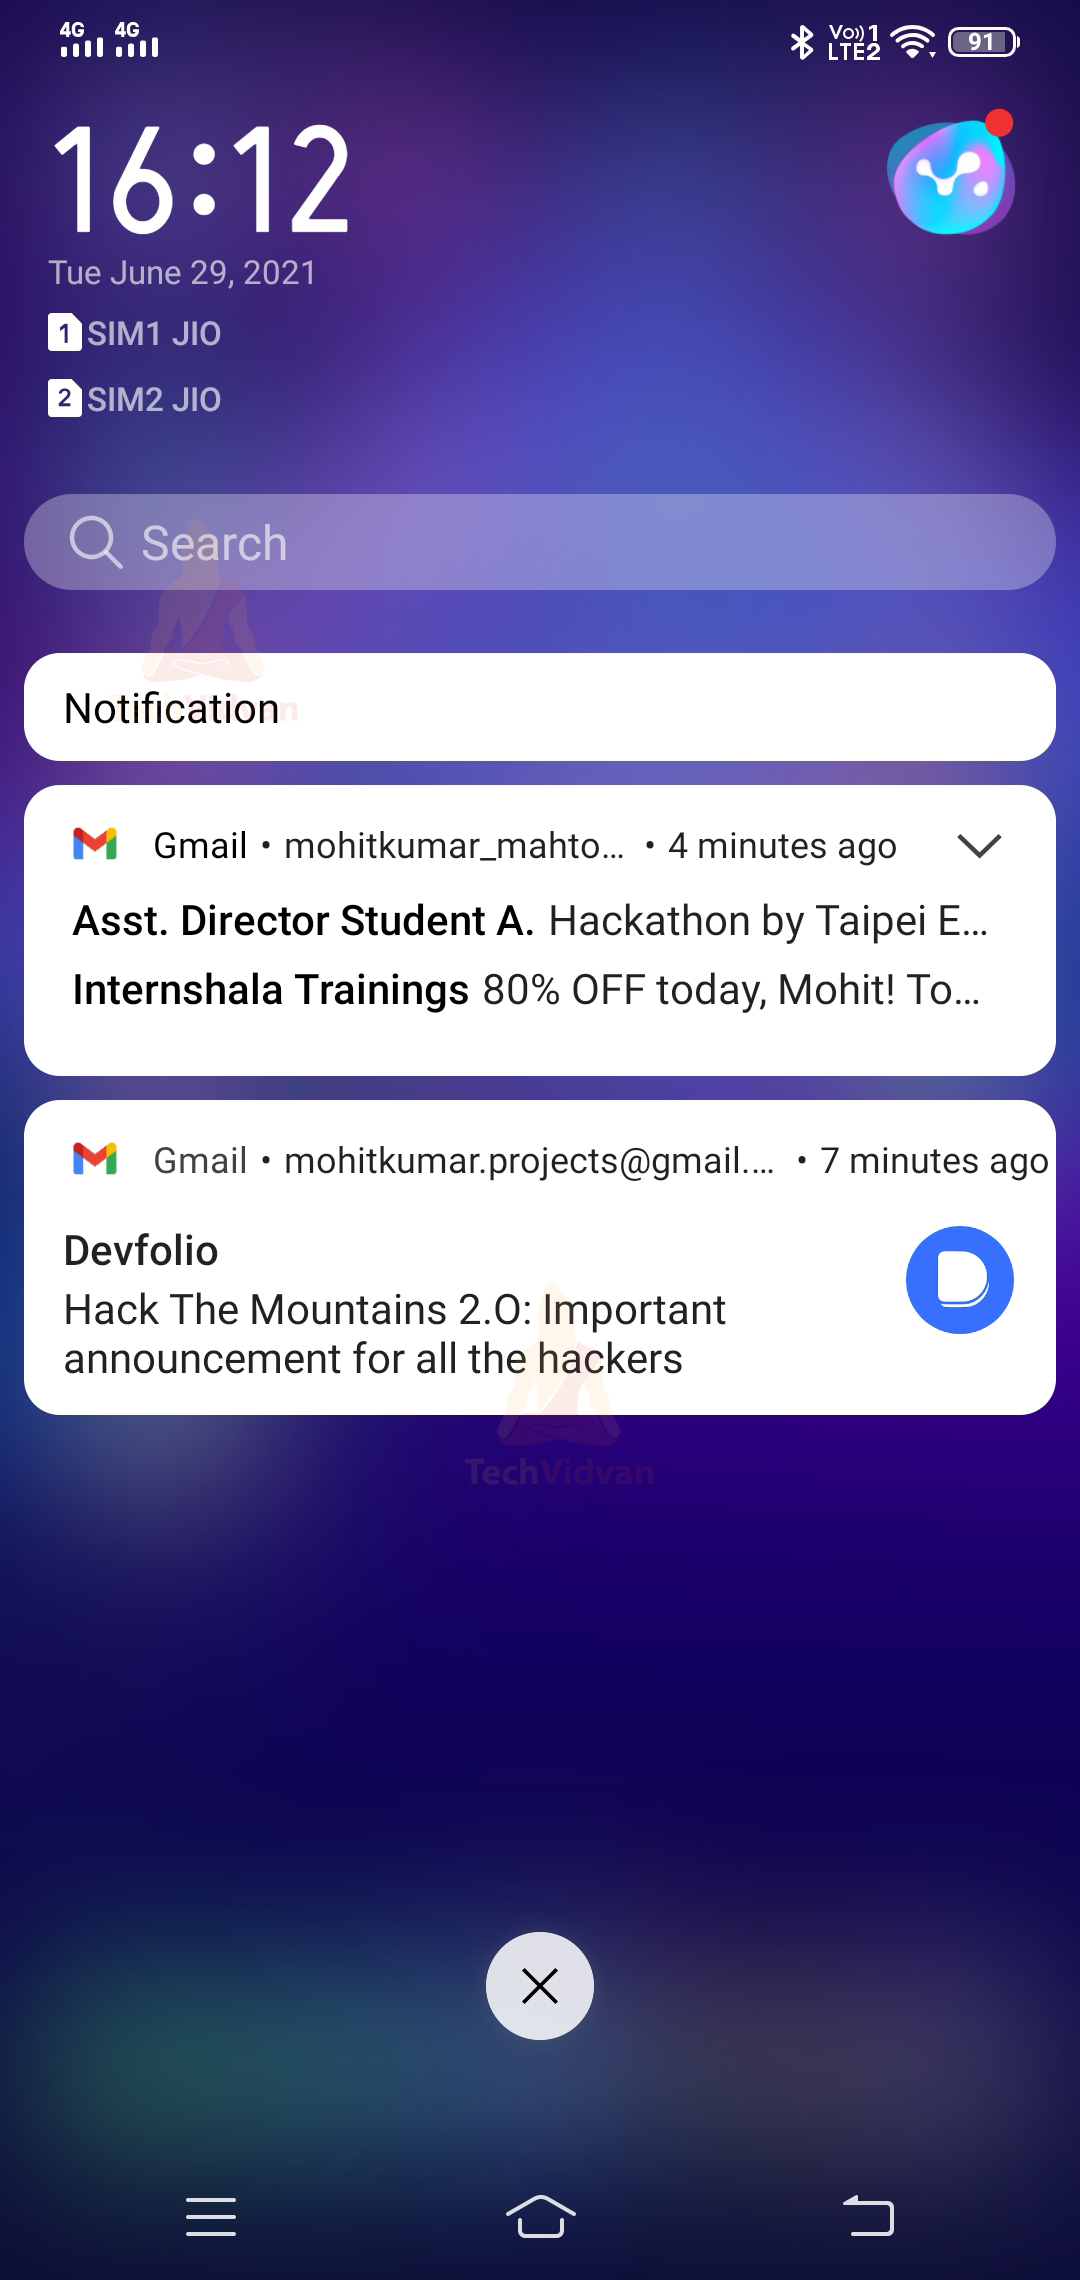
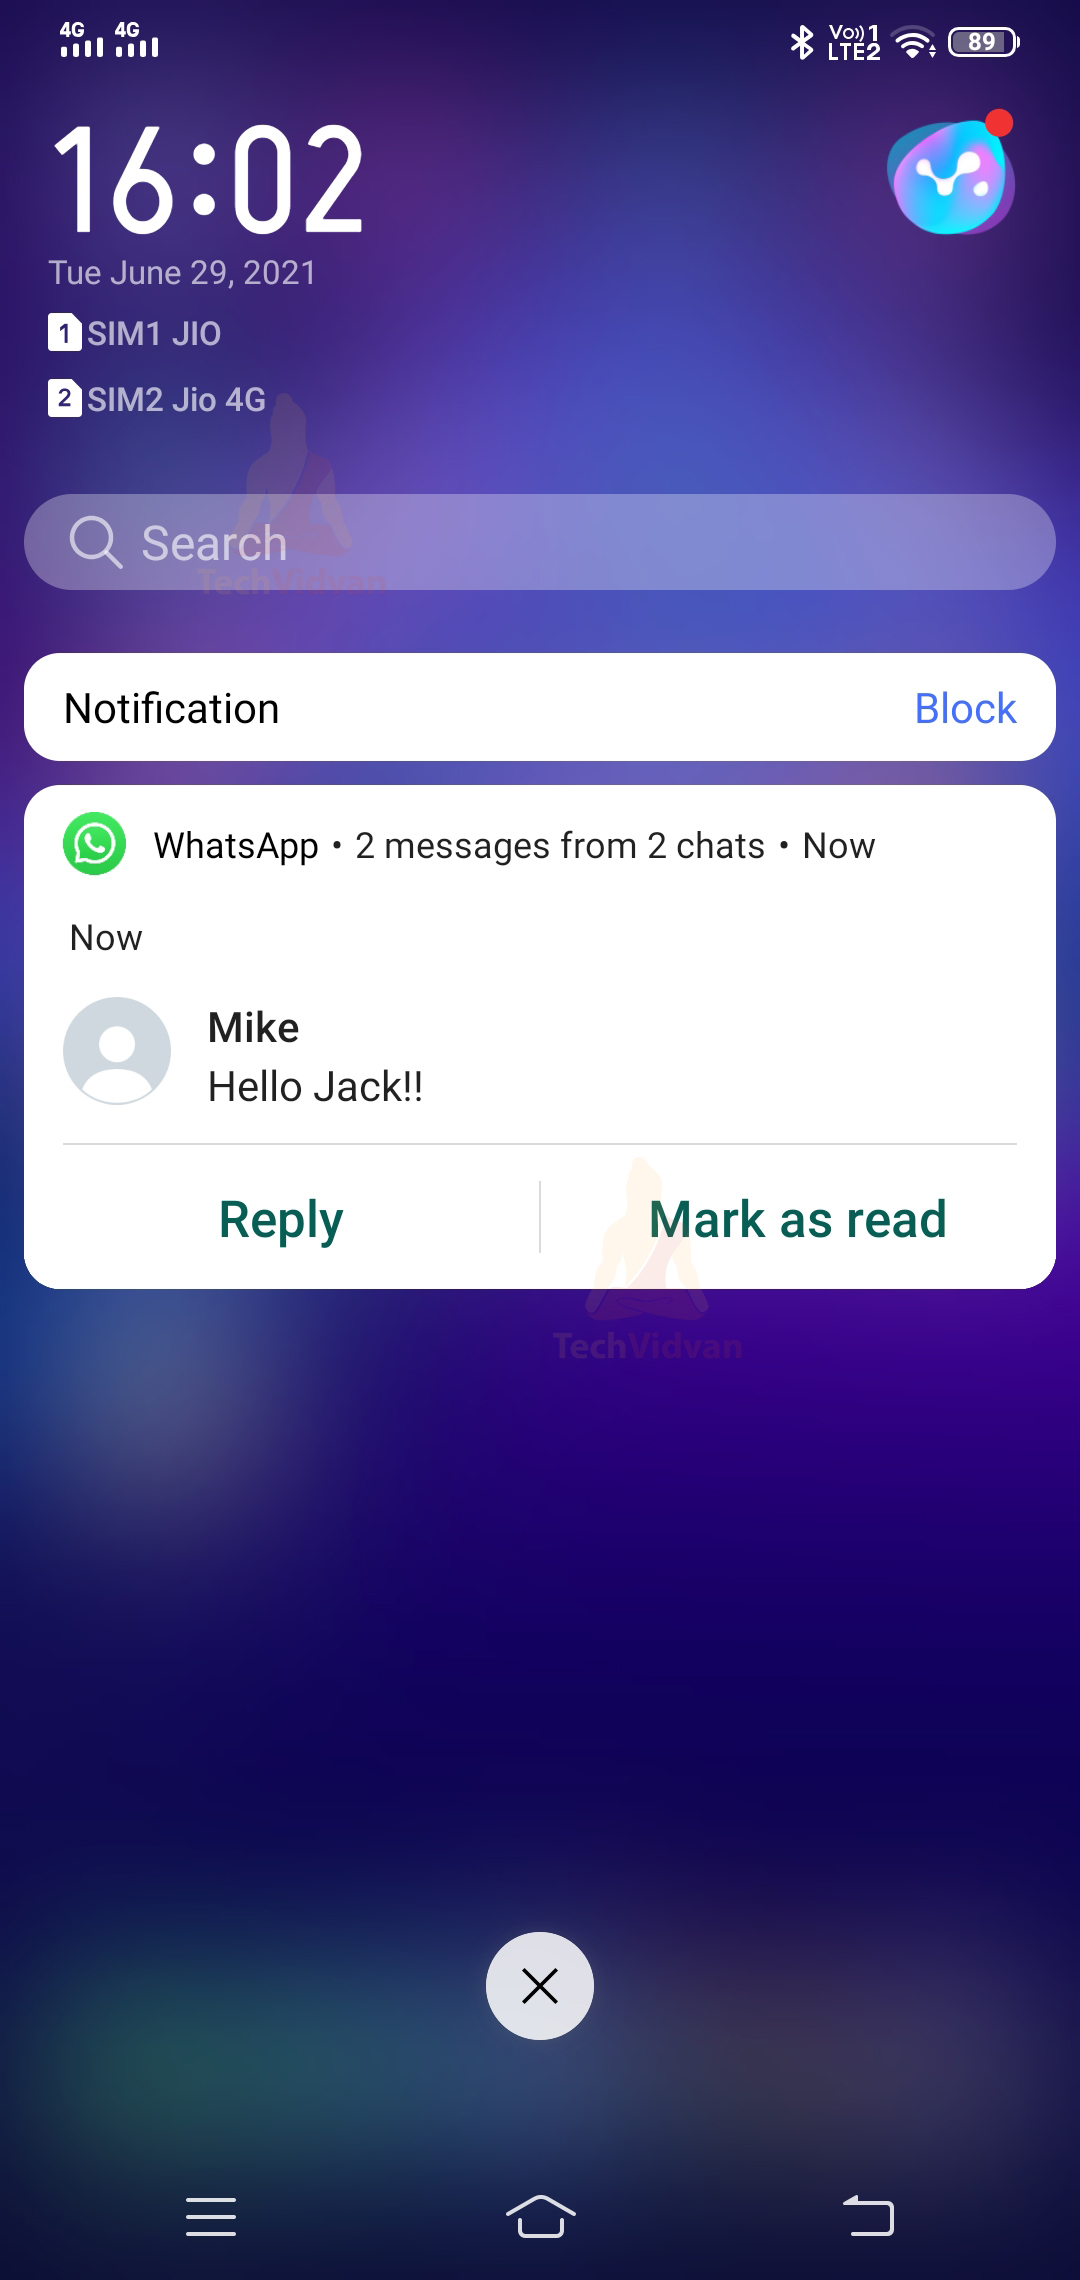
2. Notification Drawer Notifications
All the notifications which occur on your device are available in your notification drawer, accessible by swiping down from the top of the screen. This centralized area consolidates all alerts and updates, providing a comprehensive view of notifications, such as messages, app updates, or system alerts. Users can interact with or dismiss notifications directly from this drawer.
For example, you can see that in the below image.
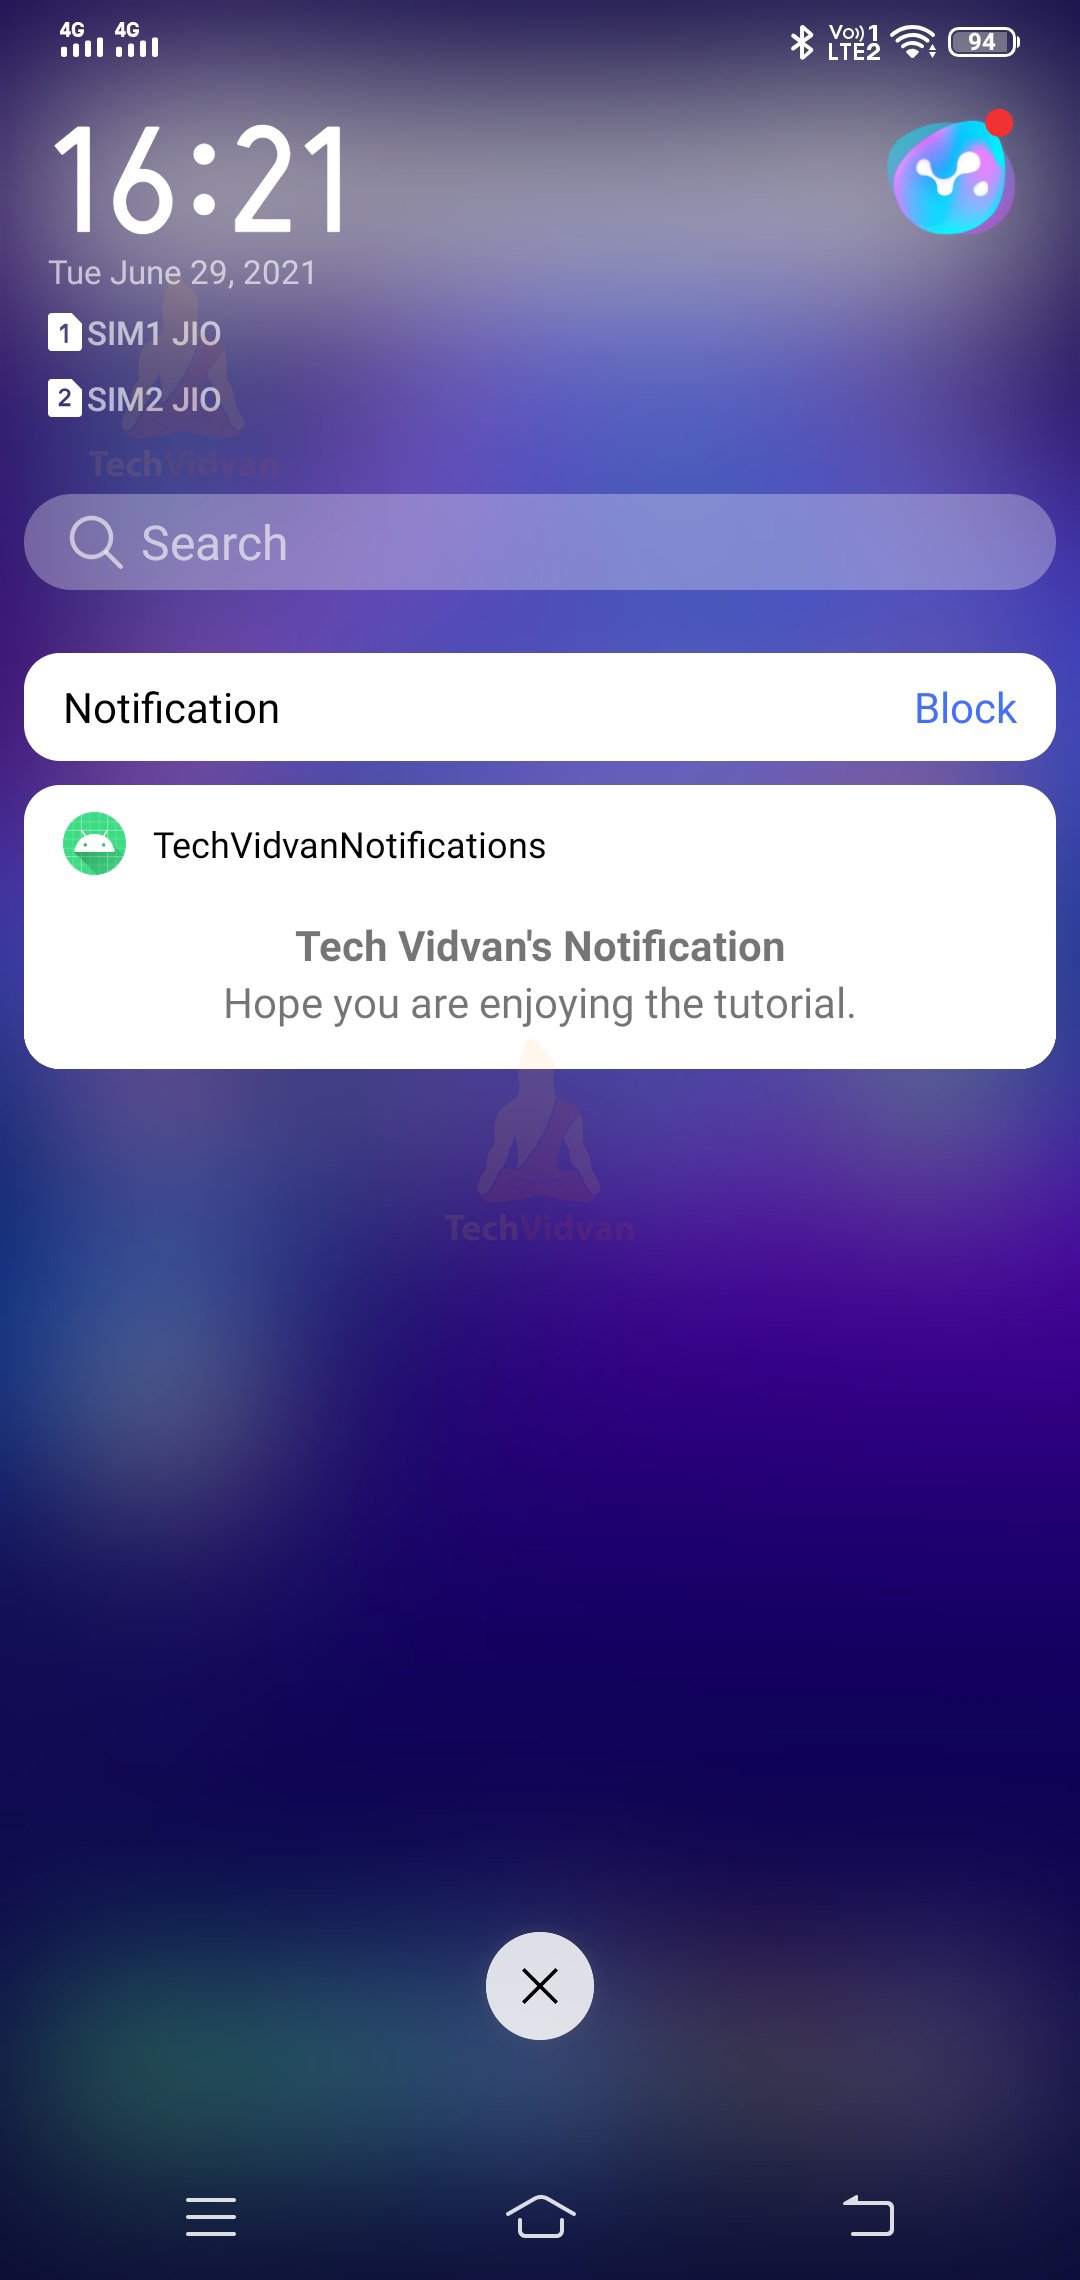
3. Text Notifications
Text Notifications only have the title and brief description of the notification. They are designed for straightforward alerts that do not require images or elaborate graphics. These notifications are ideal for delivering quick updates or reminders, ensuring that users receive concise and pertinent information at a glance.
4. Expandable Notifications
Expandable notifications offer more information than standard notifications. Initially, they display a summary or a brief overview, but users can expand them to reveal additional details, such as extended text or multiple actions. This feature enhances user engagement by allowing more comprehensive content without overwhelming the notification area.
For example, you can find it out in the below screenshot.
Normal Form:

Expanded Form
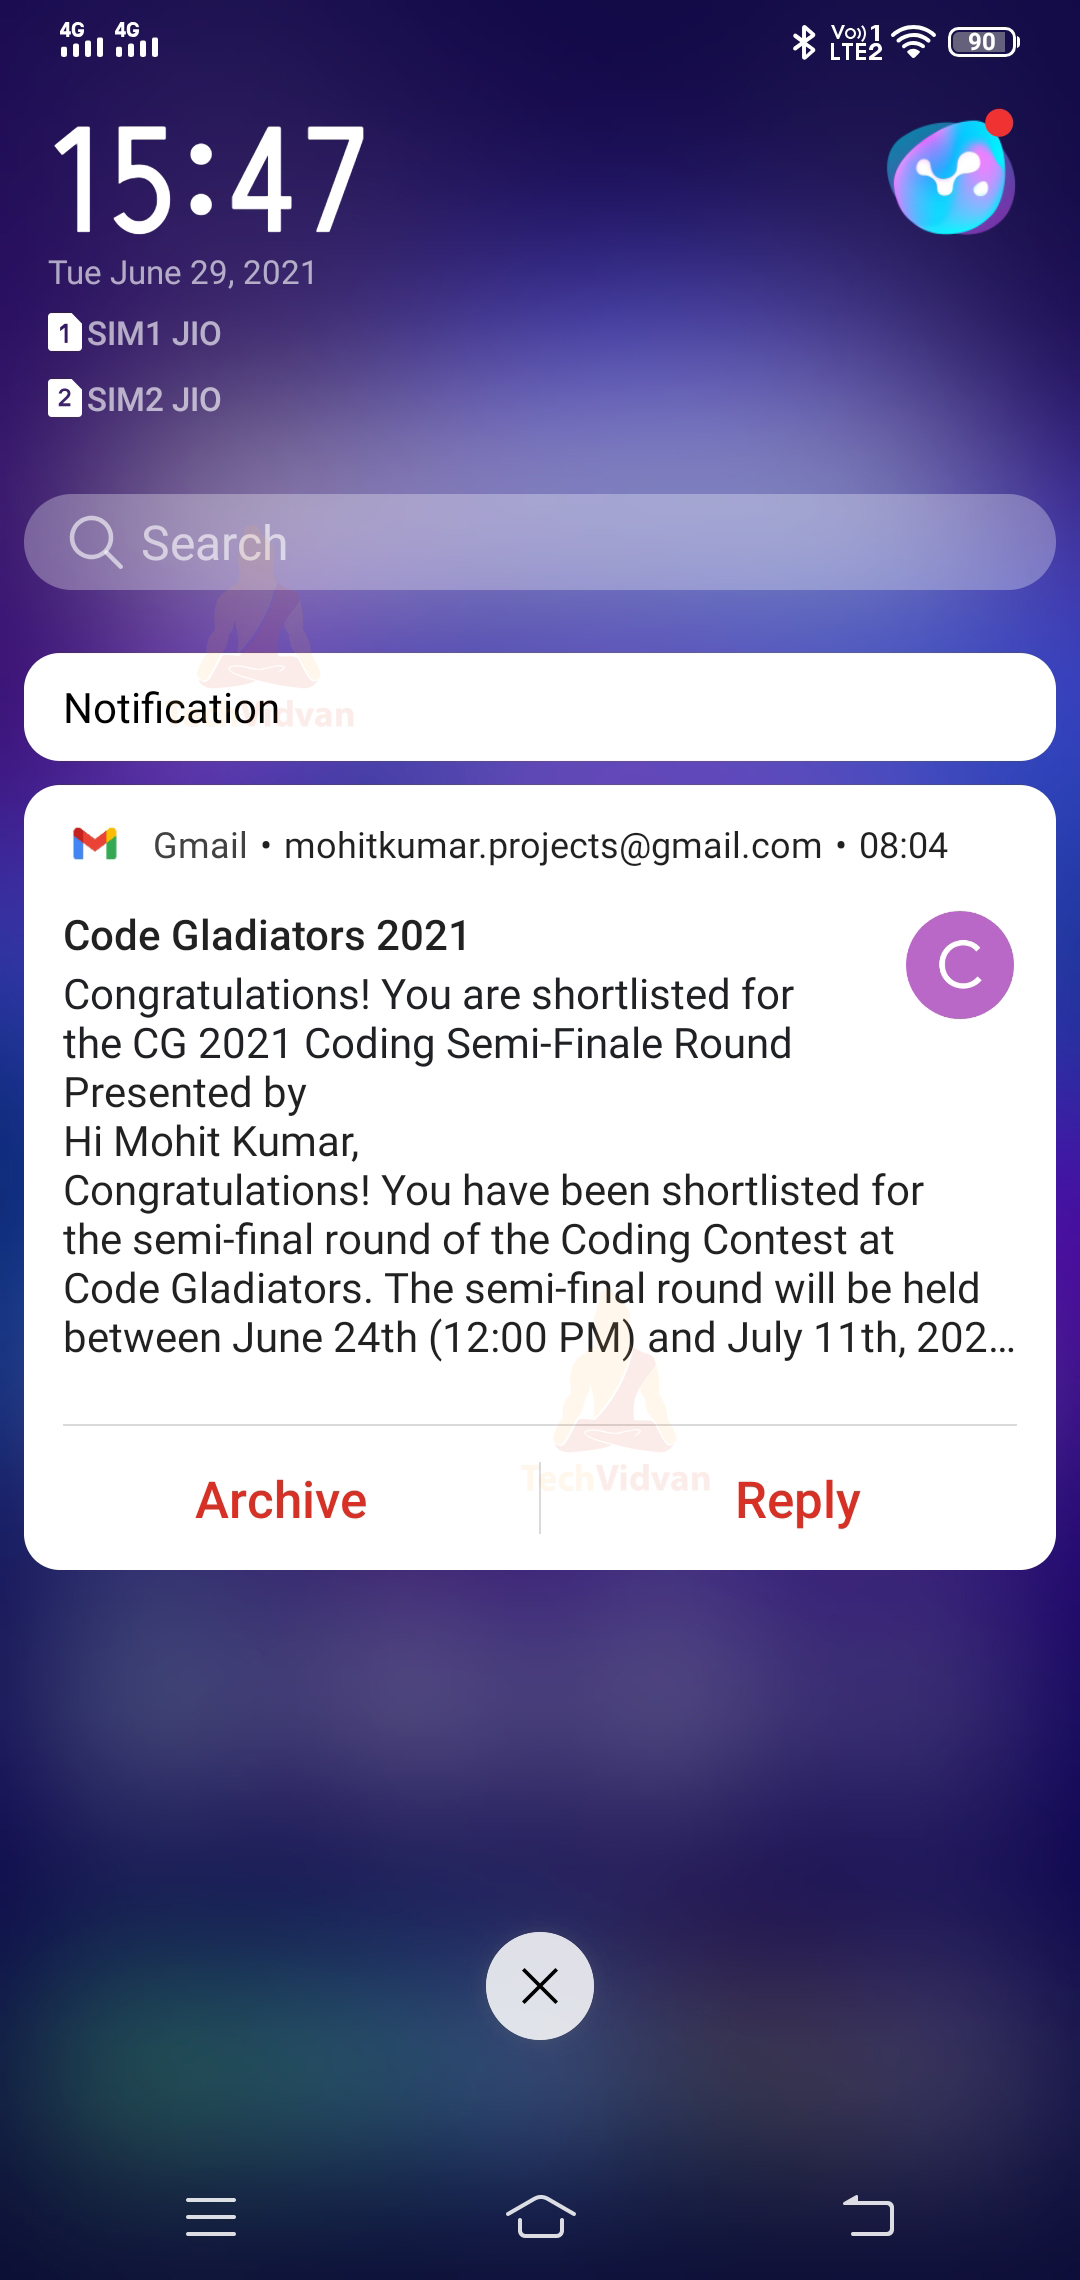
5. Action Based Notifications
These notifications come with some actions. You can directly respond through the notifications without opening your application. You can find it out in the below screenshot.
6. Lock Screen Notifications
These are the notifications that are visible on your lock screen. You can find it out in the below screenshot.

Types of Android Notifications
Until now, you saw what notifications are and why they are used. Now is the time for us to go through the various types of android notifications.
1. User-Generated Notifications
These are the notifications that the users themselves generate. Some of the common examples of this are as follows: text messaging, post liking, etc.
2. Context-Generated Notifications
The notifications are generated based on the permission sought, for example, Location-based applications.
3. System-Generated Notifications
The notifications that originate from the system are termed as System-Generated Notifications. For example – System Update Notifications.
4. User’s Action based Notifications
The notifications which come with an option for users to interact are termed User’s Action-Based Notifications. For example, you can notice the chance to reply directly from the notification itself in mail or chat applications.
5. Push Notifications
Push notifications are notifications from the Internet or, more specifically, from the cloud. For example, the manufacturers use this to update users about upcoming sales or new product launches, etc.
6. Passive Notifications
The notifications that come with some additional data or information are termed passive notifications, such as news and weather feed.
7. Smart Notifications
A smart notification is a notification that gets delivered to specific devices only. So, for example, if you wished to send some information to all your premium users, you could use smart notifications.
Defining Android Notification
To trigger a notification, first, you need to define it. Below is an example using which you can define notifications in your application.
notificationChannel = NotificationChannel(channelId,description,NotificationManager.IMPORTANCE_HIGH)
                notificationChannel.enableLights(true)
                notificationChannel.lightColor = Color.GREEN
                notificationChannel.enableVibration(false)
                notificationManager.createNotificationChannel(notificationChannel)

builder = Notification.Builder(this,channelId)
                    .setContent(contentView)
                    .setSmallIcon(R.mipmap.ic_launcher_round)
                    .setLargeIcon(BitmapFactory.decodeResource(this.resources,R.mipmap.ic_launcher))
                    .setContentIntent(pendingIntent)
Issuing the Android Notification
After you have successfully defined your notification, you should issue. To issue a notification, we use the notify() method from NotificationManger class. As a good practice, you should provide an id to your notification. It helps you to quickly refer to your notification later and do some modifications to it.
Below is an example to guide you on the same.
notificationManager.notify(9191,builder.build())
NotificationBuilder.Compat Class
NotificationBuilder.Compat is the base class that helps us to create, design and add properties to our notifications. Below are some of the commonly used methods present in the NotificationBuilder.Compat Class.
| Method Name | Description |
| setSmallIcon() | The setSmallIcon() method is used to display the icon of the notification. Usually, it’s the app’s icon. |
| setLargeIcon() | The setLargeIcon() method is used to display a contact picture or any other picture. |
| setContentTitle() | The setContentTitle() method is used to set a title for your notification. |
| setContentText() | The setContentText() method is used to set a description for your notification. |
| setPriority() | The setPriority() is used to set the importance of your notifications. |
| setAutoCancel() | The setAutoCancel() is used to make a notification cancellable or not auto cancellable. |
| build() | It builds a notification object along with all the properties and returns the notification object. |
| setContentIntent(PendingIntent intent) | The setContentIntent() method allows you to set a pending intent to work when the user clicks on notification. |
| setDefaults() | It is used to set the default property of the notification. |
| setVibrate() | It is used to define the vibration pattern that should be played when the notification comes. |
| setTicker() | It is used to set the text that will appear when notification triggers. |
| setOngoing() | It has two values, either true or false. It is used to set the ongoing status of a notification. |
| setStyle() | It uses specific styles for your notification. |
Implementation of Android Notification
So, as of now, we have discussed all the concepts relating to Android Notifications. Now let’s build an application using the above concepts. The app will have a button and using it; the user can generate custom notifications on his device.
Follow the below steps to achieve the above goal.
1: Launch your Android Studio.
2: Select Create a New Project.
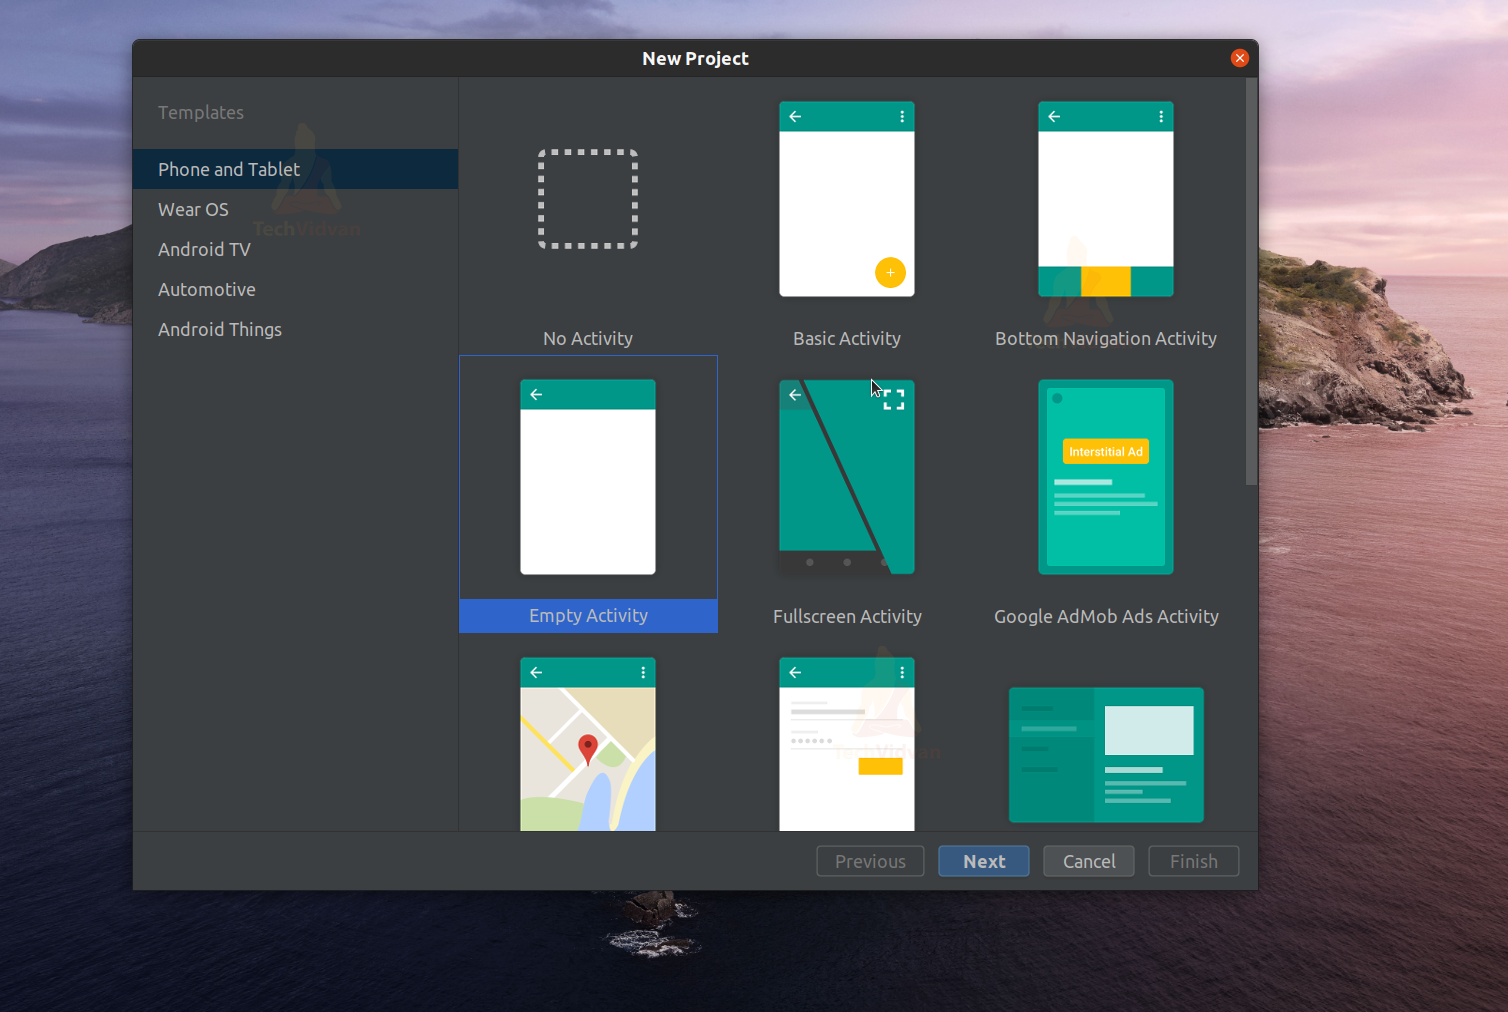
3: Select Empty Activity and proceed.
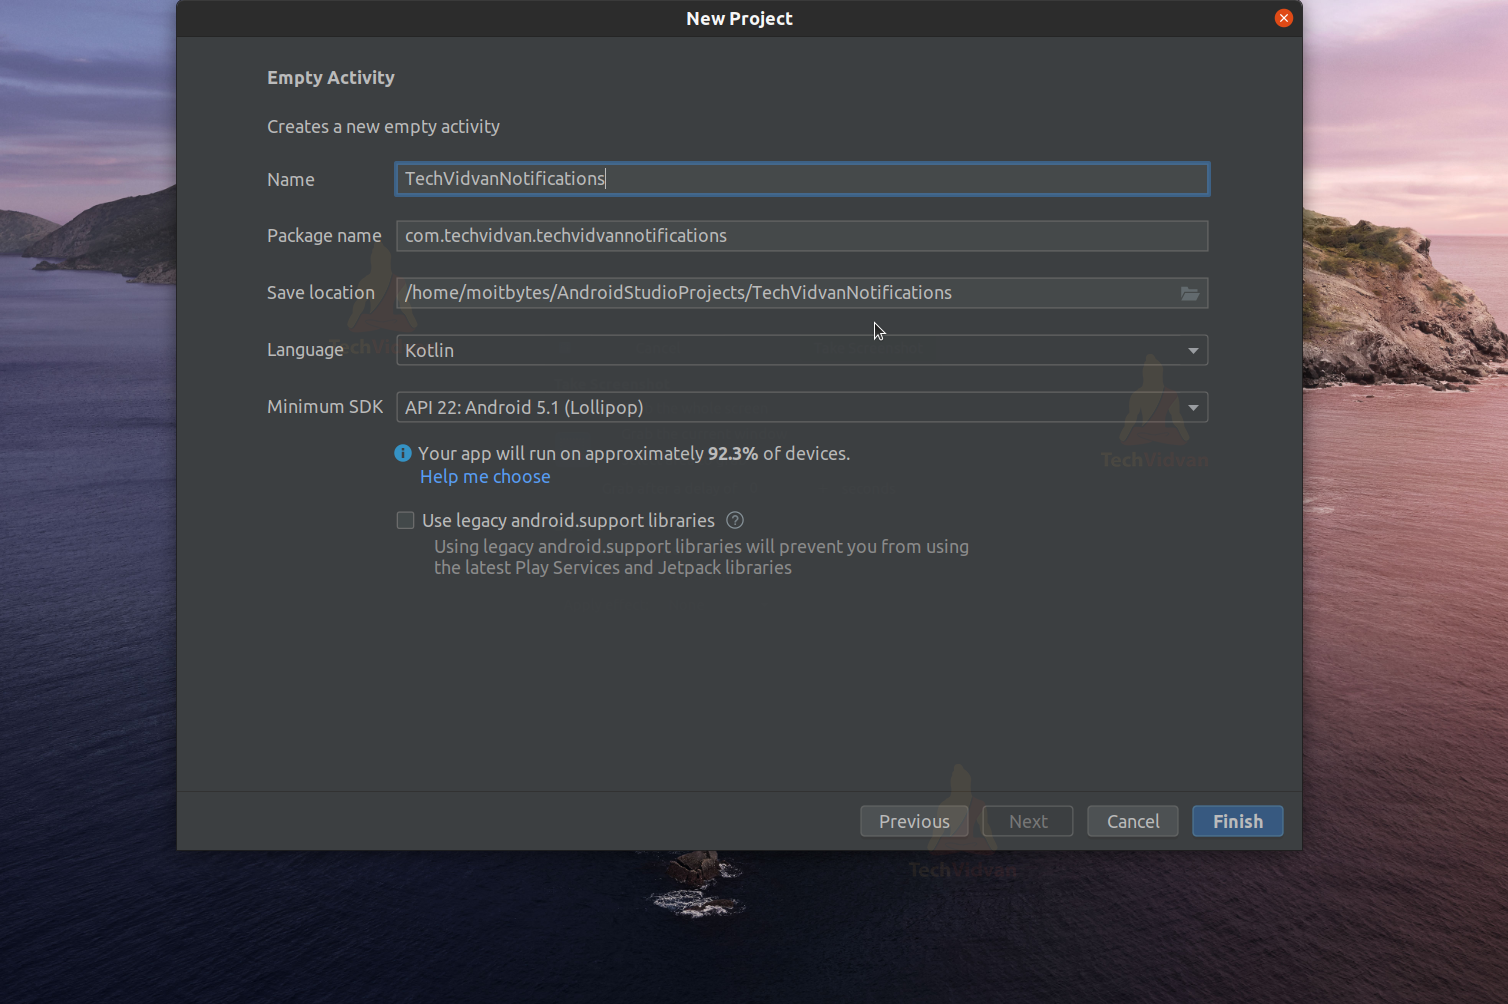
4: Enter your application name. In my case, it’s “TechVidvanNotifications.” Next, select Kotlin from the dropdown. For the API level, select API 22 for now.
5: Now go to res —> layout —-> and open activity_main.xml. Now here, you need to add a button using which notification will be generated. You can paste the below code in your activity_main.xml file.
Code: activity_main.xml
<?xml version="1.0" encoding="utf-8"?>
<androidx.constraintlayout.widget.ConstraintLayout
    xmlns:android="http://schemas.android.com/apk/res/android"
    xmlns:app="http://schemas.android.com/apk/res-auto"
    xmlns:tools="http://schemas.android.com/tools"
    android:layout_width="match_parent"
    android:layout_height="match_parent"
    tools:context=".MainActivity">

    <TextView
        android:id="@+id/title"
        android:layout_width="match_parent"
        android:layout_height="wrap_content"
        android:gravity="center"
        android:text="TechVidvan Notification"
        android:textColor="#00BCD4"
        android:textSize="28sp"
        android:padding="10dp"
        app:layout_constraintVertical_bias=".08"
        app:layout_constraintBottom_toBottomOf="parent"
        app:layout_constraintLeft_toLeftOf="parent"
        app:layout_constraintRight_toRightOf="parent"
        app:layout_constraintTop_toTopOf="parent"  />

    <Button
        android:id="@+id/btn_notify"
        android:layout_width="wrap_content"
        android:layout_height="wrap_content"
        android:text="Show My Notification"
        android:textSize="15sp"
        app:layout_constraintBottom_toBottomOf="parent"
        app:layout_constraintLeft_toLeftOf="parent"
        app:layout_constraintRight_toRightOf="parent"
        app:layout_constraintTop_toTopOf="parent" />

</androidx.constraintlayout.widget.ConstraintLayout>
6: Now, we need to create a layout for our notification. To do so, go to res—>layout—> and create a new layout XML file. Then, paste the below XML code in your created layout file.
Code: my_notification.xml
<?xml version="1.0" encoding="utf-8"?>
<LinearLayout xmlns:android="http://schemas.android.com/apk/res/android"
    android:layout_width="match_parent"
    android:layout_height="64dp"
    android:orientation="horizontal">

    <ImageView
        android:layout_width="wrap_content"
        android:layout_height="wrap_content"
        android:padding="10dp"
        android:src="@mipmap/techvidvan" />

<!--    You can add your icon in the mipmap folder and then keep it above in src-->

    <LinearLayout
        android:layout_width="match_parent"
        android:layout_height="wrap_content"
        android:layout_gravity="center_vertical"
        android:orientation="vertical">

        <TextView
            android:id="@+id/tv_title"
            android:layout_width="match_parent"
            android:layout_height="wrap_content"
            android:textStyle="bold" />

        <TextView
            android:id="@+id/tv_content"
            android:layout_width="match_parent"
            android:layout_height="wrap_content" />

    </LinearLayout>

</LinearLayout>
7: Now, you just need to edit your MainActivity.kt file as the last step.
Code: MainActivity.kt
package com.techvidvan.techvidvannotifications

import android.app.Notification
import android.app.NotificationChannel
import android.app.NotificationManager
import android.app.PendingIntent
import android.content.Context
import android.content.Intent
import android.graphics.BitmapFactory
import android.graphics.Color
import android.os.Build
import androidx.appcompat.app.AppCompatActivity
import android.os.Bundle
import android.widget.Button
import android.widget.RemoteViews

class MainActivity : AppCompatActivity()
{
    //Variable declarations
    lateinit var notificationManager : NotificationManager
    lateinit var notificationChannel : NotificationChannel
    lateinit var builder : Notification.Builder
    lateinit var btn_notify:Button

    //keeping channel id
    private val channelId = "com.techvidvan.techvidvannotifications"
    private val description = "Tech Vidvan"

    override fun onCreate(savedInstanceState: Bundle?) {
        super.onCreate(savedInstanceState)
        setContentView(R.layout.activity_main)

        //Defining the Notification Manager Object
        notificationManager = getSystemService(Context.NOTIFICATION_SERVICE) as NotificationManager

        //Binding the button with our variable
        btn_notify = findViewById(R.id.btn_notify)

        //setting up on click listener
        //whenever the user click the button
        //he gets the notification
        btn_notify.setOnClickListener {

            //setting up the pending intent to the current activity
            val intent = Intent(this,MainActivity::class.java)
            val pendingIntent = PendingIntent.getActivity(this,0,intent, PendingIntent.FLAG_UPDATE_CURRENT)

            //defining the layout of notification
            val contentView = RemoteViews(packageName,R.layout.my_notification)
            contentView.setTextViewText(R.id.tv_title,"Tech Vidvan's Notification")
            contentView.setTextViewText(R.id.tv_content,"Hope you are enjoying the tutorial.")

            //checking the android version of your device
            if (Build.VERSION.SDK_INT >= Build.VERSION_CODES.O)
            {
                //setting up the properties for the notification
                //based on android version above oreo
                notificationChannel = NotificationChannel(channelId,description,NotificationManager.IMPORTANCE_HIGH)
                notificationChannel.enableLights(true)
                notificationChannel.lightColor = Color.GREEN
                notificationChannel.enableVibration(false)
                notificationManager.createNotificationChannel(notificationChannel)

                builder = Notification.Builder(this,channelId)
                    .setContent(contentView)
                    .setSmallIcon(R.mipmap.ic_launcher_round)
                    .setLargeIcon(BitmapFactory.decodeResource(this.resources,R.mipmap.ic_launcher))
                    .setContentIntent(pendingIntent)
            }else
            {
                //setting up the properties for the notification
                //based on android version BELOW oreo
                builder = Notification.Builder(this)
                    .setContent(contentView)
                    .setSmallIcon(R.mipmap.ic_launcher_round)
                    .setLargeIcon(BitmapFactory.decodeResource(this.resources,R.mipmap.ic_launcher))
                    .setContentIntent(pendingIntent)
            }

            //Finally calling the notify method to show notifications
            //keeping notification id as 9191 for easier reference
            notificationManager.notify(9191,builder.build())
        }

    }
}
So, after completing the above steps, go ahead and test your application. For example, your application would look as follows:
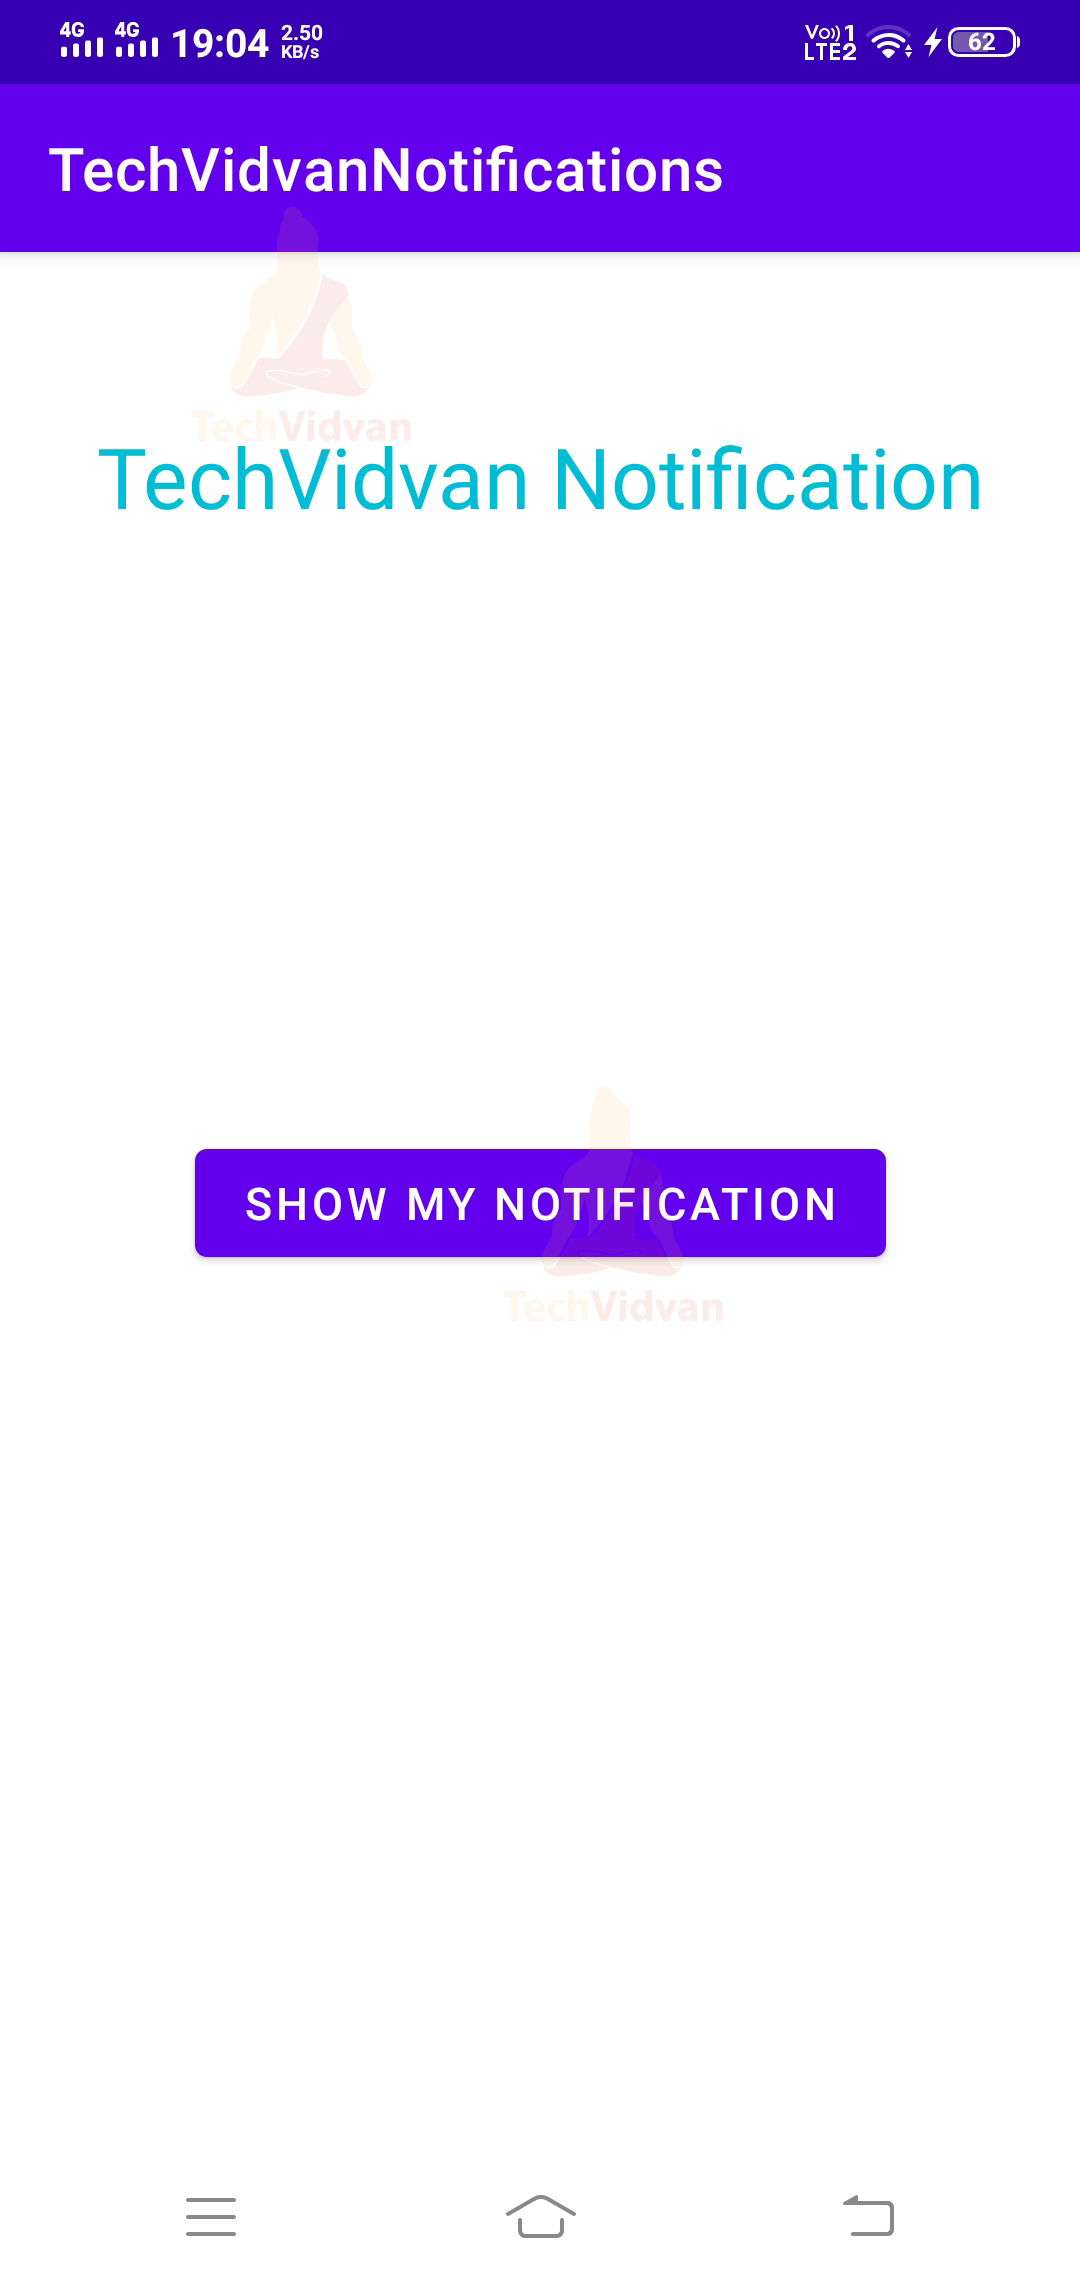
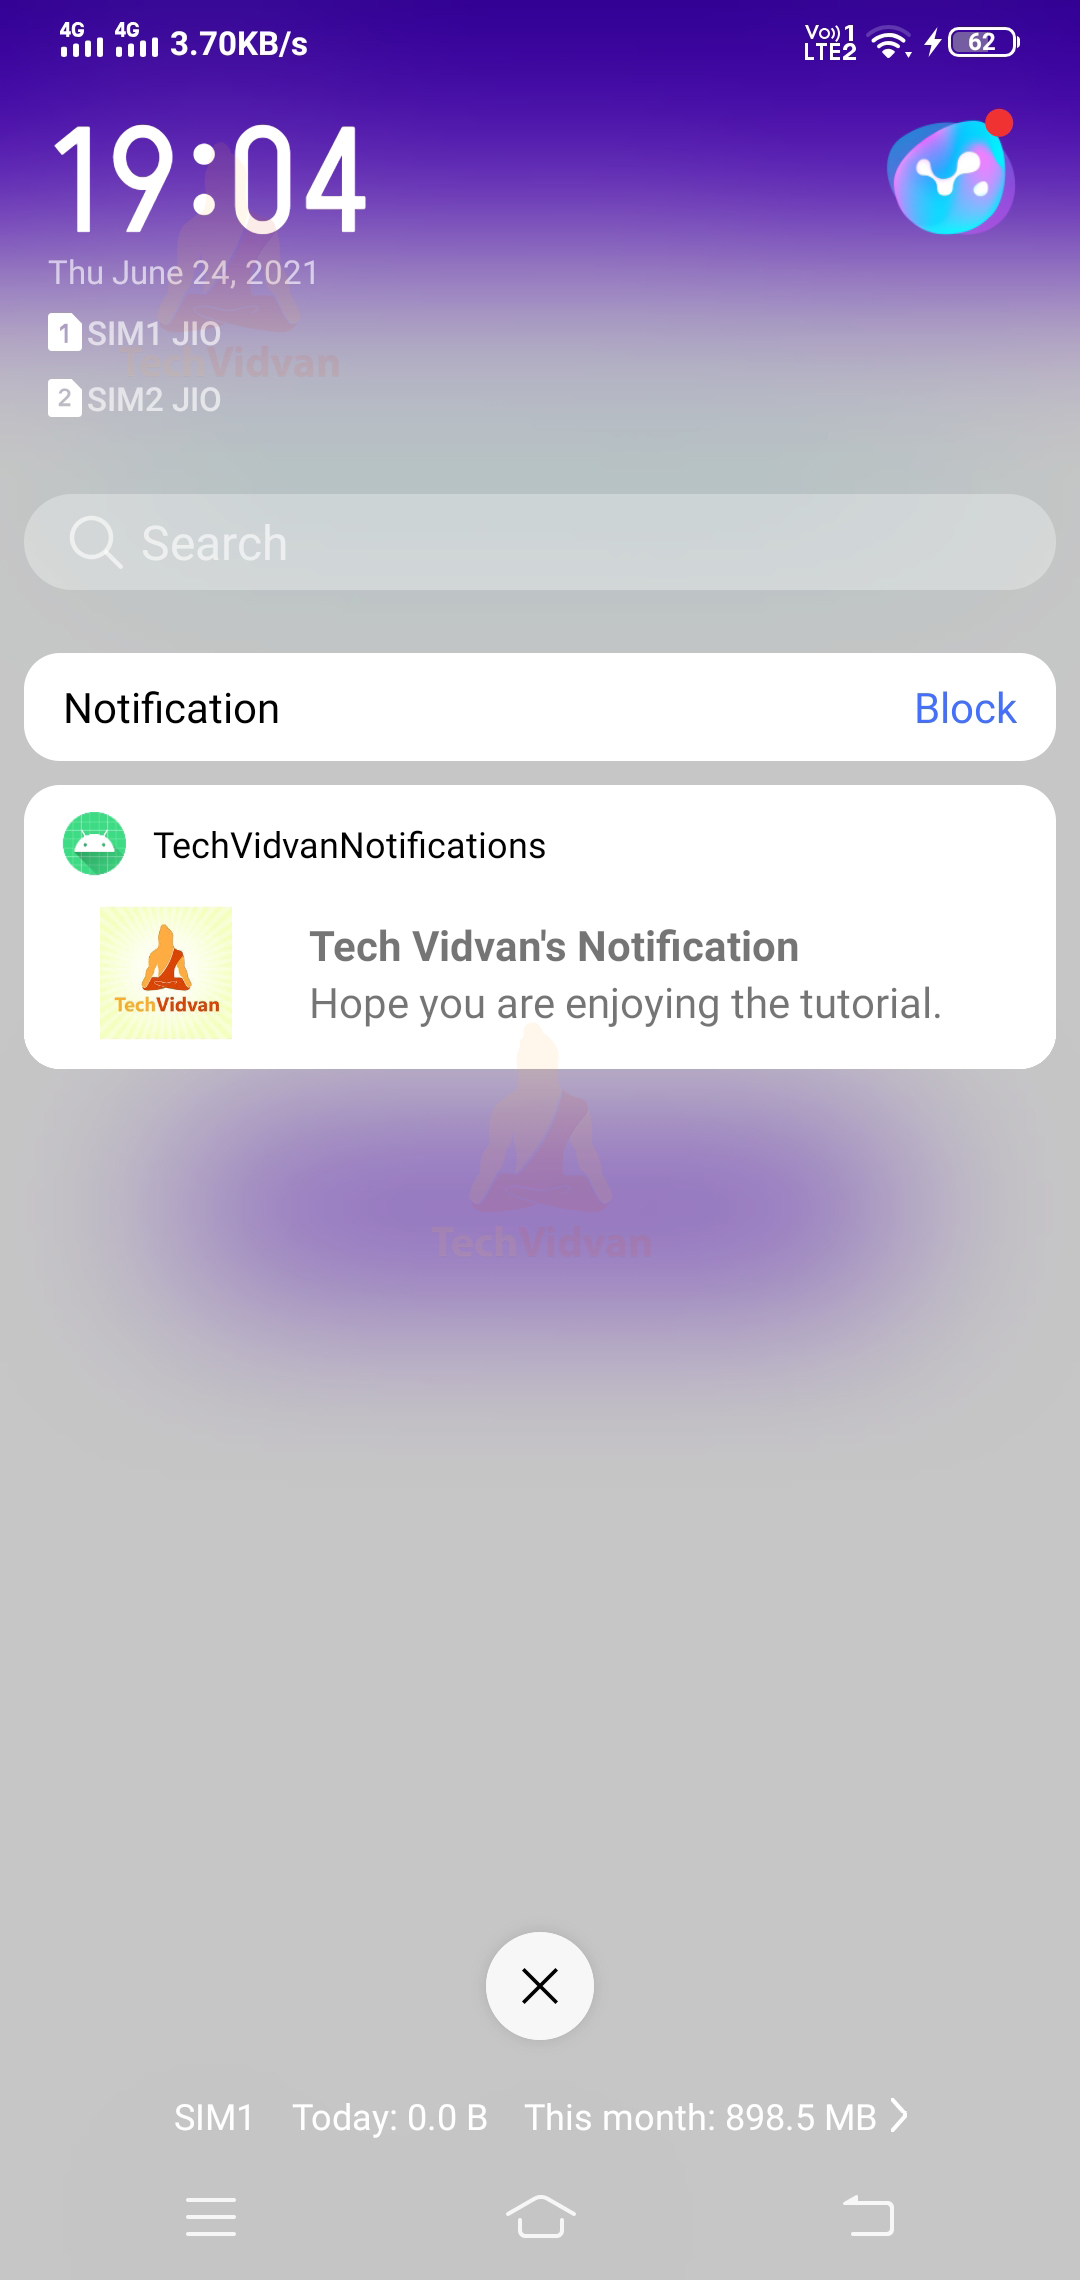
Now when you press the show my notification button, then that displays you the notification. You can notice that in the below screenshot.

The same notification can be seen in your notification drawer as well.
Summary
So through this article, you understood what notifications are and why it is used. Later on, you saw the annotations of notification. Moving further, you came across the several ways a notification may appear, the various types of notification. Also, you saw the multiple methods to build a notification. Finally, you saw an application demo involving the concepts. I hope you enjoyed the article and would proceed to create your notifications.