Android SDK Manager
I hope you are enjoying your Android journey and creating amazing apps. In this article, we’re diving into another exciting topic: Android SDK Manager. The Android SDK, or Software Development Kit, is essential for developing Android apps.
Whenever a new Android version is released, a corresponding SDK is also made available. The SDK helps you develop apps tailored for that specific Android version, but rest assured, it also supports other versions. To gain a better understanding, read through this article and get a clear picture of what the Android SDK is and how you can utilize it in your app development process.
So, let’s dive in!
What is Android SDK?
SDK or Software Development Kit provides you with a framework and several tools to ease your android development. Android SDK helps you develop and provides several tools that play a big role in your development. SDK is specific for specific android versions. Every version of Android has its SDK. When you develop the app, then you have to specify the types of SDK versions.
1. minSdk
2. targetSdk
You can find the options in your app level Gradle File, as shown below.

minSdk – The minSdk is the minimum SDK used to specify the lower bound of your app’s availability. In simple terms, it means that your app is supportive for all the devices with an SDK version greater than or equal to minSdk.
targetSdk – The targetSdk is used to specify the current SDK whose tools you are using for development purposes.
Nowadays, the SDK comes as a bundle with your Android Studio. You need not worry about installing it separately and then import it into your app development environment. However, you want to change or build apps using different SDK versions, and then you can do so easily using the SDK Manager.
What is Android SDK Manager?
SDK Manager is a tool that usually helps you locate the various available SDKs and install them easily. In Android Studio, you get this feature in your settings, and you can easily use it to install an SDK for your project.
Wondering how you can get your SDK Manager? Don’t worry; that is already available in your Android Studio. In case you don’t have Android Studio, then you can download Android Studio.
After you are all set with your Android Studio, you can simply go to File —–> Settings —–> Appearance and Behavior —–> System Settings —–> Android SDK.
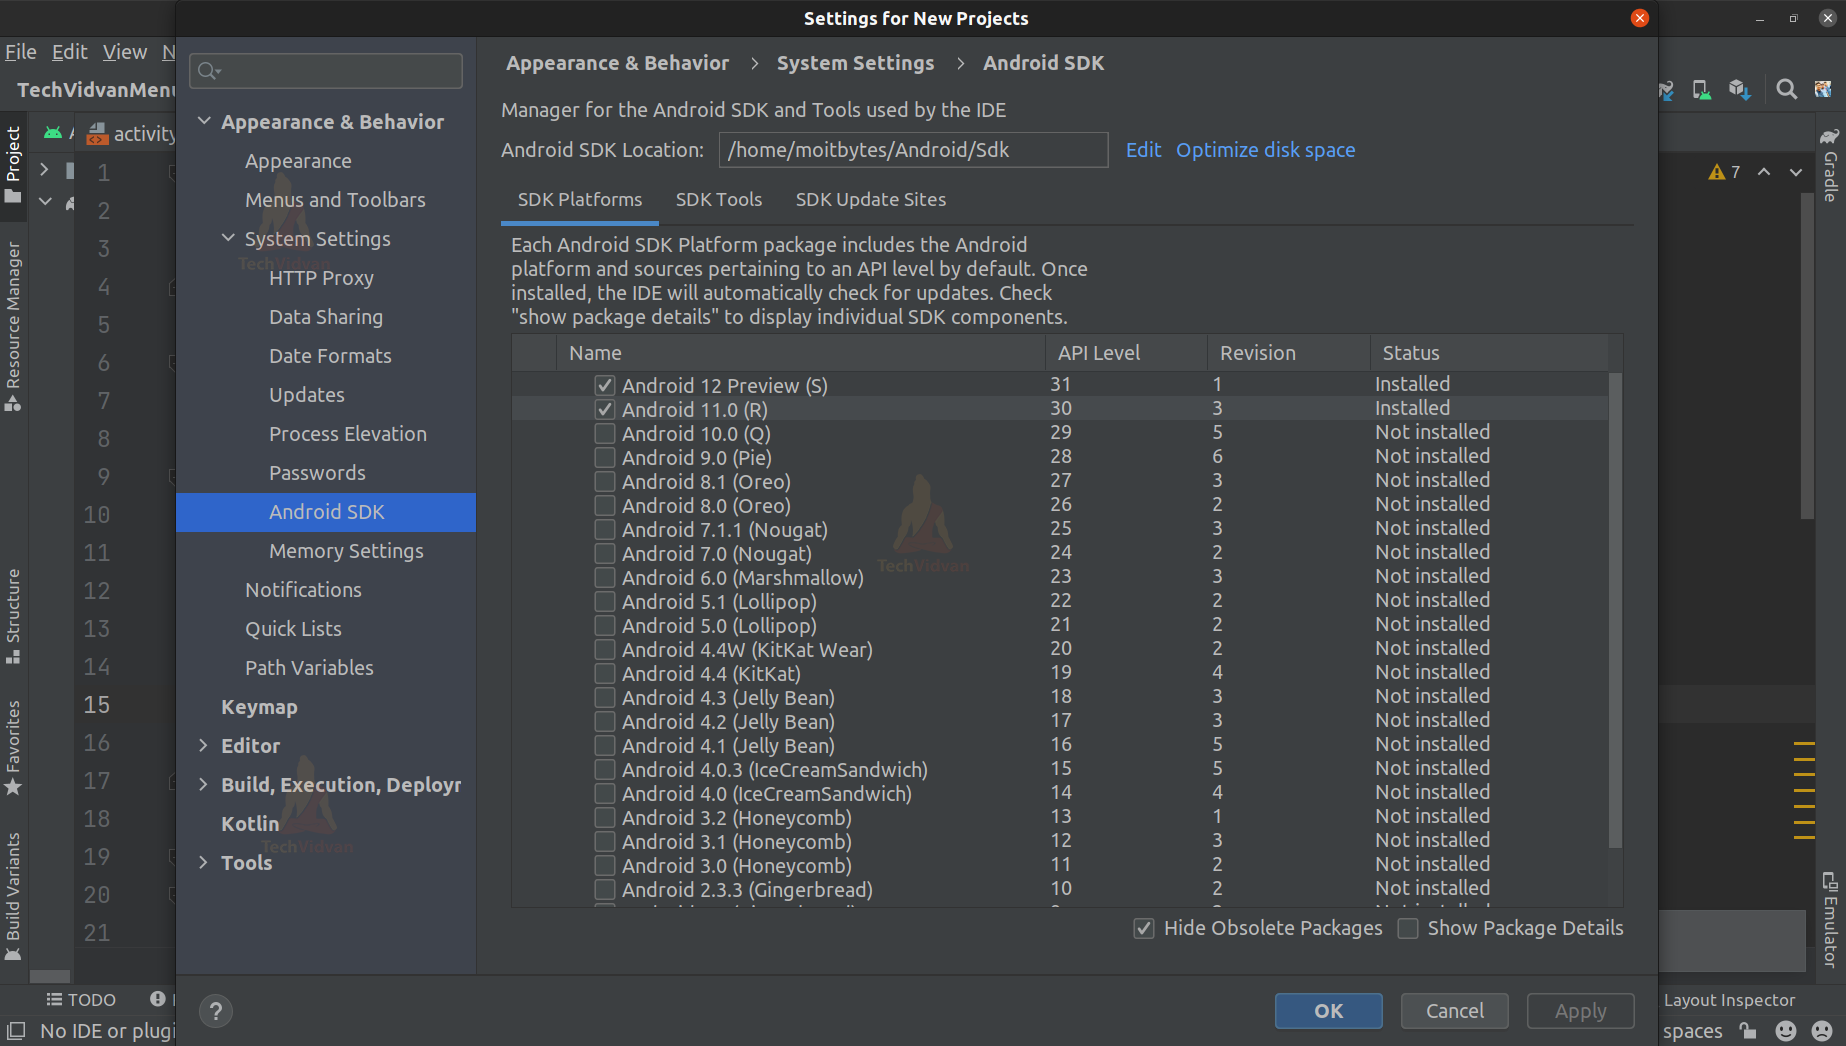
If you don’t see any SDK installed at your end, you can follow the below steps.
1: Select the Android SDK that will be suitable for your needs.

2: Now, you can see a download button on the leftmost side; just click on it.
3: The files will start downloading, and once it is downloaded, simply click on Apply and then Ok.
That’s it now you have your desired SDK installed on your Android Studio.
Packages present in Android SDK
After you install your desired SDK, you are ready to explore the several packages brought by Android SDK. Below are some of the packages that are recommended to you for self-exploration.
| Package | Priority | Description |
| SDK Tools | Required | The SDK tools provide you with features like an emulator, proguard security, debugger, etc. It should be up to date anytime while developing your projects. |
| SDK Platform Tools | Required | The Platform-tools are specific to the android platform on which we are developing our android apps. |
| SDK Platform | Required | It provides you a stage to compile, run and execute your android applications. |
| SDK Sample | Optional | It consists of some sample source codes to help;p you start working with the SDK. |
| Android Support | Optional | It has some of the support libraries that help you in the development process. |
| System Image | Optional | It has system images of all the available android versions. |
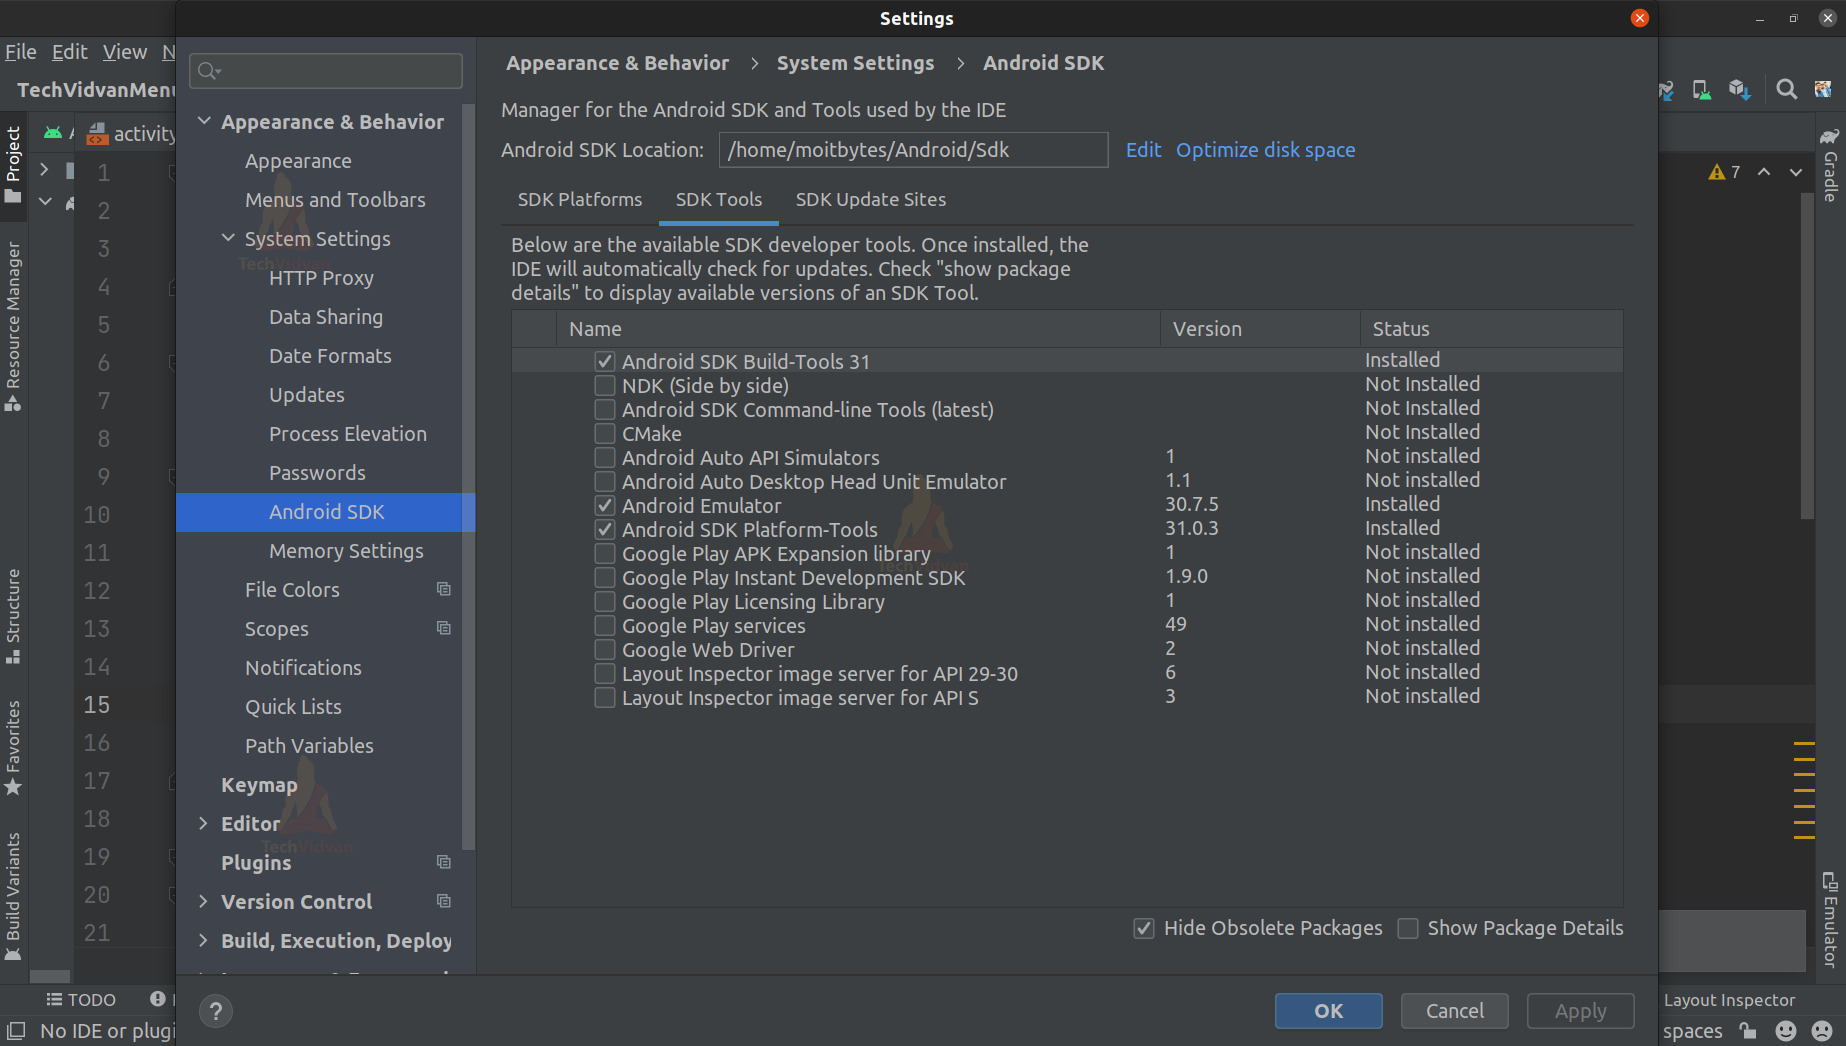
How to install SDK tools and add sites?
To install SDK tools, you simply need to go to File —–> Settings —–> Appearance and Behavior —–> System Settings —–> Android SDK. After that, browse for SDK tools as shown below and select the ones you feel you require.
If you wish to add some third-party SDK tools, you need to know about sites. Sites are like repositories from where Android fetches the tools for you. You simply need to make an entry to a new site that contains the tool you require.
1: Go to File —–> Settings —–> Appearance and Behavior —–> System Settings —–> Android SDK. Now browse to SDK Updates Site Section as shown below.

2: Here, you can notice a plus sign at the bottom left. Just press on it and create an entry for the site you require.
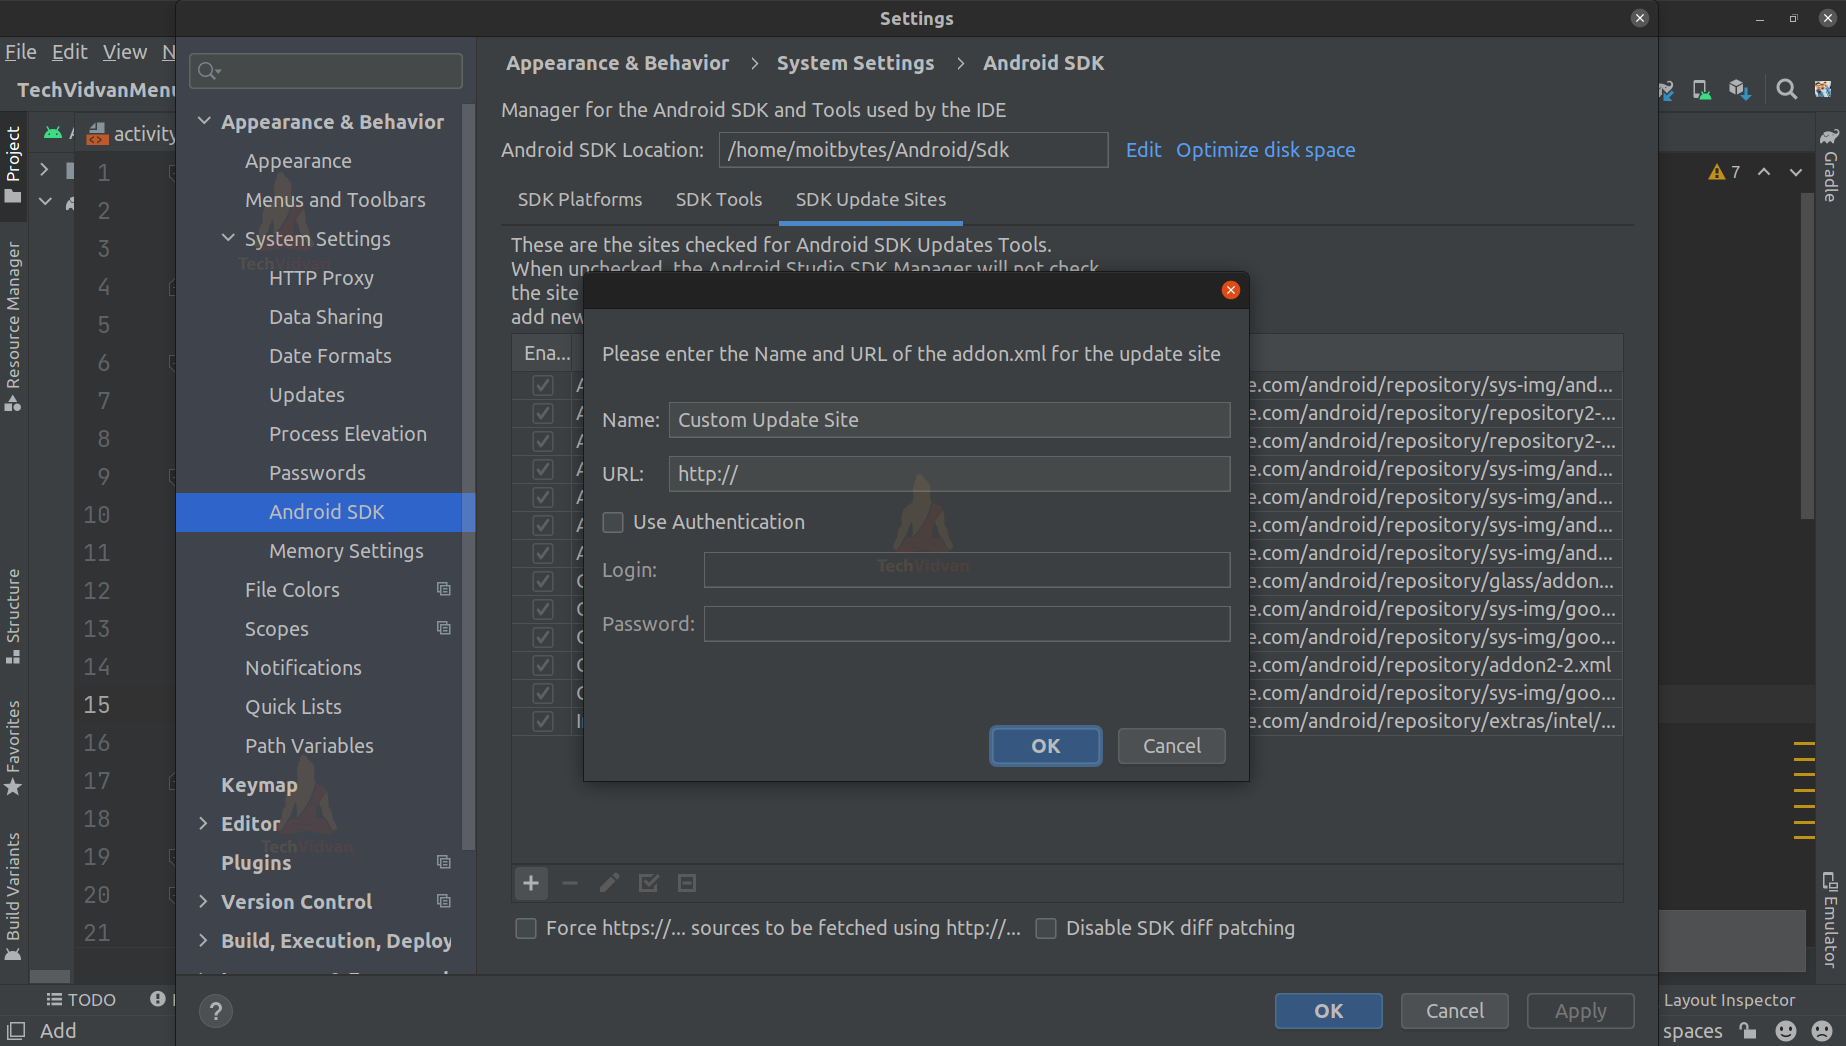
3: After entering the site name and the URL, just press on Ok. After that, you can restart your Android Studio and notice the list of tools available from that site.
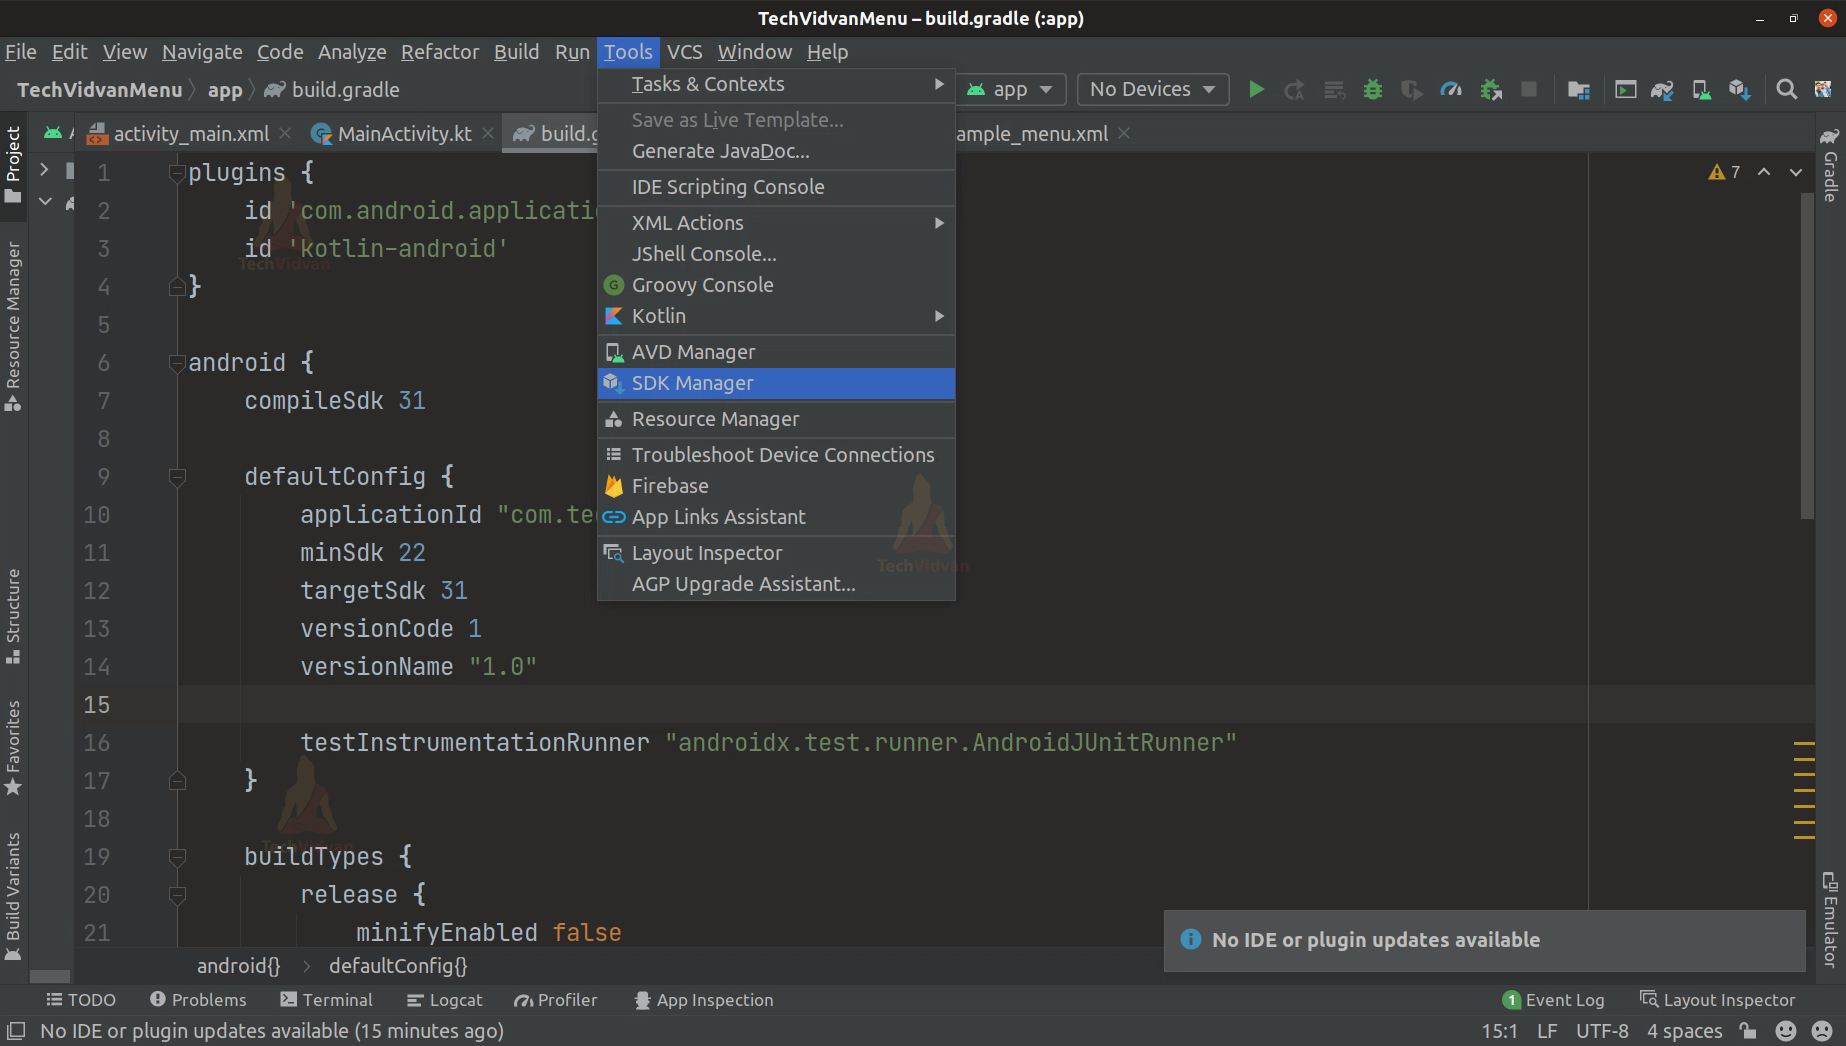
An alternate way of accessing SDK Manager
From the above, you saw the SDK Manager located inside settings. Meanwhile, if you directly want to access SDK Manager without opening Settings and then browse it. So you can do it easily by going to Tools —–> SDK Manager, as shown below.
Proxy in SDK Manager
SDK tools are usually automatically updated along with the plugins and SDK update. But in case you wish to specify your proxy server for the updates, you can easily do it by following the below steps.
1: Go to Tools —-> SDK Manager. Now when the SDK Manager opens, the window will look as follows.

2: Now here on the left side you can see a section for HTTP Proxy; just click on it.
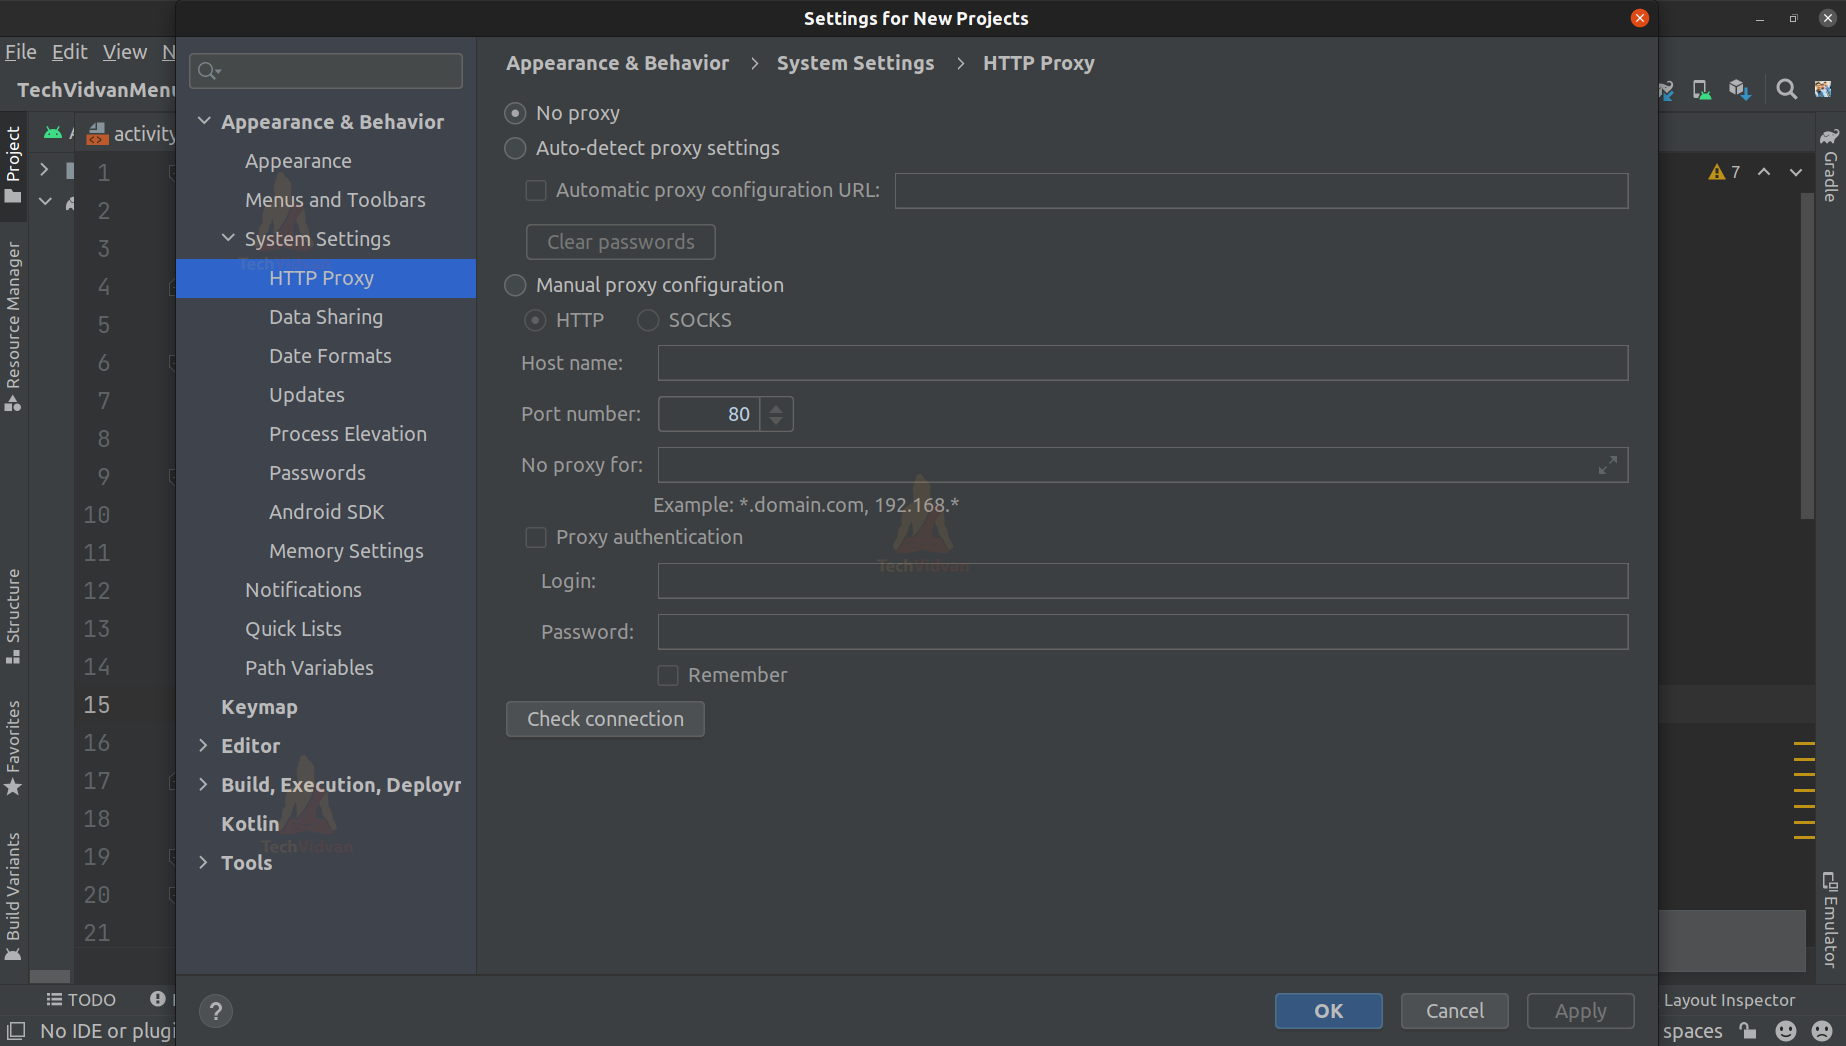
3: Here, you can specify and configure your proxy server.
Summary
Through this article, you came across the Android SDK and the SDK Manager. You saw how SDK helps you in the development process. You saw how to install several SDK tools and also came across adding third-party tools. Finally, you saw the steps to configure a proxy server for your SDK.