Android Kotlin Project – To Do List App
Hey there Android enthusiasts, today we are going to see and learn to implement an Android Project that is a To-do List App in android studio. We’ll understand the complete project development in this article.
The Todo List App will come in handy for keeping track of the tasks we want to complete in the future. With the assistance of this application, you can add new tasks you need to complete and choose whether to check them off after they’re finished. Users using to-do list apps can be more productive, experience less worry and stress, and feel a sense of success when they finish their tasks.
About Android To Do List App
This is an Android project for those just learning the fundamentals of developing Android applications. This Android app’s user interface has a floating button in the bottom right corner of the home page that allows users to add new tasks.
The home screen will display all the tasks entered by the user.
We will use Android Studio and the programming language Kotlin to develop this Android application. Let’s look over the list of features that the user interface will include:
1. The user interface will have a floating ‘+’ button at the right bottom corner of the home screen.
2. A bottom screen fragment will come up when the ‘+’ button is clicked which contains two text fields.
3. In the two text fields, the task name and description can be added by the user.
4. The ‘Save’ button at the bottom of the sheet fragment will save the newly entered task details onto the ROOM database and display it on the home screen.
All of the tasks that the user has entered will be listed on the home screen, along with a checkbox that can be used to mark a task as complete.
Prerequisites for To Do List App using Android
To develop this Android application the requirements and prerequisites are as follows:
1. Kotlin: You need first be familiar with Kotlin programming. Given that we will write the app code in the programming language Kotlin, it is necessary.
2. XML: Another crucial component of our Android application is XML. It will be applied to the development of the application’s user interface.
3. Android Studio: The core of our application is Android Studio because that is how we will develop it. Also included with Android Studio is an Android virtual device that can be used to test the functionality of applications.
4. ROOM DAOs: These refer to the queries that will be required to insert/write the data into the database. Basic database management knowledge is important.
Download Android To Do List App Project
Please download the source code of Android To Do List App Project from the following link: Android To Do List App Project Code
Steps to Create To Do List Project using Android
Following are the steps for developing the Android To Do List Project:
Let’s begin by developing the to-do list app in Android Studio. For a better understanding of how the app works, step-by-step instructions have been provided for each and every file in this tutorial.
You must complete a set of steps in order to create this Android todo-list application.
1. Extract all the files from the downloaded zip file to the location of your choice.
2. Open Android Studio.
3. Click on File then Open.
4. Find and select the folder you extracted earlier and click on OK.
You have successfully opened the todo-list app’s source code in android studio.
Let’s go through each file in this project one at a time as we comprehend how the application works.
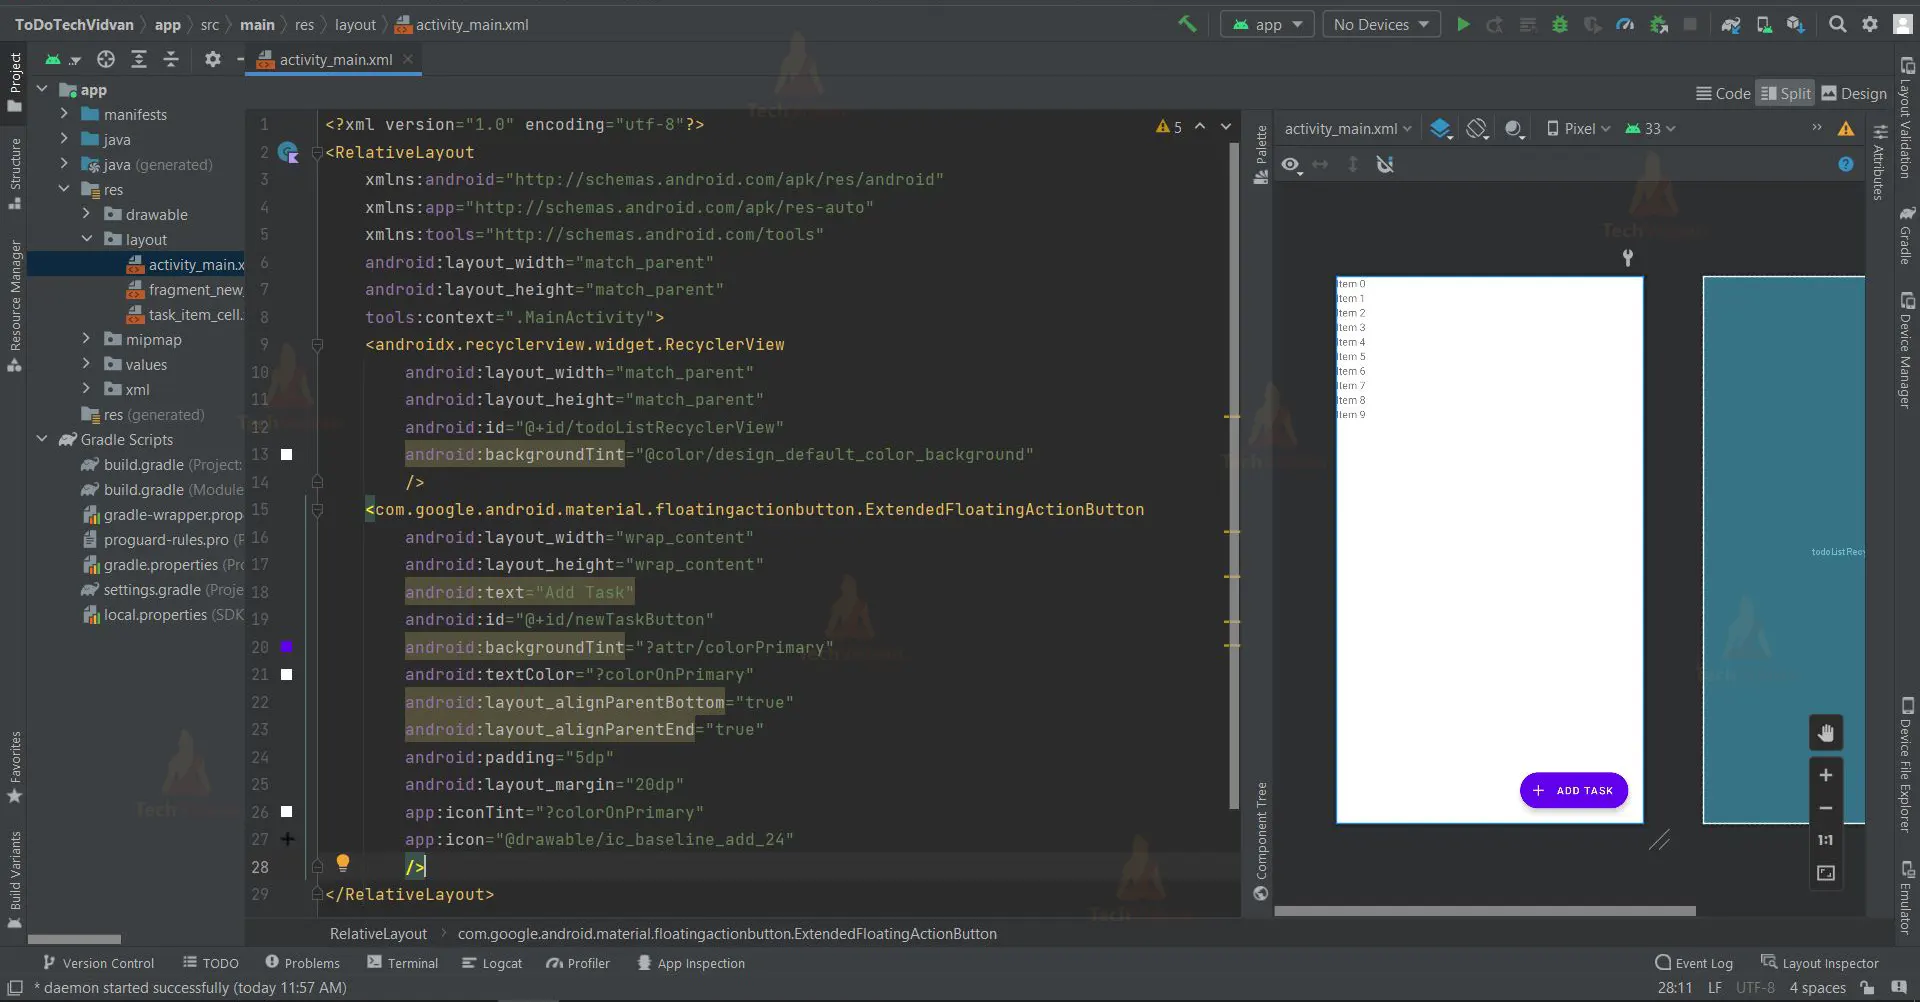
1. The “activity_main” is a XML file which is responsible for creating the text fields and buttons included in the user interface.
Code:
<?xml version="1.0" encoding="utf-8"?>
<RelativeLayout
    xmlns:android="http://schemas.android.com/apk/res/android"
    xmlns:app="http://schemas.android.com/apk/res-auto"
    xmlns:tools="http://schemas.android.com/tools"
    android:layout_width="match_parent"
    android:layout_height="match_parent"
    tools:context=".MainActivity">

    <androidx.recyclerview.widget.RecyclerView
        android:layout_width="match_parent"
        android:layout_height="match_parent"
        android:id="@+id/todoListRecyclerView"
        android:backgroundTint="@color/design_default_color_background"
        />

    <com.google.android.material.floatingactionbutton.ExtendedFloatingActionButton
        android:layout_width="wrap_content"
        android:layout_height="wrap_content"
        android:text="Add Task"
        android:id="@+id/newTaskButton"
        android:backgroundTint="?attr/colorPrimary"
        android:textColor="?colorOnPrimary"
        android:layout_alignParentBottom="true"
        android:layout_alignParentEnd="true"
        android:padding="5dp"
        android:layout_margin="20dp"
        app:iconTint="?colorOnPrimary"
        app:icon="@drawable/ic_baseline_add_24"
        />


</RelativeLayout>
2. The “fragment_new_task_sheet” is a XML file which is responsible for creating the edit text views for the user to enter new task’s name and description along with the save button. This xml file will appear when the user click on the ‘Add Task’ in the main activity.
Code:
<?xml version="1.0" encoding="utf-8"?>
<LinearLayout
    xmlns:android="http://schemas.android.com/apk/res/android"
    xmlns:tools="http://schemas.android.com/tools"
    android:layout_width="match_parent"
    android:layout_height="wrap_content"
    tools:context=".NewTaskSheet"
    android:orientation="vertical">

    <TextView
        android:id="@+id/taskTitle"
        android:layout_width="match_parent"
        android:layout_height="wrap_content"
        android:text="New Task"
        android:textSize="30sp"
        android:layout_marginTop="20dp"
        android:layout_marginStart="20dp"
        style="@style/TextAppearance.AppCompat.Title"/>


    <com.google.android.material.textfield.TextInputLayout
        style="@style/Widget.MaterialComponents.TextInputLayout.OutlinedBox.Dense"
        android:layout_width="match_parent"
        android:layout_height="wrap_content"
        android:layout_marginVertical="10dp"
        android:layout_marginHorizontal="20dp">

        <com.google.android.material.textfield.TextInputEditText
            android:layout_width="match_parent"
            android:layout_height="match_parent"
            android:id="@+id/name"
            android:hint="Name"/>

    </com.google.android.material.textfield.TextInputLayout>

    <com.google.android.material.textfield.TextInputLayout
        style="@style/Widget.MaterialComponents.TextInputLayout.OutlinedBox.Dense"
        android:layout_width="match_parent"
        android:layout_height="wrap_content"
        android:layout_marginVertical="10dp"
        android:layout_marginHorizontal="20dp">

        <com.google.android.material.textfield.TextInputEditText
            android:layout_width="match_parent"
            android:layout_height="match_parent"
            android:id="@+id/desc"
            android:hint="Description">

        </com.google.android.material.textfield.TextInputEditText>

    </com.google.android.material.textfield.TextInputLayout>

    <com.google.android.material.button.MaterialButton
        android:id="@+id/saveButton"
        android:layout_width="match_parent"
        android:layout_height="wrap_content"
        android:layout_gravity="center"
        android:layout_marginHorizontal="20dp"
        android:text="Save"/>

</LinearLayout>

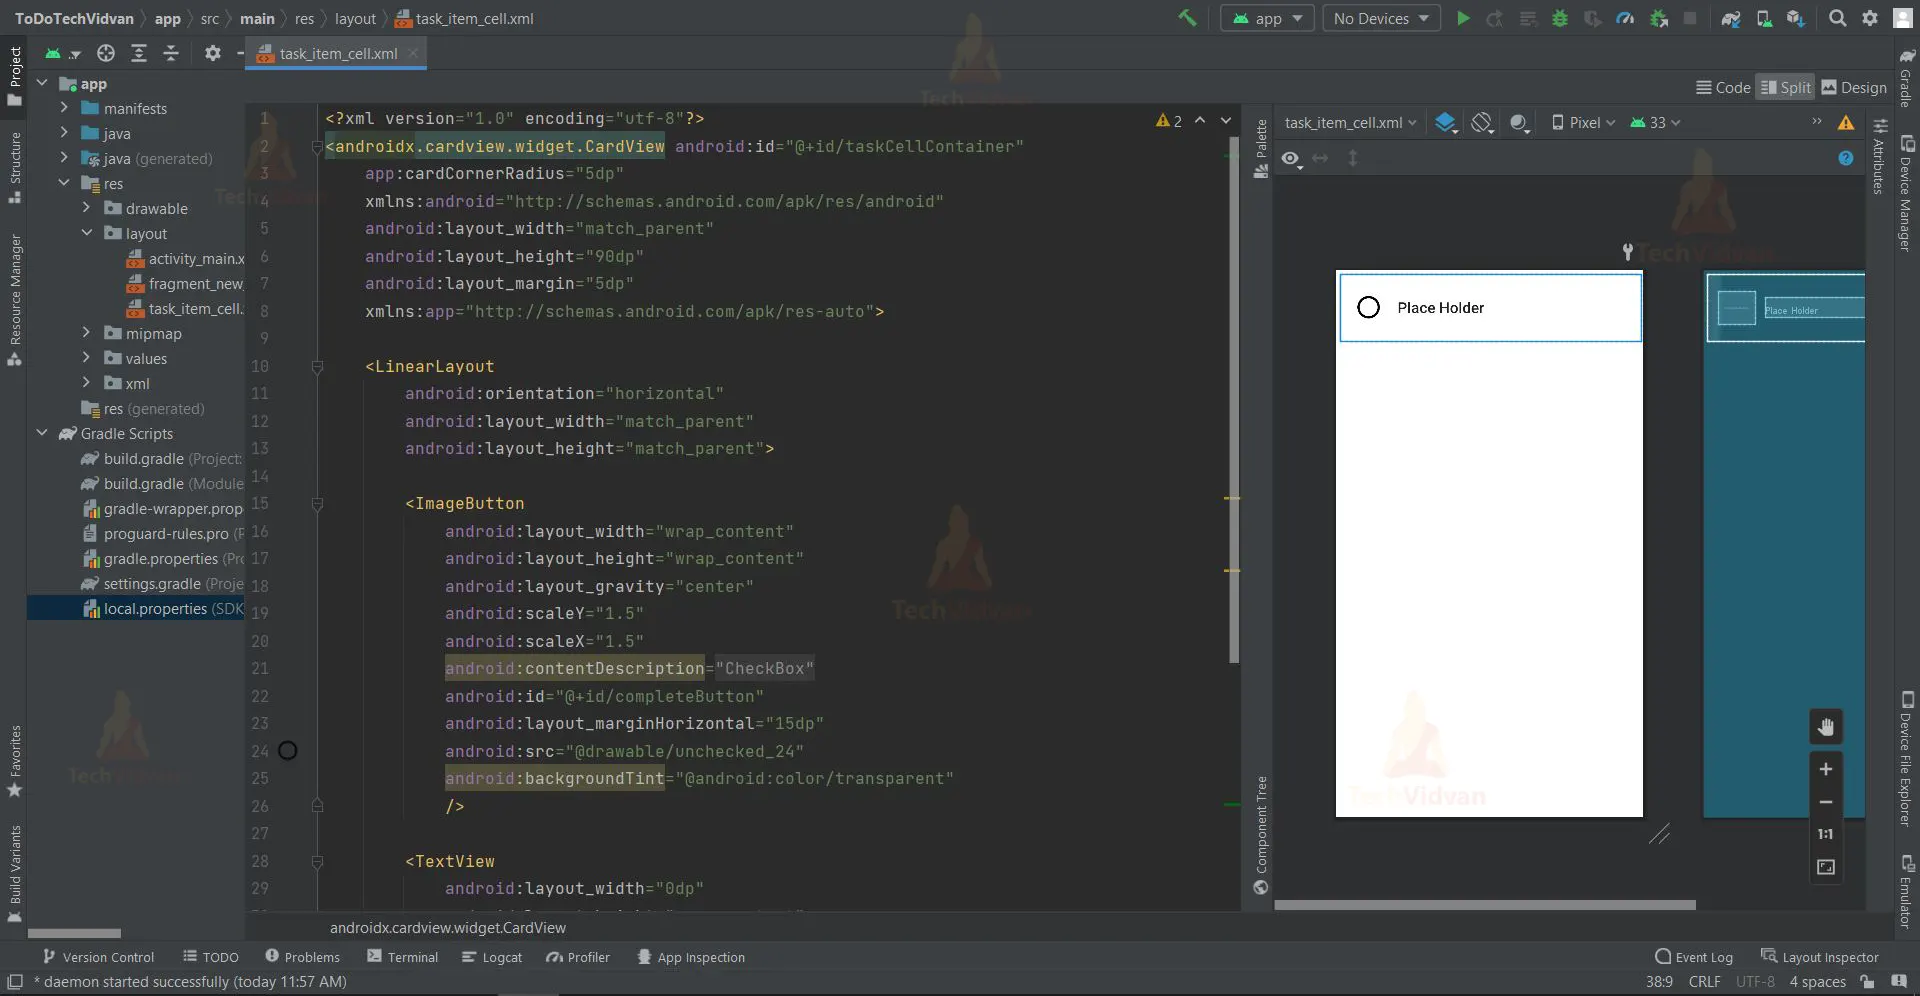
3. ‘Task_item_cell’ is a XML file which is responsible for creating the user interface (UI) for tasks that are presented on the home screen.
<?xml version="1.0" encoding="utf-8"?>
<androidx.cardview.widget.CardView android:id="@+id/taskCellContainer"
    app:cardCornerRadius="5dp"
    xmlns:android="http://schemas.android.com/apk/res/android"
    android:layout_width="match_parent"
    android:layout_height="90dp"
    android:layout_margin="5dp"
    xmlns:app="http://schemas.android.com/apk/res-auto">

    <LinearLayout
        android:orientation="horizontal"
        android:layout_width="match_parent"
        android:layout_height="match_parent">

        <ImageButton
            android:layout_width="wrap_content"
            android:layout_height="wrap_content"
            android:layout_gravity="center"
            android:scaleY="1.5"
            android:scaleX="1.5"
            android:contentDescription="@string/checkbox"
            android:id="@+id/completeButton"
            android:layout_marginHorizontal="15dp"
            android:src="@drawable/unchecked_24"
            android:backgroundTint="@android:color/transparent"
            />

        <TextView
            android:layout_width="0dp"
            android:layout_height="wrap_content"
            android:id="@+id/name"
            android:text="@string/place_holder"
            style="@style/TextAppearance.AppCompat.Title"
            android:layout_gravity="center"
            android:layout_weight="1"
            />
    </LinearLayout>
</androidx.cardview.widget.CardView>
Let’s start with setting up the necessary files required for creating a ROOM database that will store the task’s name and description.
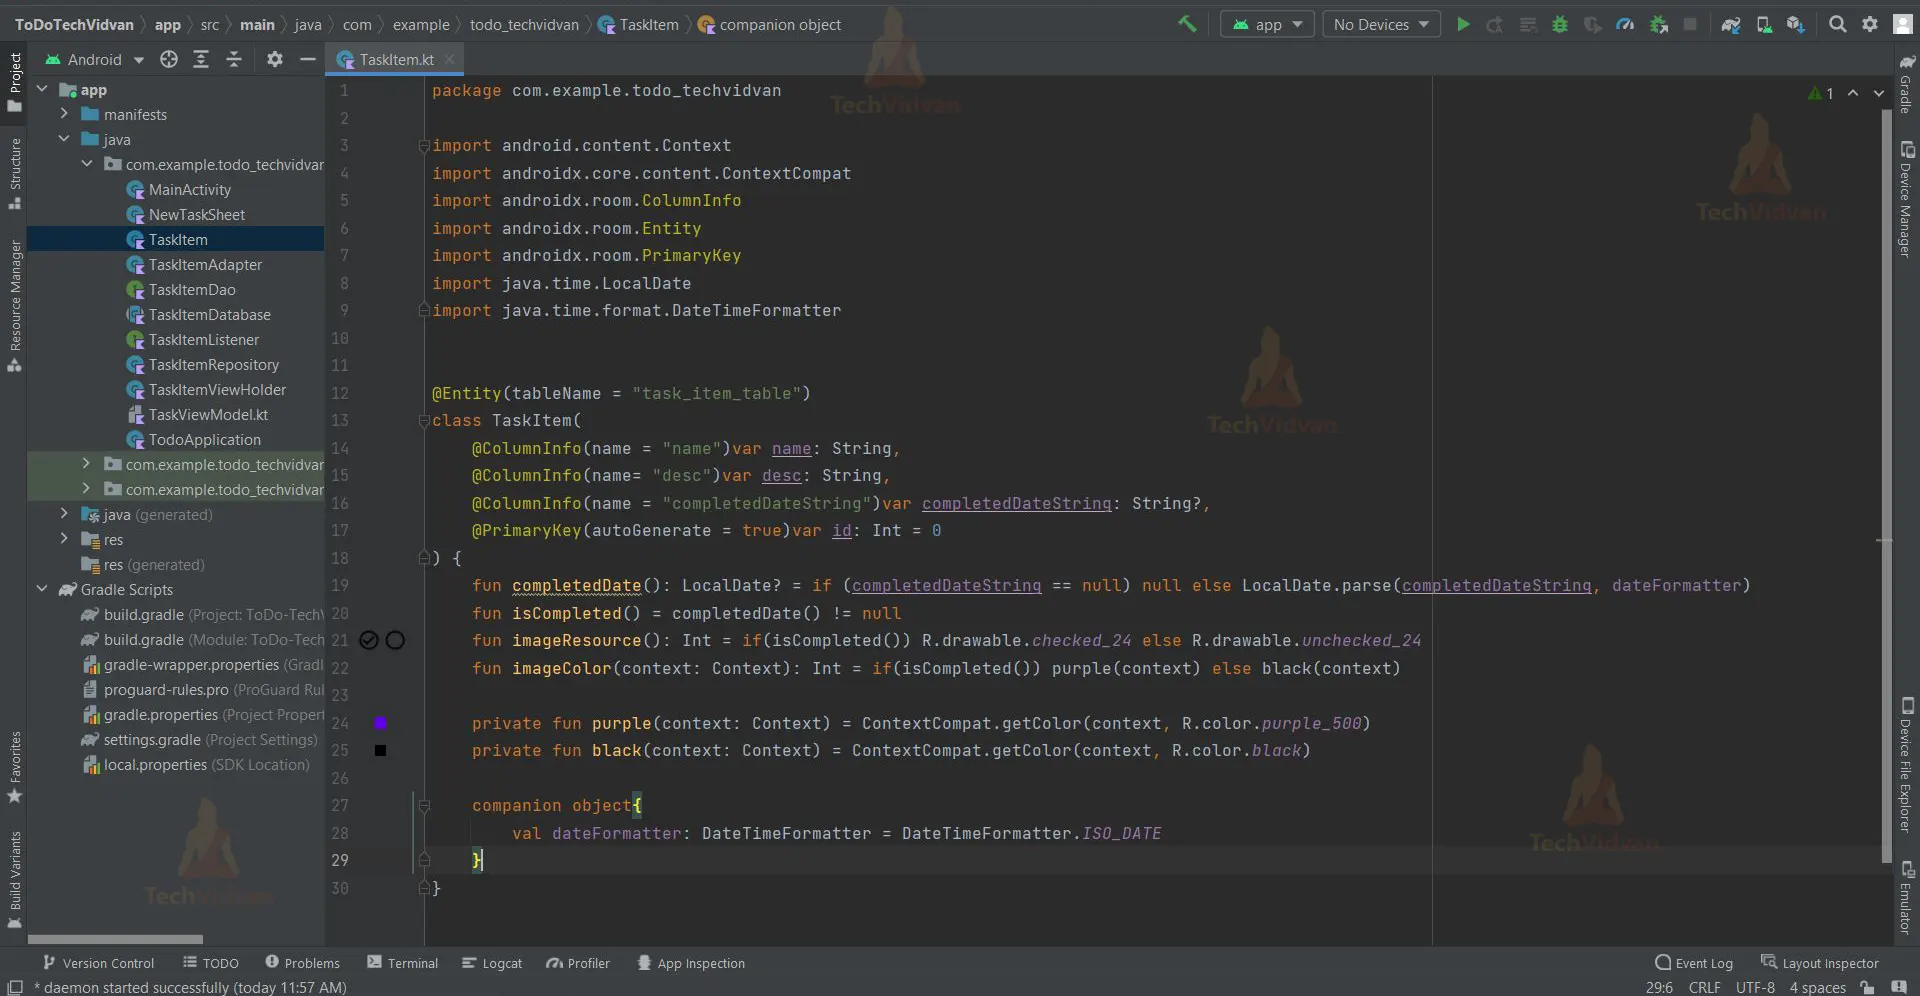
1. ‘TaskItem.kt’ is an entity file for the ROOM database that will be created when database is initialized. With the help of this file, respective table and columns will be created in the database.
Code:
import android.content.Context
import androidx.core.content.ContextCompat
import androidx.room.ColumnInfo
import androidx.room.Entity
import androidx.room.PrimaryKey
import java.time.LocalDate
import java.time.format.DateTimeFormatter


@Entity(tableName = "task_item_table")
class TaskItem(
    @ColumnInfo(name = "name")var name: String,
    @ColumnInfo(name= "desc")var desc: String,
    @ColumnInfo(name = "completedDateString")var completedDateString: String?,
    @PrimaryKey(autoGenerate = true)var id: Int = 0
) {
    fun completedDate(): LocalDate? = if (completedDateString == null) null else LocalDate.parse(completedDateString, dateFormatter)
    fun isCompleted() = completedDate() != null
    fun imageResource(): Int = if(isCompleted()) R.drawable.checked_24 else R.drawable.unchecked_24
    fun imageColor(context: Context): Int = if(isCompleted()) purple(context) else black(context)

    private fun purple(context: Context) = ContextCompat.getColor(context, R.color.purple_500)
    private fun black(context: Context) = ContextCompat.getColor(context, R.color.black)

    companion object{
        val dateFormatter: DateTimeFormatter = DateTimeFormatter.ISO_DATE
    }
}
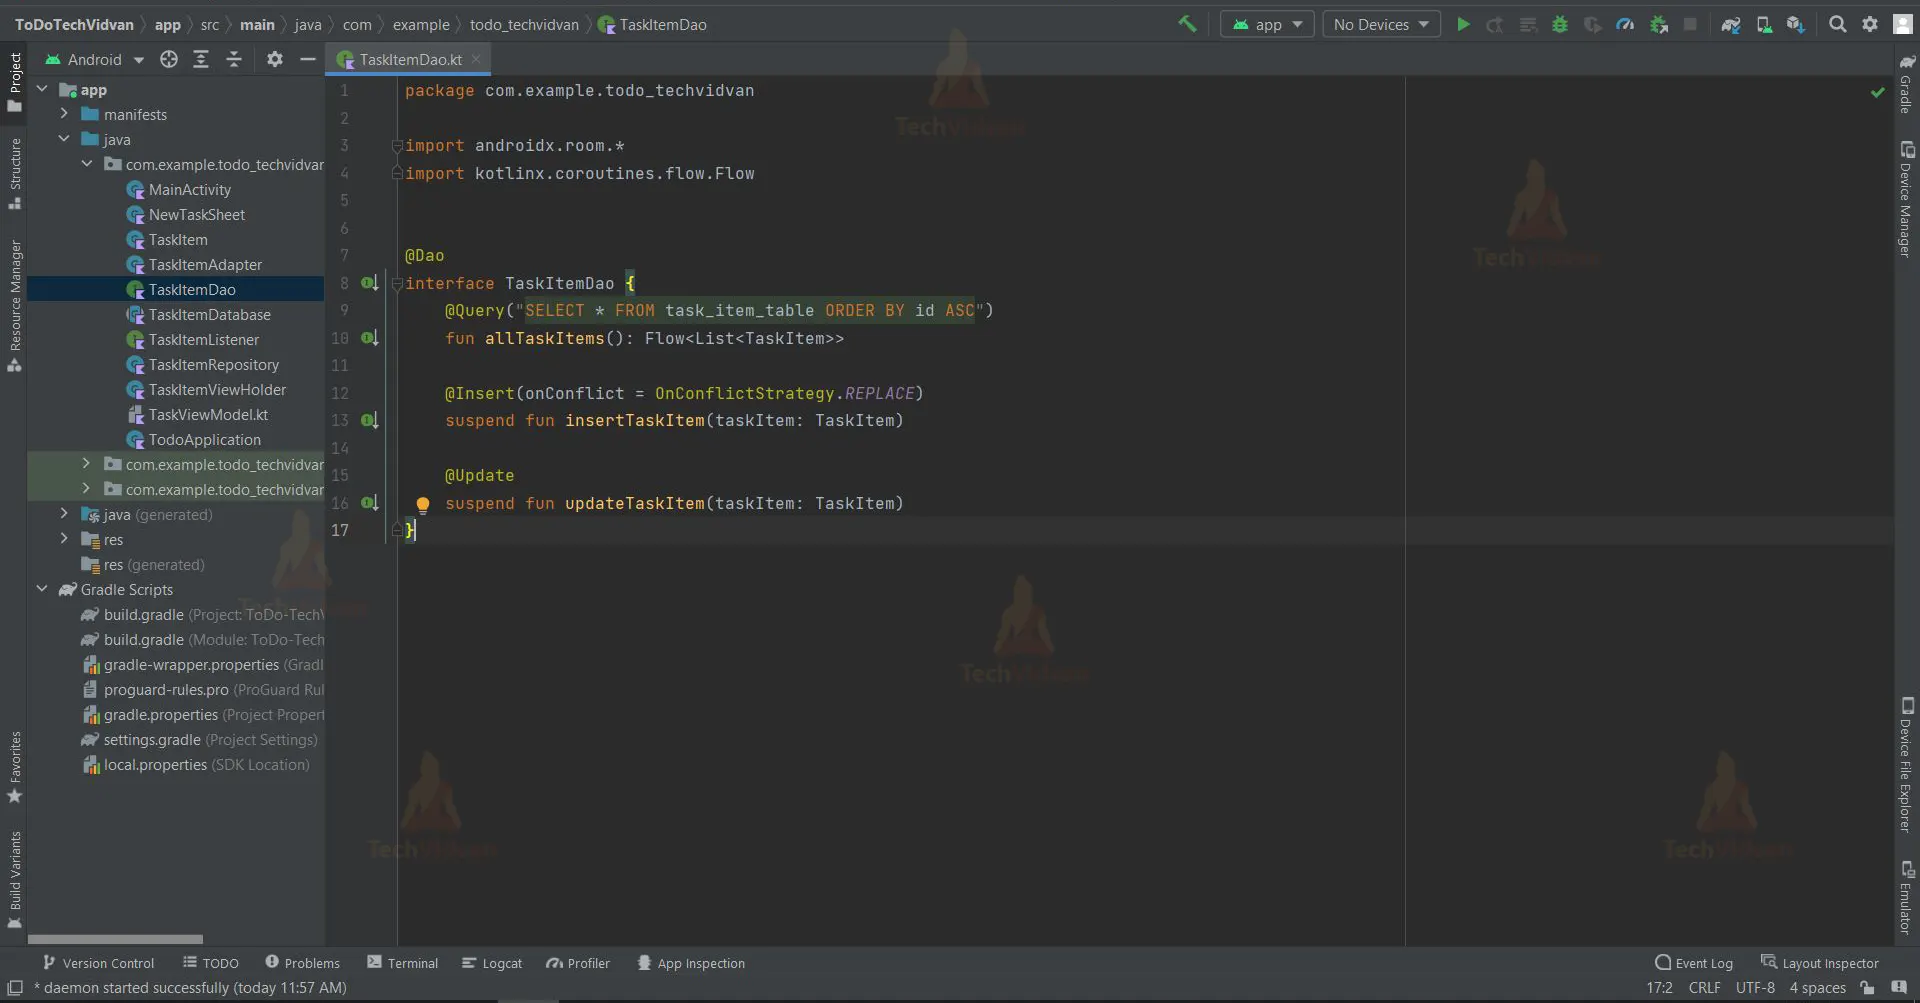
2. ‘TaskItemDAO.kt’ is an interface which is a data access object responsible for defining the methods that can access the database. Using annotations, we have defined ‘insert’ query in this file which will insert the data in the specified database table, ‘update’ which enables the user to update a task already stored in the database.
Code:
import androidx.room.*
import kotlinx.coroutines.flow.Flow


@Dao
interface TaskItemDao {
    @Query("SELECT * FROM task_item_table ORDER BY id ASC")
    fun allTaskItems(): Flow<List<TaskItem>>

    @Insert(onConflict = OnConflictStrategy.REPLACE)
    suspend fun insertTaskItem(taskItem: TaskItem)

    @Update
    suspend fun updateTaskItem(taskItem: TaskItem)
}
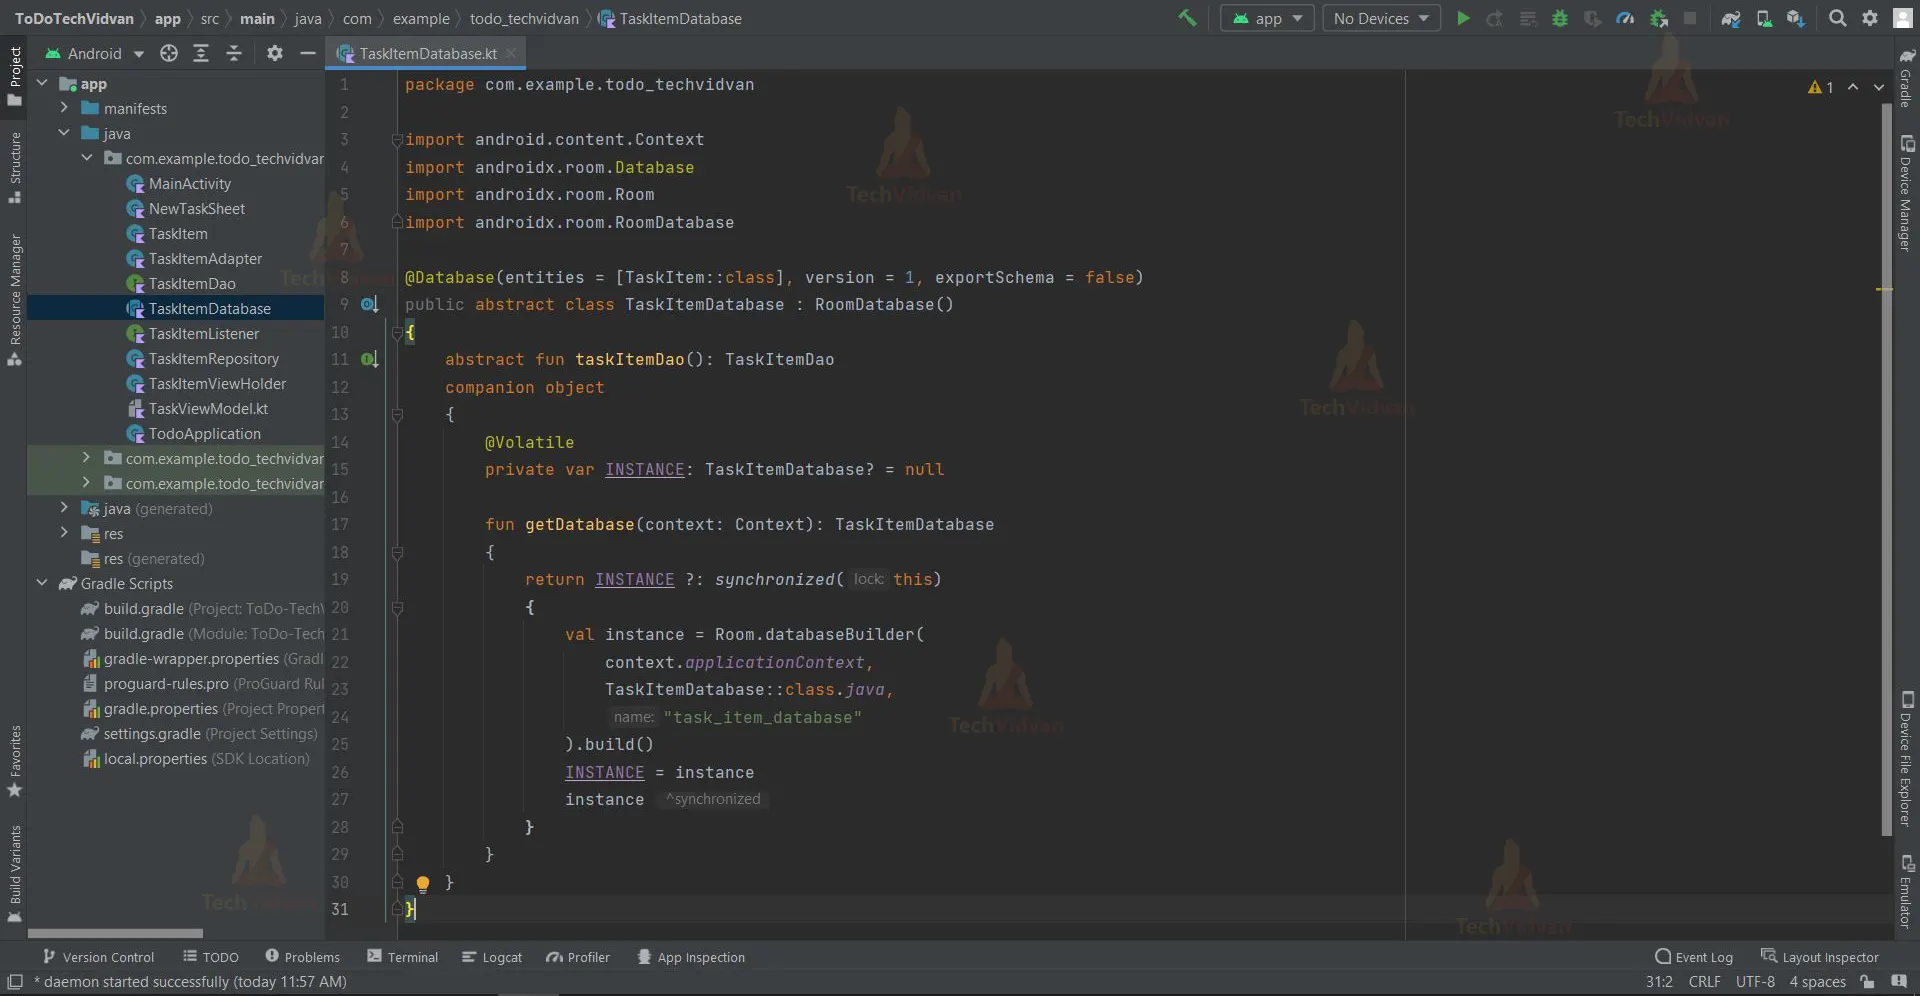
3. ‘AppDatabase.kt’ is an abstract class file which is responsible to initialize the database. In this file, the code makes sure that only one instance of the database is created even if it is a triggered multiple time.
Code:
import android.content.Context
import androidx.room.Database
import androidx.room.Room
import androidx.room.RoomDatabase
@Database(entities = [TaskItem::class], version = 1, exportSchema = false)
public abstract class TaskItemDatabase : RoomDatabase()
{
    abstract fun taskItemDao(): TaskItemDao

    companion object
    {
        @Volatile
        private var INSTANCE: TaskItemDatabase? = null
        fun getDatabase(context: Context): TaskItemDatabase
        {
            return INSTANCE ?: synchronized(this)
            {
                val instance = Room.databaseBuilder(
       		    context.applicationContext,
                    TaskItemDatabase::class.java,
                    "task_item_database"
                ).build()
                INSTANCE = instance
                instance
            }
        }
    }
}
Moving onto the files that are responsible for the working and functioning of the application.
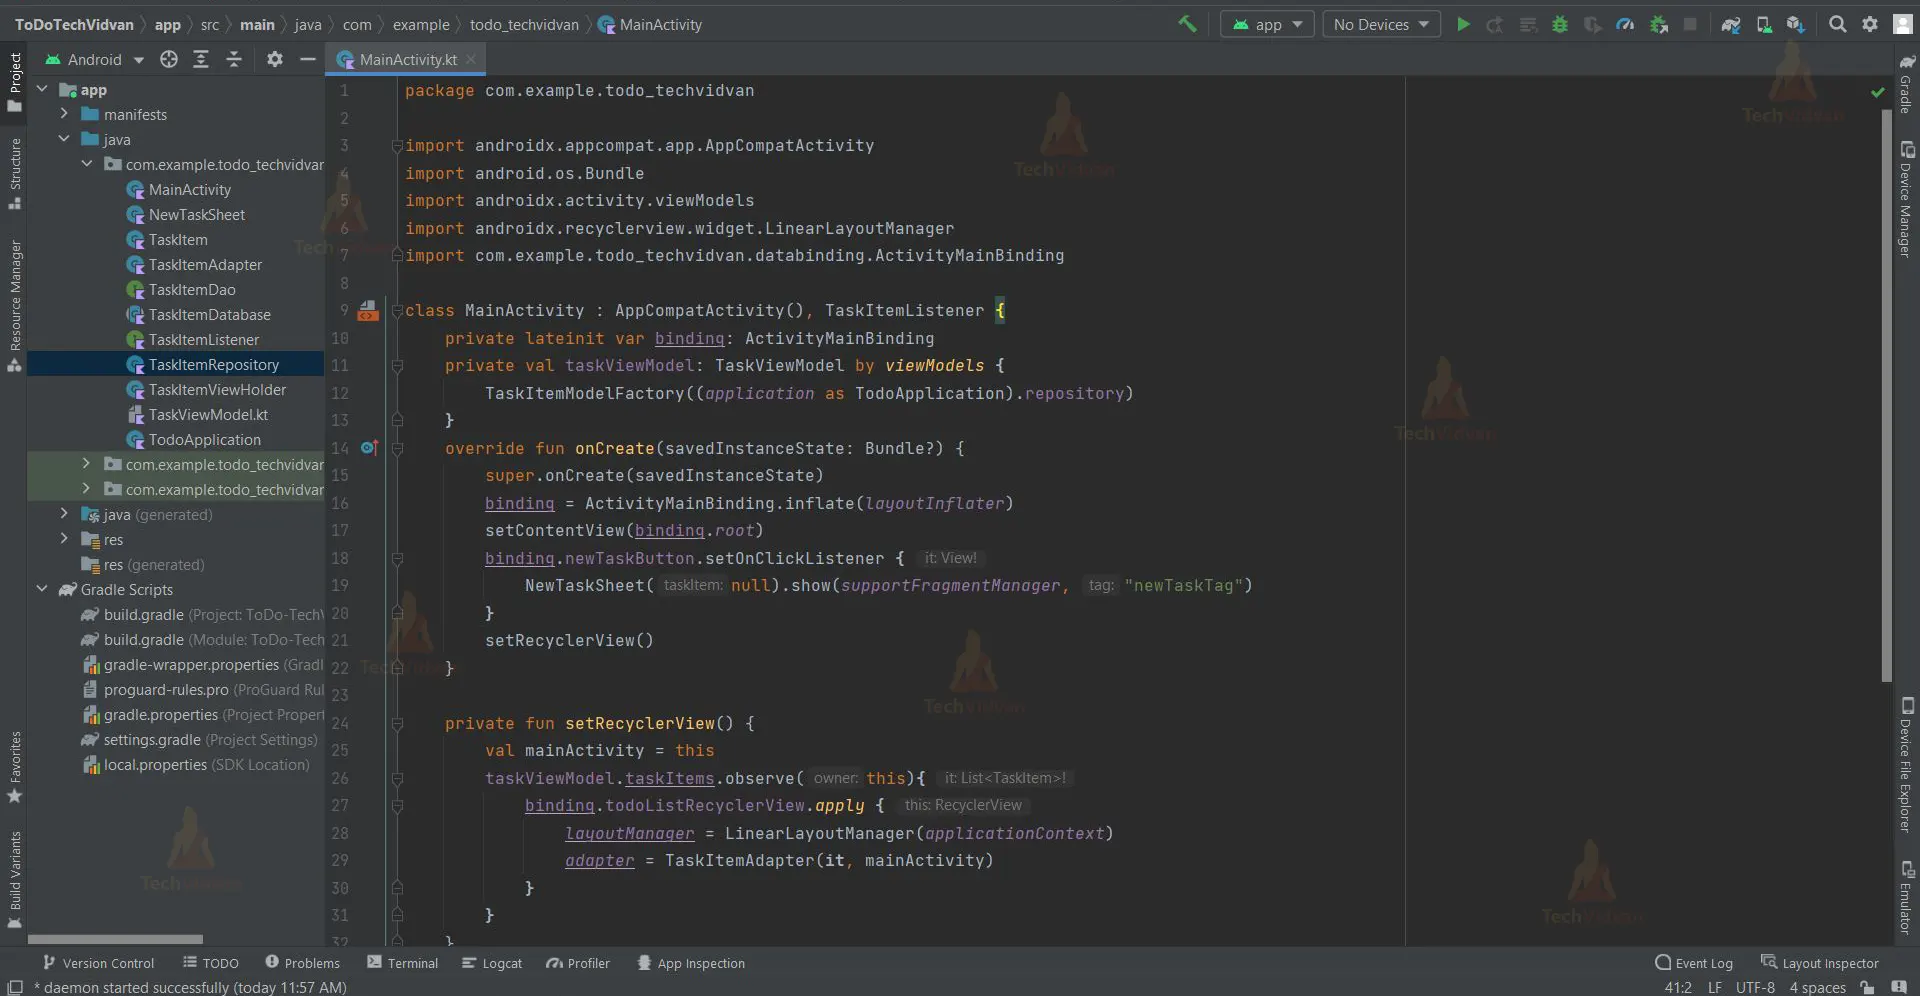
1. “MainActivity” is a kotlin file which is responsible to initialize our application.
This file contains various functions that are responsible for the working and functioning of our application.
Code:
import androidx.appcompat.app.AppCompatActivity
import android.os.Bundle
import androidx.activity.viewModels
import androidx.recyclerview.widget.LinearLayoutManager
import com.example.todo_techvidvan.databinding.ActivityMainBinding

class MainActivity : AppCompatActivity(), TaskItemListener {
    private lateinit var binding: ActivityMainBinding
    private val taskViewModel: TaskViewModel by viewModels {
        TaskItemModelFactory((application as TodoApplication).repository)
    }
    override fun onCreate(savedInstanceState: Bundle?) {
        super.onCreate(savedInstanceState)
        binding = ActivityMainBinding.inflate(layoutInflater)
        setContentView(binding.root)
        binding.newTaskButton.setOnClickListener {
            NewTaskSheet(null).show(supportFragmentManager, "newTaskTag")
        }
        setRecyclerView()
    }

    private fun setRecyclerView() {
        val mainActivity = this
        taskViewModel.taskItems.observe(this){
            binding.todoListRecyclerView.apply {
                layoutManager = LinearLayoutManager(applicationContext)
                adapter = TaskItemAdapter(it, mainActivity)
            }
        }
    }

    override fun editTaskItem(taskItem: TaskItem) {
        NewTaskSheet(taskItem).show(supportFragmentManager,"newTaskTag")
    }

    override fun completeTaskItem(taskItem: TaskItem) {
        taskViewModel.setCompleted(taskItem)
    }
}
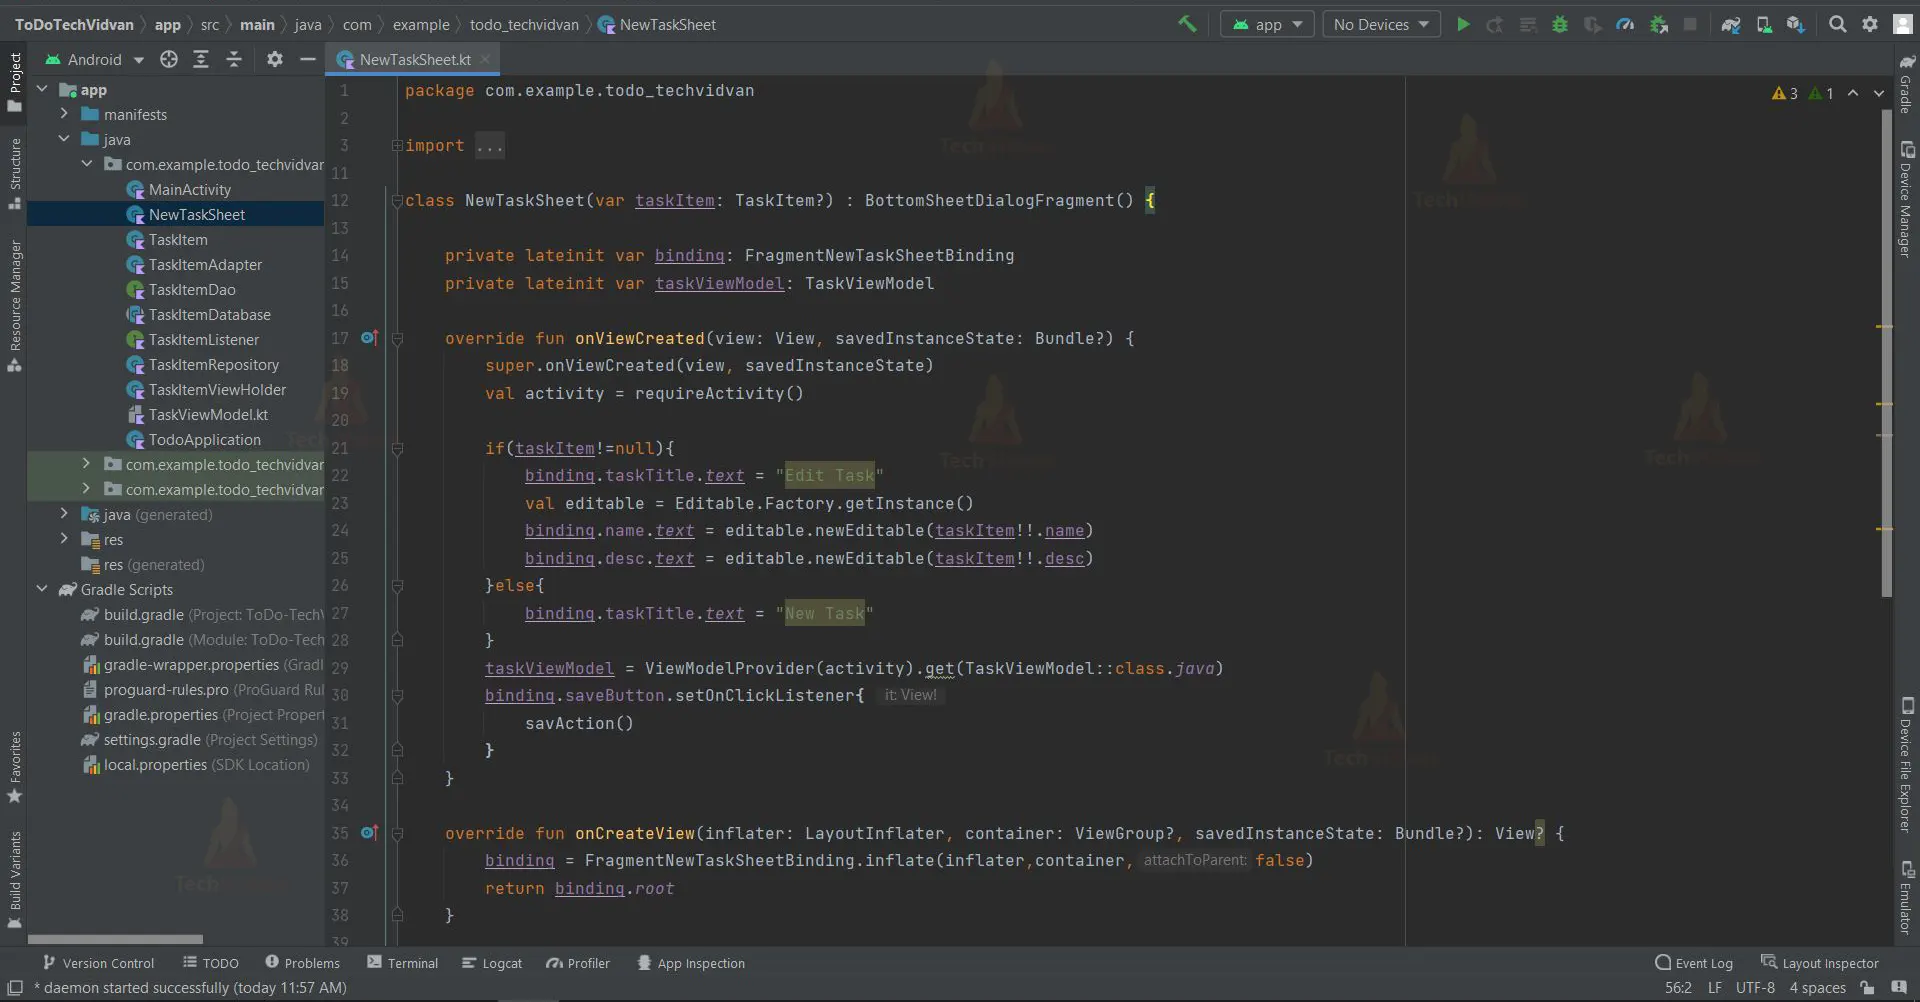
2. ‘NewTaskSheet’ is a kotlin file which initializes the fragment which allows the user to add new tasks.
Code:
import android.os.Bundle
import android.text.Editable
import android.view.LayoutInflater
import android.view.View
import android.view.ViewGroup
import androidx.lifecycle.ViewModelProvider
import com.example.todo_techvidvan.databinding.FragmentNewTaskSheetBinding
import com.google.android.material.bottomsheet.BottomSheetDialogFragment

class NewTaskSheet(var taskItem: TaskItem?) : BottomSheetDialogFragment() {

    private lateinit var binding: FragmentNewTaskSheetBinding
    private lateinit var taskViewModel: TaskViewModel

    override fun onViewCreated(view: View, savedInstanceState: Bundle?) {
        super.onViewCreated(view, savedInstanceState)
        val activity = requireActivity()

        if(taskItem!=null){
            binding.taskTitle.text = "Edit Task"
            val editable = Editable.Factory.getInstance()
            binding.name.text = editable.newEditable(taskItem!!.name)
            binding.desc.text = editable.newEditable(taskItem!!.desc)
        }else{
            binding.taskTitle.text = "New Task"
        }
        taskViewModel = ViewModelProvider(activity).get(TaskViewModel::class.java)
        binding.saveButton.setOnClickListener{
            savAction()
        }
    }

    override fun onCreateView(inflater: LayoutInflater, container: ViewGroup?, savedInstanceState: Bundle?): View? {
        binding = FragmentNewTaskSheetBinding.inflate(inflater,container,false)
        return binding.root
    }


    private fun savAction() {
       val name = binding.name.text.toString()
       val desc = binding.desc.text.toString()
        if(taskItem==null){
            val newTask = TaskItem(name,desc,null)
            taskViewModel.addTaskItem(newTask)
        }else{
            taskItem!!.name = name
            taskItem!!.desc = desc
            taskViewModel.updateTaskItem(taskItem!!)
        }
        binding.name.setText("")
        binding.desc.setText("")
        dismiss()
    }
}
3. ‘TaskItemAdapter.kt’ is a class which contains some important functions to work with the RecyclerView, they are mentioned as follows:
- onCreateViewHolder(): This function sets the views to display the items.
- onBindViewHolder(): This function is used to bind the list items to our widgets such as TextView, ImageView, etc.
- getItemCount(): It returns the count of items present in the list.
Code:
import android.view.LayoutInflater
import android.view.ViewGroup
import androidx.recyclerview.widget.RecyclerView
import com.example.todo_techvidvan.databinding.TaskItemCellBinding

class TaskItemAdapter(
    private val taskItems: List<TaskItem>,
    private val clickListener: TaskItemListener
): RecyclerView.Adapter<TaskItemViewHolder>() {
    override fun onCreateViewHolder(parent: ViewGroup, viewType: Int): TaskItemViewHolder {
        val from = LayoutInflater.from(parent.context)
        val binding = TaskItemCellBinding.inflate(from, parent, false)
        return TaskItemViewHolder(parent.context, binding, clickListener)
    }

    override fun onBindViewHolder(holder: TaskItemViewHolder, position: Int) {
        holder.bindTaskItem(taskItems[position])
    }

    override fun getItemCount(): Int = taskItems.size
}
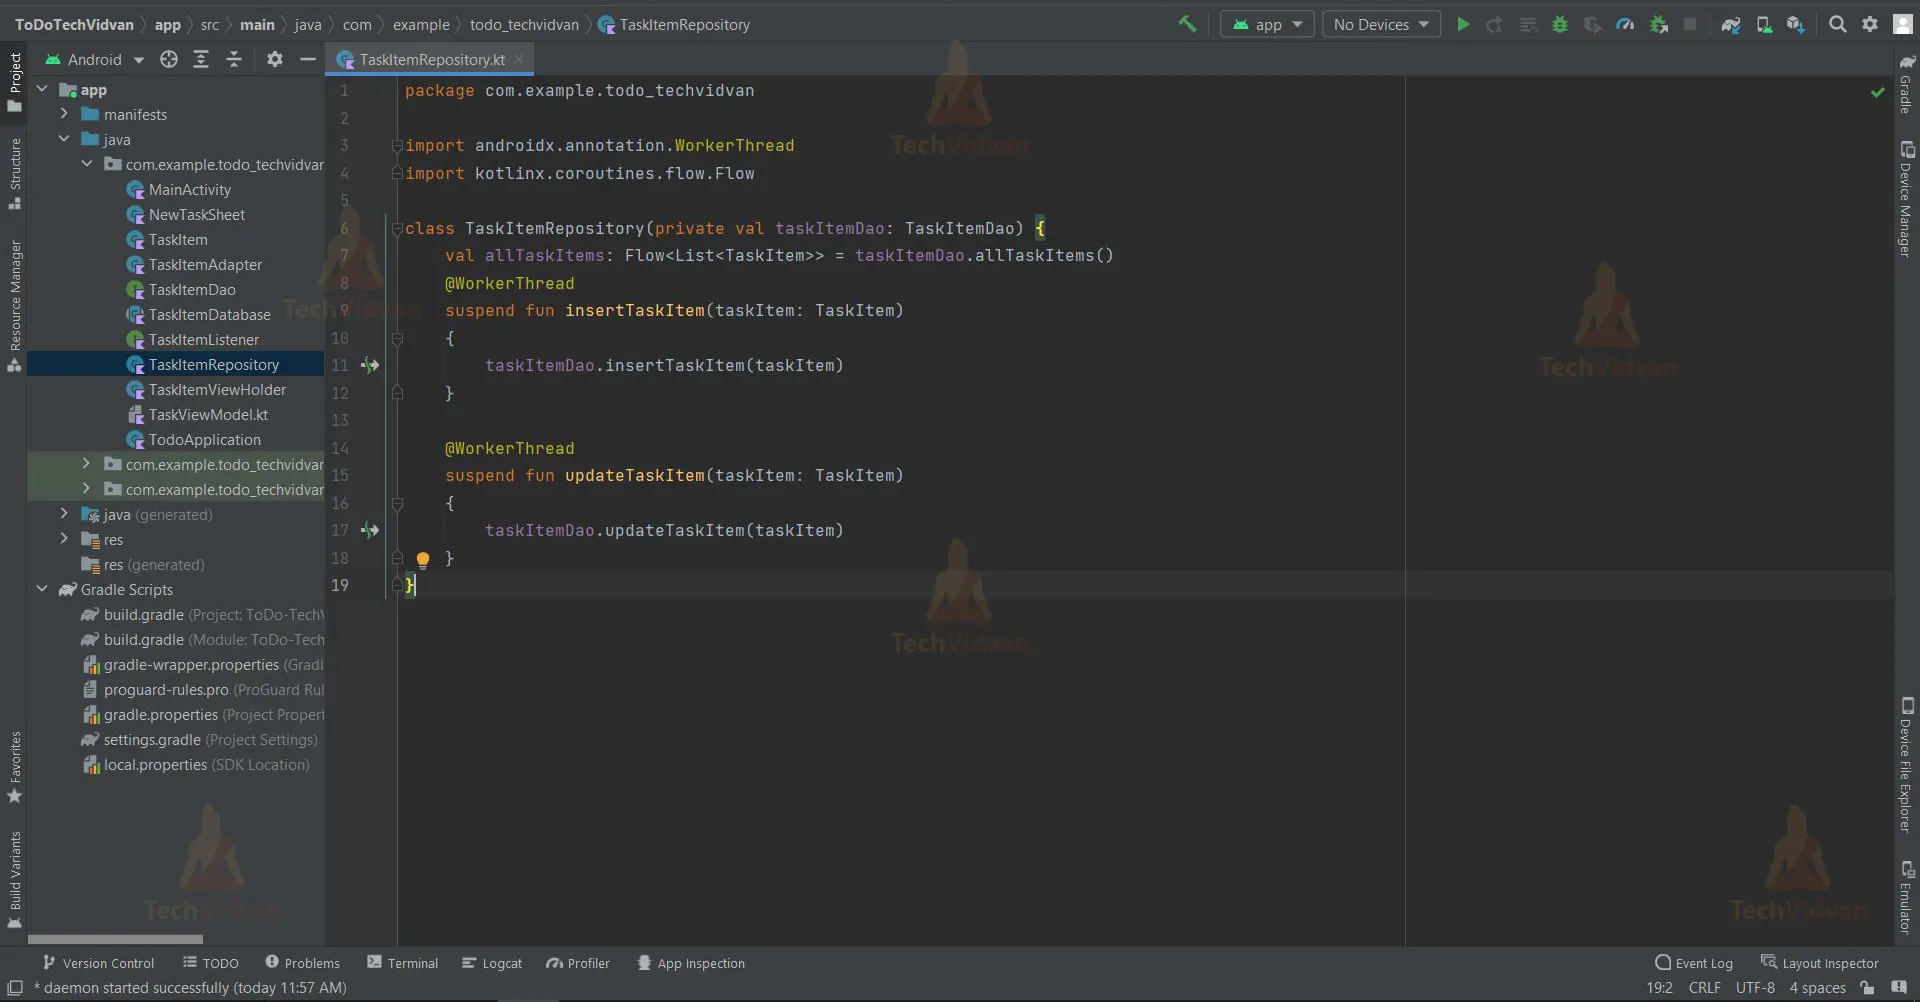
4. ‘TaskItemRepository.kt’ is a kotlin class which contains worker threads to insert and update the items in the database.
import androidx.annotation.WorkerThread
import kotlinx.coroutines.flow.Flow

class TaskItemRepository(private val taskItemDao: TaskItemDao) {
    val allTaskItems: Flow<List<TaskItem>> = taskItemDao.allTaskItems()
    @WorkerThread
    suspend fun insertTaskItem(taskItem: TaskItem)
    {
        taskItemDao.insertTaskItem(taskItem)
    }

    @WorkerThread
    suspend fun updateTaskItem(taskItem: TaskItem)
    {
        taskItemDao.updateTaskItem(taskItem)
    }
}
5. ‘TaskItemViewHolder.kt’ is a kotlin class which overlooks when a task is completed or being edited and performs the functions defined inside it accordingly.
import android.content.Context
import android.graphics.Paint
import androidx.recyclerview.widget.RecyclerView
import com.example.todo_techvidvan.databinding.TaskItemCellBinding


class TaskItemViewHolder(
    private val context: Context,
    private val binding: TaskItemCellBinding,
    private val clickListener: TaskItemListener
): RecyclerView.ViewHolder(binding.root) {
    fun bindTaskItem(taskItem: TaskItem)
    {
        binding.name.text = taskItem.name

        if(taskItem.isCompleted()){
            binding.name.paintFlags = Paint.STRIKE_THRU_TEXT_FLAG
        }

        binding.completeButton.setImageResource(taskItem.imageResource())
        binding.completeButton.setColorFilter(taskItem.imageColor(context))

        binding.completeButton.setOnClickListener {
            clickListener.completeTaskItem(taskItem)
        }

        binding.taskCellContainer.setOnClickListener{
            clickListener.editTaskItem(taskItem)
        }
    }
}

6. ‘TodoApplication.kt’ is a kotlin file which initializes the instance of the database when the app is launched.
import android.app.Application

class TodoApplication:Application() {
    private val database by lazy { TaskItemDatabase.getDatabase(this) }
    val repository by lazy { TaskItemRepository(database.taskItemDao()) }
}

Android Todo-List App Output
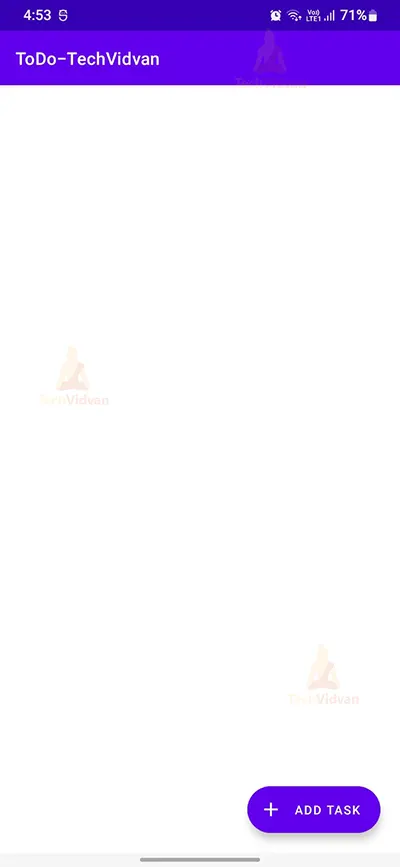
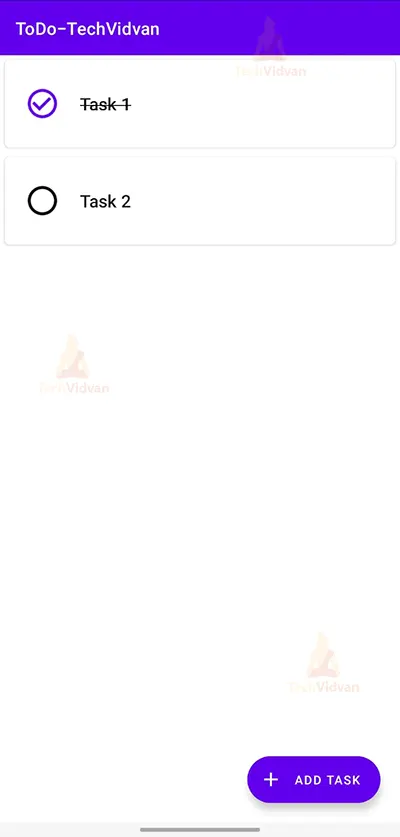
1. Home Screen
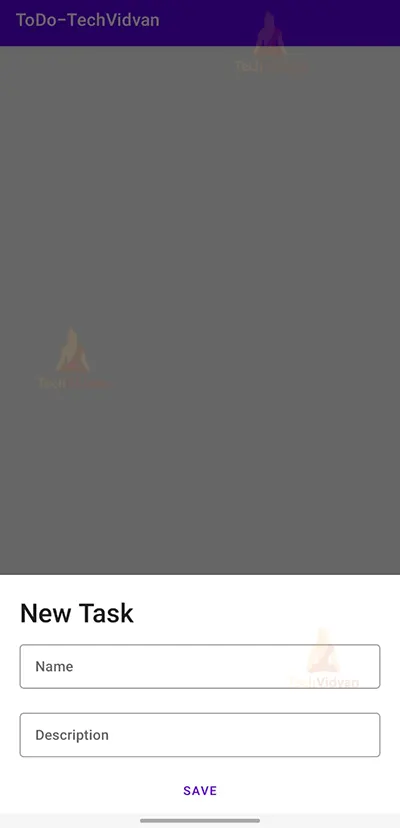
2. New Task sheet fragment when the ‘add task’ button clicked.
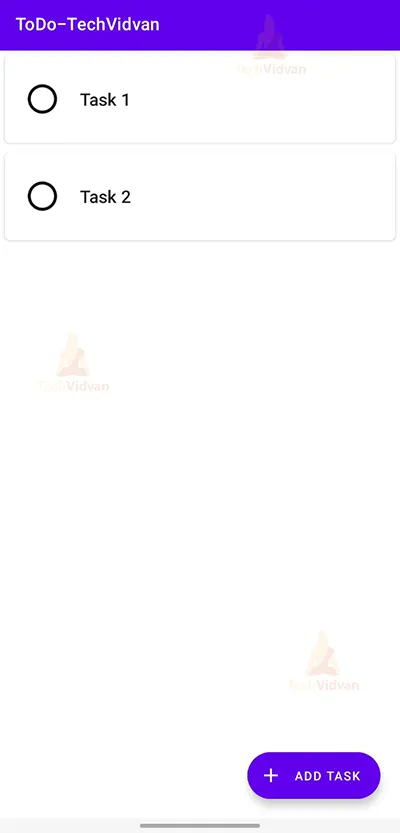
3. New entered task displayed on the home screen
4. Updating/Editing a task by clicking on it.
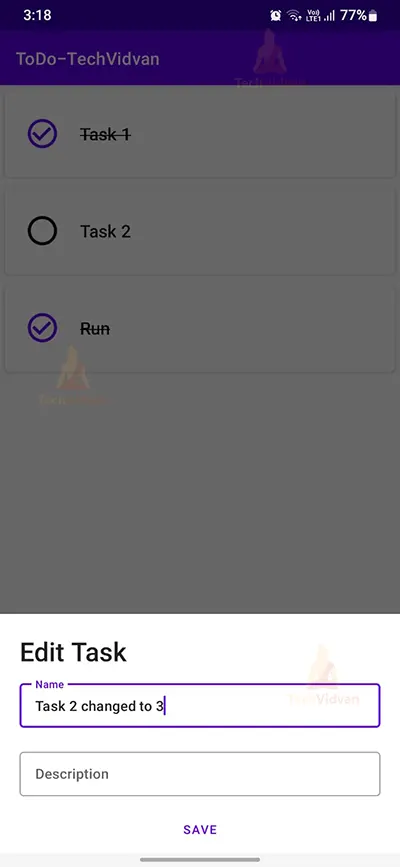
5. Updated/Edited Task.

6. Ticking off tasks that have been finished.
Summary
So in this project, we have learned how to create and develop a todo list app in android studio. This project is highly beneficial for beginners since it familiarizes users with utilizing XML to create user interfaces, switching between activities by clicking a button, using ROOM database, especially when inserting data into the database, getting familiar with recycler view and its working. We sincerely hope you enjoyed it, and we are sure you will enjoy implementing it into reality.