Android Virtual Device
In this article, we will delve into the Android Virtual Device (AVD). We’ll explore what an AVD is and why it has become so popular among developers today. As the name suggests, an Android Virtual Device is a virtual replica of a physical Android device, mirroring its functionality. This tool has numerous applications in Android development, and we’ll cover all of them in detail. By the end, you’ll also learn how to set up your own Android Virtual Device using Android Studio, enhancing your development process. Let’s start!
About Android Virtual Device(AVD)
Android Virtual Device(AVD) is a software representation of an actual world physical android device. In other words, it doesn’t have any physical existence but behaves like a physical android device itself. It has everything which you think a physical machine would have.
Whether it’s storage, audio, notifications, applications, etc., all are present in the android virtual device. Most of the android virtual devices are self-configurable. In other words, you can configure the hardware and the version of android which you wish to operate on.
Why Android Virtual Device?
We understood what an android virtual device is from the above, but now the question arises, “Why do we need it?” We already have many physical android devices available then why android virtual device is so popular. So, there are several use cases of android virtual devices, which makes their existence more popular.
Suppose you are an android developer but don’t have an android device at all. In such cases, to test your application will you purchase a new phone? The answer is No, not at all. You can simply use an android virtual device to test your applications.
The other use case is supposed when you wish to test your application on a specific android version. Then would you hunt for a device with that particular android version? No, you won’t. You shall go for an android virtual device that is flexible with the configurations and allows you to decide and alter its configuration whenever required.
Similarly, many other use cases of the android virtual devices make it so essential for android developers.
Who uses Android Virtual Device?
As discussed before, android virtual devices are highly used by android developers. But it’s not just restricted to android developers. Even regular users can use it if they require it. Most gamers worldwide use android virtual devices to play games that their actual physical devices won’t support.
Most of the time, the physical android devices with higher configurations cost a lot and can’t afford it. You can use an android virtual device to configure the software and hardware requirements you require in those circumstances.
Features of Android Virtual Device(AVD)
Android Virtual Device brings many features that make it so popular among developers, gamers, and android users. Let’s see a few of the features of AVD before proceeding with the setup.
- It is self-configurable and allows users to pick up any android version of their choice.
- It provides storage and also allows applications to be installed.
- This behaves mostly like your actual physical device and provides most of the functionalities.
- You can alter the appearance of your android virtual device depending on your needs.
- Android Virtual Device is as secure as your physical device.
Setting up your Android Virtual Device
Now, it’s time for us to explore the steps to set up your Android Virtual Device.
Step 1: Start your Android Studio and click on Tools —-> AVD Manager. The AVD Manager window will appear on your Android Studio, as shown below.
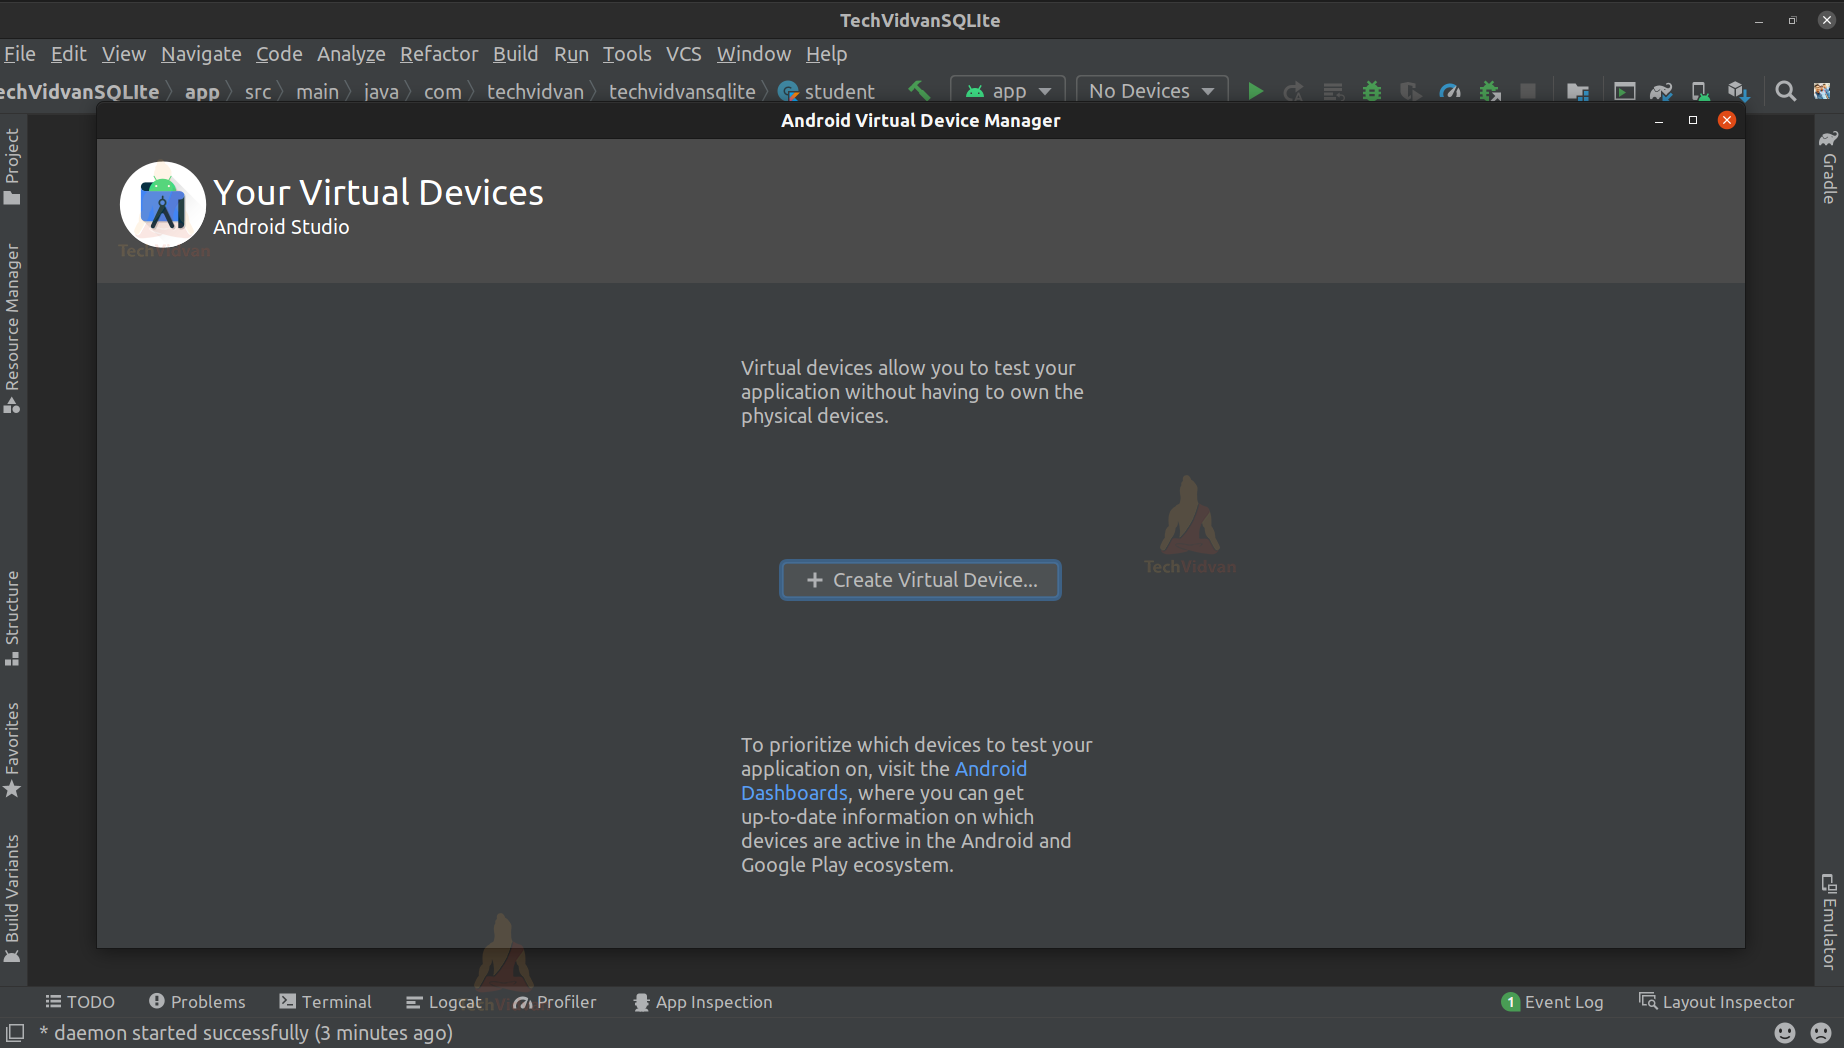
Step 2: Now, you can see a button “Create Virtual Device.” Simply click on it, and it will redirect you to another window where you will be asked to select your hardware requirements.
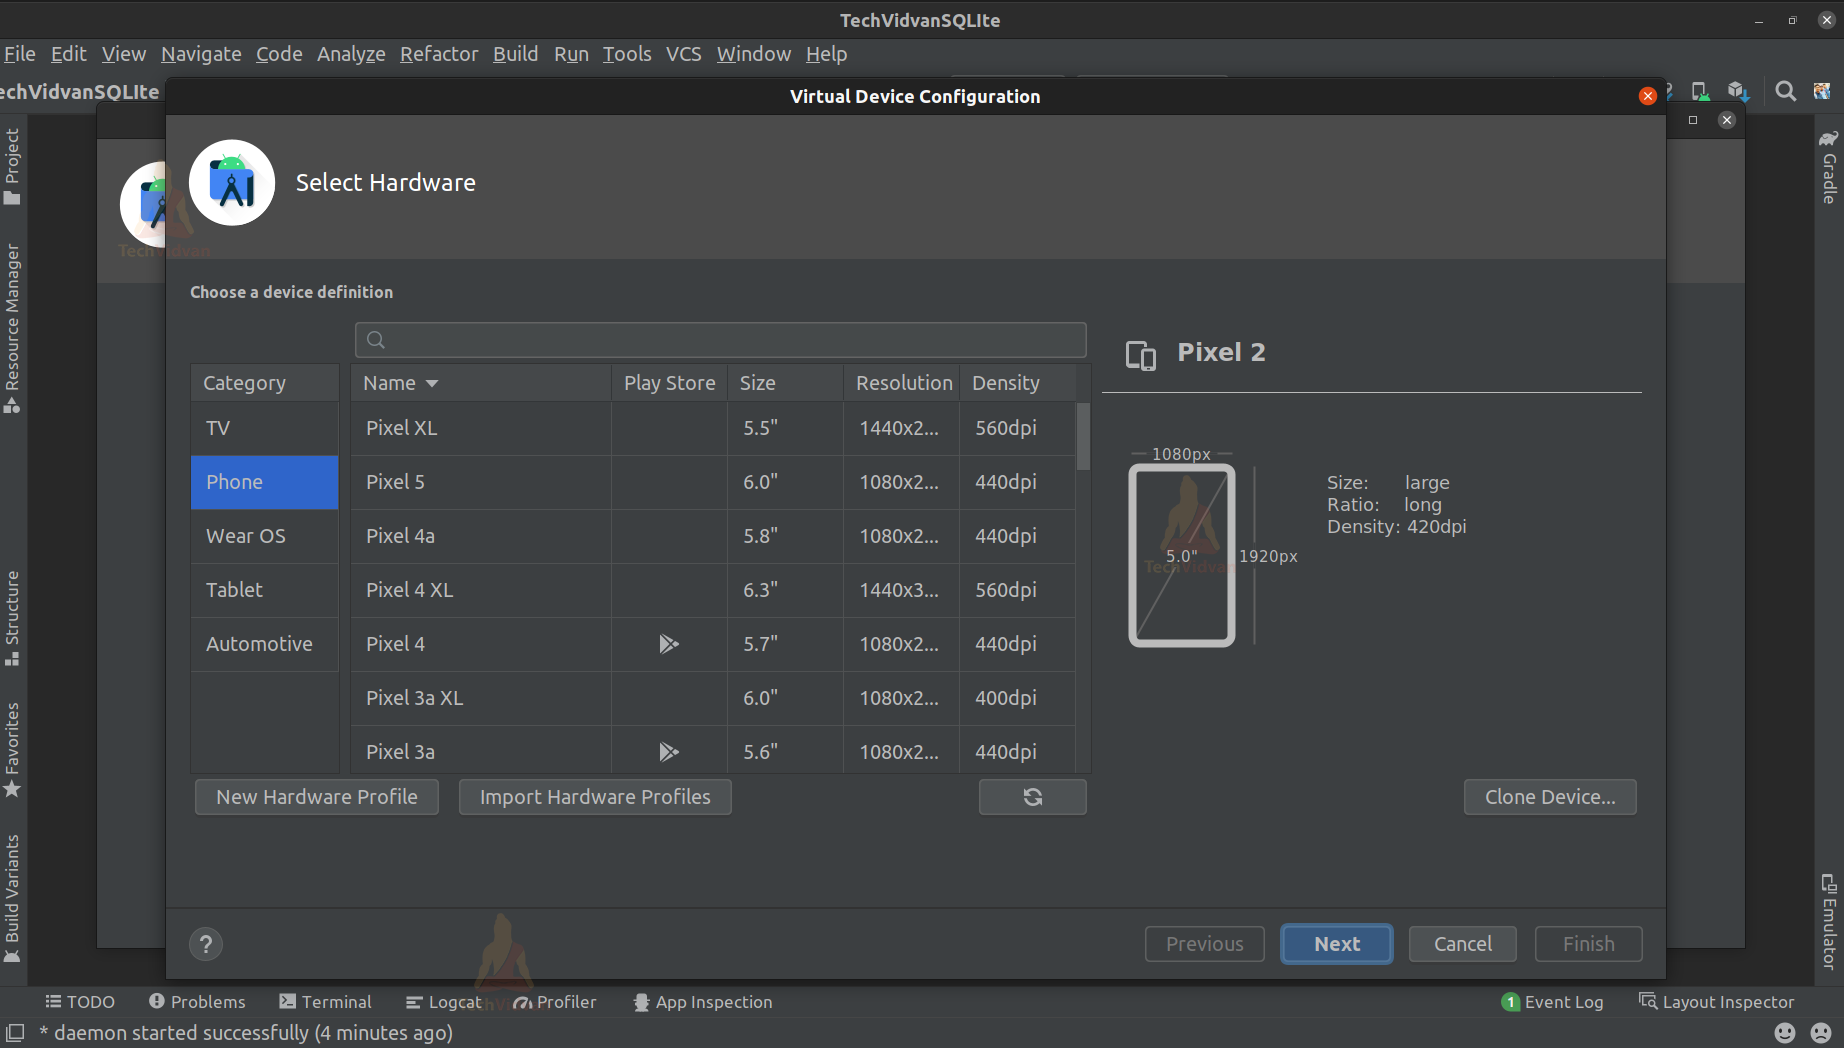
Step 3: Now, simply select the type of device and the model you wish to have. I am choosing the device type as a phone and the model as Pixel 2 XL for my case. After selecting these, press on Next.

Step 4: Now, you will see a window seeking to select the system image you wish to have for your device. Here, the system image simply means the version of android you want to have.
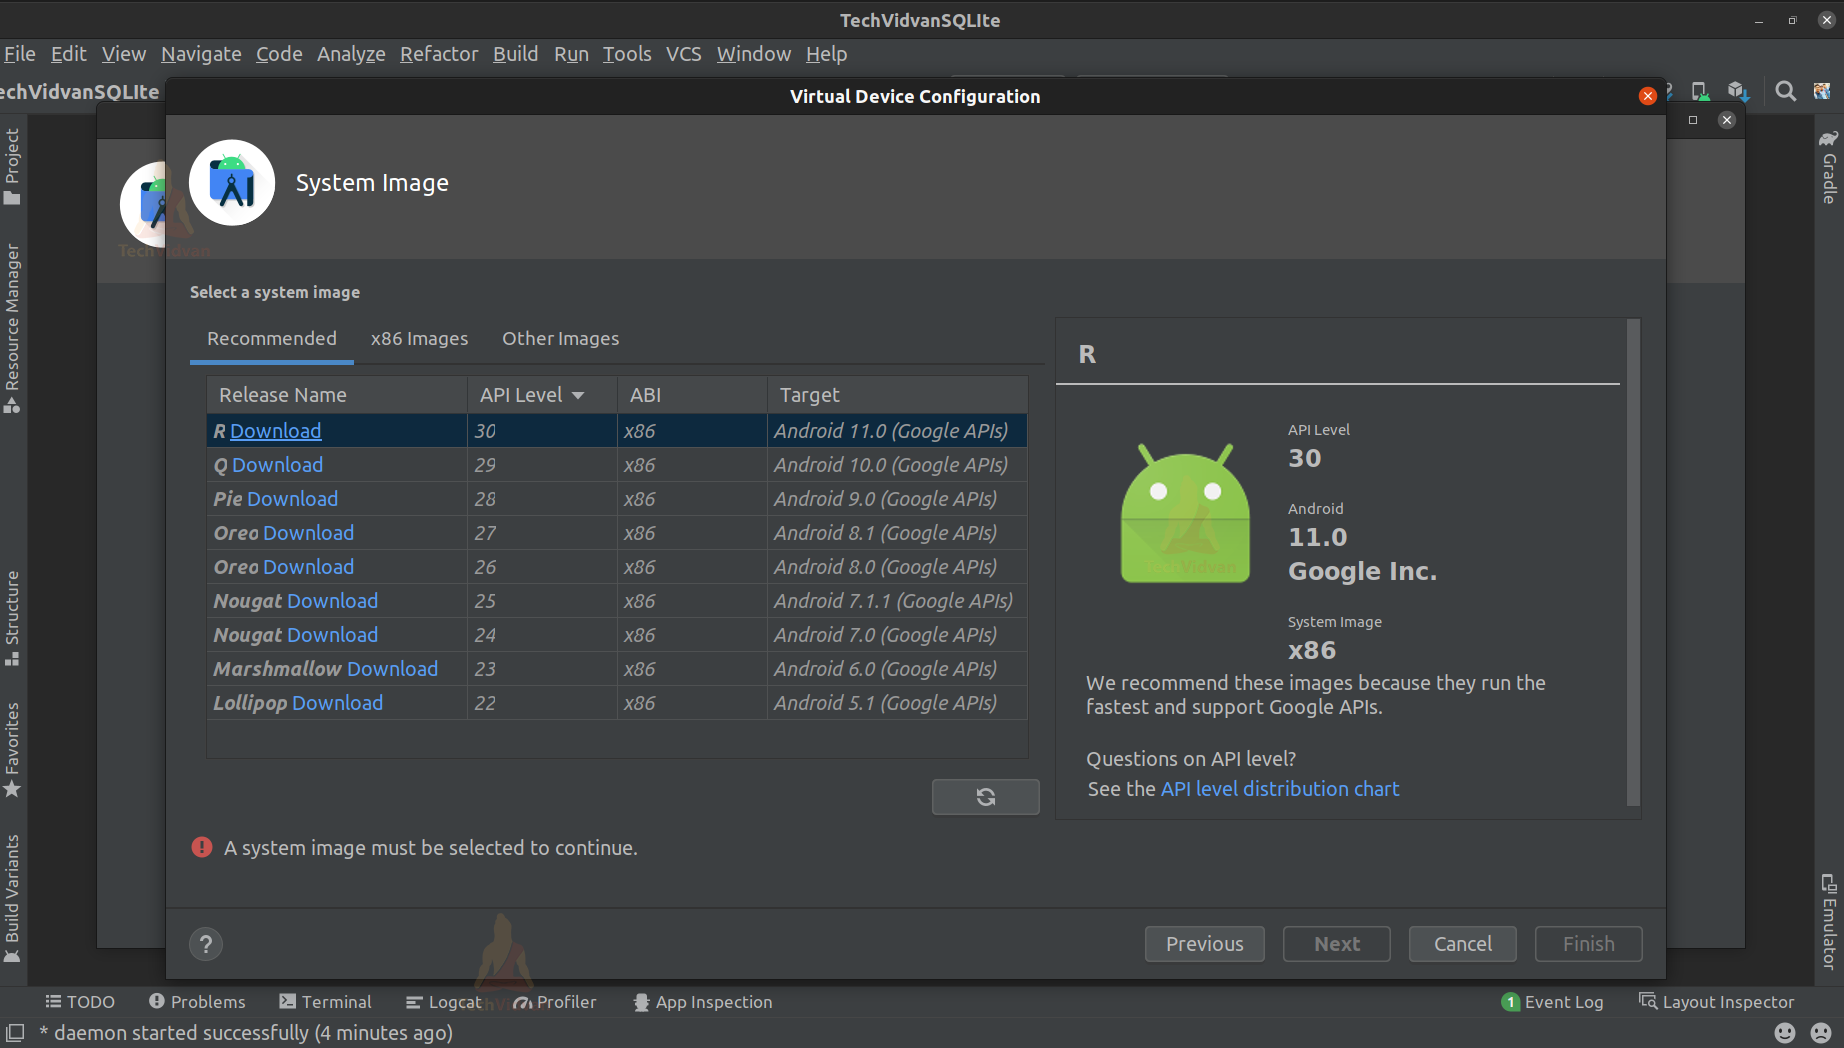
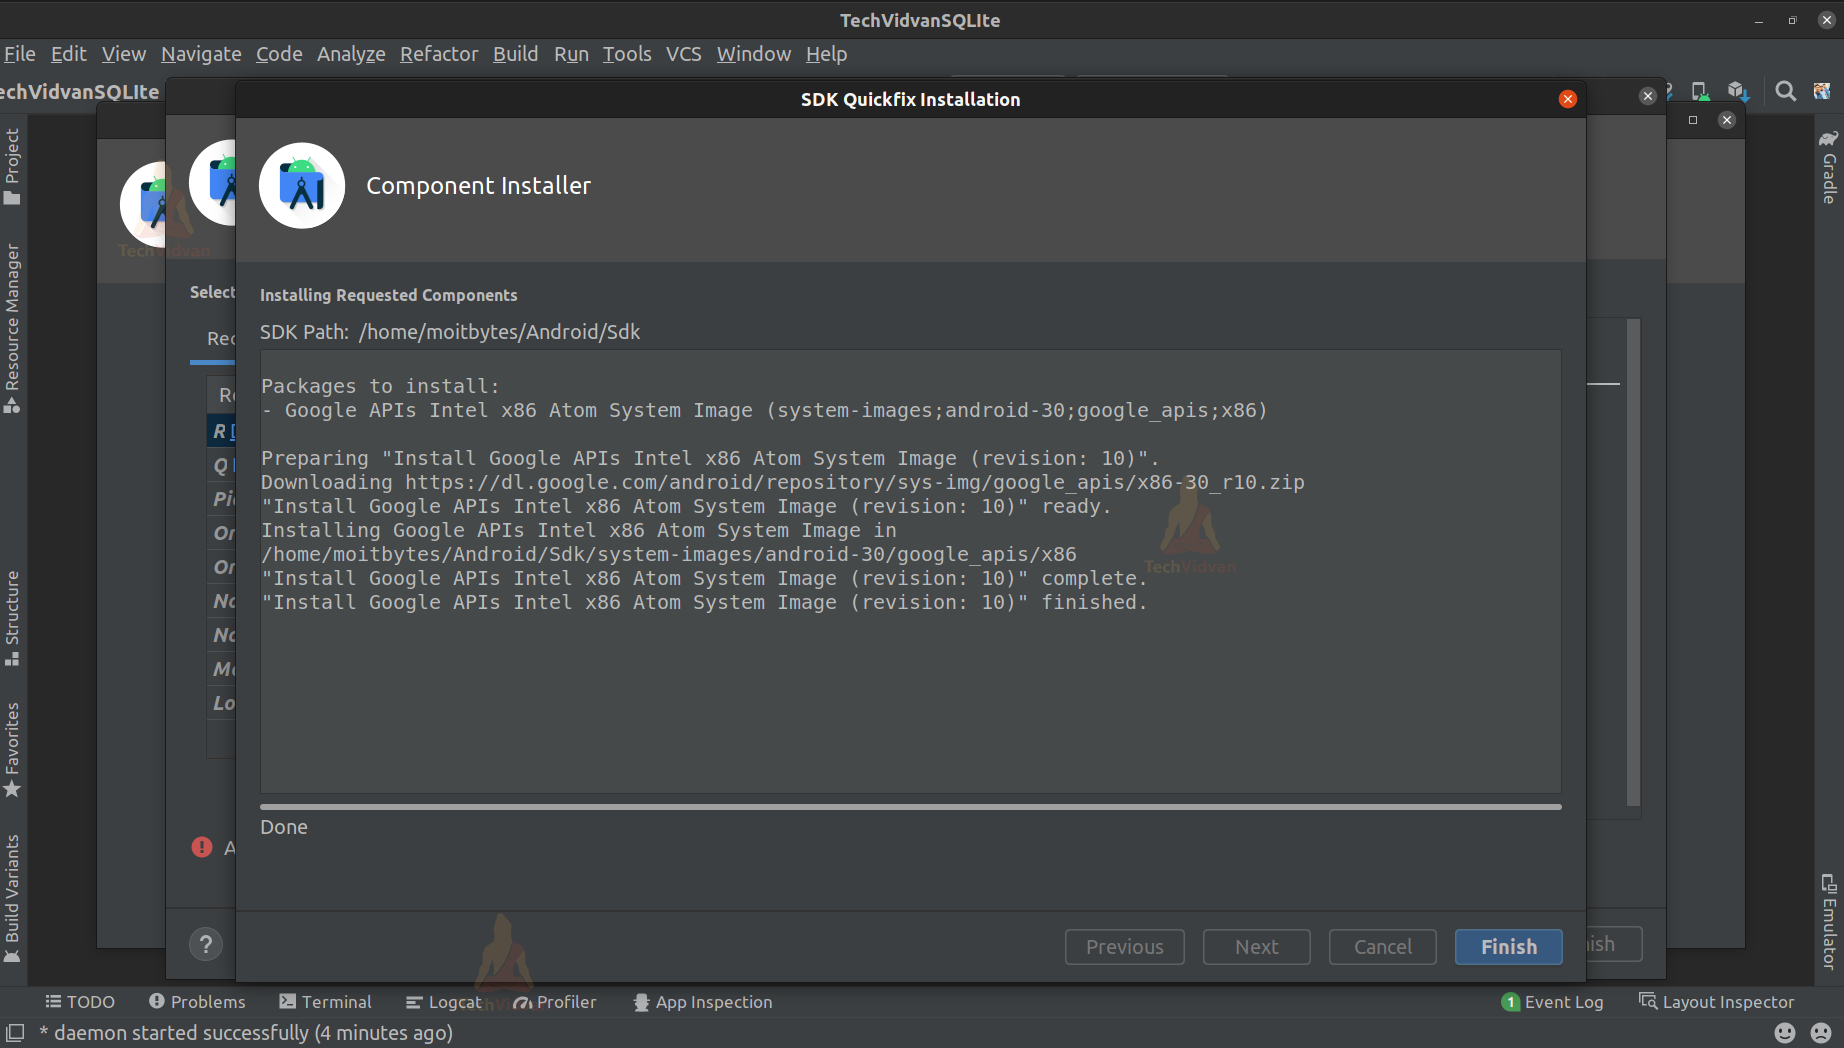
Step 5: For my case, I am selecting Android R (or Android 11) as my device’s system image. To choose the android version, I need to press the download button present beside the Android version. After pressing the download button, the download of the system image will start, as shown below.
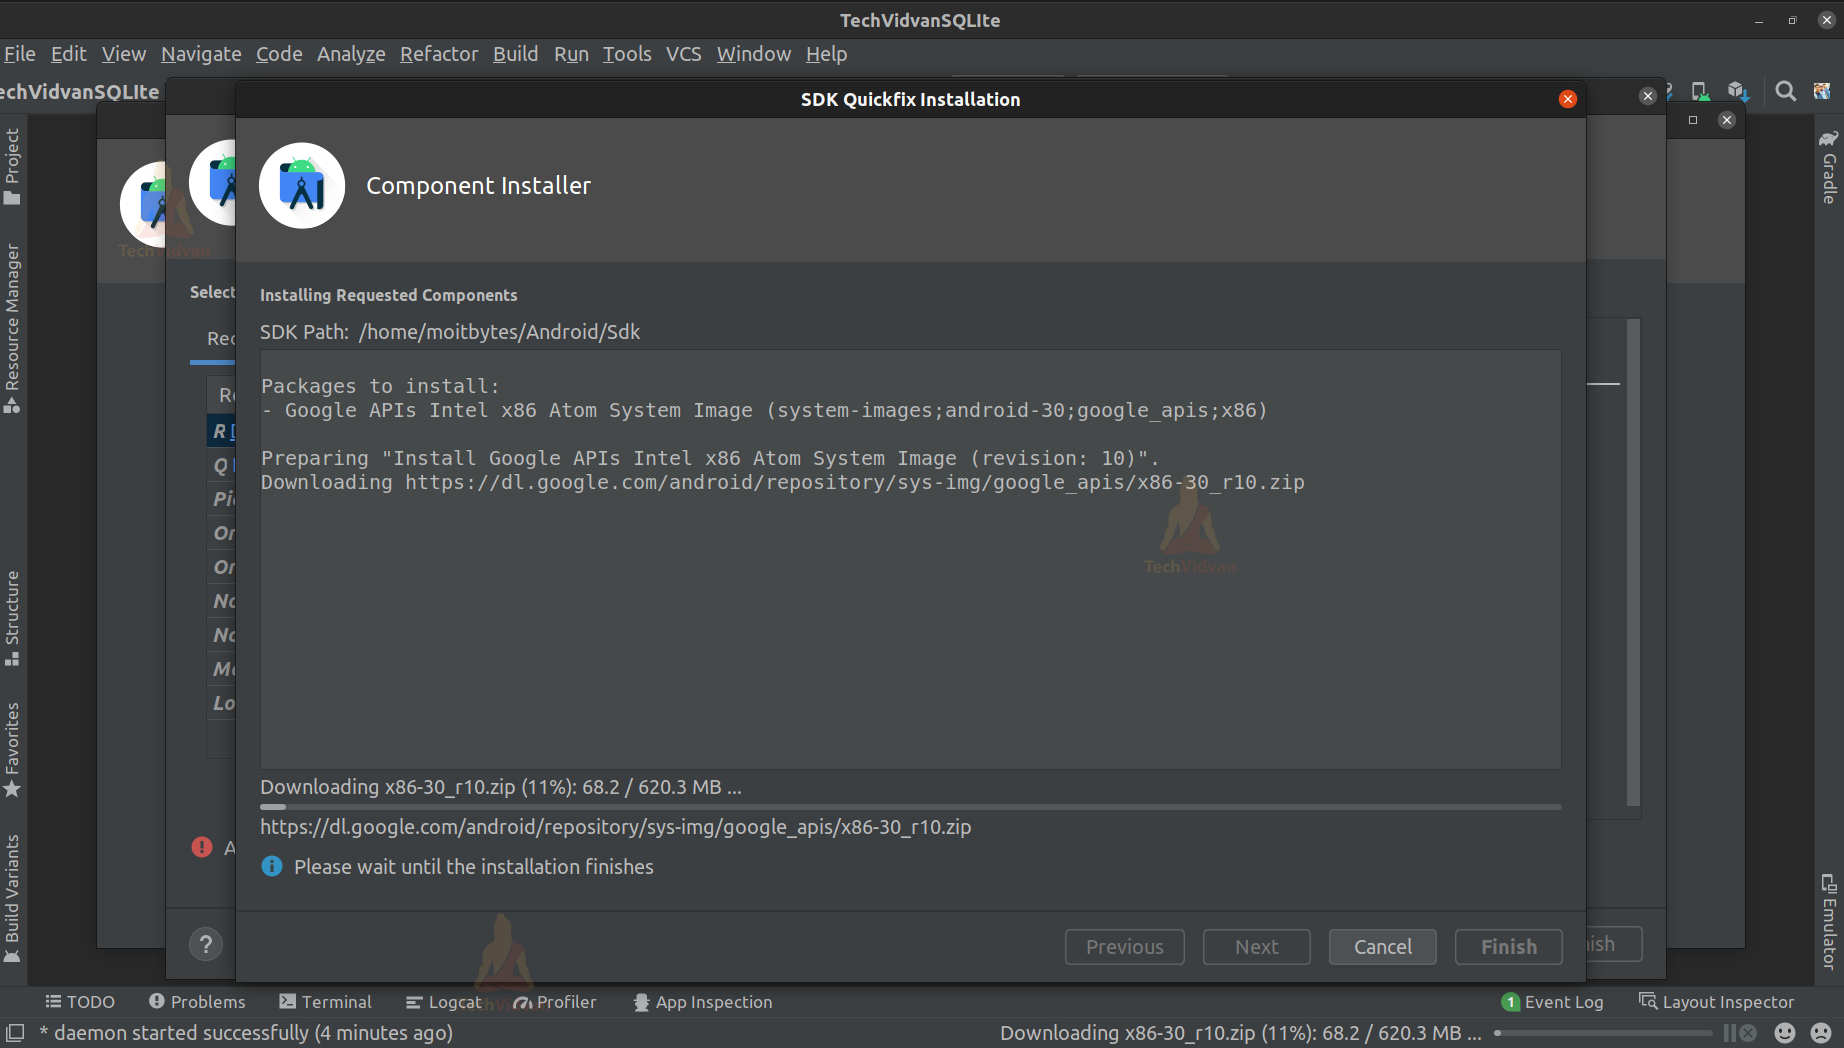
Step 6: After the download is accomplished, simply press on Finish and then press Next, as shown below.

Step 7: After pressing Next, you will be redirected to a window where you need to enter the name of your AVD and select the graphics hardware. You can provide the desired name for your AVD, for instance, “TechVidvan AVD.”

Now click on Finish, and your AVD setup will accomplish.
Step 8: Now, you can see the available Virtual devices in your Android Studio, as shown below.

You need to go to the actions block and press the play button to start the Android Virtual Device in your system.
Summary
You came across what an Android Virtual Device is and why it is so essential these days through this article. You came across its features, setup and several users for whom this is most beneficial.