Animation in Android with Examples
In this article, we will proceed with another exciting topic called Animation in Android. You can use animations to make your design more attractive. The animation means making graphical items move, shift or reform.
Animation is built in several ways, and we will try to cover each of them through this article. You will also find how you can develop your animations on android.
How to apply animation to Android UI components?
As we already know, applying animation to your design makes your design more attractive and gives an edge to your application. I hope you are already aware of Android UI elements like Text View, Image View, etc.
Now let’s see how you can apply animations to those UI elements.
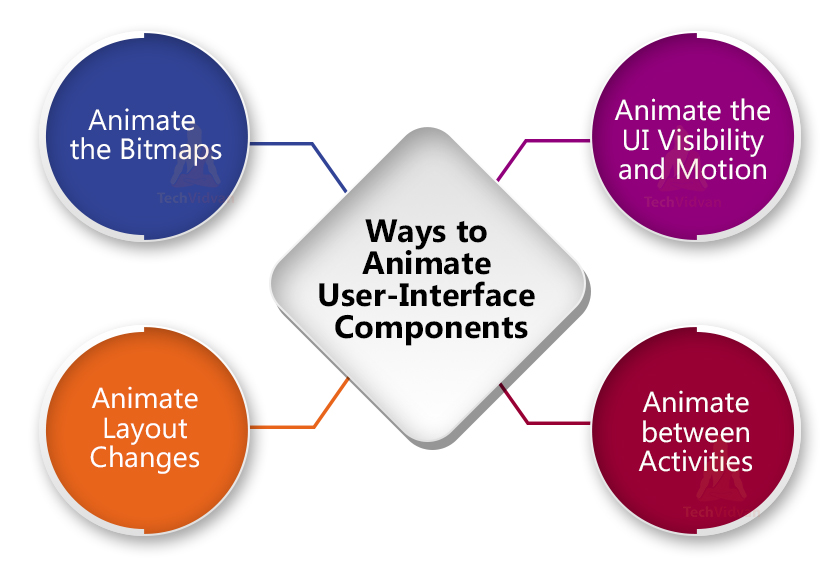
1. Animate the Bitmaps
In Android, we use bitmaps to showcase images, fonts and other static graphical content. Now to apply motion to these bitmaps, you need to create your animations in the resources—->drawable and then apply during runtime. This allows for dynamic visual effects like moving, rotating, or scaling bitmaps to enhance user experience.
2. Animate the UI Visibility and Motion
You can shift a UI element from one position to another with time delays. You can fade in or fade out the visibility of the UI elements. These are all possible due to the android.animation package. This package offers various classes and methods to create smooth transitions and animations, making your app more interactive and visually appealing.
3. Animate Layout Changes
We can animate your layout designs as well. There are many elements in a layout, and you can make them appear from top, bottom, right or left., Even you can apply time delays as top elements occur first, then bottom parts.
For this, you need to find out the start and end of your layout design. Use the TransitionManager.go() to apply your animation during the loading of the layout. This ensures a seamless and engaging user experience when interacting with different parts of the UI.
4. Animate between Activities
You can even animate your activities on android. Suppose you are going from one activity to another; then, we can apply some animation to make this more attractive during this transition.
For this, we need to call the startActivity() along with the options provided by ActivityOptions.makeSceneTransitionAnimation(). The views of the activity are also included in the animation.
Tween Animation in Android
Tween Animation is used to make the designs of your layout attractive and more interactive. This usually works upon the view elements of the layout. It can rotate, scale, shift, translate, or zoom the UI element. It can be used on any kind of element.
To apply animation to your UI elements, you need to provide parameters such as size, duration, value, times, etc. Finally, to implement the animation in your layout, you need to call the loadAnimation() method from the Animation Utils class.
You can find an example of the tween animation below.
We have some functions in the Animation class that make our task more manageable.
| Method | Description |
| start() | It is used to begin the animation. |
| setDuration(long duration) | It is used to set the duration of your animation. |
| getDuration() | Suppose you want to check the duration you set for your animation, then you can use getDuration() |
| end() | You can use this to terminate the animation. |
| cancel() | It cancels the current animation. |
Interpolator in Android
An interpolator acts as a tool to add features between the start and end of a task. We can use an interpolator to alter or insert between the initial and final state.
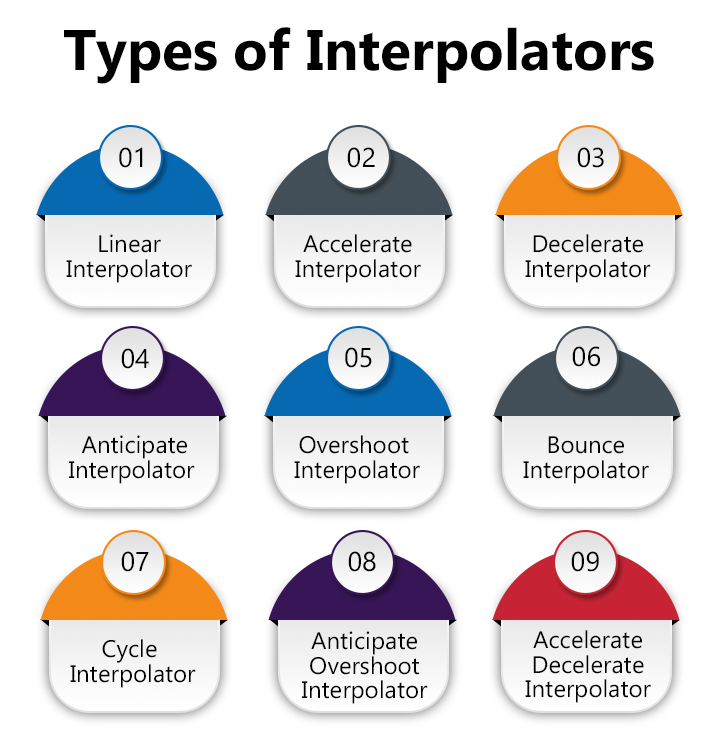
Let’s see the types of interpolators available to us:
1. Linear Interpolator –
It is also known as the default interpolator. It shows that the rate of change of the animation is constant, creating a smooth and even transition throughout the duration of the animation.
2. Accelerate Interpolator –
It is useful to accelerate the animation. Starting with slow, then gradually speeds up the animation. This creates a feeling of an object gaining momentum as it moves.
3. Decelerate Interpolator –
It is useful to decrease the motion of an animation gradually. The animation starts fast and then slows down, giving the effect of an object coming to a gentle stop.
4. Anticipate Interpolator –
It is useful to make the animation work in reverse before moving forward. This creates a realistic motion effect where the object moves backward slightly before starting the main motion.
5. Overshoot Interpolator –
It is used to make the animation move in a forward direction.
6. Bounce Interpolator –
It is used to make the animation show bouncing movements. The animation gives a bouncy effect, resembling an object bouncing after hitting a surface.
7. Cycle Interpolator –
It is used to repeat the animation for a certain number or an infinite number of times. This creates a cyclic effect, making the animation loop continuously in a rhythmic pattern.
8. Anticipate Overshoot Interpolator –
It makes the animation first go in reverse then go in a forward direction.
9. Accelerate Decelerate Interpolator –
It is used to make the animation movement in the following order, first slow, then fast in the middle, then again slow. This creates a smooth acceleration and deceleration effect, giving a natural movement.
Implementation of Android Animations
So now, let’s see the steps of how you can create your application to animate a text view.
1: Open your Android Studio and Click on create a new Project.
2: Select Empty Activity and then enter your application name and proceed.
3: Add the following code in your activity_main.xml file.
activity_main.xml
<?xml version="1.0" encoding="utf-8"?>
<RelativeLayout xmlns:android="http://schemas.android.com/apk/res/android"
    xmlns:tools="http://schemas.android.com/tools"
    android:layout_width="match_parent"
    android:layout_height="match_parent"
    android:background="@color/black"
    tools:context=".MainActivity">
    <TextView
        android:id="@+id/title"
        android:layout_width="match_parent"
        android:layout_height="match_parent"
        android:layout_above="@+id/your_button_layout"
        android:gravity="center"
        android:text="Tech Vidvan"
        android:textSize="40sp"
        android:textColor="#2196F3"
        android:textStyle="bold" />
    <LinearLayout
        android:id="@+id/your_button_layout"
        android:layout_width="match_parent"
        android:layout_height="wrap_content"
        android:layout_alignParentBottom="true"
        android:orientation="vertical">
        <LinearLayout
            android:layout_width="match_parent"
            android:layout_height="wrap_content"
            android:orientation="horizontal"
            android:layout_margin="10dp"
            android:weightSum="2">
            <Button
                android:id="@+id/fade_in_anim"
                android:layout_width="0dp"
                android:layout_height="match_parent"
                android:layout_weight="1"
                android:text="Fade In"
                android:layout_marginRight="20dp"
                android:backgroundTint="@color/white"
                android:textColor="@color/black"
                android:textAllCaps="false" />
            <Button
                android:id="@+id/fade_out_anim"
                android:layout_width="0dp"
                android:layout_height="match_parent"
                android:layout_weight="1"
                android:text="Fade Out"
                android:backgroundTint="@color/white"
                android:textColor="@color/black"
                android:textAllCaps="false" />
        </LinearLayout>
        <LinearLayout
            android:layout_width="match_parent"
            android:layout_height="wrap_content"
            android:orientation="horizontal"
            android:layout_margin="10dp"
            android:weightSum="2">
            <Button
                android:id="@+id/zoom_in_anim"
                android:layout_width="0dp"
                android:layout_height="match_parent"
                android:layout_weight="1"
                android:text="Zoom In"
                android:layout_marginRight="20dp"
                android:backgroundTint="@color/white"
                android:textColor="@color/black"
                android:textAllCaps="false" />
            <Button
                android:id="@+id/zoom_out_anim"
                android:layout_width="0dp"
                android:layout_height="match_parent"
                android:layout_weight="1"
                android:text="Zoom Out"
                android:backgroundTint="@color/white"
                android:textColor="@color/black"
                android:textAllCaps="false" />
        </LinearLayout>
        <LinearLayout
            android:layout_width="match_parent"
            android:layout_height="wrap_content"
            android:orientation="horizontal"
            android:layout_margin="10dp"
            android:weightSum="2">
            <Button
                android:id="@+id/move_anim"
                android:layout_width="0dp"
                android:layout_height="match_parent"
                android:layout_weight="1"
                android:text="Move"
                android:layout_marginRight="20dp"
                android:backgroundTint="@color/white"
                android:textColor="@color/black"
                android:textAllCaps="false" />
            <Button
                android:id="@+id/blink_anim"
                android:layout_width="0dp"
                android:layout_height="match_parent"
                android:layout_weight="1"
                android:text="Blink"
                android:backgroundTint="@color/white"
                android:textColor="@color/black"
                android:textAllCaps="false" />
        </LinearLayout>
        <LinearLayout
            android:layout_width="match_parent"
            android:layout_height="wrap_content"
            android:orientation="horizontal"
            android:layout_margin="10dp"
            android:weightSum="2">
            <Button
                android:id="@+id/bounce_anim"
                android:layout_width="0dp"
                android:layout_height="match_parent"
                android:layout_weight="1"
                android:text="Bounce"
                android:layout_marginRight="20dp"
                android:backgroundTint="@color/white"
                android:textColor="@color/black"
                android:textAllCaps="false" />
            <Button
                android:id="@+id/rotate_anim"
                android:layout_width="0dp"
                android:layout_height="match_parent"
                android:layout_weight="1"
                android:text="Rotate"
                android:backgroundTint="@color/white"
                android:textColor="@color/black"
                android:textAllCaps="false" />
        </LinearLayout>
    </LinearLayout>
</RelativeLayout>
4: Go to res and right-click. Now select new —> Android Resource Directory, and provide the directory’s name as anim and proceed.
5: Now, you need to create multiple XML files in your anim directory. You can find the code for each of the XML files below.
blink.xml
<?xml version="1.0" encoding="utf-8"?>
<set xmlns:android="http://schemas.android.com/apk/res/android">
    <alpha android:fromAlpha="0.0"
        android:toAlpha="1.0"
        android:interpolator="@android:anim/accelerate_interpolator"
        android:duration="400"
        android:repeatMode="reverse"
        android:repeatCount="infinite"/>
</set>
bounce.xml
<?xml version="1.0" encoding="utf-8"?>
<set
    xmlns:android="http://schemas.android.com/apk/res/android"
    android:interpolator="@android:anim/linear_interpolator"
    android:fillAfter="true">
    <translate
        android:fromYDelta="100%"
        android:toYDelta="-40%"
        android:duration="280" />
    <translate
        android:startOffset="500"
        android:fromYDelta="-40%"
        android:toYDelta="10%"
        android:duration="160" />
    <translate
        android:startOffset="1000"
        android:fromYDelta="20%"
        android:toYDelta="0"
        android:duration="120" />
</set>
fade_in.xml
<?xml version="1.0" encoding="utf-8"?>
<set xmlns:android="http://schemas.android.com/apk/res/android"
    android:interpolator="@android:anim/linear_interpolator">
    <alpha
        android:duration="800"
        android:fromAlpha="0.0"
        android:toAlpha="1.0" />
</set>
fade_out.xml
<?xml version="1.0" encoding="utf-8"?>
<set xmlns:android="http://schemas.android.com/apk/res/android"
    android:interpolator="@android:anim/linear_interpolator">
    <alpha
        android:duration="800"
        android:fromAlpha="1.0"
        android:toAlpha="0.1" />
</set>
move.xml
<?xml version="1.0" encoding="utf-8"?>
<set
    xmlns:android="http://schemas.android.com/apk/res/android"
    android:interpolator="@android:anim/linear_interpolator"
    android:fillAfter="true">

    <translate
        android:fromXDelta="0%p"
        android:toXDelta="80%p"
        android:duration="1800" />
</set>
rotate.xml
<?xml version="1.0" encoding="utf-8"?>
<rotate xmlns:android="http://schemas.android.com/apk/res/android"
    android:duration="800"
    android:fromDegrees="0"
    android:interpolator="@android:anim/linear_interpolator"
    android:pivotX="40%"
    android:pivotY="60%"
    android:startOffset="0"
    android:toDegrees="360" />
zoom_in.xml
<?xml version="1.0" encoding="utf-8"?>
<set xmlns:android="http://schemas.android.com/apk/res/android"
    android:fillAfter="true">
    <scale
        android:duration="800"
        android:fromXScale="1"
        android:fromYScale="1"
        android:pivotX="60%"
        android:pivotY="40%"
        android:toXScale="1.5"
        android:toYScale="1.5">
    </scale>
</set>
zoom_out.xml
<?xml version="1.0" encoding="utf-8"?>
<set xmlns:android="http://schemas.android.com/apk/res/android"
    android:fillAfter="true" >
    <scale
        android:duration="800"
        android:fromXScale="1.0"
        android:fromYScale="1.0"
        android:pivotX="60%"
        android:pivotY="40%"
        android:toXScale="0.5"
        android:toYScale="0.5" >
    </scale>
</set>
6: Now, simply paste the below code in your Main Activity file.
Code: MainActivity.kt
package com.techvidvan.techvidvananimations

import android.os.Bundle
import android.os.Handler
import android.view.View
import android.view.animation.AnimationUtils
import android.widget.Button
import android.widget.TextView
import androidx.appcompat.app.AppCompatActivity

class MainActivity : AppCompatActivity()
{
    lateinit var titleText:TextView
    lateinit var fade_in_anim:Button
    lateinit var fade_out_anim:Button
    lateinit var zoom_in_anim:Button
    lateinit var zoom_out_anim:Button
    lateinit var rotate_anim:Button
    lateinit var blink_anim:Button
    lateinit var move_anim:Button
    lateinit var bounce_anim:Button

    override fun onCreate(savedInstanceState: Bundle?)
    {
        super.onCreate(savedInstanceState)
        setContentView(R.layout.activity_main)

        //binding the views to our variables
        titleText = findViewById(R.id.title)
        fade_in_anim = findViewById(R.id.fade_in_anim)
        fade_out_anim = findViewById(R.id.fade_out_anim)
        zoom_in_anim = findViewById(R.id.zoom_in_anim)
        zoom_out_anim = findViewById(R.id.zoom_out_anim)
        rotate_anim = findViewById(R.id.rotate_anim)
        blink_anim = findViewById(R.id.blink_anim)
        move_anim = findViewById(R.id.move_anim)
        bounce_anim = findViewById(R.id.bounce_anim)


        //Adding on click listeners to each button.
        //then starting animation on our title text.

        fade_in_anim.setOnClickListener {
            titleText.visibility = View.VISIBLE
            val animationFadeIn = AnimationUtils.loadAnimation(this, R.anim.fade_in)
            titleText.startAnimation(animationFadeIn)

        }
        fade_out_anim.setOnClickListener {
            val animationFadeOut = AnimationUtils.loadAnimation(this, R.anim.fade_out)
            titleText.startAnimation(animationFadeOut)
            Handler().postDelayed({
                titleText.visibility = View.GONE
            }, 1000)
        }
        zoom_in_anim.setOnClickListener {
            val animationZoomIn = AnimationUtils.loadAnimation(this, R.anim.zoom_in)
            titleText.startAnimation(animationZoomIn)
        }
        zoom_out_anim.setOnClickListener {
            val animationZoomOut = AnimationUtils.loadAnimation(this, R.anim.zoom_out)
            titleText.startAnimation(animationZoomOut)
        }

        bounce_anim.setOnClickListener {
            val animationBounce = AnimationUtils.loadAnimation(this, R.anim.bounce)
            titleText.startAnimation(animationBounce)
        }
        rotate_anim.setOnClickListener {
            val animationRotate = AnimationUtils.loadAnimation(this, R.anim.rotate)
            titleText.startAnimation(animationRotate)
        }

        blink_anim.setOnClickListener {
            val animationRotate = AnimationUtils.loadAnimation(this, R.anim.blink)
            titleText.startAnimation(animationRotate)
        }

        move_anim.setOnClickListener {
            val animationRotate = AnimationUtils.loadAnimation(this, R.anim.move)
            titleText.startAnimation(animationRotate)
        }
    }
}
So, the application will work as follows:
Please keep the video demo here.
Summary
Through this article, you got to know about android animations and how they can make your designs more attractive. You saw about Tween Animation and interpolators.
Later on, you saw a detailed demonstration of animations through an application.
I hope you enjoyed it and will develop more such animations of your own.