Create and Publish Android App
So as of now, we have covered many different concepts in Android. We came across various features, services, UI designing, entirely and even their implementations. Now, you will get to know how you can create an APK build for your project. Publishing an app is the last phase of the development process and is required to launch your app in the market. In this article, we will try to cover various essential aspects to create and publish android applications on the app store.
What is an Android APK?
You might be well aware of archive files like ZIP or RAR. Similarly, APK is also an archival file containing multiple sub-files. After your project is built successfully, you need to develop its APK file to distribute or install various devices.
APK contains multiple files of your project along with their data. These files help the Package Manager of your device to install the app properly. The APK file is much similar to the JAR files, yet they have some differences.
Whenever you need to install apps on your device, whether it’s apps like Zomato, Whatsapp, or even some games, then you go to your play store and select the app and just click install.
But the back play store also follows the same procedure. It downloads the app’s APK file and installs it on your device.
Prerequisites for publishing an app.
Before you proceed to publish your android app, you need to get ready with the following things:
1. Build your Project –
You need to build the project entirely and check if everything is working correctly. This includes running the app on different devices and screen sizes to ensure compatibility. If there are errors, debug them before publishing to avoid any issues for end-users.
2. Generate release APK –
After your project is ready, you need to build the release APK of your project. The release APK is optimized and prepared for distribution, unlike the debug APK used during development. You can find the detailed steps to generate a release APK file further in this article.
3. Singing your app –
Signing your app is a crucial step that involves attaching a digital certificate to your APK. You can either manually sign your release APK using your keystore file or automate the signing process while developing the release app. This ensures the authenticity and integrity of your app.
4. Choose a store –
You need to select an app store or a website to publish your app. This decision depends on your target audience and distribution strategy. Further in the article, we have listed several popular marketplaces where you can upload your app, such as Google Play Store, Amazon Appstore, and others.
Now let’s see how you can achieve these prerequisites quickly.
Android Development Lifecycle
Android development has its lifecycle, and it is recommended to proceed in that direction to avoid errors or bugs in your application. Below is an image that describes the Android Development Lifecycle.
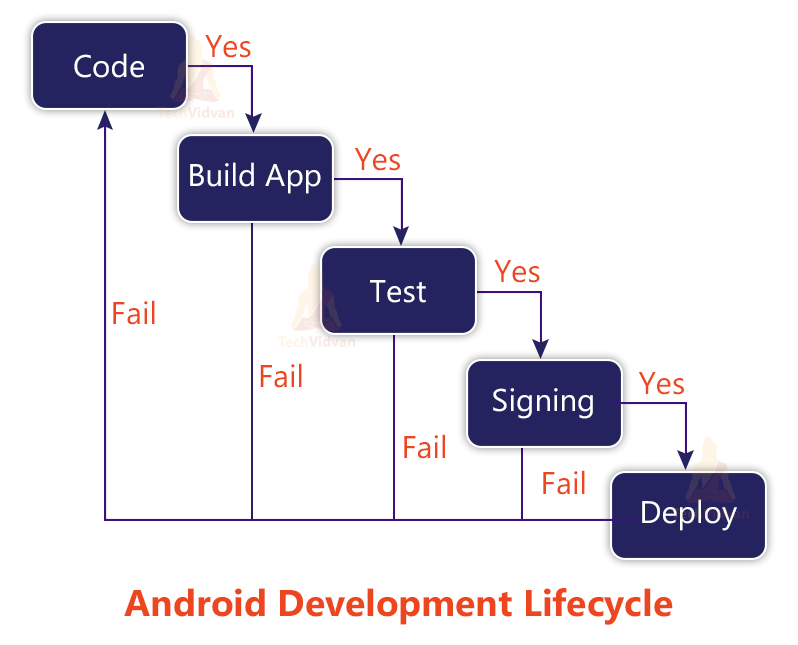
So the first step you need to do is to code your project and develop your application. After building your application, you need to test it, you can first go with UI Testing, and then you can test your app with some real-time users.
Now, you need to sign your application with your company name and other credentials. The final step is to deploy your app on some marketplace.
How to develop your Android App?
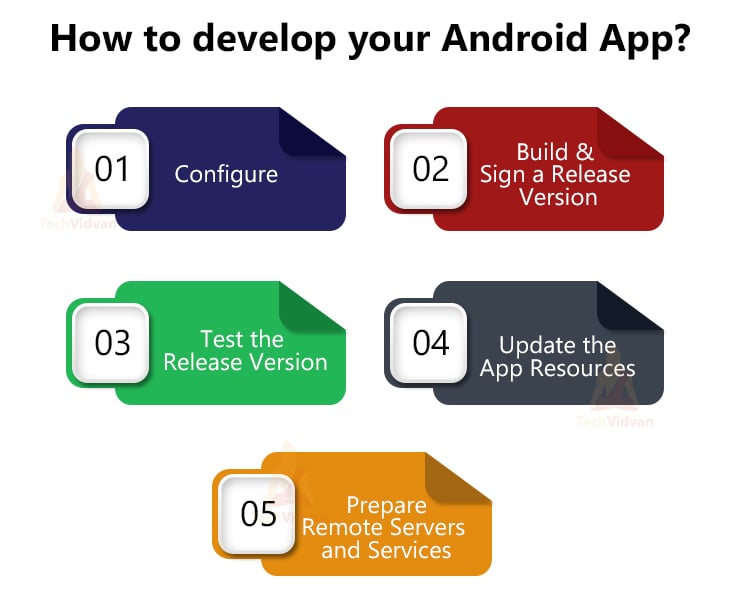
To develop your Android App needs, you need to follow the below steps:
1. Configure
You need to clear the errors from log cat and need to configure them in your Manifest File. You need to remove the android:debuggable attribute from the Manifest file and then add android:versionCode and android:versionName in your Manifest file.
2. Build & Sign a Release Version
You need to build your Gradle files and sign them up with your company name and credentials.
3. Test the Release Version
You can test whether or not the release version is working correctly or not.
4. Update the App Resources
It’s a good practice to check whether all your graphical stuff like images and videos are correctly working inside your application.
5. Prepare Remote Servers and Services
When you are done with the steps, you need to set up your server for the application. This ensures security for your application.
Generating Debug APK file in Android
As you know, we can make mistakes while developing an app. Sometimes we overlook those mistakes as a developer, but the users notice them. You would never allow such a scenario to happen wherein your app is released and you are getting tons of bug reports from the user.
A better practice is to test your application before publishing it. For this, you need to send your application to a group of people and take their reviews.
So, we need to generate a debug APK file and send it to the group for testing.
Now let’s see the steps you need to follow to develop a debug APK.
Step 1: Start Android Studio and open the project that you need to publish.
Step 2: Now go to Tools —-> Select Build Variant.
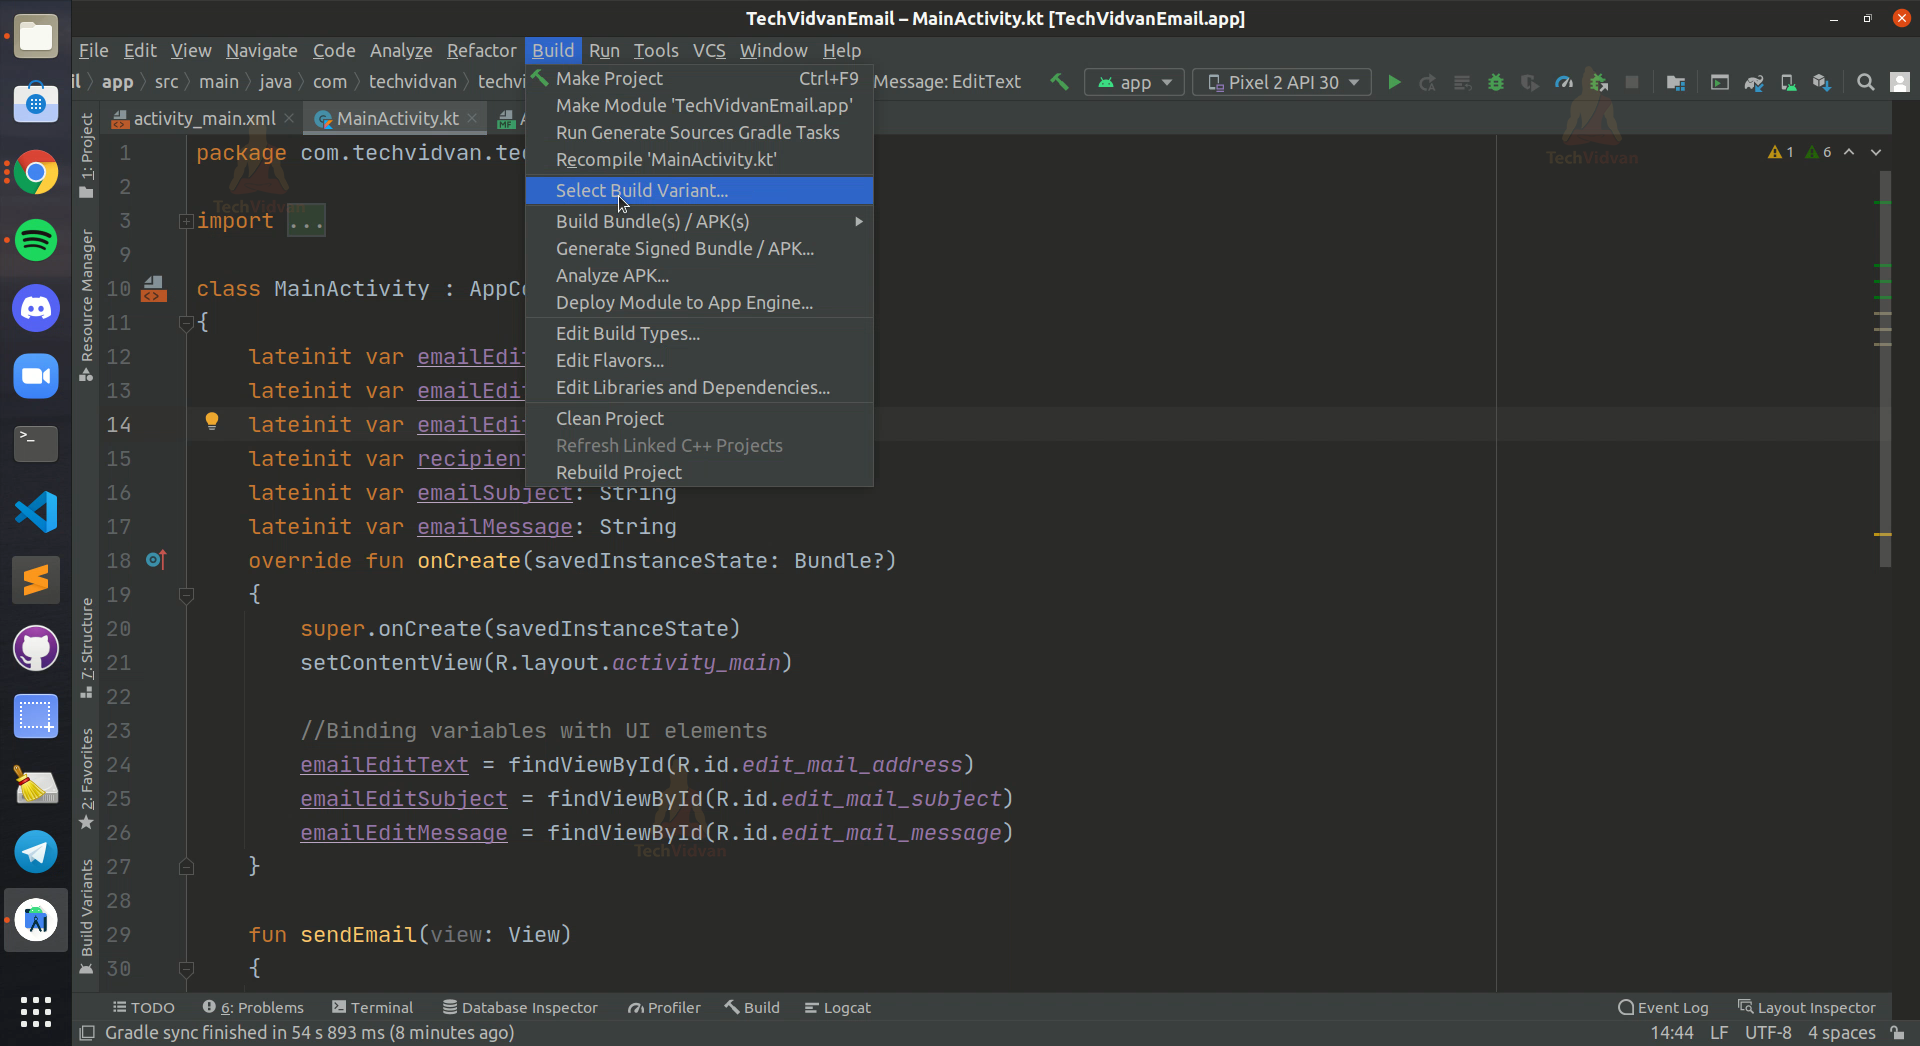
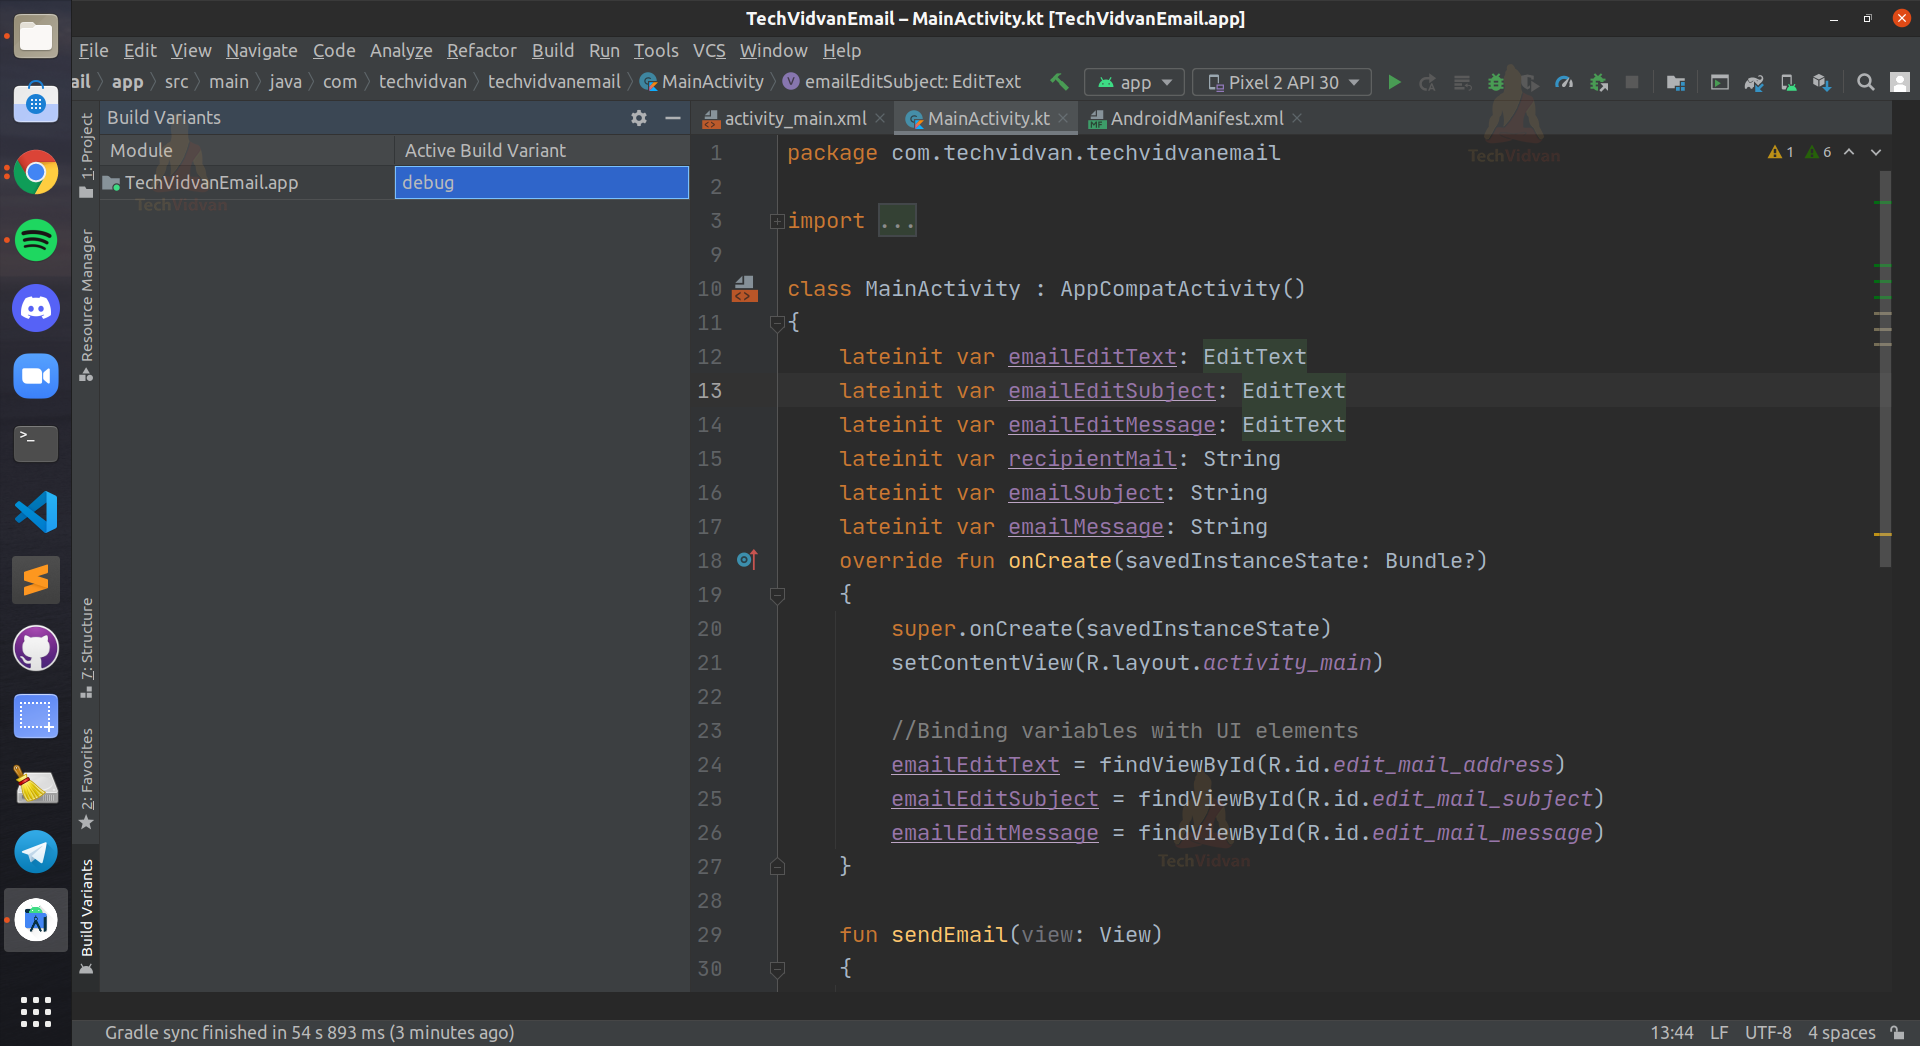
Now the build variant window will appear, which is as follows. Here select debug.
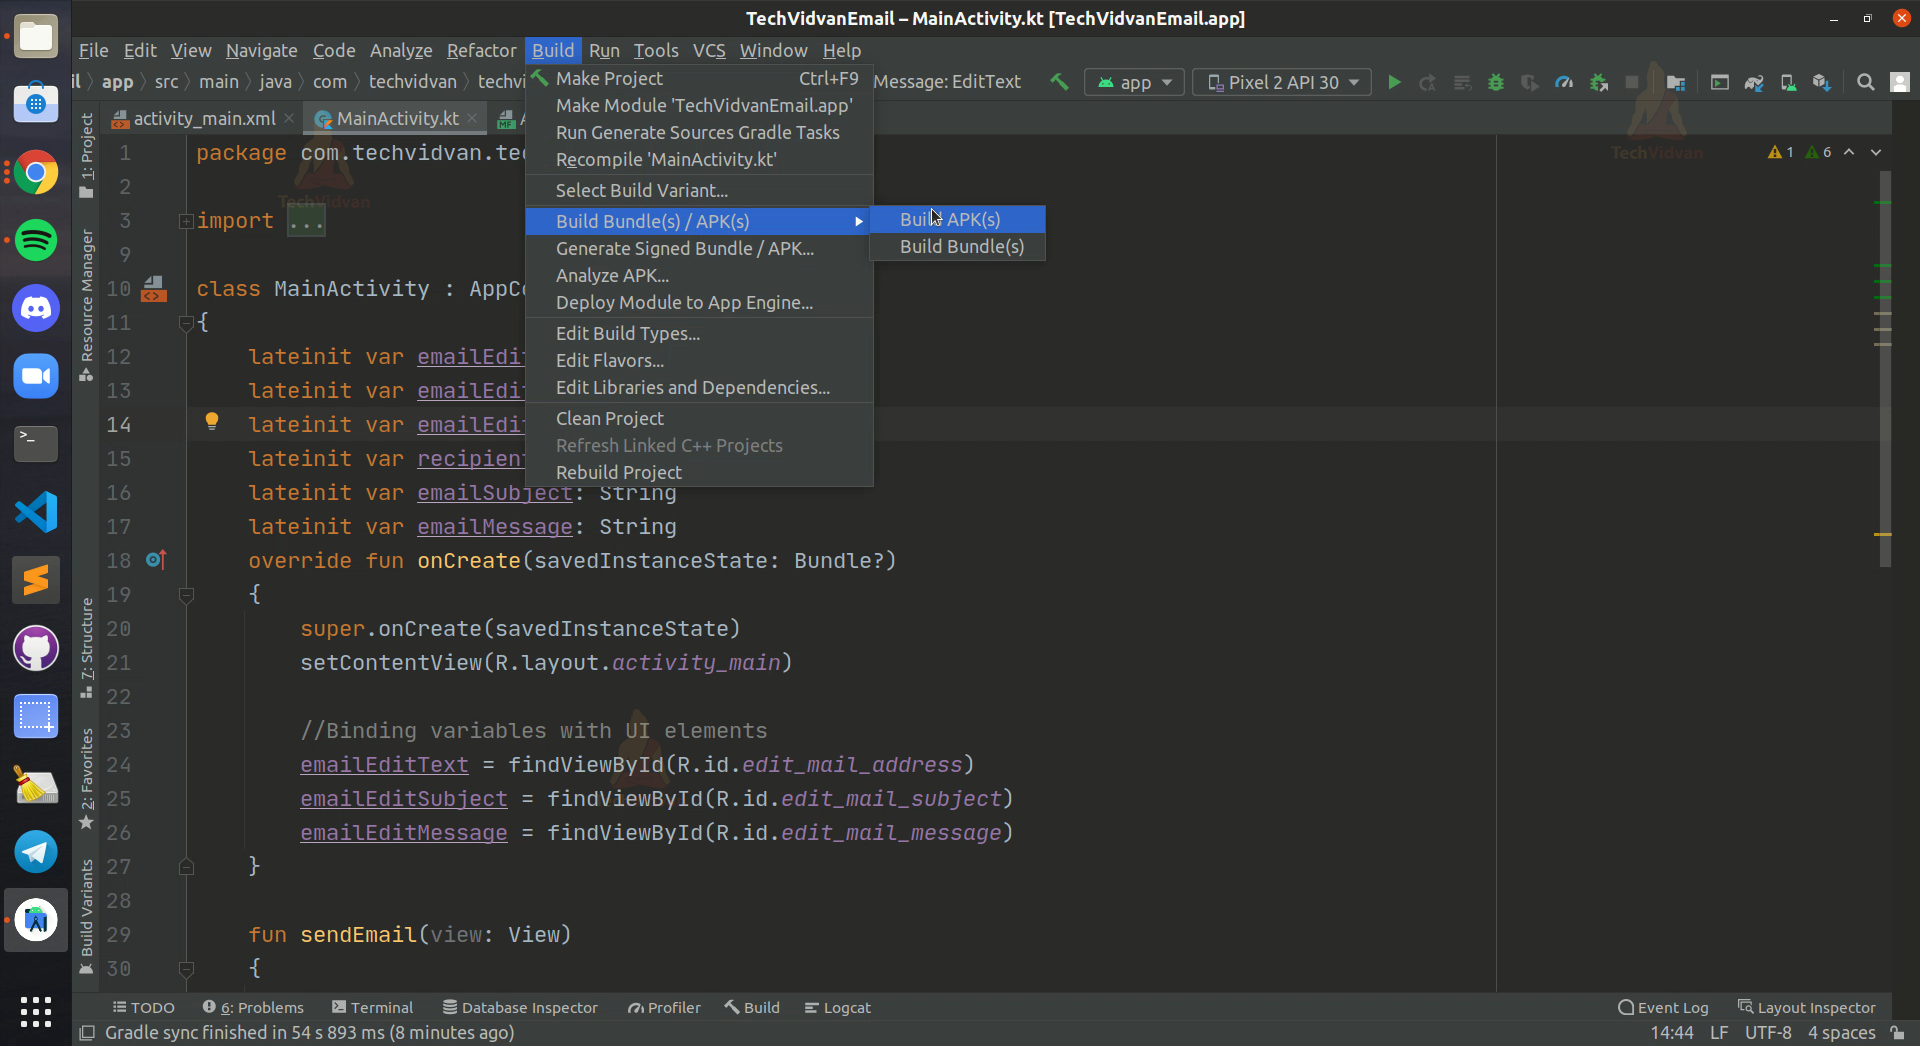
Step 3: Now again, go to Tools and select Build Bundle(s)/APK(s). Now proceed with build APK(s).
Step 4: Now, after your Gradle build completes, you get an option to locate your APK file. Now, this is the APK file which is the debug one.
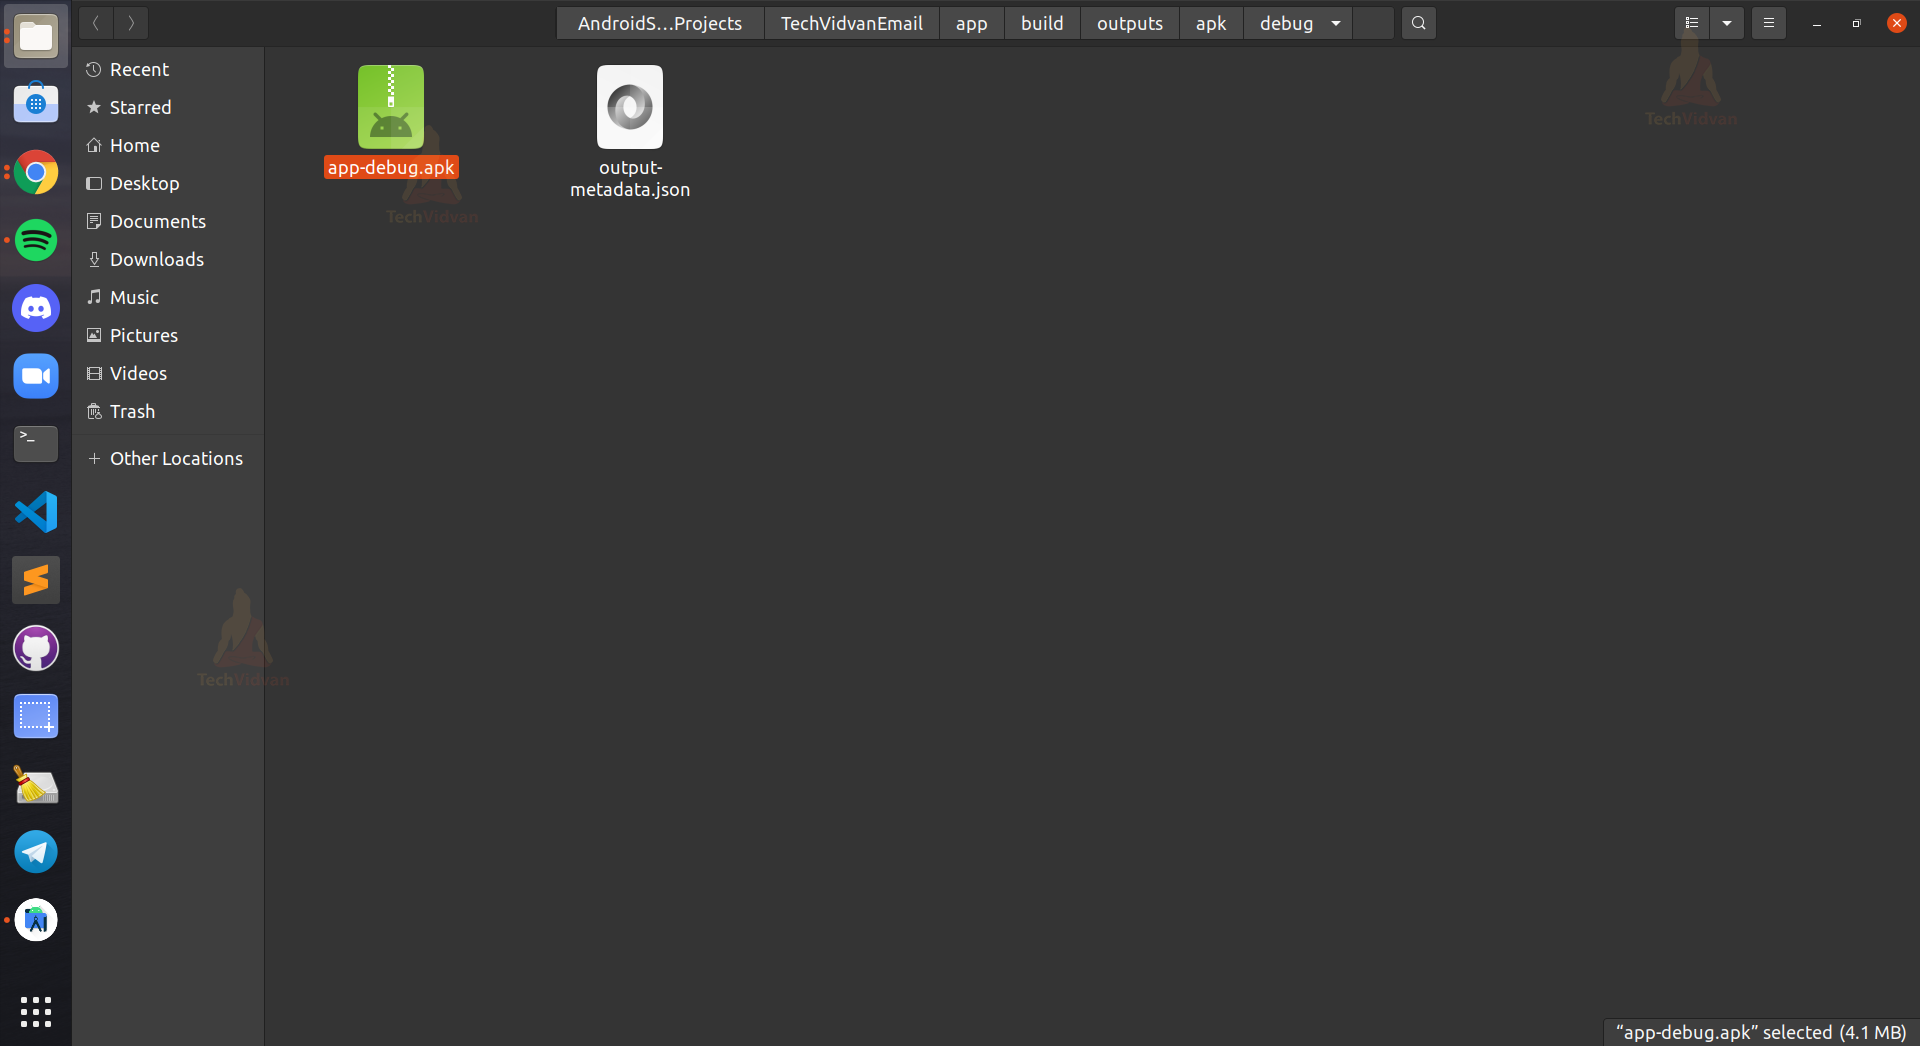
So that’s it. Your debug APK is ready with you; now, use it to test your application.
Generating Release APK file in Android
Now, above, you saw generating the debug APK file. Directly a question may arise.
Why do we need the release APK? Why can’t we use the debug APK for publishing? The answer to this is because the debug APK is not signed and is not secured. Debug APK’s never specify who the publisher is or who developed it.
Suppose you installed an APK from an unknown publisher, and then your phone got bricked now since the app had an undisclosed publisher, so you can’t reach the developers with the issue.
Hence, it becomes essential for us to use release APK while publishing the app.
Let’s see the steps you need to follow to develop the release APK.
Step 1: Open your project in Android Studio.
Step 2: Now go to Tools —-> Generate Signed Bundle/APK.
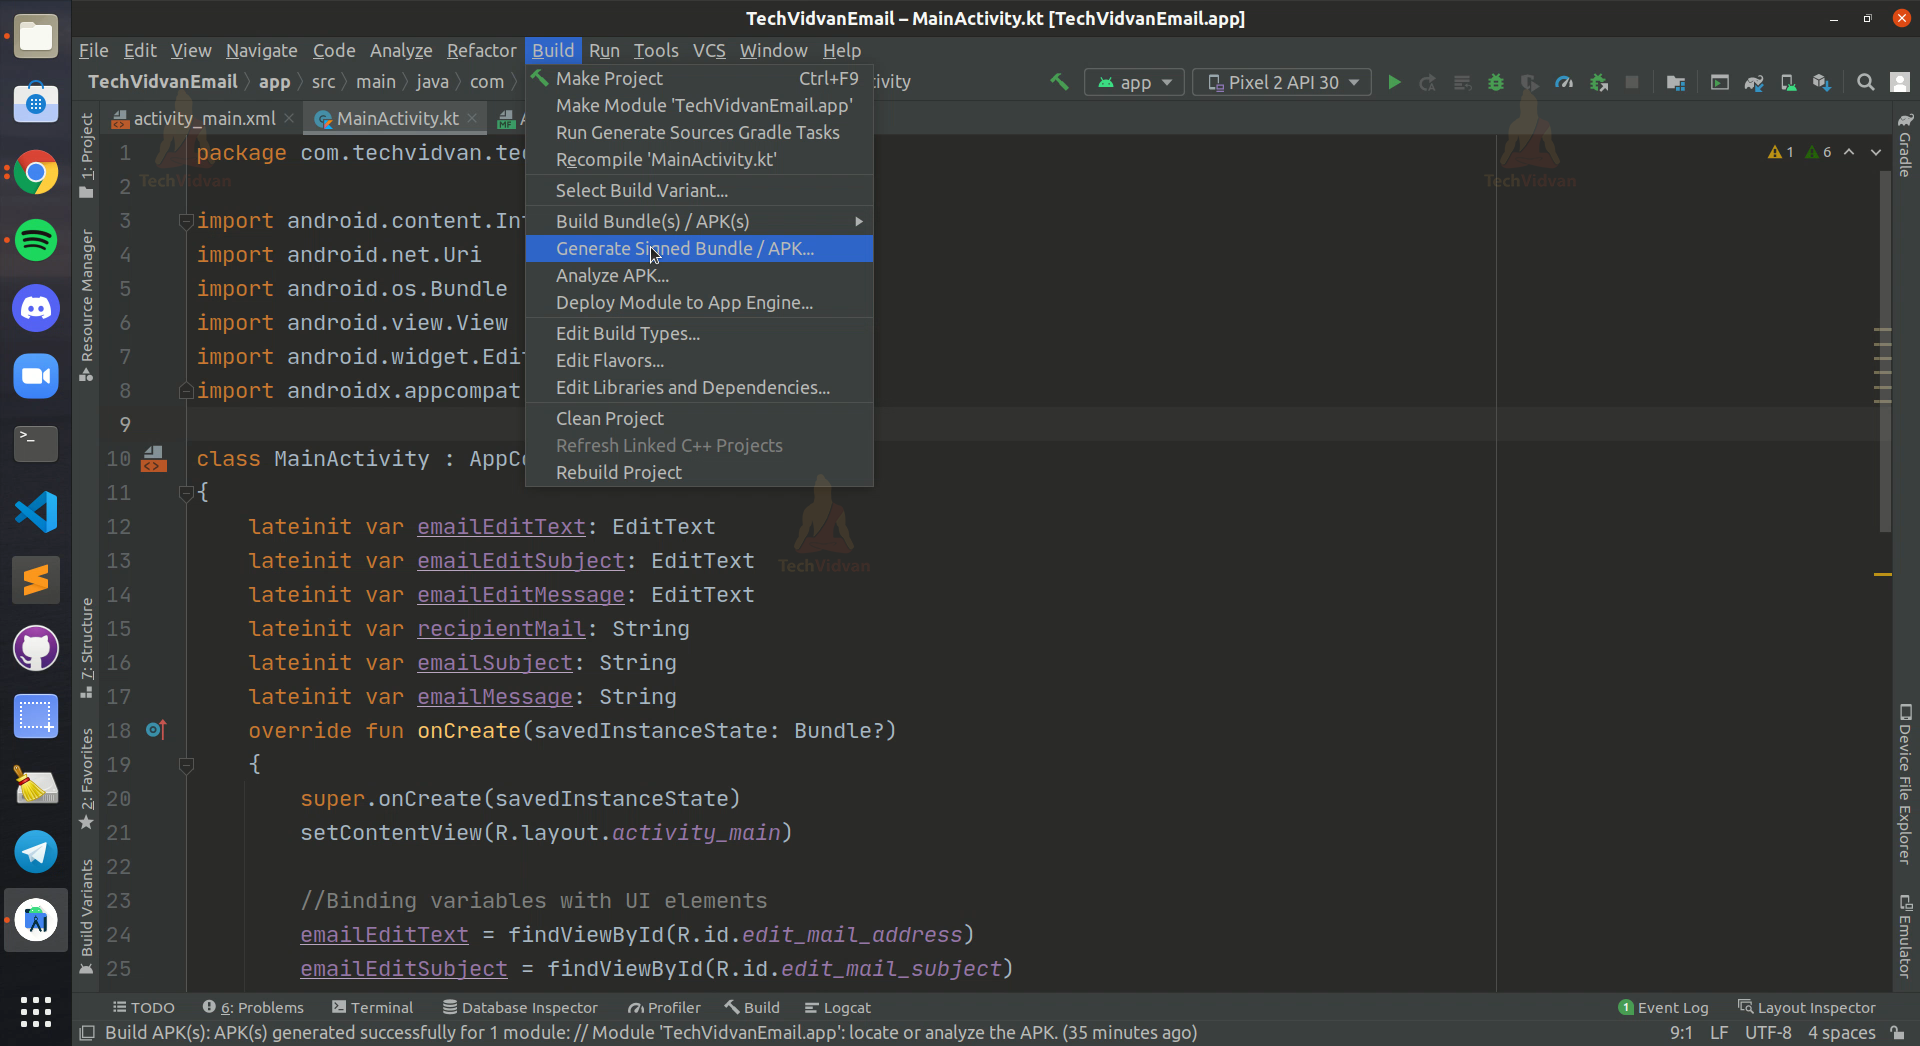
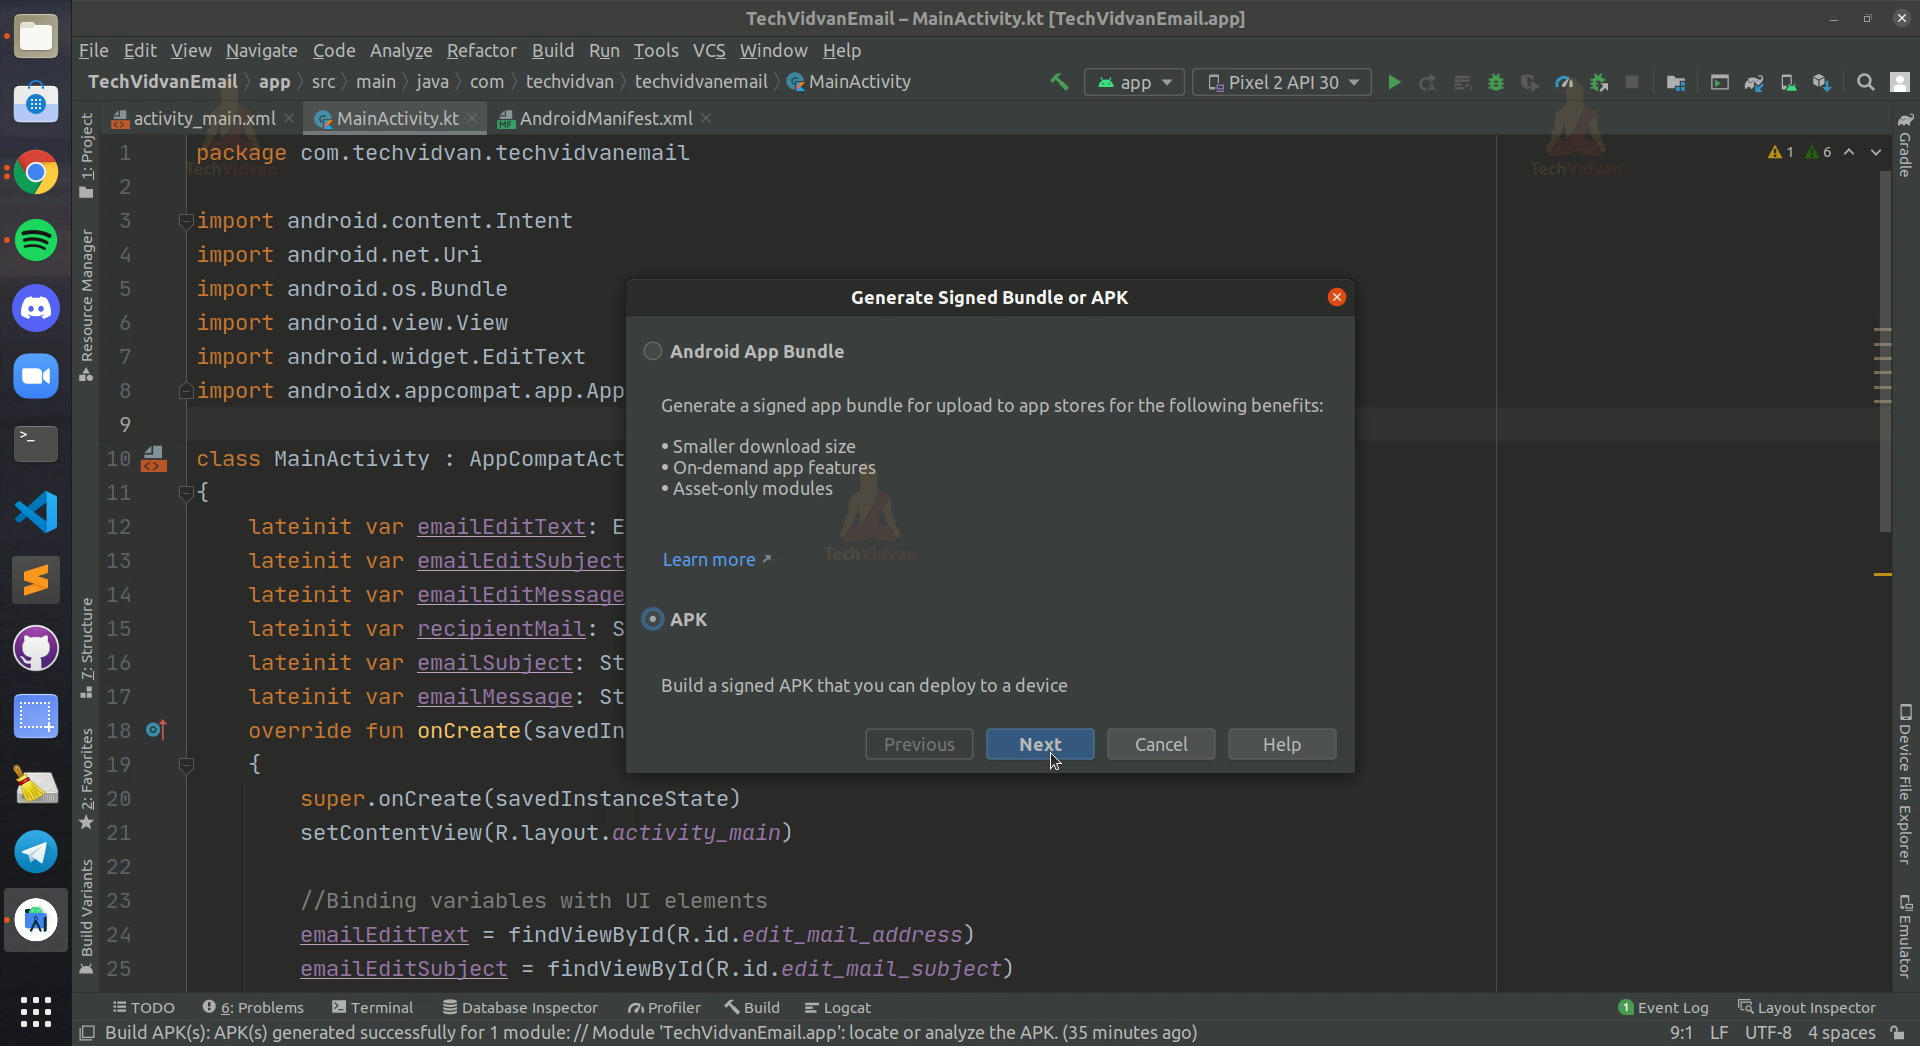
Now a window will appear, where you need to select APK and proceed.
Step 3: Now, you need to select your key path if you otherwise click on create new.
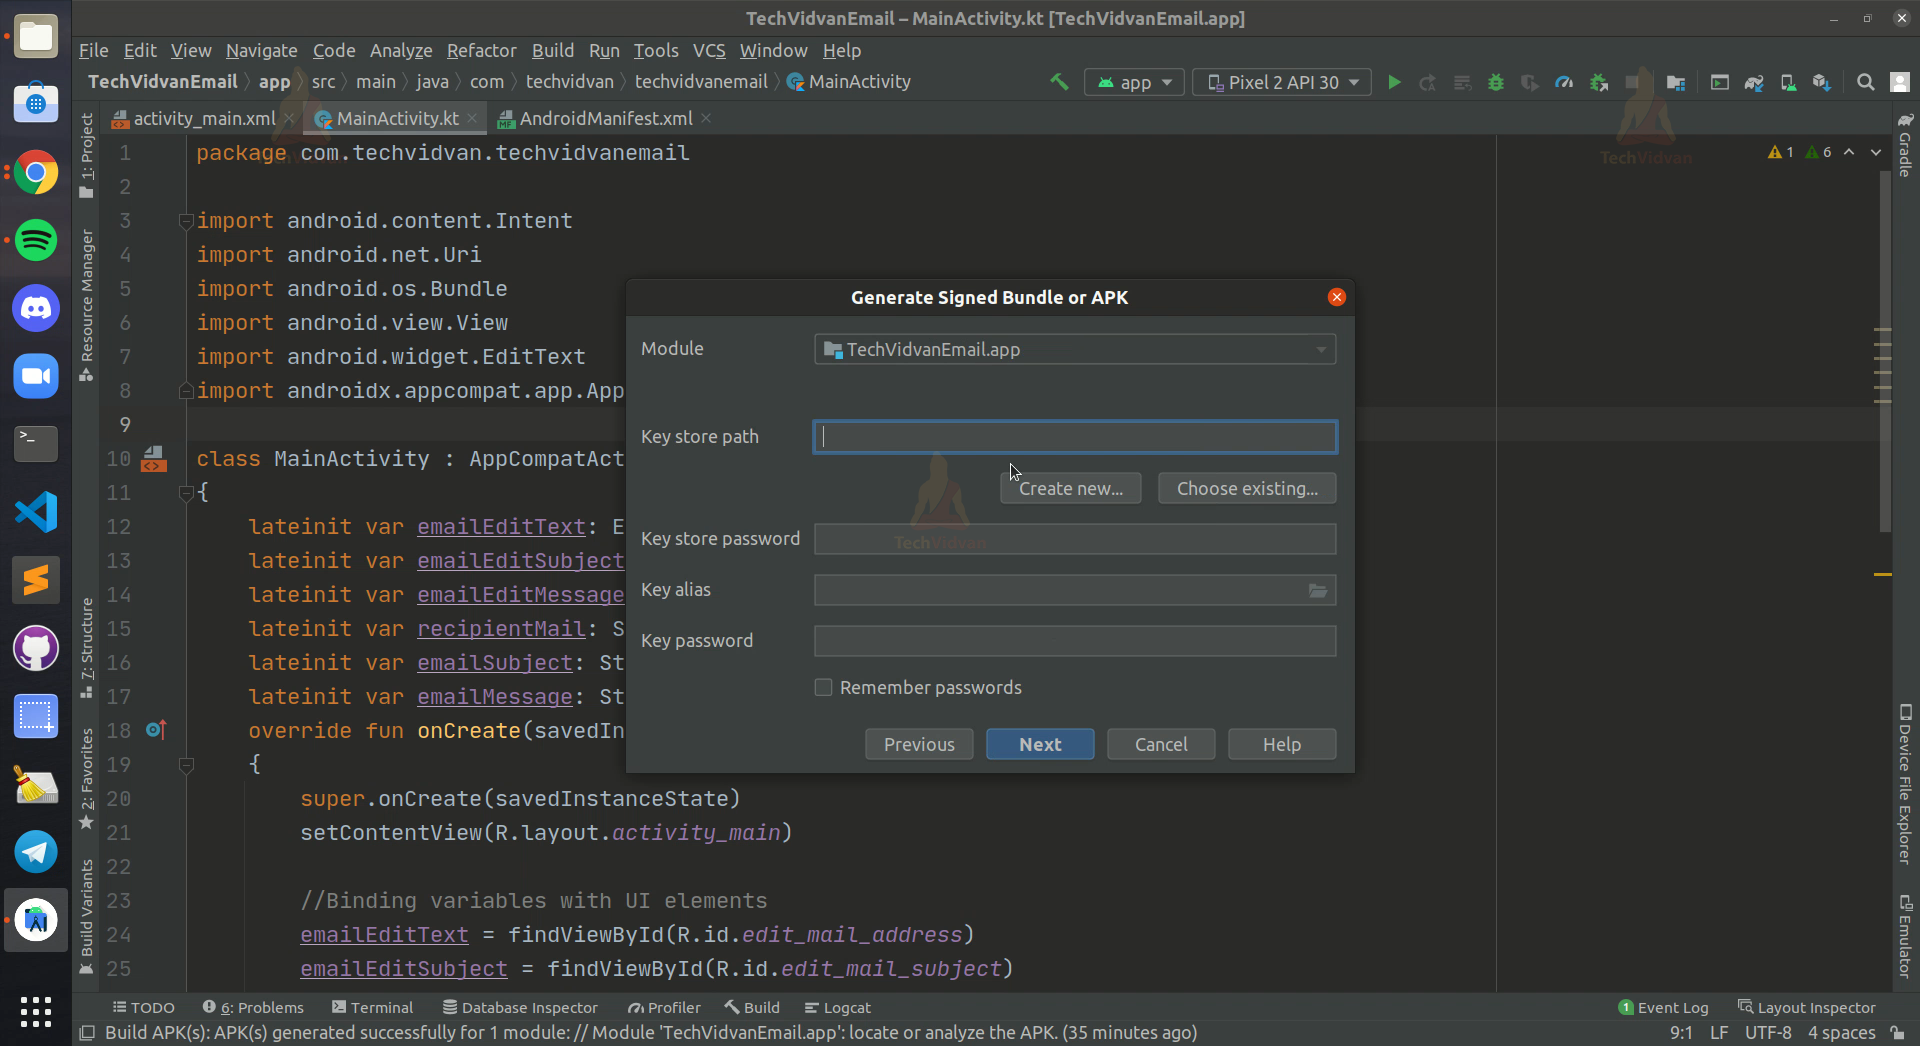
Now you will get a window where you need to provide all the details and keep a password to sign in to your app.
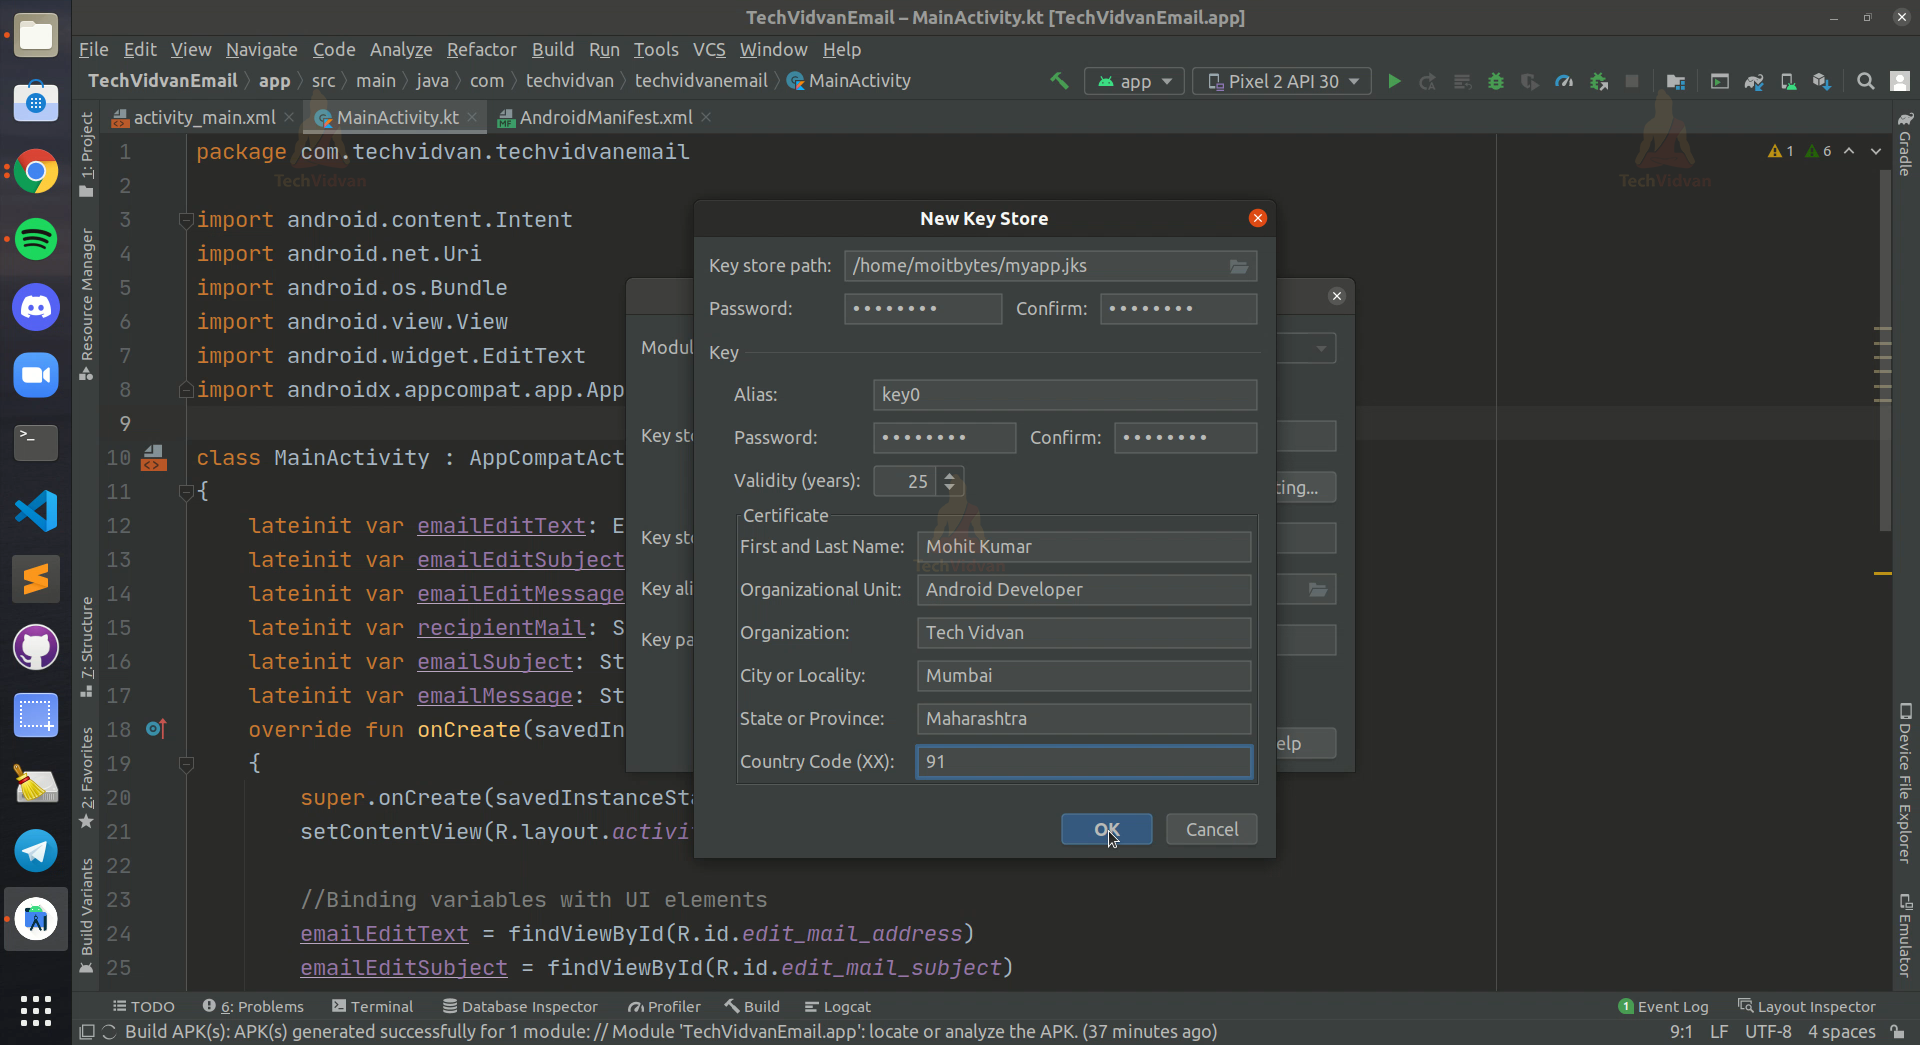
Now, after this, just click on Ok.
Step 4: Now, after completing the above steps, you need to click on Next.
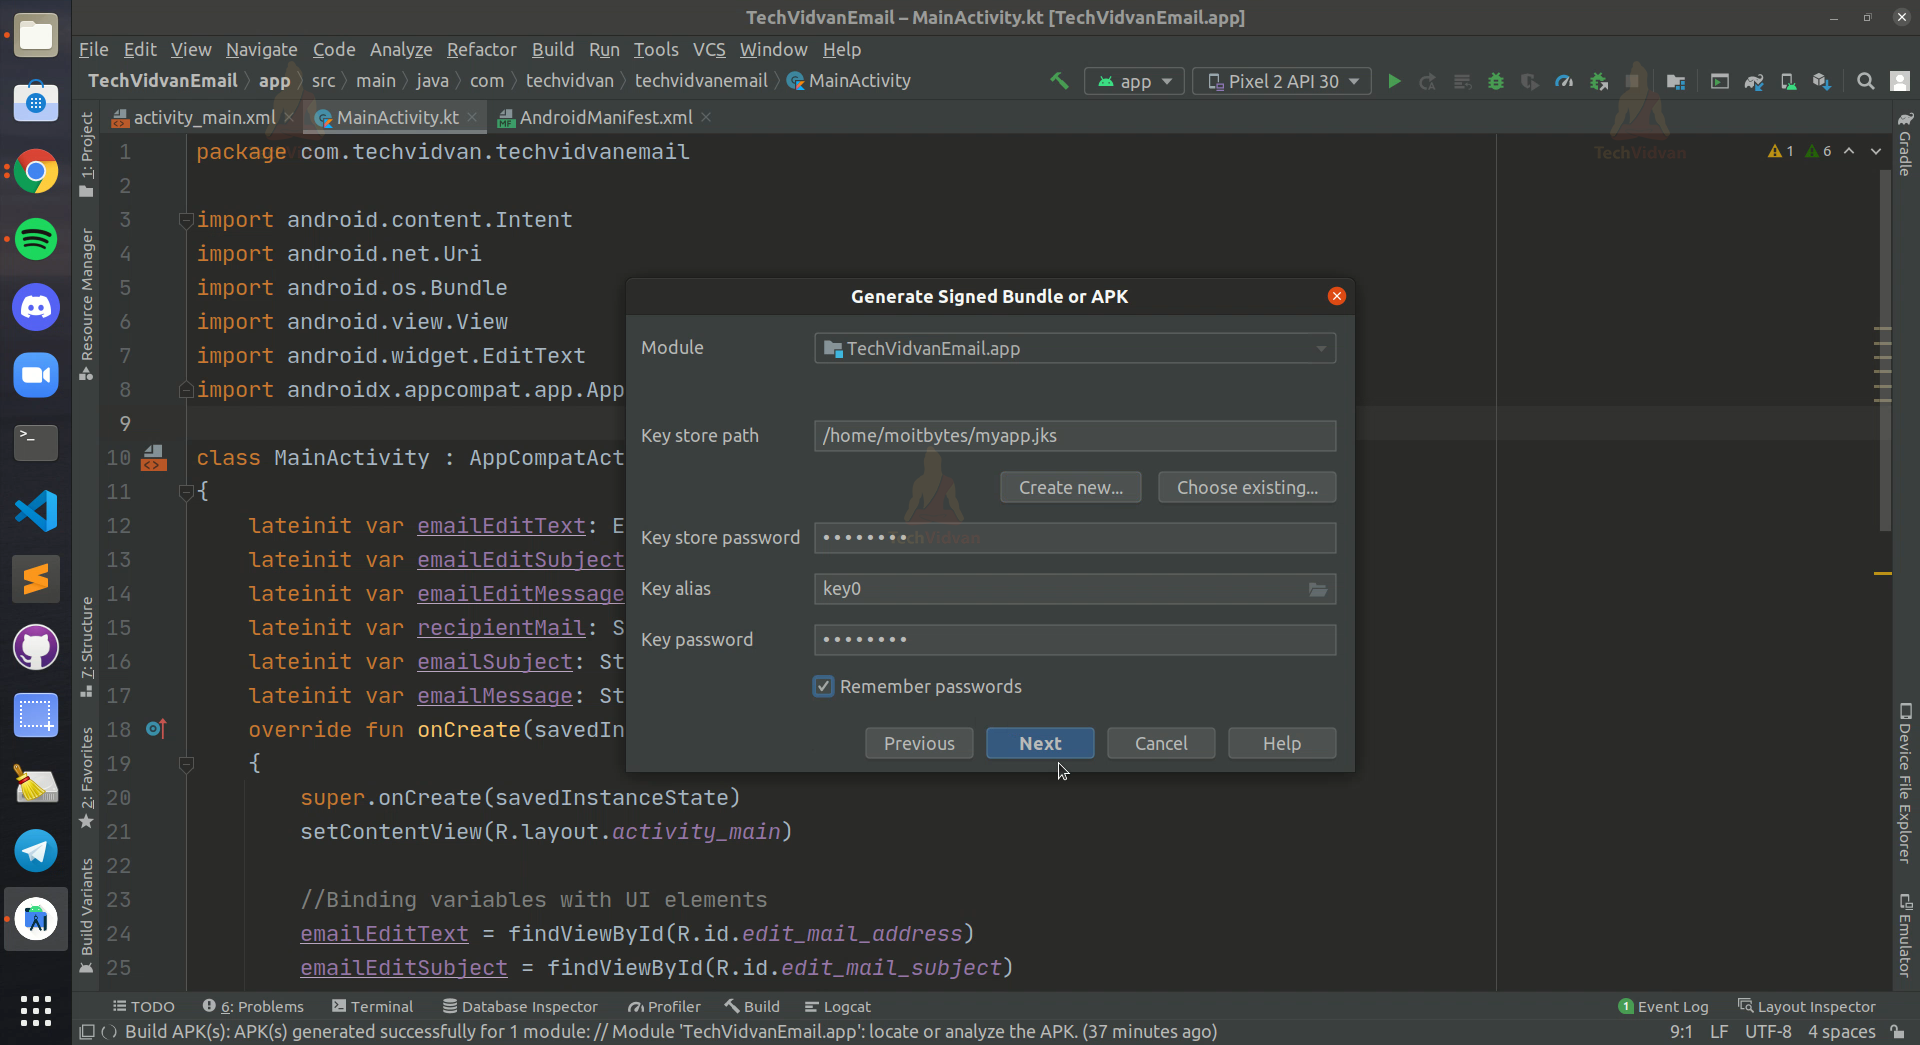
Now select release and select V2 to sign your application thoroughly. Now just click on finish.

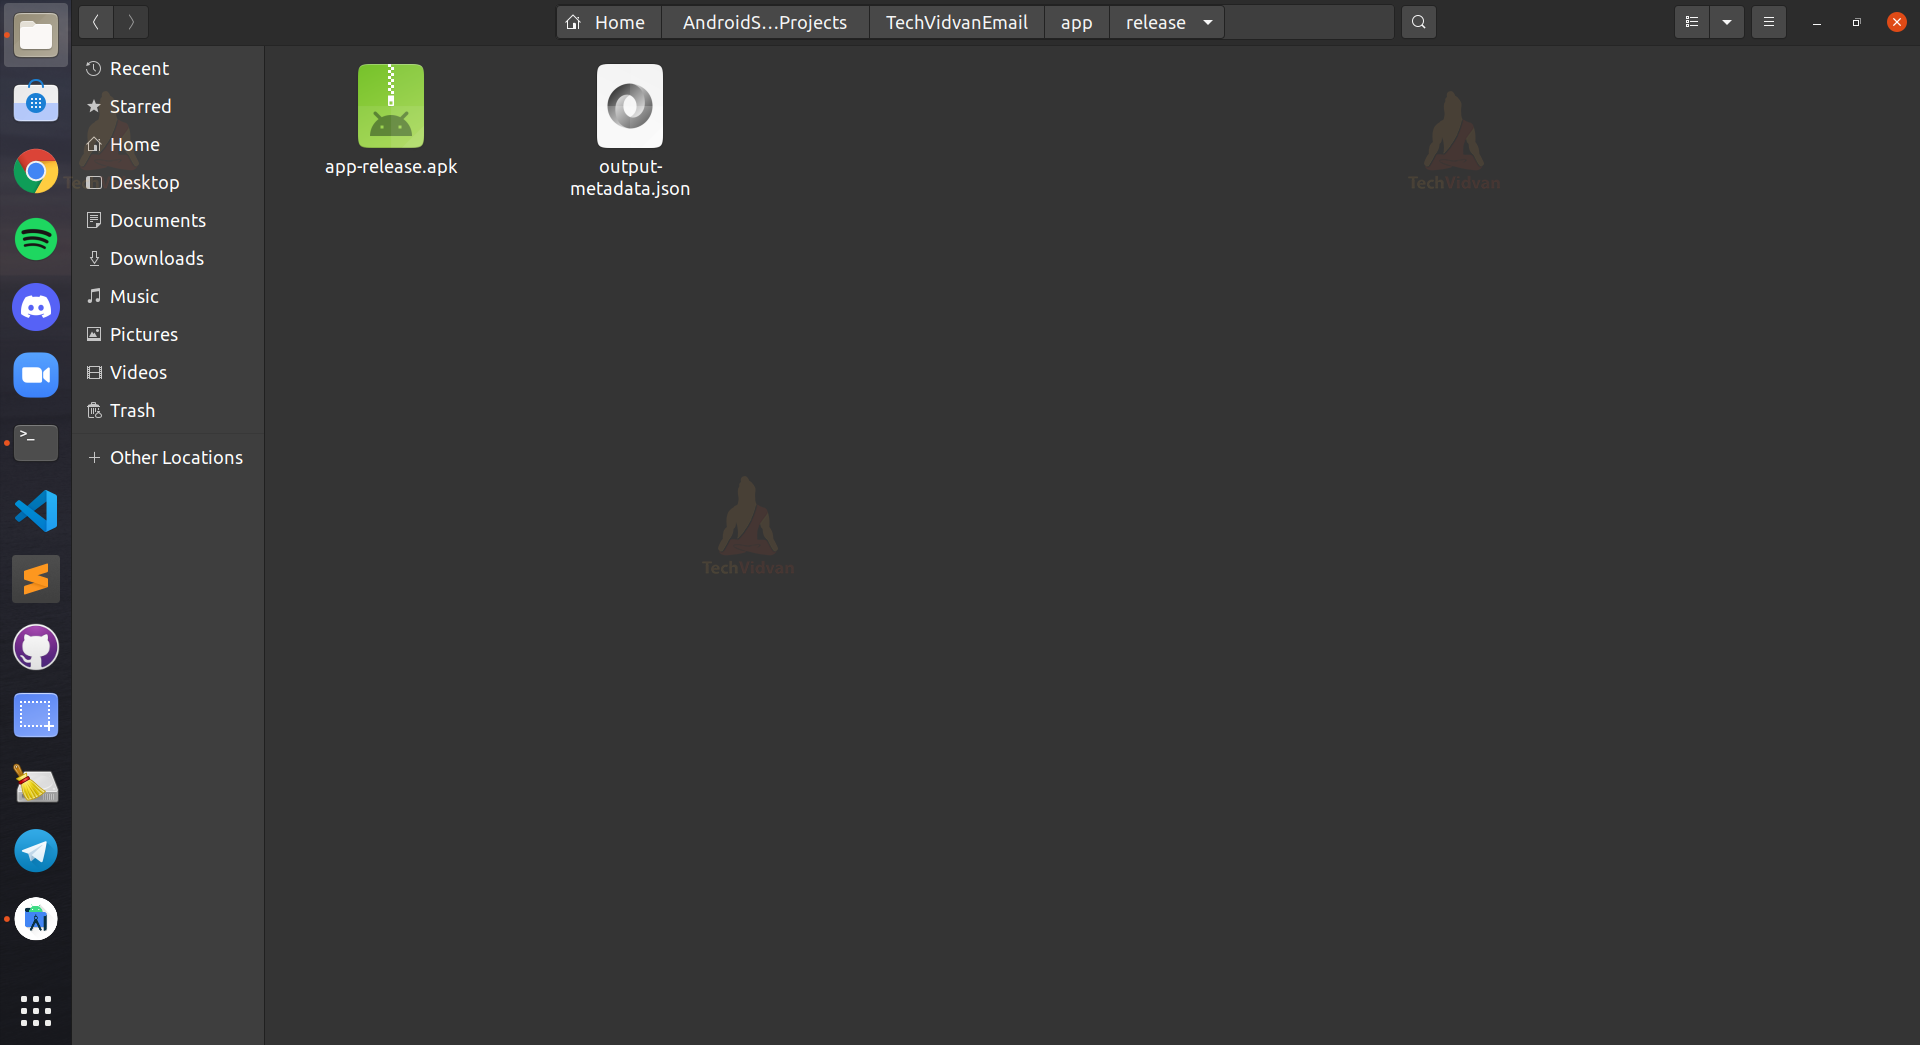
So. that’s it. Your release APK is ready with you, and you can proceed to publish it. You can locate your file in the app—->release folder of your project files.
Signing your app manually
Sometimes there are scenarios where you don’t want to have Android Studio in your system, but you have a project build that you need to sign. So in such cases, you can use the command prompt to sign your application.
Step 1: You need to generate your private key for your application.
keytool -genkey -v -keystore my-release-key.keystore
-alias alias_name -keyalg RSA -keysize 2048 -validity 5000
Step 2: Now, you need to build your project in release mode. After that, you need to sign in your application. For this, you can use jarsigner.
jarsigner -verbose -sigalg SHA1withRSA -digestalg SHA1
-keystore my-release-key.keystore techVidvanApp.apk alias_name
Step 3: Now, check whether your app is successfully signed or not.
jarsigner -verify -verbose -certs techVidvanApp.apk
Step 4: You need to align your application. For this, you need to use zipalign.
zipalign -v 4 techVidvanApp-unaligned.apk techVidvanApp.apk
Various stores to publish your Android app
Android provides several ways to distribute your applications. We can broadly classify the places into two categories:
1. App stores
2. Websites
So now let’s each of them in detail and understand how you can publish your application in these places.
App stores
There are several app stores available that allow you to publish your android apps hustle-free. They also provide features to market your app and earn more users.
Some of such app stores are as follows:
1. Google Play Store
2. Samsung Galaxy Store
3. F-Droid
4. Amazon App Store
5. Insyde Market
6. Huawei App Gallery
7. Xiaomi Store
Websites
You can even use websites and blogs to share your application. Nowadays, all the giant companies have their app link mentioned on their landing page. For this, you can create your website or use exciting forums or blogs to post your application and gain users.
Google Play Registration and publishing of your Android app
Google Play store is one of the biggest stores to distribute and market your android apps. Most of the android devices have google play store installed on their device. Now let’s see how you can upload your apps on the google play store.
For understanding this, you need to follow the below steps carefully:
1: Browse the Google Play Console Website from the link below.
https://play.google.com/console/about/releasewithconfidence/
Now click on Go to my console and then login with your Gmail account. If you don’t have one, then do create it. Without a Gmail account, you can’t access the play console.
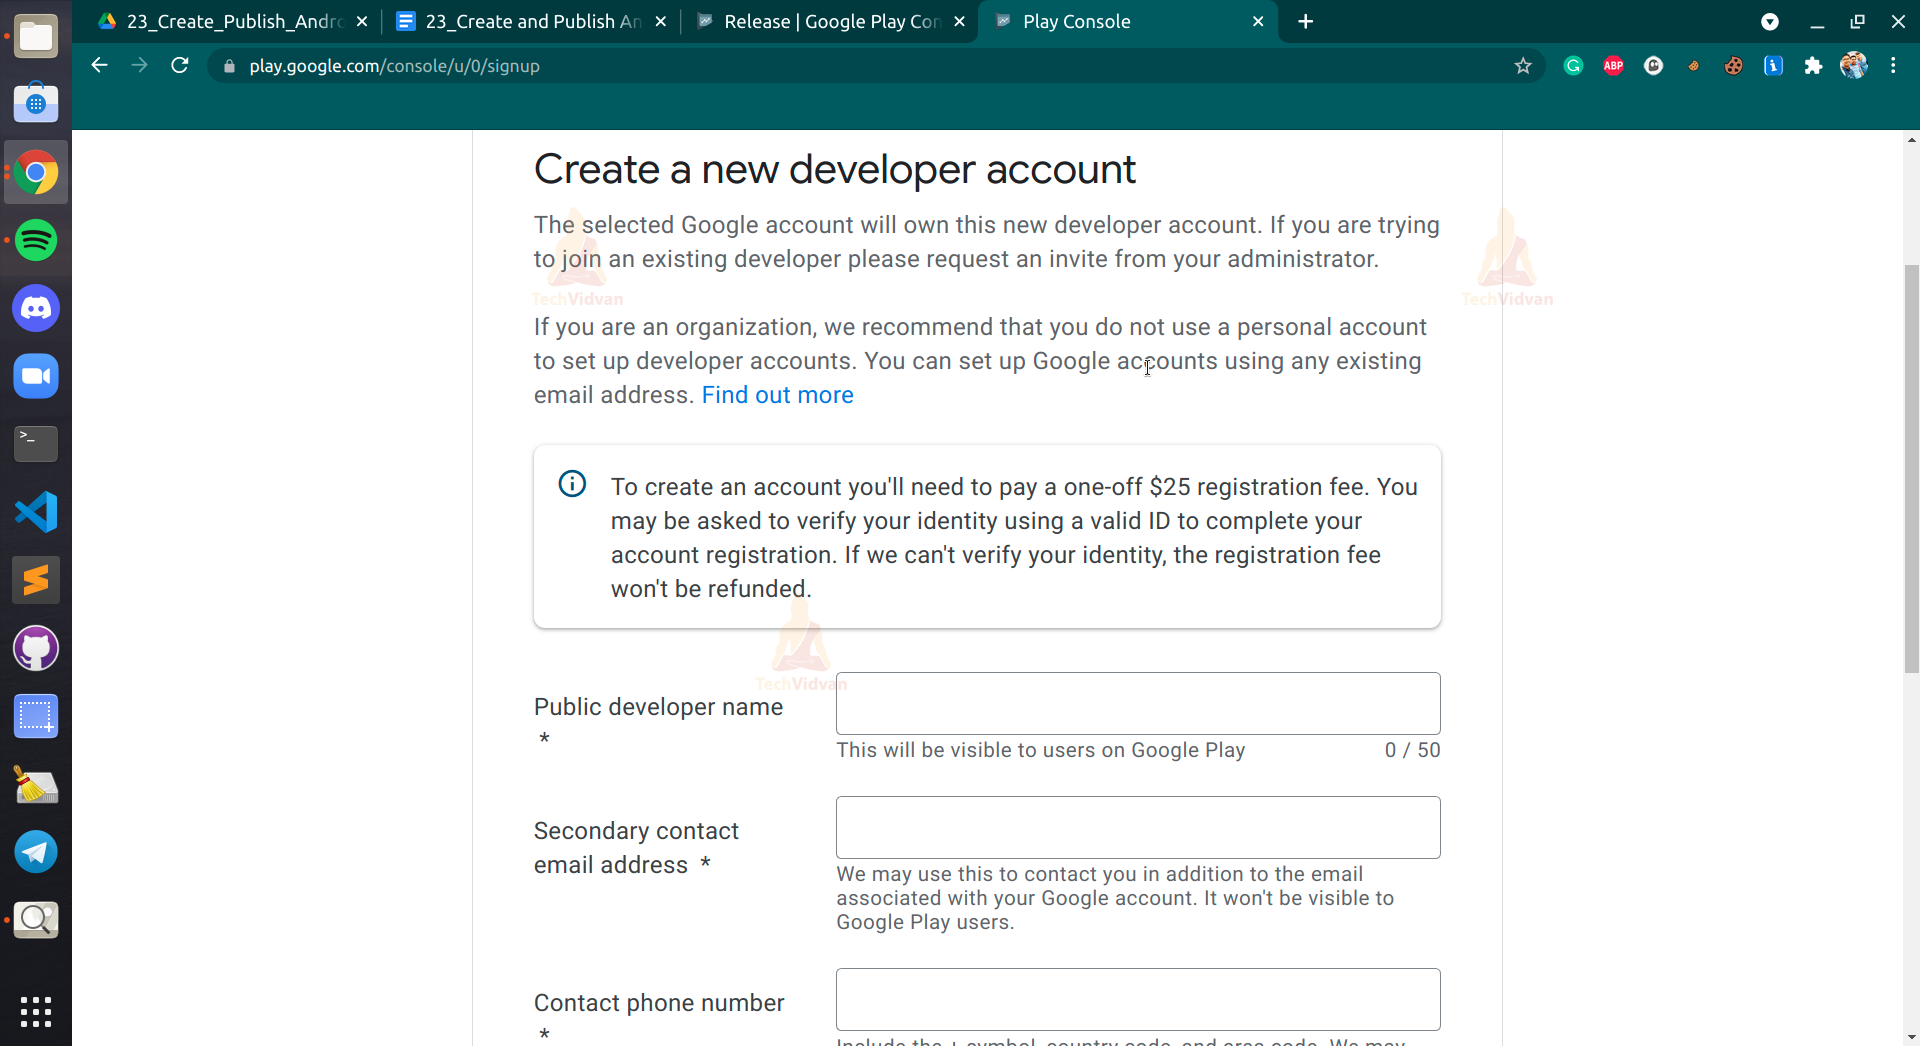
2: After you successfully opened your console, it would ask you to create a developer account. You just need to fill in your details and then proceed.
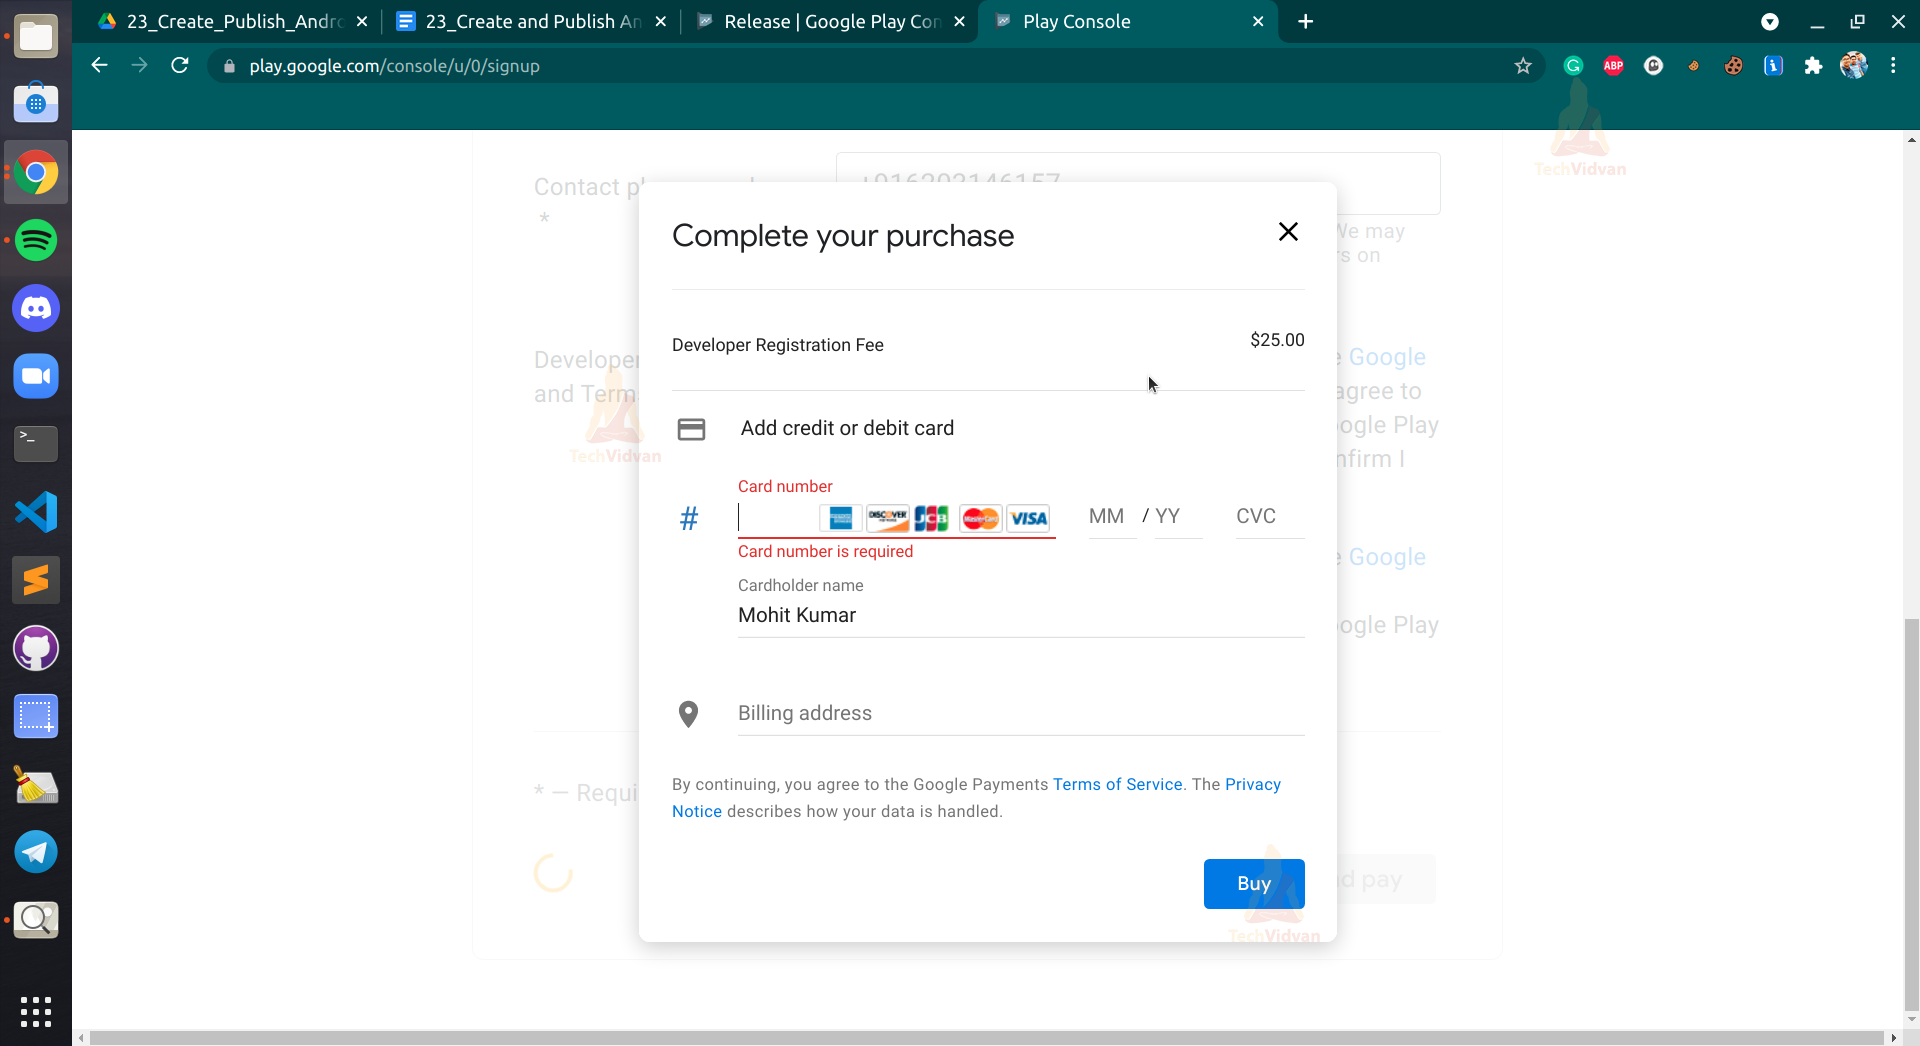
3: Now, you need to pay the fee to confirm your registration.
4: After successfully creating the developer account, you will get options to publish your application.
5: Now, you need to upload your release APK and fill in the app details. After successfully filling in the details, your app would be published on Google Play Store.
So that’s what you need to do.
Summary
So through this article, you got to know about android APK and how you can generate your android app.
Moving forth, you saw several prerequisites which you need to follow to build your app. You also learned the Android development Lifecycle and got to know the difference between debug and release applications.
Finally, you saw how you could use the google play store to publish android app. I hope you enjoyed it and got to know several new things through this article.
Keep learning, keep developing.