How to Send Email in Android Using Intent?
Until now, we have seen many ways to communicate through Android. They were through SMS and calls. Now we will see how you can send emails through an Android Application.
Nowadays, emails become an essential aspect of communication whether you are in an organization, workspace, or community.
For example, suppose you are working for a company or studying in a school. In this scenario, you need to mail your school administrator an inquiry about the school fee.
At this place, you can’t directly call the school administrator or text them. The only option available for you is to mail them. There are multiple scenarios where email is helpful and plays an essential role.
So in this article, we will try to cover all the crucial aspects that will help you build your email application.
What is an Email and how do we usually send it?
An electronic mail (or email) is a way to communicate through people using their email addresses. As discussed earlier, it has a significant impact on our day to day life and helps us communicate.
Emails are also a way to notify or update people about new activities or new announcements.
There are several apps available on App stores that are used to send emails. Some of them are as follows:
- Gmail
- Outlook
- ProtonMail
- Spark Mail
- Newton Mail
- Cleanfox
- Blue Mail
You can go ahead to the app store and try these apps to explore more about them.
Now let’s see to send an email what are the necessary fields we need to provide.
1. Email Address/Addresses of the recipient/s.
2. The subject of the Mail (Optional field but recommended)
3. Body or Content of the mail.
How to send an Email using Intent in Android?
I hope you learned what an email is and the necessary fields to take from users before sending an email. Now it’s time for us to see how you can send emails from your Android App. For this purpose, you need to use Intents.
Let’s see what action and data you need to keep to form the intent.
1. Action in your Intent –
So, to create an email intent, you need to use the action as ACTION_SEND. This action indicates that you are trying to send data, such as an email, and it triggers the appropriate email client on the user’s device.
2. Data you need to pass –
The data you pass along with the intent should be an intent object. For this, you can use the data method to specify the email recipient, subject, body, and other relevant information. This ensures that all necessary details are included in the email intent.
3. Set Type of your intent –
For standard text content, you need to use text/plain as the type. You can use the type method for the above.
Let’s see below an example code of the same.
//create an intent object
 val intent = Intent(Intent.ACTION_SEND)

//provide email address of the recipient as data
 intent.data = Uri.parse("mailto:$recipientMail")

//set the type of mail
intent.type = "text/plain"

//start your intent
startActivity(Intent.createChooser(intent, "Select your Email app"))
Extras that are sent along with the mail?
Sometimes while sending an email, you need to specify the cc or bcc. So, those extra details which go along with your mail are known as the extras for your email.
You need to use the putExtra() method to attach extras with your email.
Let’s see a few of them which you can use as extras.
- EXTRA_CC – Here, you can specify the email addresses in the form of a string array. These email addresses will get a carbon copy of your email. It allows you to keep multiple recipients in the loop without directly addressing them.
- EXRTA_BCC – Here, you can specify the email addresses to whom you wish to send a blind carbon copy. The recipients in the BCC field will not be visible to other recipients, ensuring privacy.
- EXTRA_SUBJECT – It contains a string defining the subject of your email, giving the recipient an idea of the email’s content before opening it.
- EXTRA_EMAIL – It holds the email address to which you wish to send the original mail. This is the primary recipient’s email address and is essential for sending the email.
- EXTRA_TEXT – It is used to send text data along with your email. This can include the main message body in plain text, providing the core content of the email.
- EXTRA_HTML_TEXT – It is used to send HTML data along with your email. This allows for richer formatting, including images, links, and styled text, enhancing the email’s visual appeal.
Implementation of an Email App
So, now we are ready to build our email application. You need to follow the below-mentioned steps to get through the app.
1: Launch your Android Studio.
2: Select Create a New Project.
3: Select Empty Activity and proceed.
4: Enter your application name. In my case, it’s “TechVidvanEmail” Next, select Kotlin from the dropdown. For the API level, select API 22 for now.
5: Now go to res —> layout —-> and open activity_main.xml. Now here, you need to add three edit texts and one button to send an email.
Code: activity_main.xml
<?xml version="1.0" encoding="utf-8"?>
<LinearLayout xmlns:android="http://schemas.android.com/apk/res/android"
    xmlns:tools="http://schemas.android.com/tools"
    android:layout_width="match_parent"
    android:layout_height="match_parent"
    android:orientation="vertical"
    android:background="#051130"
    tools:context=".MainActivity">

    <TextView
        android:id="@+id/title"
        android:layout_width="match_parent"
        android:layout_height="wrap_content"
        android:text="Tech Vidvan Email App"
        android:textColor="@color/white"
        android:textSize="28sp"
        android:gravity="center"
        android:textStyle="bold"
        android:layout_margin="20dp"
        />
    <EditText
        android:id="@+id/edit_mail_address"
        android:layout_width="match_parent"
        android:layout_height="wrap_content"
        android:padding="10dp"
        android:layout_margin="15dp"
        android:background="@color/white"
        android:textSize="18sp"
        android:hint="Enter Recipient Email Address"
        />
    <EditText
        android:id="@+id/edit_mail_subject"
        android:layout_width="match_parent"
        android:layout_height="wrap_content"
        android:hint="Enter your Subject here"
        android:padding="10dp"
        android:background="@color/white"
        android:layout_margin="15dp"
        android:textSize="18sp"
        />
    <EditText
        android:id="@+id/edit_mail_message"
        android:layout_width="match_parent"
        android:layout_height="wrap_content"
        android:lines="6"
        android:hint="Write your message here"
        android:background="@color/white"
        android:padding="10dp"
        android:textSize="18sp"
        android:layout_margin="15dp"/>
    <Button
        android:id="@+id/send_email_button"
        android:onClick="sendEmail"
        android:layout_width="wrap_content"
        android:layout_height="wrap_content"
        android:backgroundTint="#4CAF50"
        android:layout_gravity="center"
        android:layout_marginTop="15dp"
        android:textSize="16sp"
        android:text="Send Email" />
</LinearLayout>
Step 6: Now, as a final step, just paste the below code in your MainActivity.kt file.
Code: MainActivity.kt
package com.techvidvan.techvidvanemail

import android.content.Intent
import android.net.Uri
import android.os.Bundle
import android.view.View
import android.widget.EditText
import androidx.appcompat.app.AppCompatActivity

class MainActivity : AppCompatActivity()
{
    lateinit var emailEditText: EditText
    lateinit var emailEditSubject: EditText
    lateinit var emailEditMessage: EditText
    lateinit var recipientMail: String
    lateinit var emailSubject: String
    lateinit var emailMessage: String
    override fun onCreate(savedInstanceState: Bundle?)
    {
        super.onCreate(savedInstanceState)
        setContentView(R.layout.activity_main)

        //Binding variables with UI elements
        emailEditText = findViewById(R.id.edit_mail_address)
        emailEditSubject = findViewById(R.id.edit_mail_subject)
        emailEditMessage = findViewById(R.id.edit_mail_message)
    }

    fun sendEmail(view: View)
    {
        //first access data from the edit text fields
        recipientMail = emailEditText.text.toString()
        emailSubject = emailEditSubject.text.toString()
        emailMessage = emailEditMessage.text.toString()

        //now create an intent object
        val intent = Intent(Intent.ACTION_SEND)

        //provide email address of the recipient as data
        intent.data = Uri.parse("mailto:$recipientMail")

        //now we will add extras with the mail
        intent.putExtra(Intent.EXTRA_SUBJECT, emailSubject)
        intent.putExtra(Intent.EXTRA_TEXT, emailMessage)

        //set the type of mail
        intent.type = "text/plain"

        //start your intent
        startActivity(Intent.createChooser(intent, "Select your Email app"))
    }
}
Now, you need to run your application.
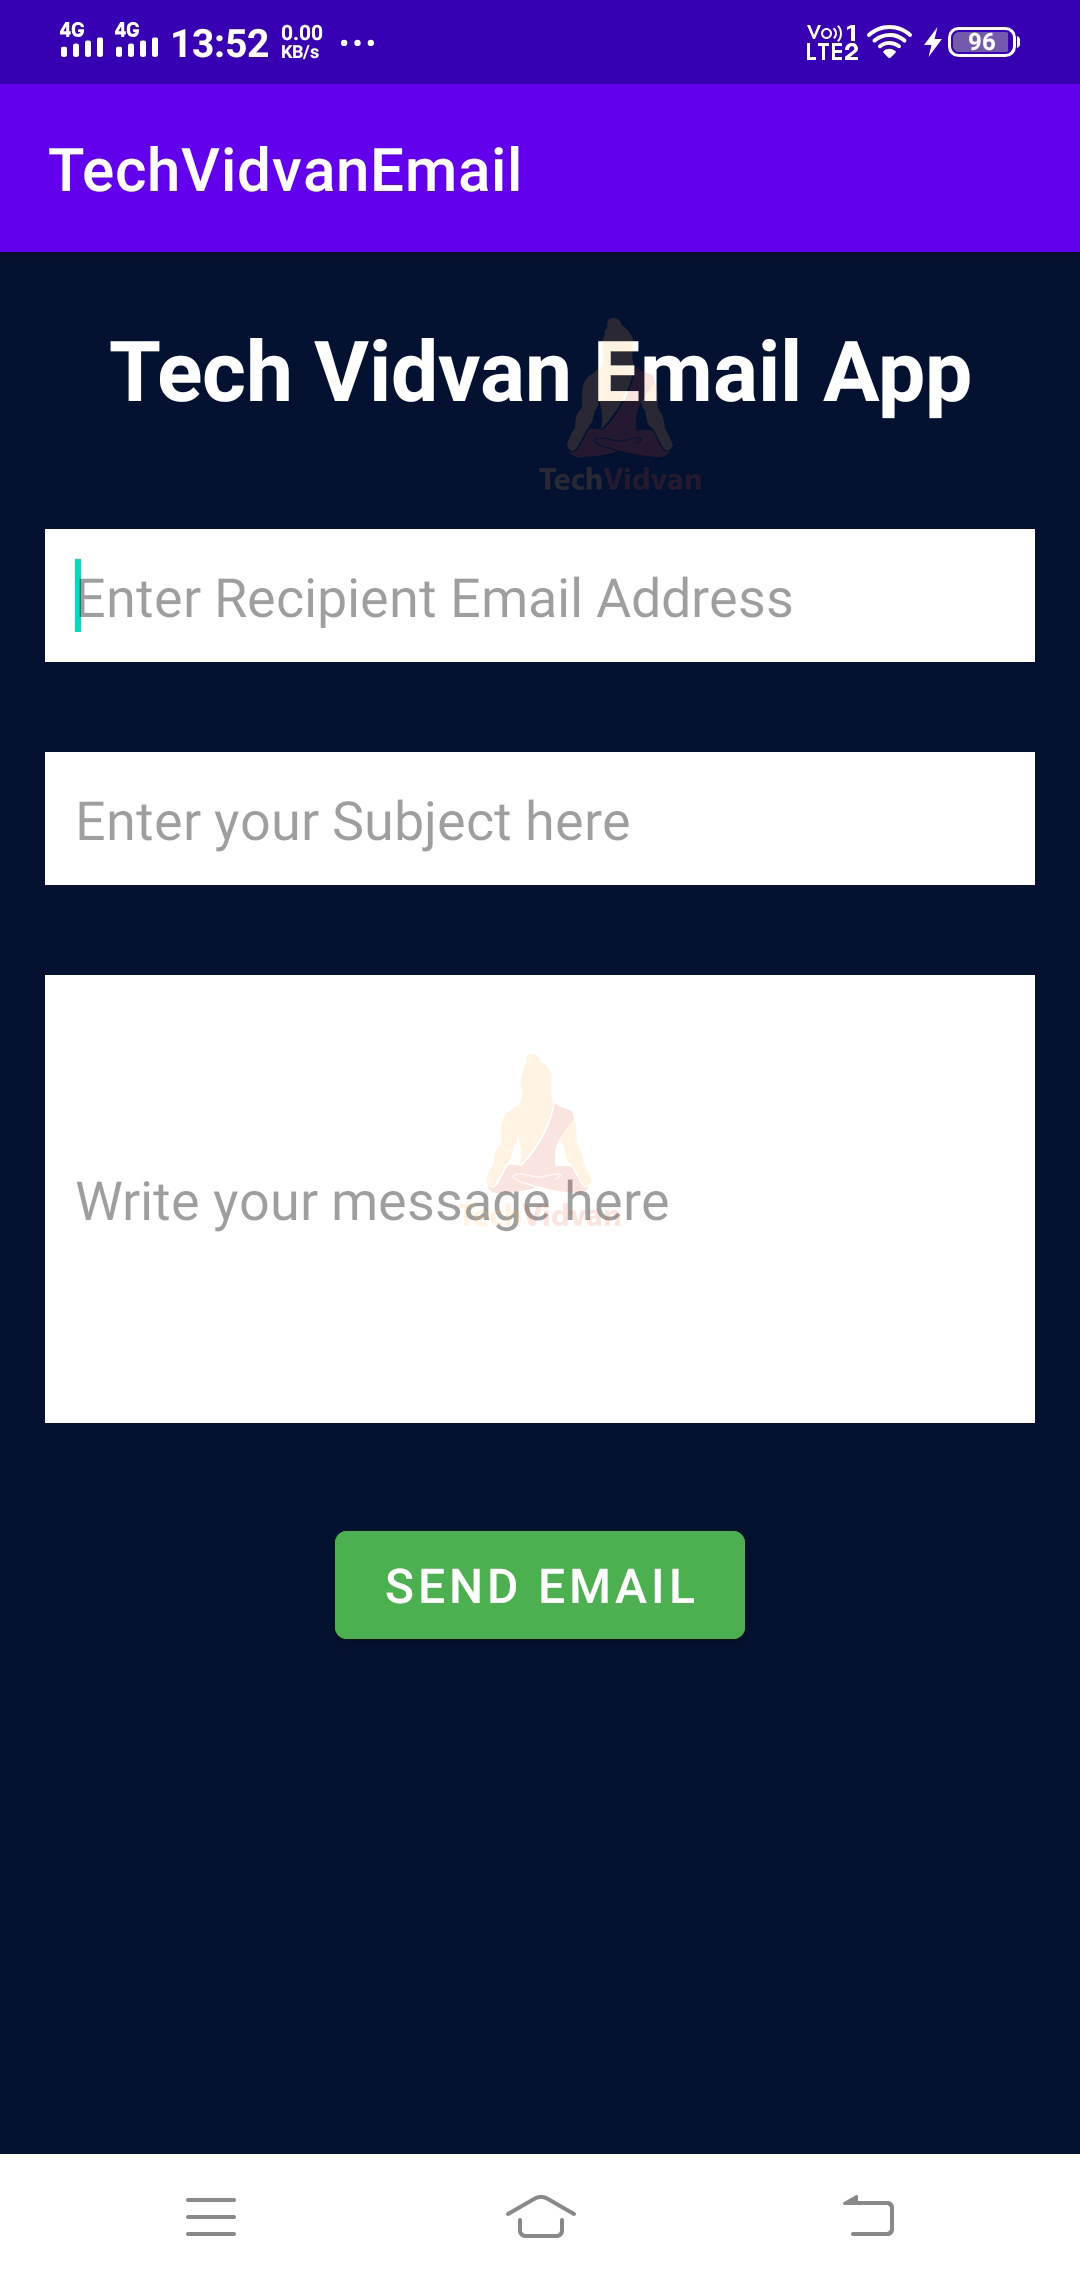
Here, you need to enter the recipient email, subject and body of the mail.
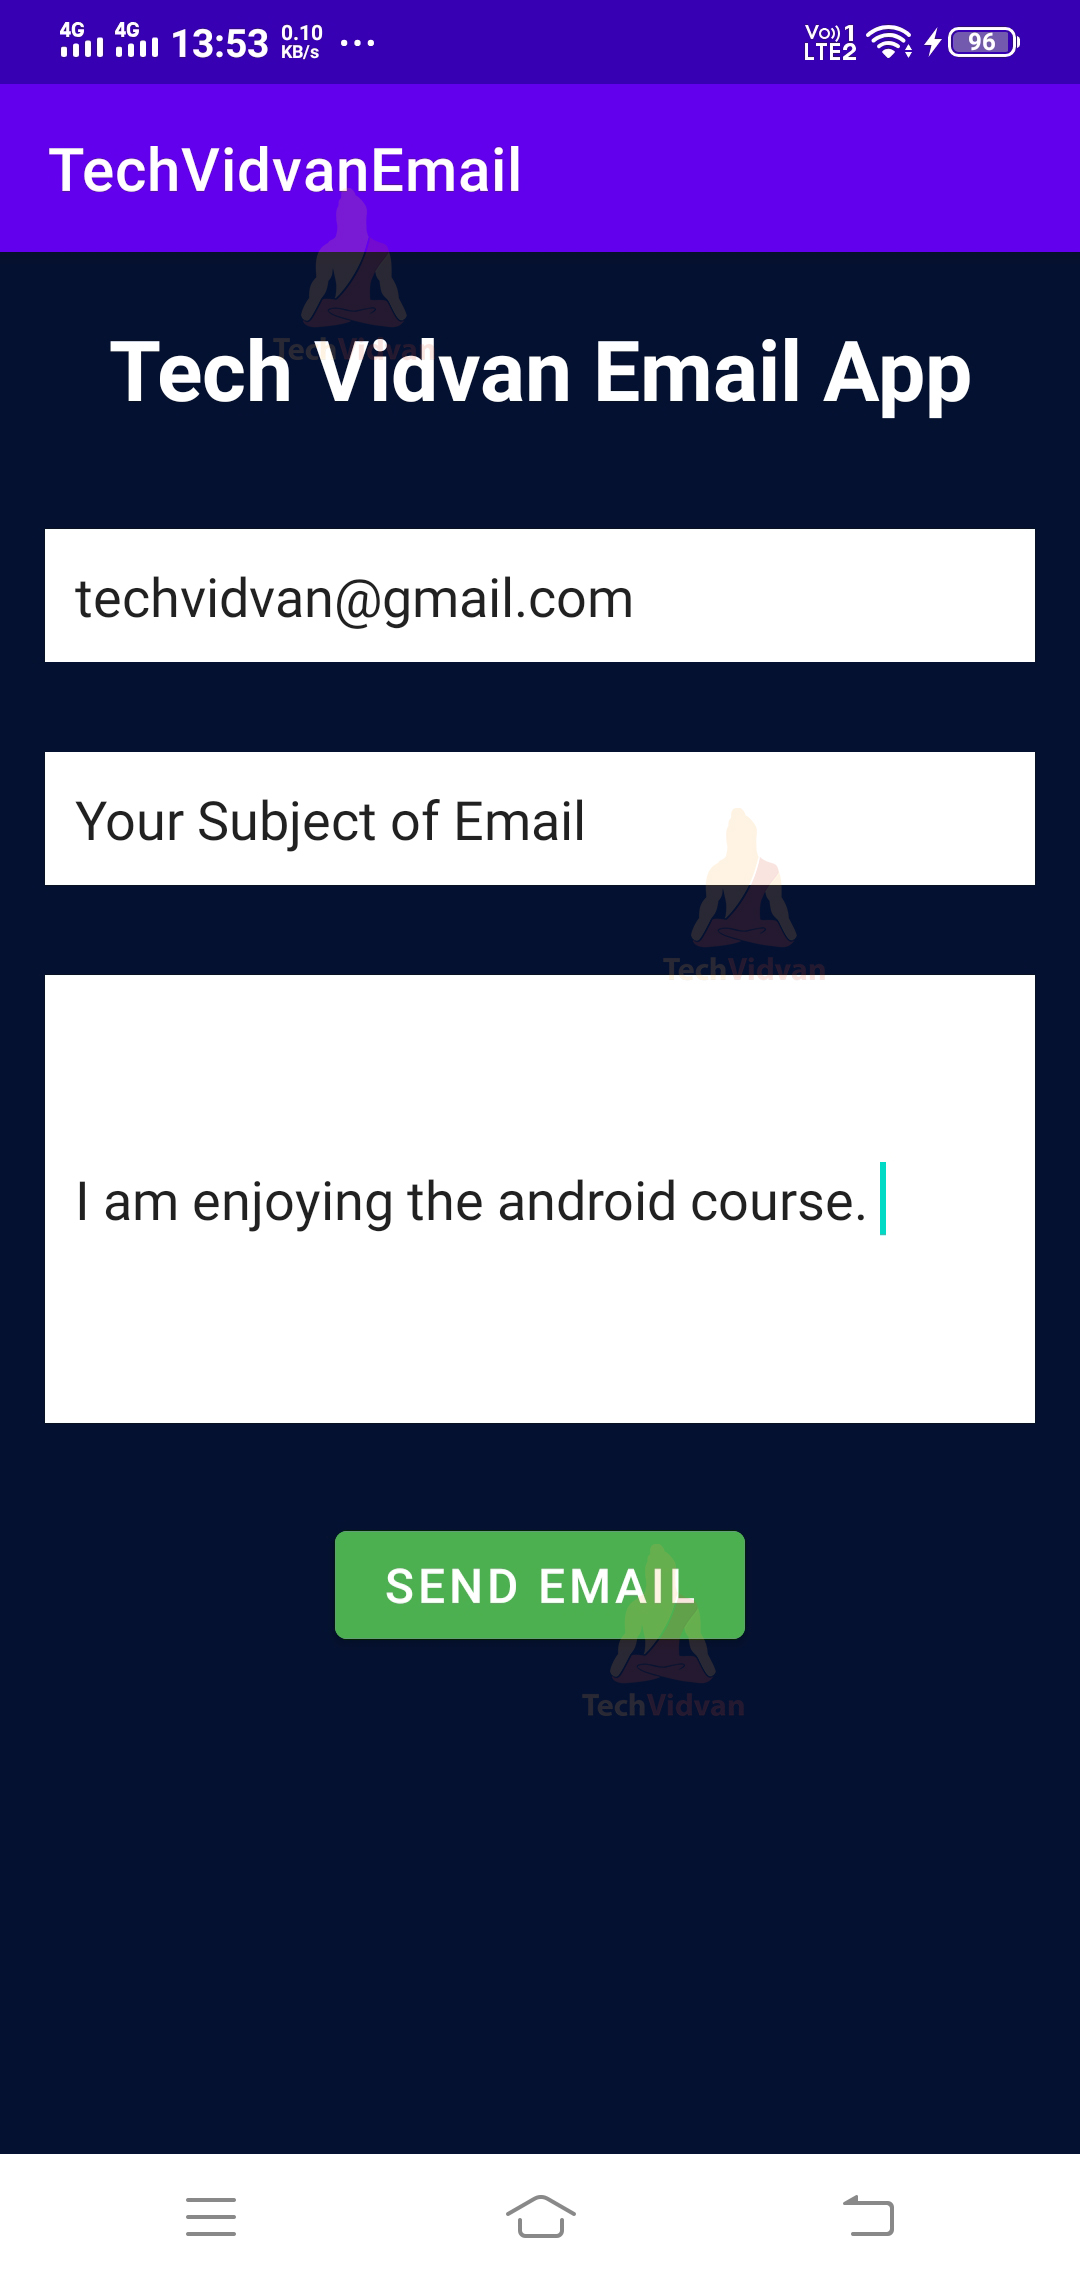
Now click on the send email button.
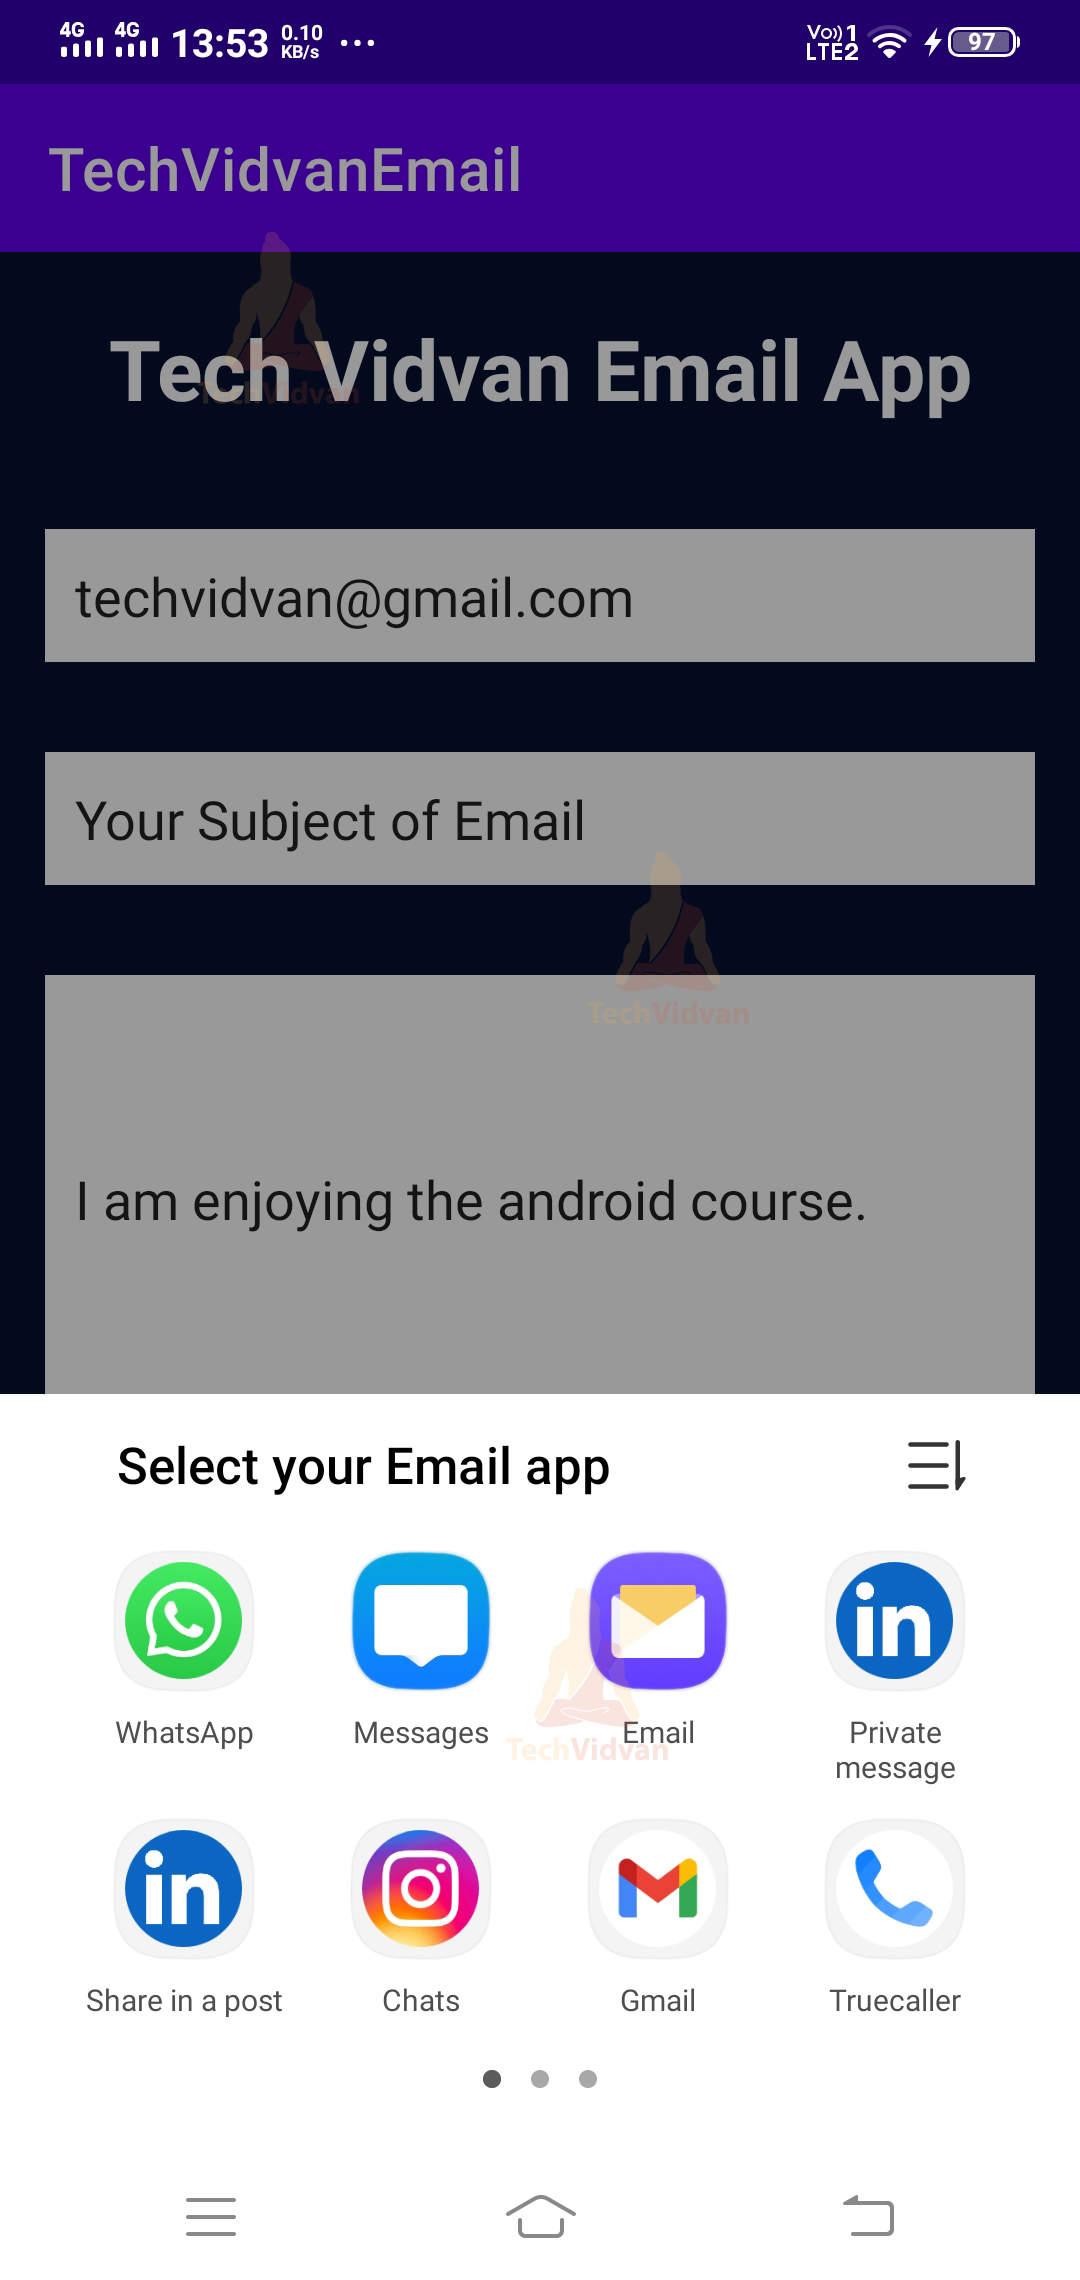
Now here you select your mail application. In my case, I will select Gmail.
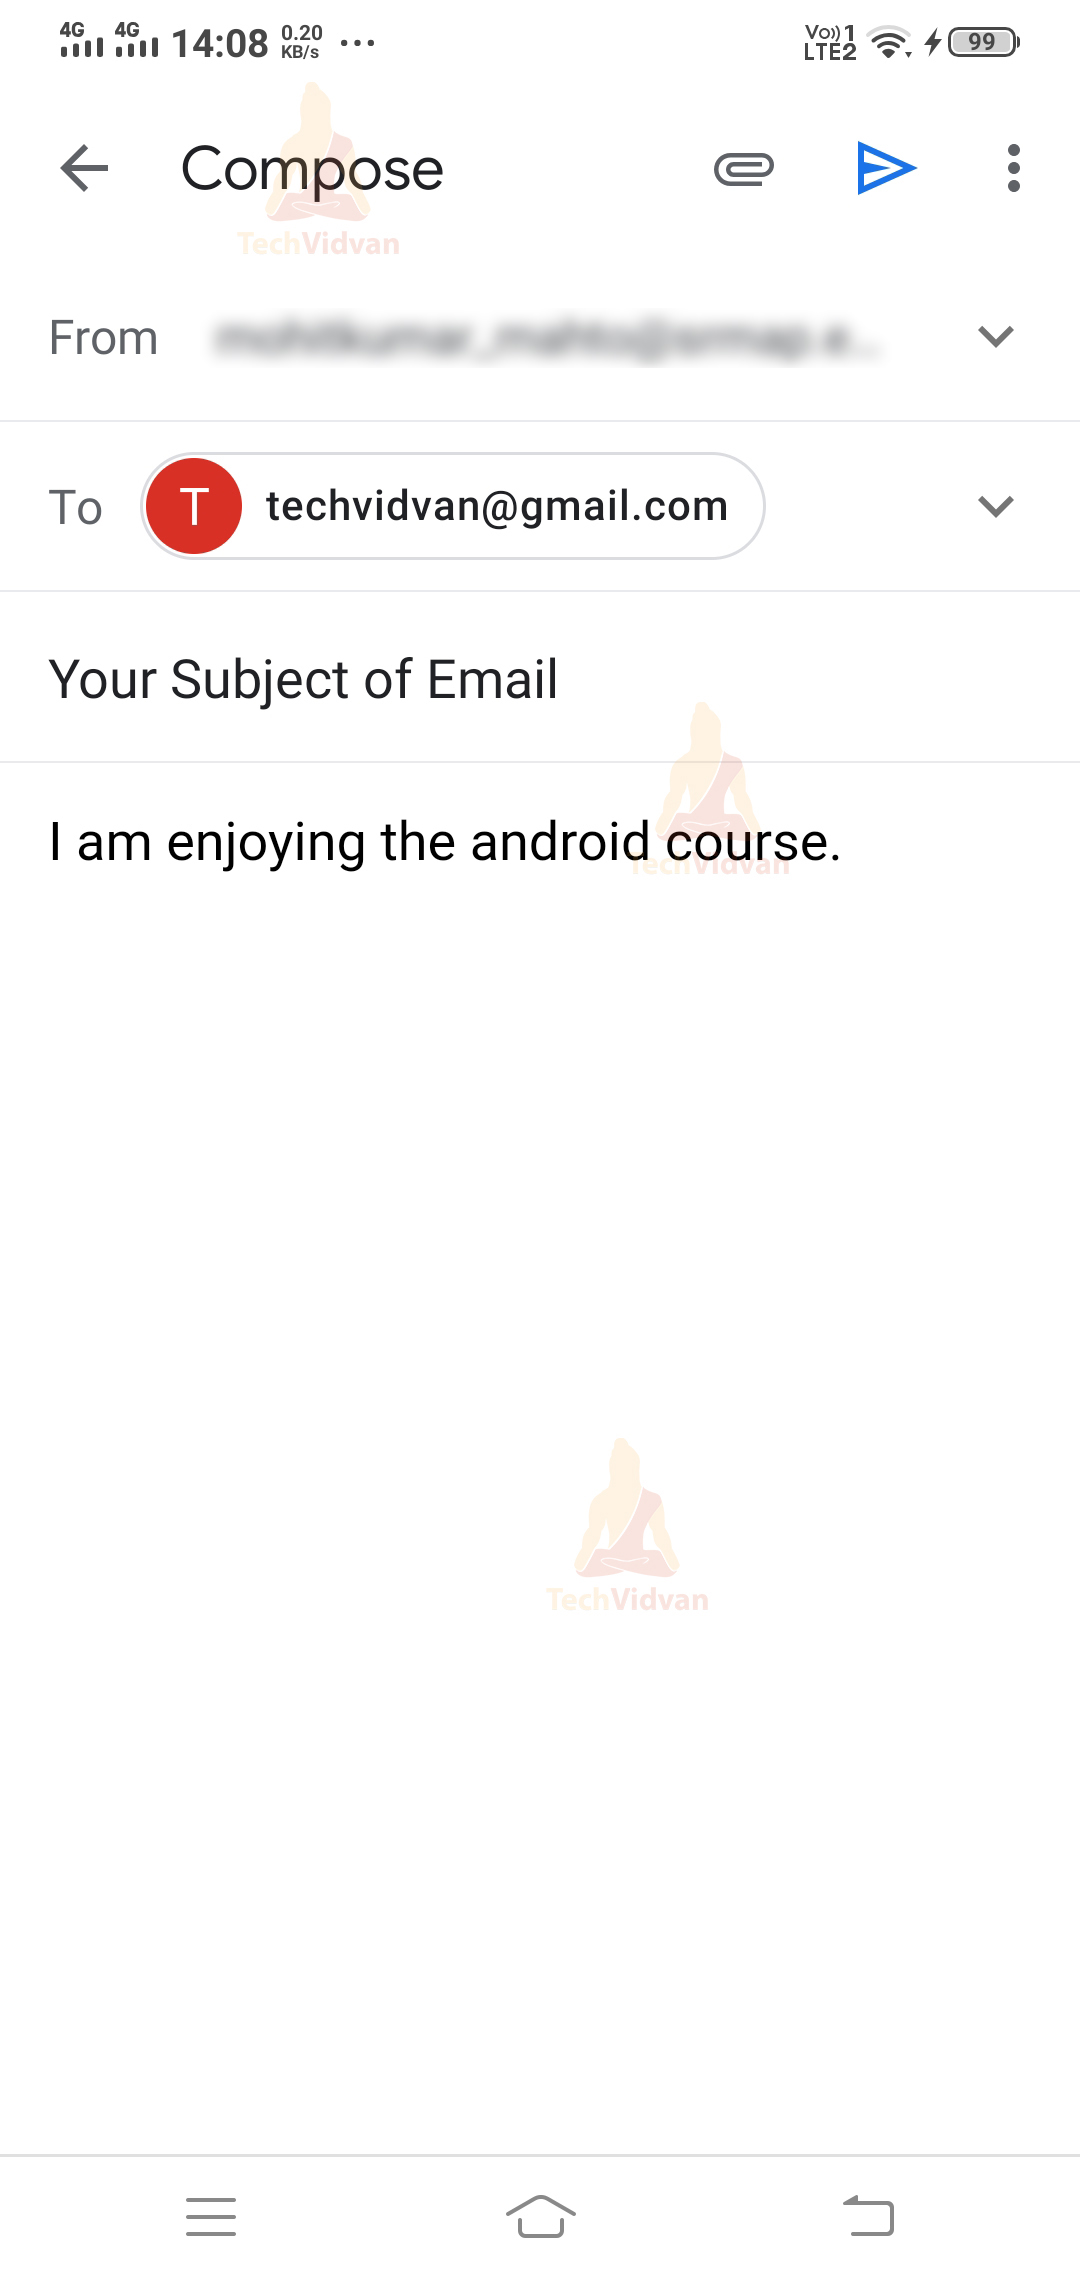
So you can see in your Gmail application along with your recipient mail, subject and mail body.
Summary
Through this article, you got to know more about emails and their uses. Moving forth, you saw the method to send emails from Android.
We discussed the intent you need to use and what extras you can add along with it. Finally, you saw how you create your mail sending application.