How to Send SMS in Android?
Today, we will cover yet another exciting topic. You might be well aware of the feature of sending SMS in android. Through this article, you will understand how you can send SMS to other devices using an application. For this, you need to know a few things.
Two ways to Send SMS on Android
First, SMS means short message service. So, you understand that it’s a service, and we term it as Messaging service. To send a message, you require the recipient’s phone number.
Now there are two ways to sending SMS in Android. They are as follows:
1. Using SMS Manager API
2. Using Built-in Application to send SMS.
Before going to any of the above methods, you need to add Send SMS permission in your manifest file. You can copy-paste the below in your manifest file.
<uses-permission android:name="android.permission.SEND_SMS"/>
Now let’s see each of the methods along with code snippets.
SMS Manager API
SMS Manager API is used to send text, data, and PDU messages. You can implement SMS Manager API by copying the below code.
//Creating SMS Manager object
val smsManager: manager = SmsManager.getDefault()

//Calling sendTextMessage
manager.sendTextMessage(recepient_number, null, the_message, null, null)
Built-in Application Method
So, above, you saw how you could send messages using SMS Manager API. Now, you will know how you can use your built-in SMS application to send messages. You can find the code below for this method.
val msg_uri = Uri.parse("smsto:recepient_phone_number")
val msgIntent = Intent(Intent.ACTION_SENDTO, msg_uri)
msgIntent.putExtra("message", "content of your message.")
startActivity(msgIntent)
SMS Manager Class
SMS Manager Class, as you know, is used to send messages and data. Above you saw a way how you can use the SMS manager API to send a text message. Now we will see the other methods that are present in the SMS Manager Class.
1. ArrayList<String> divideMessage()
The divideMessage() method is used to split a long message into multiple sub-messages, each within the allowable character limit for a single SMS. This is particularly useful when you need to send lengthy text messages without truncation.
2. void sendDataMessage()
The sendDataMessage() method allows you to send messages that include binary data, such as multimedia content or application-specific data. This method is essential for sending complex messages beyond plain text.
3. static SmsManager getDefault()
The getDefault() method creates and returns an instance of the SmsManager class, which is essential for sending SMS messages. This method provides a default SmsManager that is configured for the device’s network.
4. void sendTextMessage()
The sendTextMessage() method sends an SMS message that contains only text. It requires parameters such as the recipient’s phone number, the message content, and optional parameters for delivery and sent intents.
Implementation of Location-Based Services in Android.
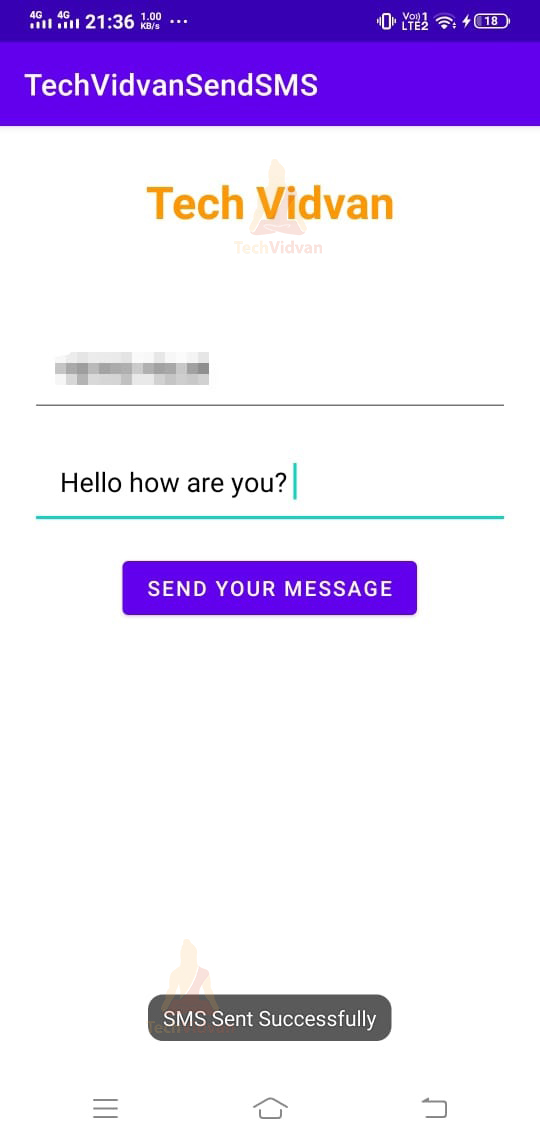
So, after understanding the above concepts. We are ready to implement the concepts through a messaging application. The application will contain a button and two edit texts to send a message.
Follow the below steps to achieve the goal.
1: Launch your Android Studio.
2: Select Create a New Project.

3: Select Empty Activity and proceed.
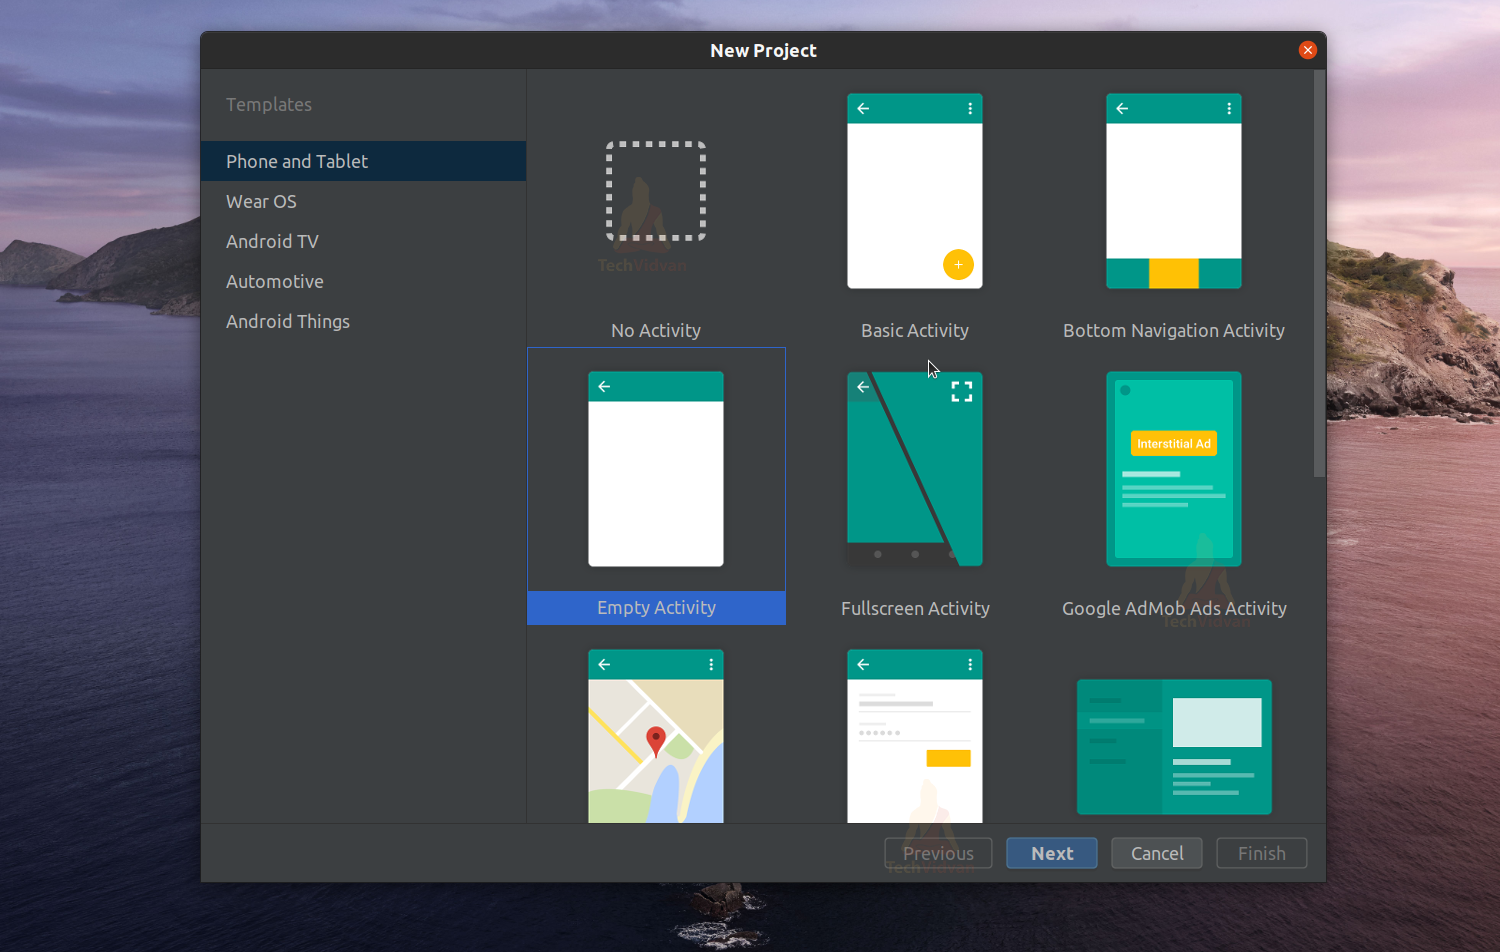
4: Enter your application name. In my case, it’s “TechVidvanSendSMS” Next, select Kotlin from the dropdown. For the API level, select API 22 for now.
5: Now, you need first to add the send SMS permission in your Manifest file.
Code:AndroidManifest.xml
<?xml version="1.0" encoding="utf-8"?>
<manifest xmlns:android="http://schemas.android.com/apk/res/android"
    package="com.techvidvan.techvidvansendsms">

    <!--    Adding Permission to send SMS    -->
    <uses-permission android:name="android.permission.SEND_SMS"/>
    <application
        android:allowBackup="true"
        android:icon="@mipmap/ic_launcher"
        android:label="@string/app_name"
        android:roundIcon="@mipmap/ic_launcher_round"
        android:supportsRtl="true"
        android:theme="@style/Theme.TechVidvanSendSMS">
        <activity android:name=".MainActivity">
            <intent-filter>
                <action android:name="android.intent.action.MAIN" />

                <category android:name="android.intent.category.LAUNCHER" />
            </intent-filter>
        </activity>
    </application>

</manifest>
6: Now go to res —> layout —-> and open activity_main.xml. Now here, you need to add two edit texts and a button.
Code: activity_main.xml
<?xml version="1.0" encoding="utf-8"?>
<LinearLayout xmlns:android="http://schemas.android.com/apk/res/android"
    xmlns:tools="http://schemas.android.com/tools"
    android:layout_width="match_parent"
    android:layout_height="match_parent"
    tools:context=".MainActivity"
    android:layout_margin="20dp"
    android:orientation="vertical">

    <TextView
        android:id="@+id/title"
        android:layout_width="match_parent"
        android:layout_height="wrap_content"
        android:text="Tech Vidvan"
        android:textColor="#FF9800"
        android:textSize="30sp"
        android:textStyle="bold"
        android:gravity="center"
        android:padding="10dp"
        />
    <EditText
        android:id="@+id/recipient_phone_number"
        android:layout_width="match_parent"
        android:layout_height="wrap_content"
        android:padding="20dp"
        android:layout_marginTop="50dp"
        android:hint="Enter Recipient's Phone Number "
        android:textColor="@android:color/black" />
    <EditText
        android:id="@+id/your_message"
        android:layout_width="match_parent"
        android:layout_height="wrap_content"
        android:padding="20dp"
        android:layout_marginTop="10dp"
        android:hint="Please enter your message"
        android:textColor="@android:color/black" />
    <Button
        android:id="@+id/send_your_sms"
        android:layout_width="wrap_content"
        android:layout_height="wrap_content"
        android:layout_gravity="center"
        android:layout_marginTop="15dp"
        android:onClick="sendSMS"
        android:text="Send Your Message" />

</LinearLayout>
7: Now, just open your MainActivity file and paste the below code.
Code: MainActivity.kt
package com.techvidvan.techvidvansendsms
import android.Manifest
import android.content.pm.PackageManager
import androidx.appcompat.app.AppCompatActivity
import android.os.Bundle
import android.telephony.SmsManager
import android.text.TextUtils
import android.view.View
import android.widget.Button
import android.widget.EditText
import android.widget.Toast
import androidx.core.app.ActivityCompat
import androidx.core.content.ContextCompat
class MainActivity : AppCompatActivity()
{
//declaring the variables
lateinit var button: Button
lateinit var recipient_number: EditText
lateinit var your_message: EditText
private val permissionRequest = 901
override fun onCreate(savedInstanceState: Bundle?)
{
super.onCreate(savedInstanceState)
setContentView(R.layout.activity_main)
//binding edit text views with variable
recipient_number = findViewById(R.id.recipient_phone_number)
your_message = findViewById(R.id.your_message)
//binding button with the variable
button = findViewById(R.id.send_your_sms)
}
private fun sendMessage()
{
//fetching the number from edit text field
val number: String = recipient_number.text.toString().trim()
//fetching your message from edit text
val msg: String = your_message.text.toString().trim()
if (number == "" || msg == "")
{
//if number or message is empty
Toast.makeText(this, "Please enter all the fields", Toast.LENGTH_SHORT).show()
}
else
{
//if both number and message is not empty
if (TextUtils.isDigitsOnly(number))
{
//if number contains only digits
//creating sms manager object
val smsManager: SmsManager = SmsManager.getDefault()
//use sms manager api to send the message
smsManager.sendTextMessage(number, null, msg, null, null)
//if the message is sent successfully then show toast
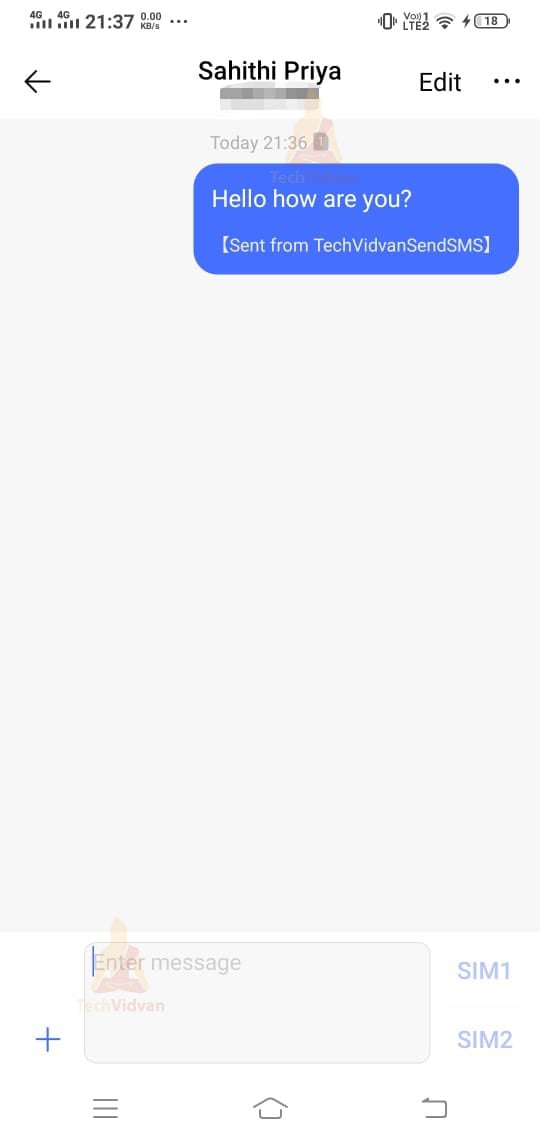
Toast.makeText(this, "SMS Sent Successfully", Toast.LENGTH_SHORT).show()
}
else
{
//if number has other than digits then show wrong number
Toast.makeText(this, "Wrong Number!", Toast.LENGTH_SHORT).show()
}
}
}
override fun onRequestPermissionsResult(requestCode: Int, permissions: Array<out String>, grantResults:
IntArray)
{
super.onRequestPermissionsResult(requestCode, permissions, grantResults)
//checking if the permissions are granted
if (requestCode == permissionRequest) {
if (grantResults[0] == PackageManager.PERMISSION_GRANTED) {
sendMessage()
} else {
Toast.makeText(this, "Please provide permission",
Toast.LENGTH_SHORT).show()
}
}
}
fun sendSMS(view: View)
{
//when you press the button
val permissionCheck = ContextCompat.checkSelfPermission(this, Manifest.permission.SEND_SMS)
if (permissionCheck == PackageManager.PERMISSION_GRANTED)
{
//if permission is granted, then send the message
sendMessage()
}
else
{
//if not granted, then seek again
ActivityCompat.requestPermissions(this, arrayOf(Manifest.permission.SEND_SMS),
permissionRequest)
}
}
}
So, now your application is ready.
Summary
So through this article, you got to know about the various ways for sending SMS to other devices using android. You saw in detail what an SMS Manager API is and how you can use several methods. Finally, you saw a demo of creating your messaging application.