How to start Android Application Development
Hey Folks! Many of you are here with one question in your mind: How to kickstart android application development? Don’t worry you have landed in the safest hands. From this article, you will get everything that requires you to start with android application development. There are many tools and frameworks available both online and offline that you can use for android development.
If you wish to know more about those tools, then do refer to the article mentioned here.
After understanding the tools available and knowing their features, I hope you have your mind for which framework or tool suits you the best. If you still feel confused, I recommend going with Android Studio and starting your android journey.
Through this article, we will try to cover each aspect of building an application in Android Studio in a very basic banner. Please ensure that you follow each step clearly and do it side by side.
About Android Studio
Before proceeding with the android application development with android studio, let’s give a brief glance over what android studio is. Android Studio is one of the most widely used tools for android development. The simplicity and immense user experience make android studio one of the best tools for android development.
Android Studio allows you to build native android apps with relatively less effort and provides many features. Using Android Studio, you can both design the app as well as code the application. Android Studio supports both Java and Kotlin, and users can choose any of them depending on their interests.
Android Studio has a large community and provides you support all the time when you face some issue. When you develop Android Studio apps, you can easily integrate your applications with backend services like Firebase. You can also generate signed versions of APK that we can directly upload on the Google Play Store.
Prerequisites of Android Application Development
As stated before, this tutorial is quite simple and doesn’t require any prerequisites. However, you should once know the basics of the following topics to start your android application development.
- Kotlin or Java Programming
- Basics of XML
- Basics of Object-Oriented Programming
So, if you are comfortable with the above three, then you are good to start.
Description of terms involved in Android Application Development
One more thing you should be familiar with is the basic terms involved in android application development. You will often encounter these terms while developing android applications, so knowing them will advance your learning.
1. MainActivity File: MainActivity is one of the most often encountered files while developing any android application. The MainActivity file is by default created by Android Studio and is well known as the first activity of your application. By activity, I mean the first screen that is visible after opening your application.
2. Gradle file – Gradle in android is the build tool that builds the application from your app source code.
3. \res directory – You can see a res directory present in your project files. The res directory consists of all assets of your project like images, strings, layouts, etc.
4. AndroidManifest.xml – AndroidManifest.xml files consist of declarations of various app components and also defines permissions for your application.
Step by Step building of an Android Application
So, now it’s time for us to explore the essential steps to build an android application. let’s see the steps below:
1: If you don’t have Android Studio installed, follow the article here, which takes you through the step-by-step installation of Android Studio.
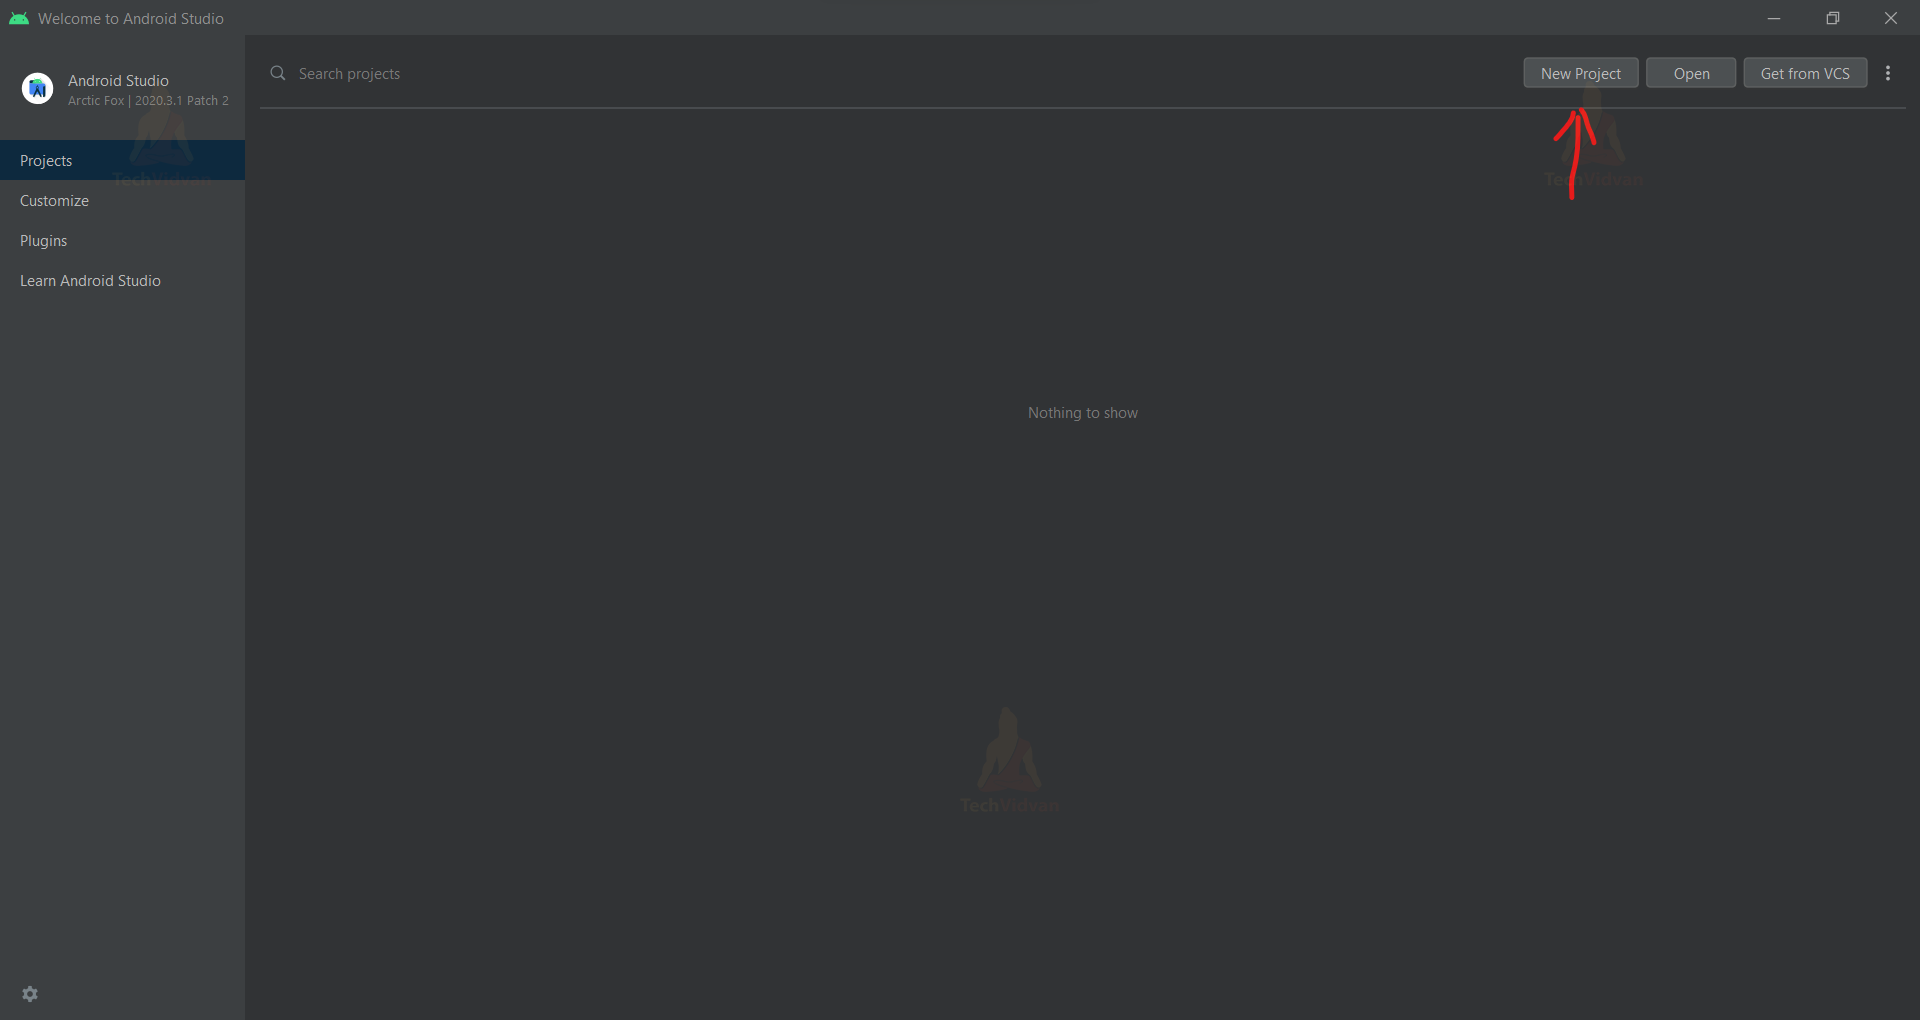
2: Search the Android Studio application in your system and then open it.
3: Click on New Project, as shown below in the screenshot.
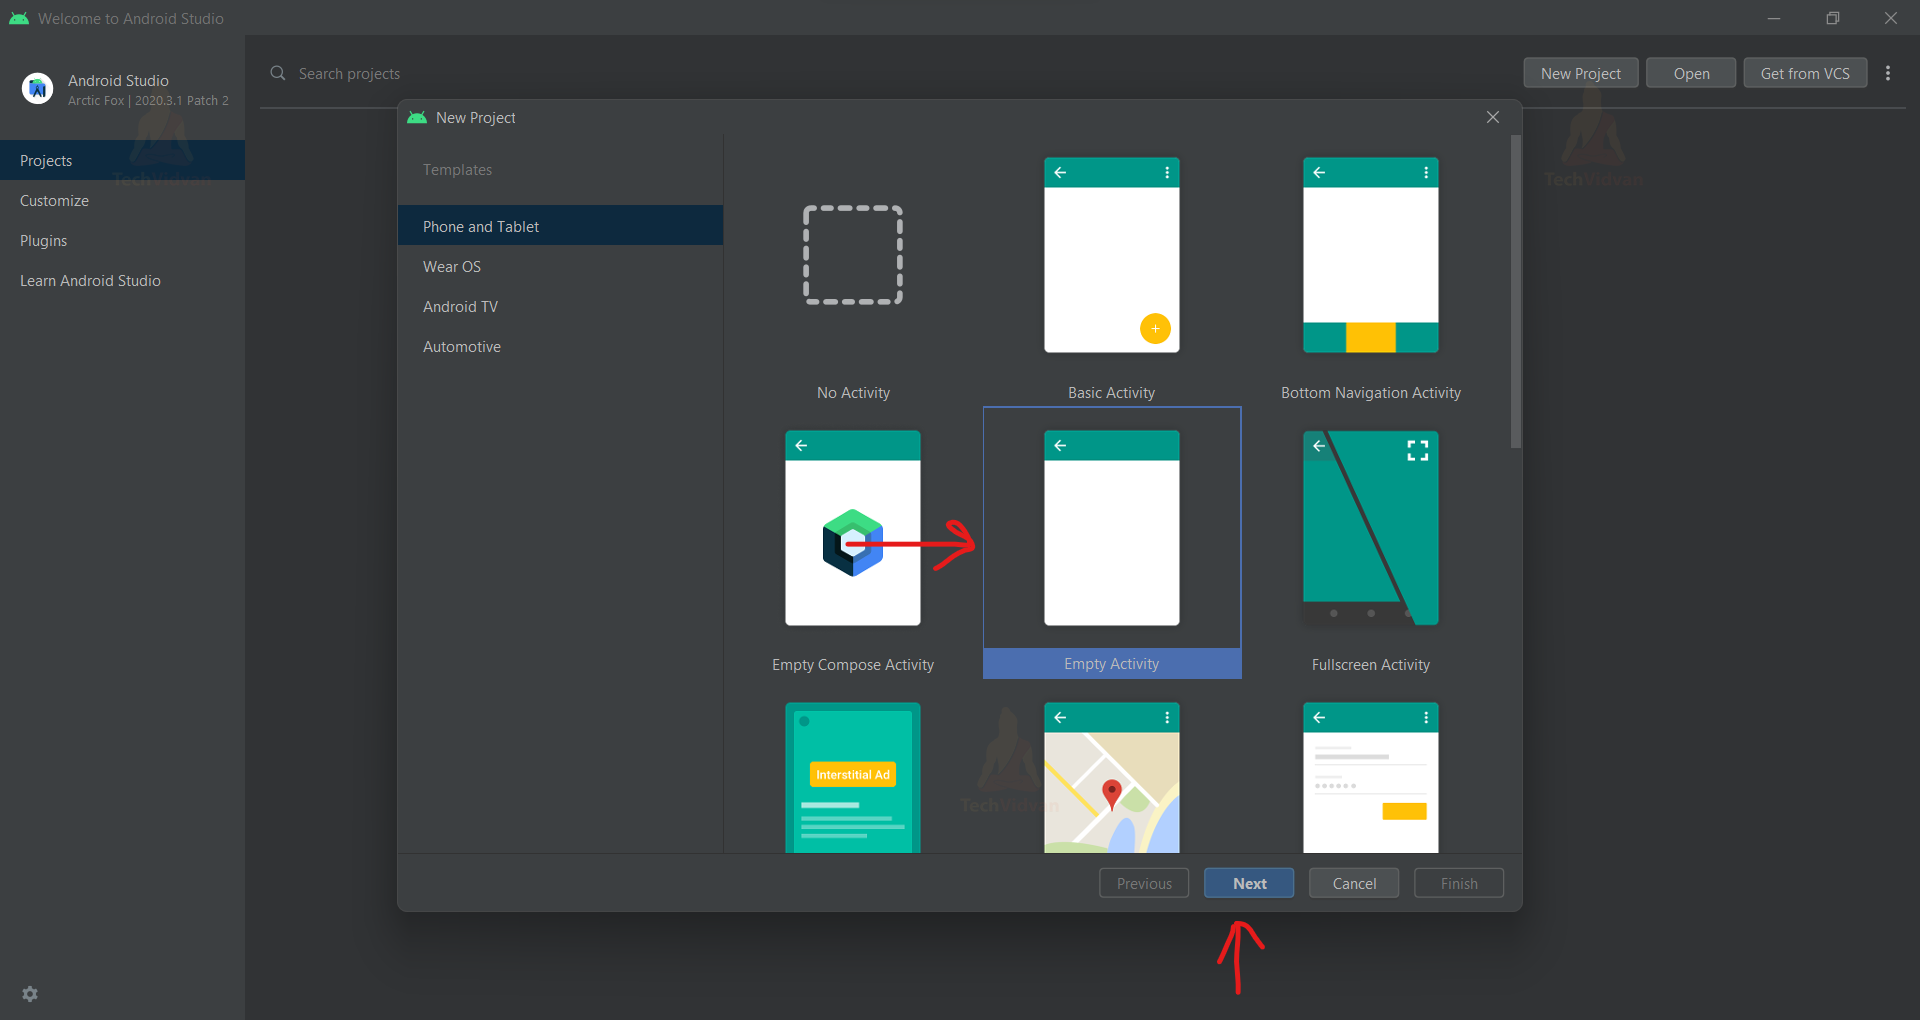
4: Now, you need to select Empty Activity and click on Next.
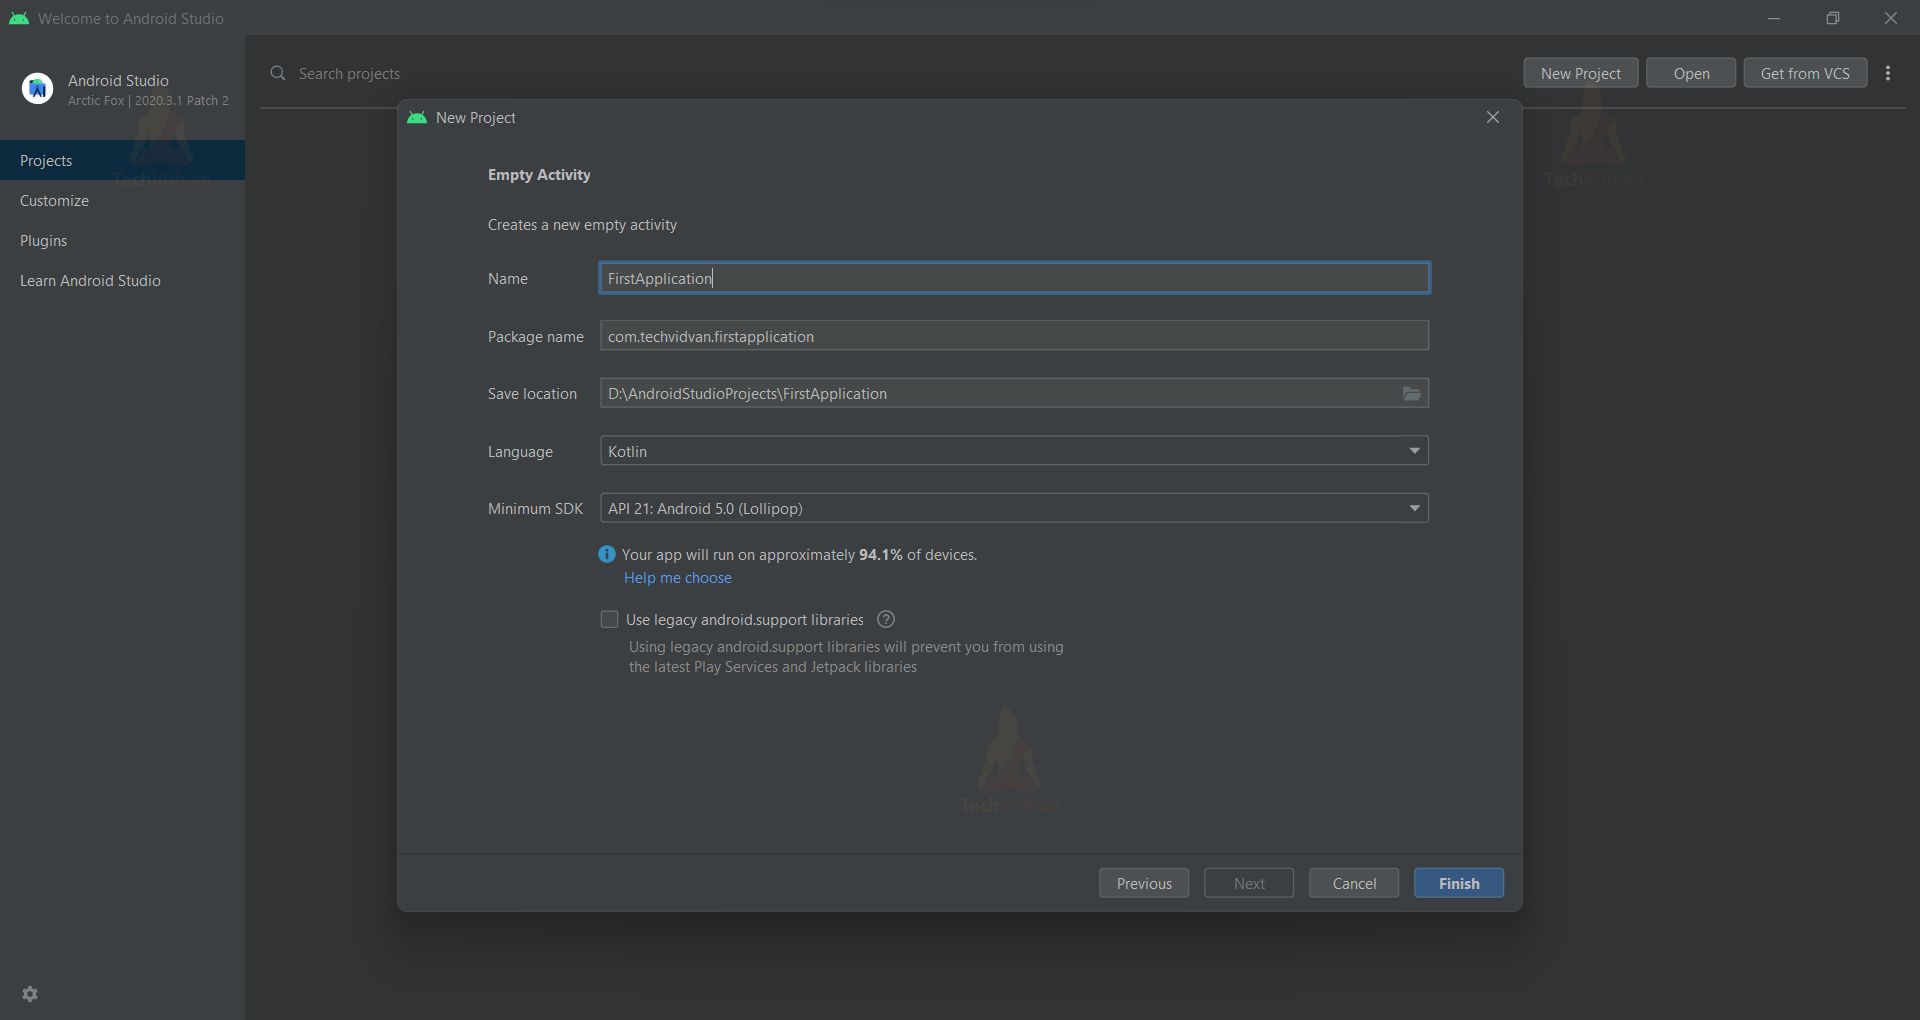
5: Now, you will see a window prompting you to enter the application name, package name, select location, Language, and minimum SDK. While filling in these details, keep the following things in mind:
- Application Name: Application Name can be anything of your desire and will appear as the name of your app also when you install iron on some device.
- Package Name: For development purposes, you can keep the Package name of your choice, but when you go for publishing, you have to specify a unique package name. Usually, the package name is of the form “com.example.application_name”.
- Save Location: You can decide where you wish to save all your applications by browsing the path.
- Language: If you are comfortable with Java, you can select Java or if you are comfortable with Kotlin, then select Kotlin.
- Minimum SDK: You should be cautious while selecting minimum SDK. Minimum SDK defines the minimum requirement for any device. In other words, by specifying a minimum SDK, you ensure that your application would perfectly run on the android version the same or above the specified version.
Choosing a lower SDK makes your app compatible with most of the available android devices. However, selecting a low version is also problematic because some features are not allowed in those SDK.
The below screenshot shows you an example of filling in the above details for your application.
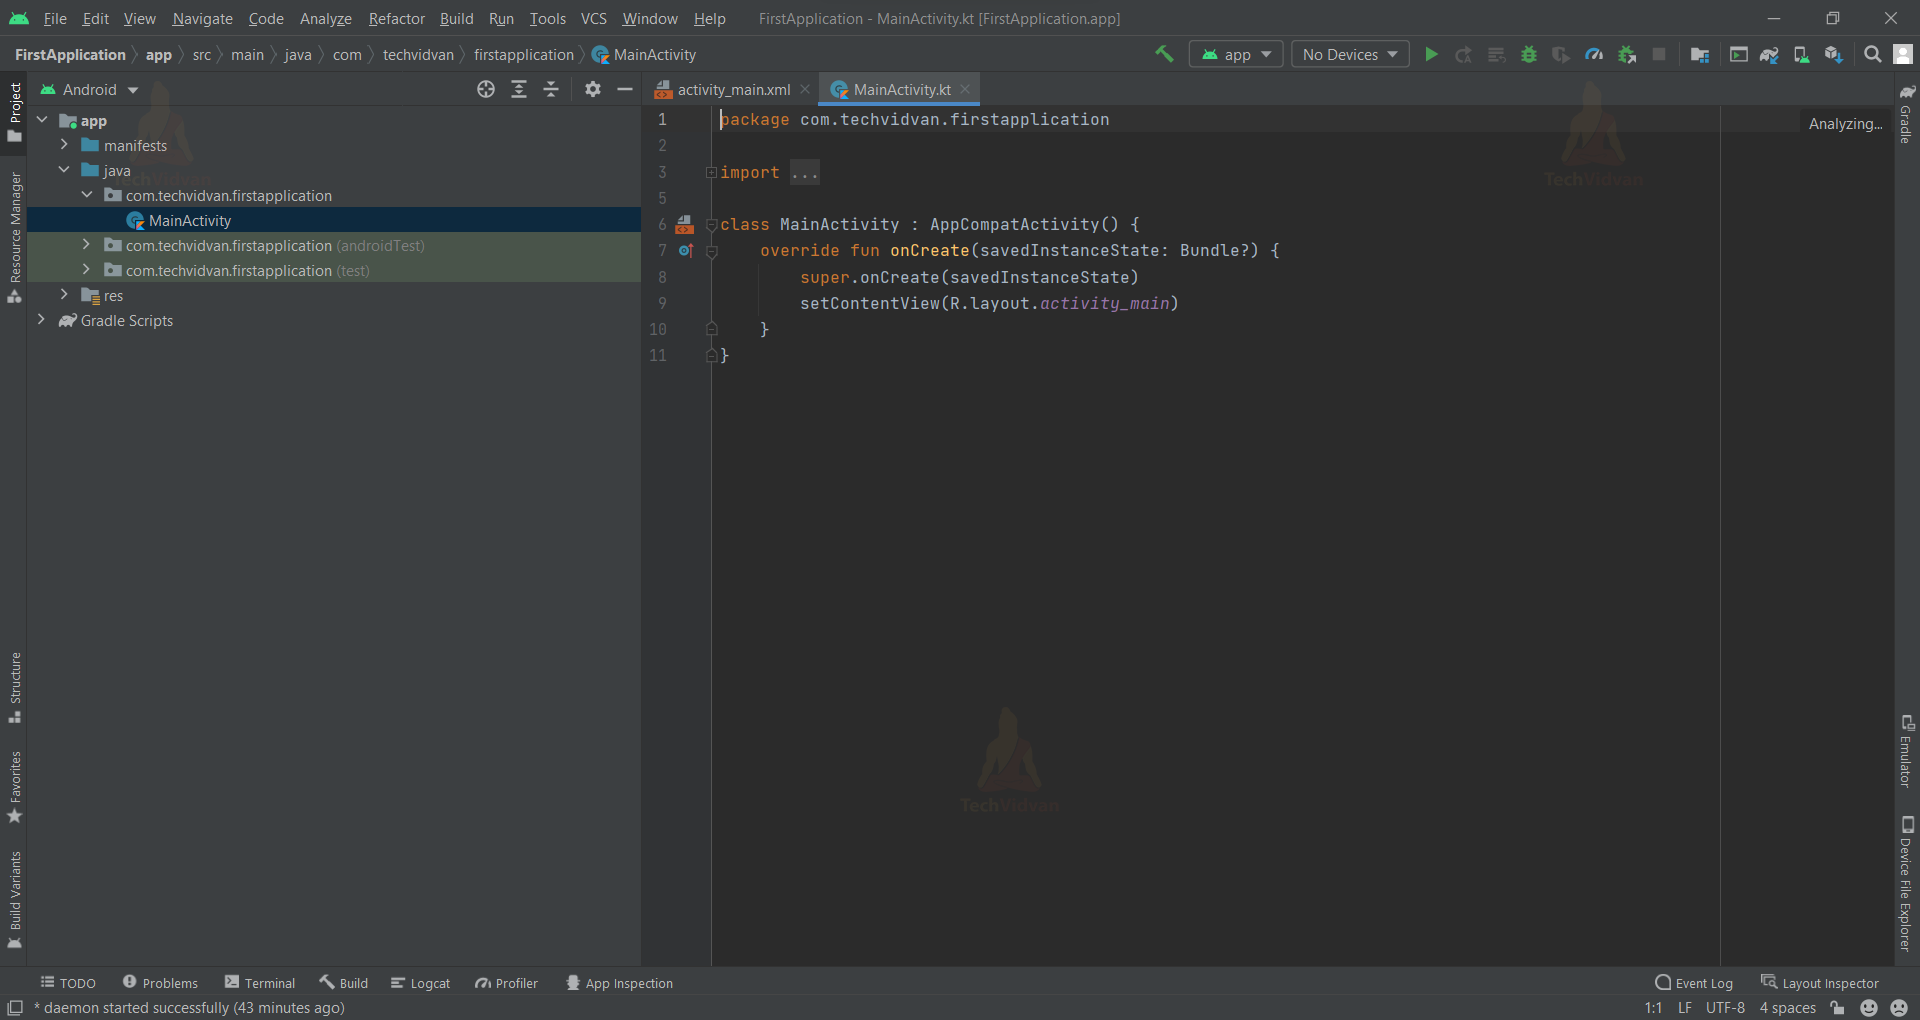
6: After filing the application details, click on Finish. Now, wait for some time until Gradle makes the project files ready for you. When it gets ready, the screen looks as follows:
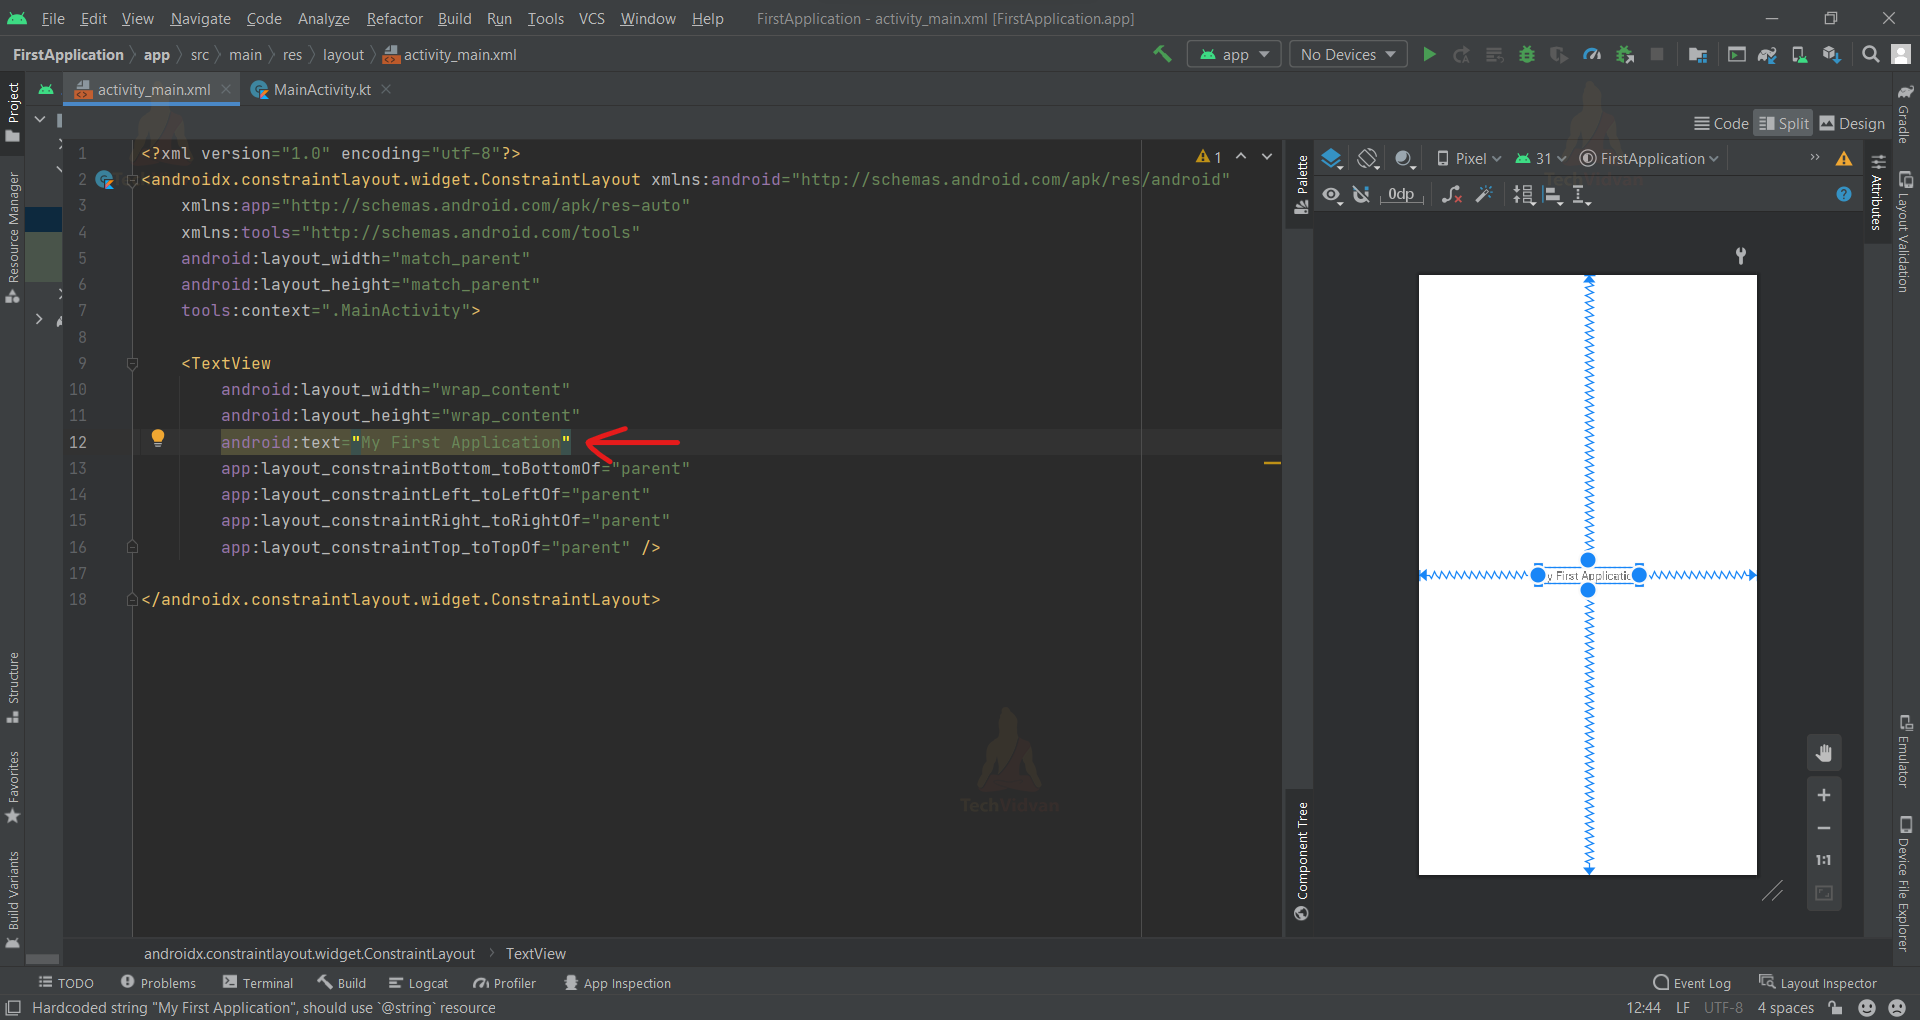
7: Now navigate to activity_main.xml and edit the code shown there. You can see “Hello World” there, and you can edit it and name it “My First Application,” as shown below.
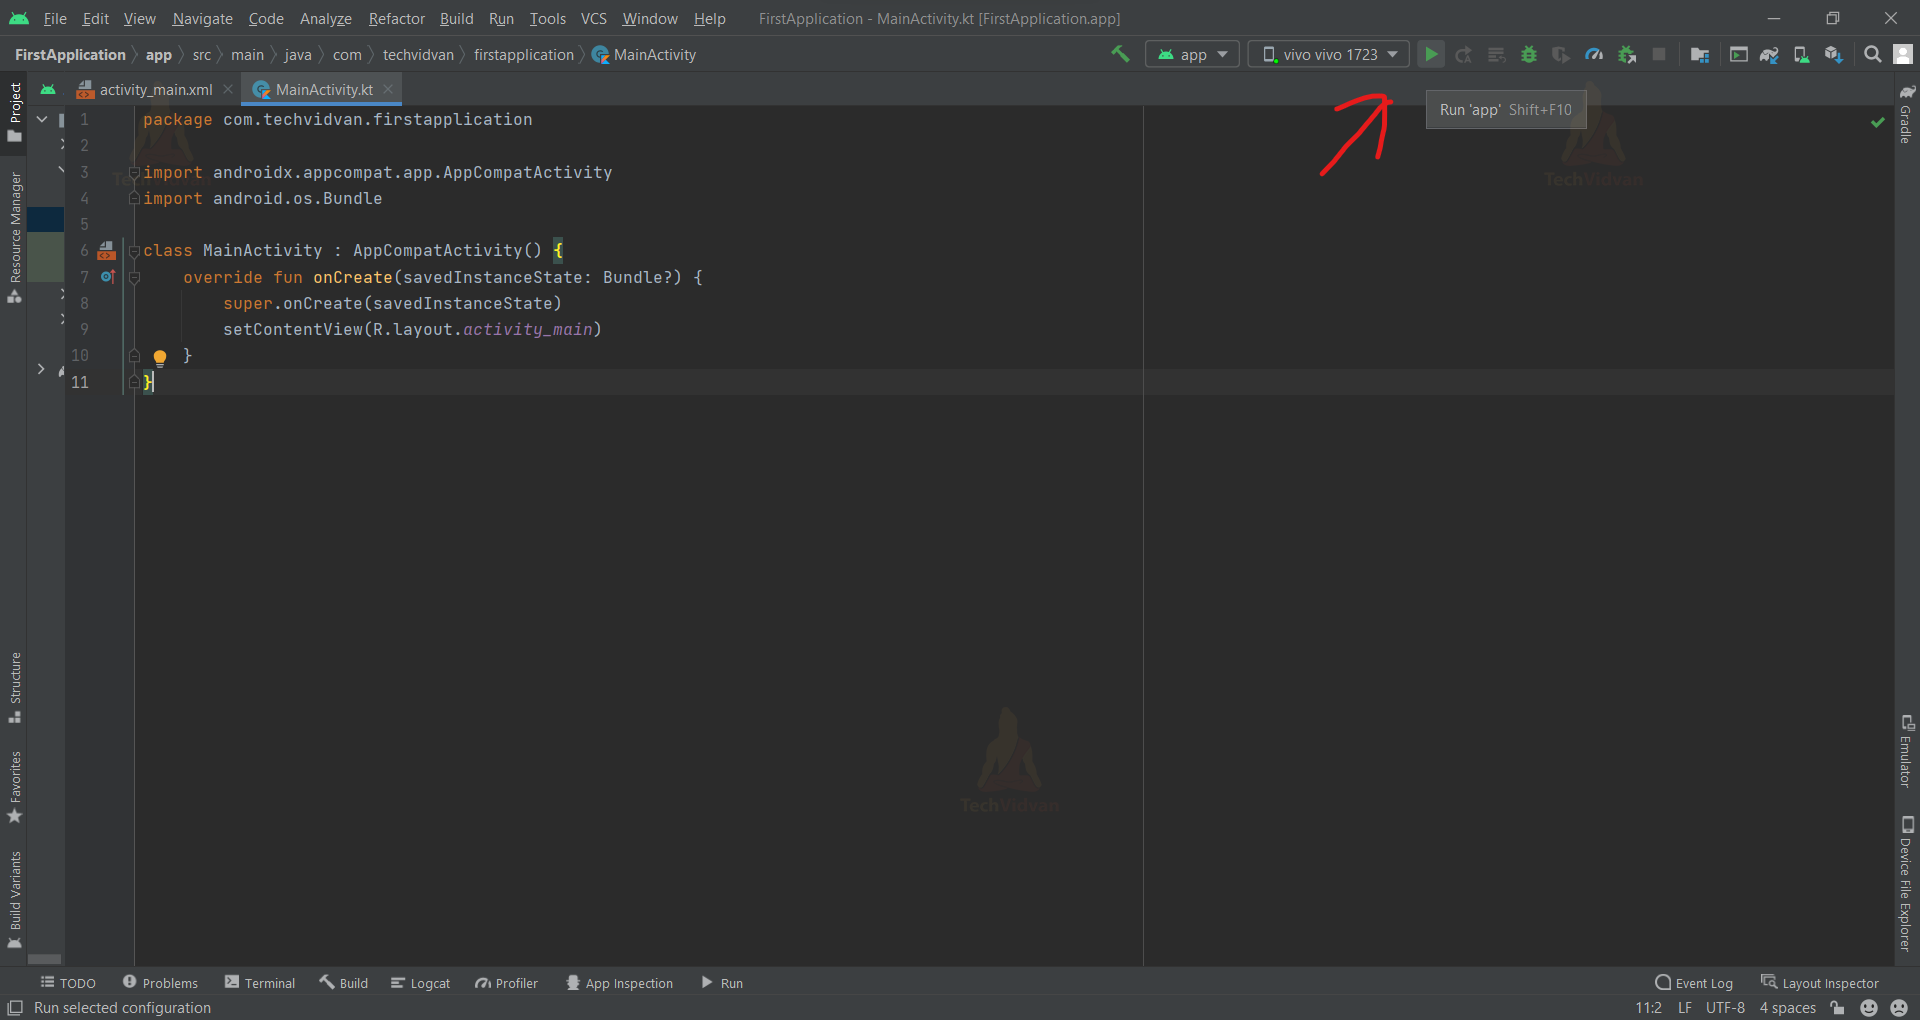
8: Now, you need to connect your device to a PC and enable USB Debugging in your device. Now, you need to press the green play button present in android studio to run an application on your device.
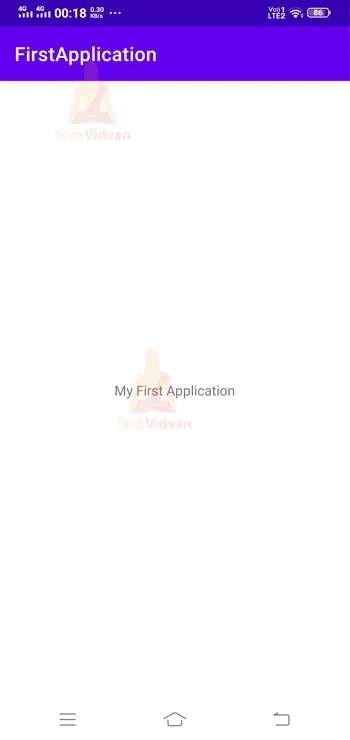
Now, open your device, and you will see your first android application installed on your device.
Summary
Through this article, you came across the android application development process. You came across briefly what Android Studio is and how it helps in application development. Later on, you saw the prerequisites that are essential to building Android Development. Moving forth, you saw the description of the files that you usually encountered while developing an android application. Finally, you saw the step-by-step procedure to build an android application.

