Create Quiz Web App with Python Django
Let’s develop our own Quiz App Project in Django and let others attempt and test their knowledge by giving the Quiz. You will also get the basic idea of Django Python framework and how to design the front-end part.
About Quiz App
Every one of us likes to attempt a Quiz and check our score at the end. Have you ever thought of building a quiz using some of the programming knowledge and which other people can also be able to play. If you have thought about this, you have come to the right place to learn to make a beautiful quiz on various topics.
If you are new to Django then it is the perfect project for you all to do it and have practice. It will also improve your front-end skills and most importantly javascript, ajax, and jQuery which many people find it difficult to understand.
Django Quiz App Project
The objective of our project is to implement quiz having different topics using Python Django Framework. A good knowledge of Django and front-end skills is enough for the project.
Project Prerequisites
This Django Quiz App requires a good knowledge of html, css, javascript, jQuery, bootstrap, and offcourse Python Django Framework. Some basic knowledge of javascript, ajax, and jQuery is very important.
Download Django Quiz Project Code
Please download the source code of python django quiz app: Django Quiz Project Code
Project File Structure
First, let’s check the steps to build the Quiz Project Python:
1. First it is important to start the project in Django by using django-admin startproject command
2. Then creating an app inside our project by django-admin startapp command.
3. Create a folder for templates and add it to the settings.py file.
4. Similarly, create a static file and media file as per requirements and add it to the settings.py file.
5. Then you are good to go and start making the urls and views.
Let’s start.
1. First of all we create a navigation bar in base.html of our project:
<nav class="navbar navbar-expand-lg navbar-dark bg-dark">
    <div class="container-fluid">
      <a class="navbar-brand" href="/"><span class="head1">Tech</span> <span class="head2">Vidvan</span></a>
      <button class="navbar-toggler" type="button" data-bs-toggle="collapse" data-bs-target="#navbarSupportedContent" aria-controls="navbarSupportedContent" aria-expanded="false" aria-label="Toggle navigation">
        <span class="navbar-toggler-icon"></span>
      </button>
      <div class="collapse navbar-collapse" id="navbarSupportedContent">
          {% if user.is_authenticated %}
          <ul class="navbar-nav me-auto mb-2 mb-lg-0">
            <li class="nav-item">
              <a class="nav-link" href="#">Welcome {{request.user}}</a>
            </li>
            <li class="nav-item">
                <a class="nav-link" href="/logout">Logout</a>
              </li>
              {% if user.is_superuser %}
              <li class="nav-item">
                <a class="nav-link" href="/admin">Admin</a>
              </li>
              {% endif %}
          </ul>
          {% else %}
        <ul class="navbar-nav me-auto mb-2 mb-lg-0">
          <li class="nav-item">
            <a class="nav-link" href="/signup">Sign Up</a>
          </li>
          <li class="nav-item">
            <a class="nav-link" href="/login">Login</a>
          </li>
        </ul>
        {% endif %}
      </div>
    </div>
  </nav>
Code Explanation:
You must have a basic knowledge of bootstrap. It is sometimes very important to use it. It is open source and free to use the code. There are various components which you can use from bootstrap. Here a navbar is used and designed as per our needs.
{% if user.is_authenticated %}: It means that if the user is logged in then the sign up and login options won’t be visible to the user and vice versa.
{% if user.is_superuser %}: It means if the user is a super user or the admin then only that particular user will get an admin option where he can manage all the quizzes.
 {% for i in quiz %}
      <div class="col-md-4">
        <div class="card" style="width: 21rem;">
          <div class="card-body">
            <h5 class="card-title" style="text-align: center;">{{i.name}}</h5>
            <br>
            <p class="card-text">{{i.desc}}</p>
            <br>
            <button data-bs-target="#exampleModal" data-bs-toggle="modal" data-time="{{i.time}}"
              data-questions="{{i.number_of_questions}}" data-name="{{i.name}}" data-id="{{i.id}}" id="btn"
              style="justify-content: center;" class="attempt btn mr-2 modal-button"><i class="fas fa-link"></i>Attempt
              Quiz</button>
          </div>
        </div>
      </div>
      {% endfor %}
    </div>
  </div>
</div>
Code Explanation:
In this django project, we have used cards for displaying various quiz topics which the user can view and choose whichever topic the user wants to give a quiz on. In Django if you want to use a for loop then the syntax for using it is: {% for loop %} and where the for loop ends: {% endfor %}. By using this for loop we fetch the data from the database and display it in a loop.
You don’t have to worry about the quiz topics, if you want to add a new quiz for the users you can simply add it through the database and it will automatically get displayed on the screen. Only the admin that is the superuser can make changes in Quiz.
<style>
  .attempt {
    --gradient: linear-gradient(to left top, #c724dd 10%, #aaaaaa 90%) !important;
  }

  body {
    background: #111;
  }

  .card {
    background: #222;
    border: 1px solid #7a24dd;
    color: rgba(250, 250, 250, 0.8);
    margin-bottom: 3rem;
  }

  #btn {
    border: 5px solid;
    border-image-slice: 1;
    background: var(--gradient) !important;
    -webkit-background-clip: text !important;
    -webkit-text-fill-color: transparent !important;
    border-image-source: var(--gradient) !important;
    text-decoration: none;
    position: relative;
    left: 80px;
  }

  .head1 {
    color: #FBAD30;
    font-size: 2rem;
    font-weight: bold;
    height: 50px;
  }

  .head2 {
    color: #EF4926;
    font-size: 2rem;
    font-weight: bold;
  }

  #btn:hover,
  #btn:focus {
    background: var(--gradient) !important;
    -webkit-background-clip: none !important;
    -webkit-text-fill-color: #fff !important;
    border: 5px solid #fff !important;
    box-shadow: #222 1px 0 10px;
    text-decoration: underline;
  }

  .logo {
    position: relative;
    bottom: 2rem;
  }

  .container-fluid {
    height: 60px;
  }
</style>
This is the required css that are included in the first page.
Linear Gradient: You can basically use more than one color where ever you want to use it. Also, give the position of it and the amount of which color you want in percent.
Body: Inside body whatever we specify it will get applied to the whole body that is whole page. Here, we have given a color for the whole body.
Btn:hover and btn:focus: Whenever user take their cursor on any button having the above mentioned class it can change its styling. Here the color of the button gets changed and it gets a white border.
You can try giving your own styling as you like.
from django.db import models
from django.contrib.auth.models import User
import random

class Quiz(models.Model):
    name = models.CharField(max_length=50)
    desc = models.CharField(max_length=500)
    number_of_questions = models.IntegerField(default=1)
    time = models.IntegerField(help_text="Duration of the quiz in seconds", default="1")

    def __str__(self):
        return self.name

    def get_questions(self):
        return self.question_set.all()

class Question(models.Model):
    content = models.CharField(max_length=200)
    quiz = models.ForeignKey(Quiz, on_delete=models.CASCADE)

    def __str__(self):
        return self.content

    def get_answers(self):
        return self.answer_set.all()


class Answer(models.Model):
    content = models.CharField(max_length=200)
    correct = models.BooleanField(default=False)
    question = models.ForeignKey(Question, on_delete=models.CASCADE)

    def __str__(self):
        return f"question: {self.question.content}, answer: {self.content}, correct: {self.correct}"

class Marks_Of_User(models.Model):
    quiz = models.ForeignKey(Quiz, on_delete=models.CASCADE)
    user = models.ForeignKey(User, on_delete=models.CASCADE)
    score = models.FloatField()

    def __str__(self):
        return str(self.quiz)
Code Explanation:
So here we have created 4 models or databases named Quiz, Question, Answer, and marks_of_user. In the Quiz model, the details related to the quiz is added like the name of the quiz etc. In the Question model as the quiz is the foreign key, it is possible to add a question with respect to the quiz we want.
It is possible to add the options and tick the correct option. Similarly in the Answer model question is a foreign key all the options are saved with their Boolean values and with respect to the particular question. Finally, in the marks of the user model the name of the user, the user’s marks, and the name of the quiz given by user is saved.
JavaScript and jQuery:
vaScript and jQuery:
    document.addEventListener('DOMContentLoaded', () => {
        const timeLeftDisplay = document.querySelector('#time-left');
        const startbtn = document.querySelector('.start-button');
        let timeLeft = {{ quiz.time }
    } ;

    function countDown() {
        setInterval(function () {
            if (timeLeft <= 0) {
                clearInterval(timeLeft = 0)
            }
            if (timeLeft == 0) {
                $(".ans").attr("disabled", true);
            }
            timeLeftDisplay.innerHTML = timeLeft
            timeLeft--;
        }, 1000)
    }
    startbtn.addEventListener('click', countDown)
    });
Code Explanation:
The above code is required to display the count down time. To answer the quiz questions user will be getting some amount of time, if the user fails to answer the questions in the given amount of time then all the radio buttons that is the options will get disabled and the user will not be allowed to further answer the questions.
Function Countdown:
if (timeLeft <= 0) {
                clearInterval(timeLeft = 0)
This means that the timer should get stopped at zero and not go further in negative numbers.
if (timeLeft == 0) {
                    $(".ans").attr("disabled", true);
It means that whenever the timer will be equal to zero all the options will get disabled so that the user cannot answer the questions.
timeLeftDisplay.innerHTML = timeLeft
                timeLeft--;
It will display the time and after every second it will reduce it by one second.
const url = window.location.href
   const quizBox = document.getElementById('quiz-box')
   const resultBox = document.getElementById('result-box')
   const totalScore = document.getElementById('total')

   $.ajax({
       type: 'GET',
       url: `${url}data`,
       success: function (response) {
           const data = response.data
           data.forEach(ele => {
               for (const [question, answers] of Object.entries(ele)) {

                   quizBox.innerHTML += `
                   <hr class="ques" style="display:none">
                   <div class="mb-2 ques" style="display:none">
                       <b>${question}</b>
                   </div>
               `
                   $('.start-button').click(function () {
                       $(".ques").show();
                   });
                   answers.forEach(answer => {
                       quizBox.innerHTML += `
                       <div>
                           <input type="radio" class="ans" style="display:none" id="${question}-${answer}" name="${question}" value="${answer}">
                           <label for="${question}" style="display:none" class="answer">${answer}</label>
                       </div>
                   `
Code Explanation:
Here nested for loop is used to display all the questions with their options. The first forEach loop displays the first question of the quiz and second forEach loop displays all the options of the particular quiz. This process continues till all the questions are displayed from the database.
marks.forEach(res=>{
               const resDiv = document.createElement("div")
               for (const [question, resp] of Object.entries(res)){

                   resDiv.innerHTML += question
                   const cls = ['container', 'p-3', 'text-light', 'h6']
                   resDiv.classList.add(...cls)

                   if (resp=='not answered') {
                       resDiv.innerHTML += '- not answered'
                       resDiv.classList.add('bg-info')
                   }
                   else {
                       const answer = resp['answered']
                       const correct = resp['correct_answer']

                       if (answer == correct) {
                           resDiv.classList.add('bg-success')
                           resDiv.innerHTML += ` answered: ${answer}`
                       } else {
                           resDiv.classList.add('bg-danger')
                           resDiv.innerHTML += ` | correct answer: ${correct}`
                           resDiv.innerHTML += ` | answered: ${answer}`
                       }
                   }
               }
               resultBox.append(resDiv)
           })
       },
Code Explanation:
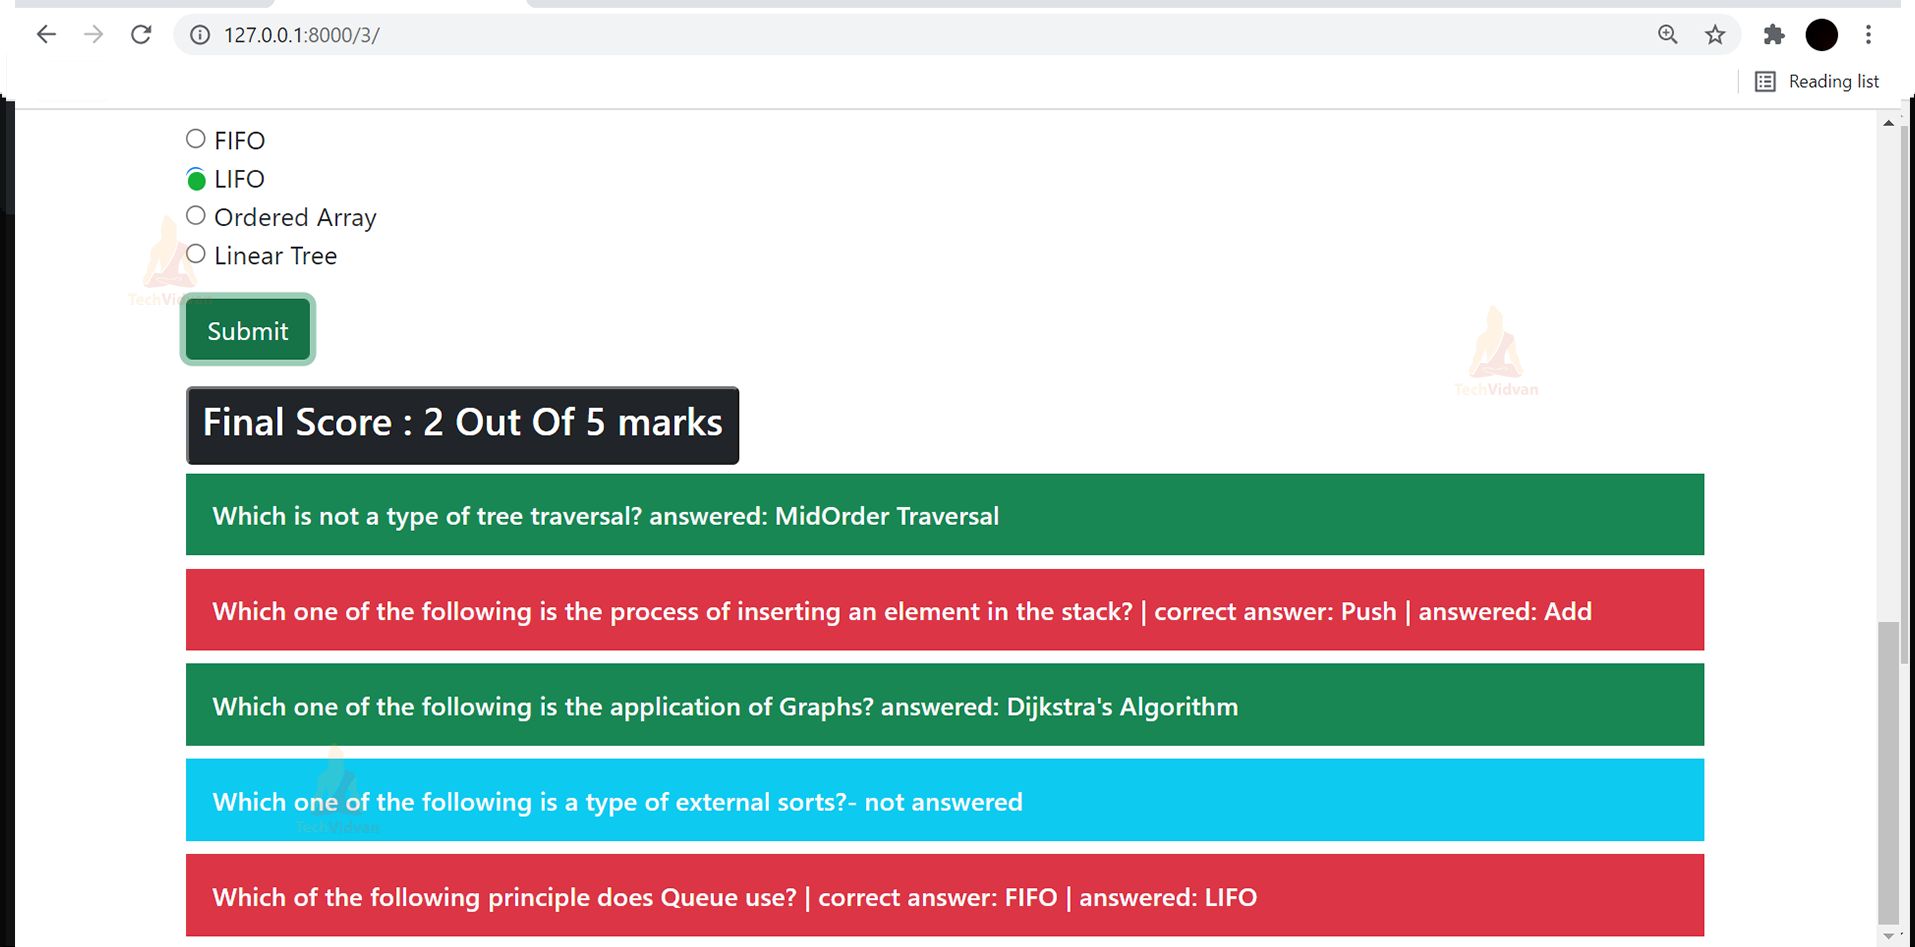
This forEach loop displays all the answers and the final score of the user after clicking on submit.
if (resp=='not answered') {
                  resDiv.innerHTML += '- not answered'
                  resDiv.classList.add('bg-info')
              }
If the user does not answer any of the question then that question will be displayed in blue color(bg-info) as not answered.
if (answer == correct) {
                           resDiv.classList.add('bg-success')
                           resDiv.innerHTML += ` answered: ${answer}`
                       } else {
                           resDiv.classList.add('bg-danger')
                           resDiv.innerHTML += ` | correct answer: ${correct}`
                           resDiv.innerHTML += ` | answered: ${answer}`
                       }
                   }
               }
               resultBox.append(resDiv)
           })
       },
If the user’s answer matches the correct answer, it will be displayed in green (bg-success). And if the answer doesn’t match, then it gets displayed in red color(bg-danger) indicating a wrong answer and the correct answer will be printed besides the users answer.
$(document).ready(function () {

    $('.start-button').click(function () {
        $(".start").hide();
        $("#button1").show();
    });
    $("#button1").click(function () {
        $(".total").show();
        $("#hide-time").hide();
    });
});
Once the document is ready this jQuery will be ready to get executed. Basically, using the above code we show, hide or disable whatever we want when we click something.
For example:
$("#button1").click(function () {
         $(".total").show();
         $("#hide-time").hide();
     });
When the submit button which has the id of “button1” is clicked the total marks having class “total” is shown on the screen and the timer having id of “hide-time” is hidden.
Django Quiz Project Output:
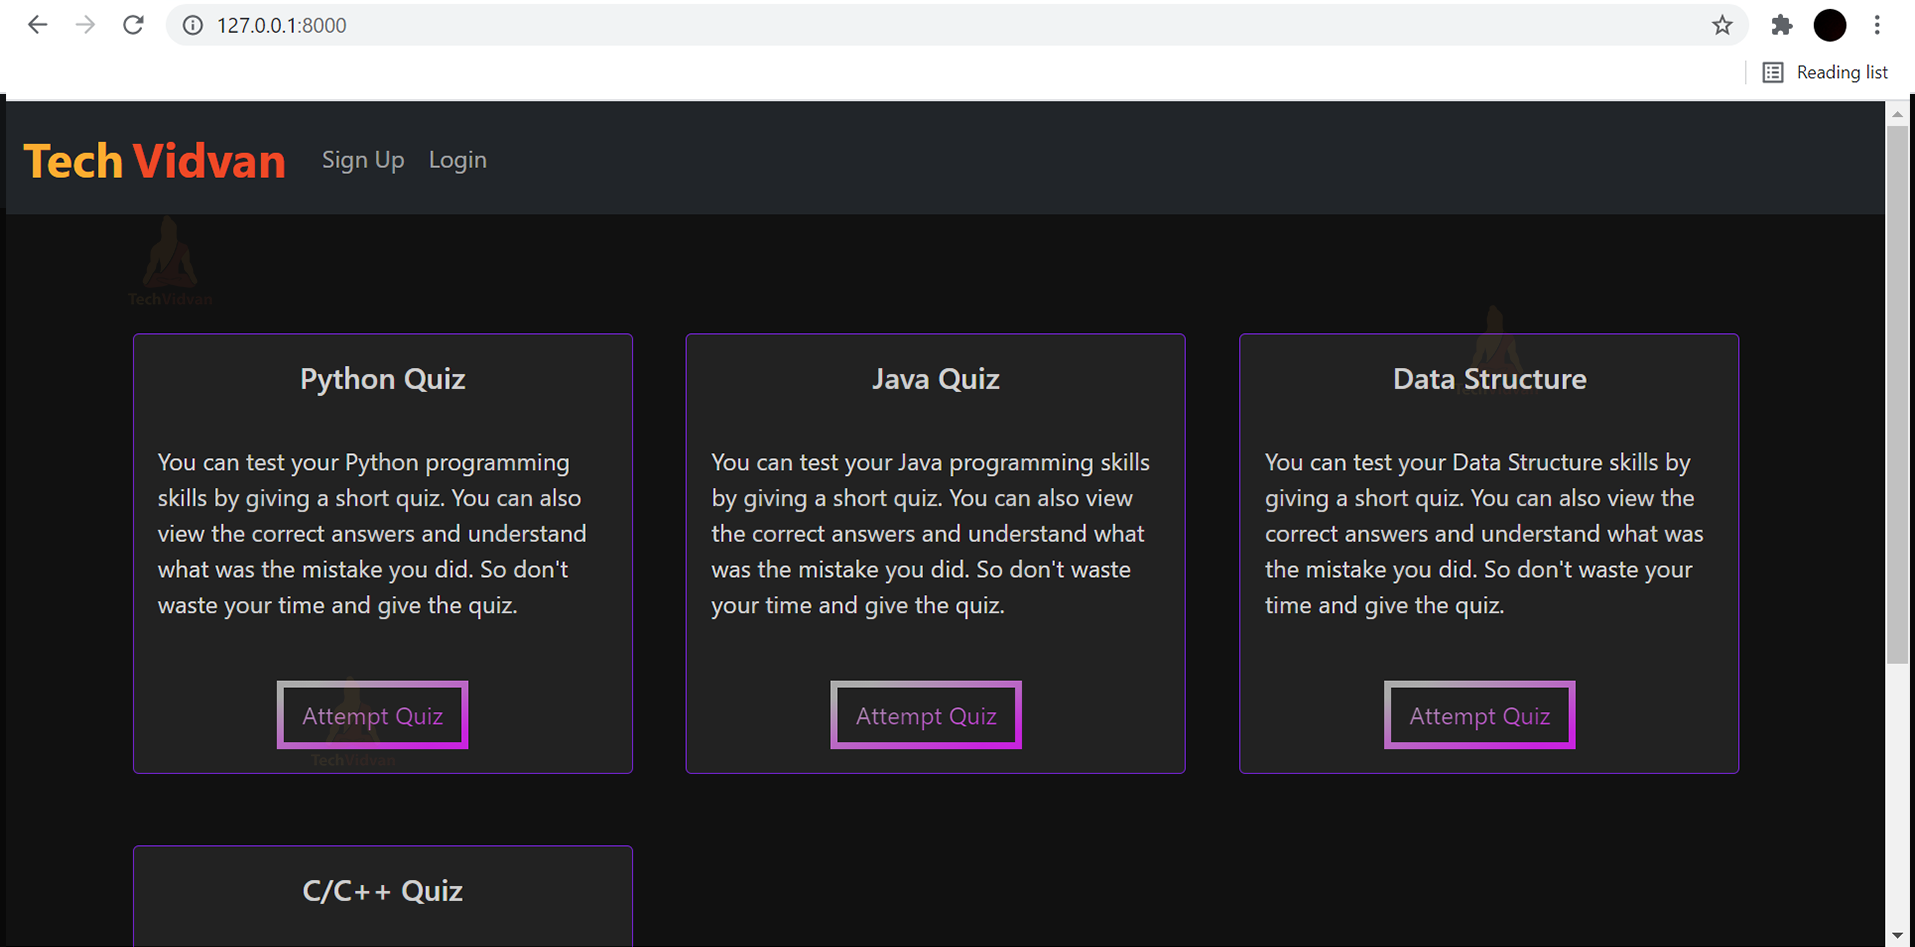
First Page of the project with the navigation bar and the cards having topics of the quiz
When the user is not logged in:
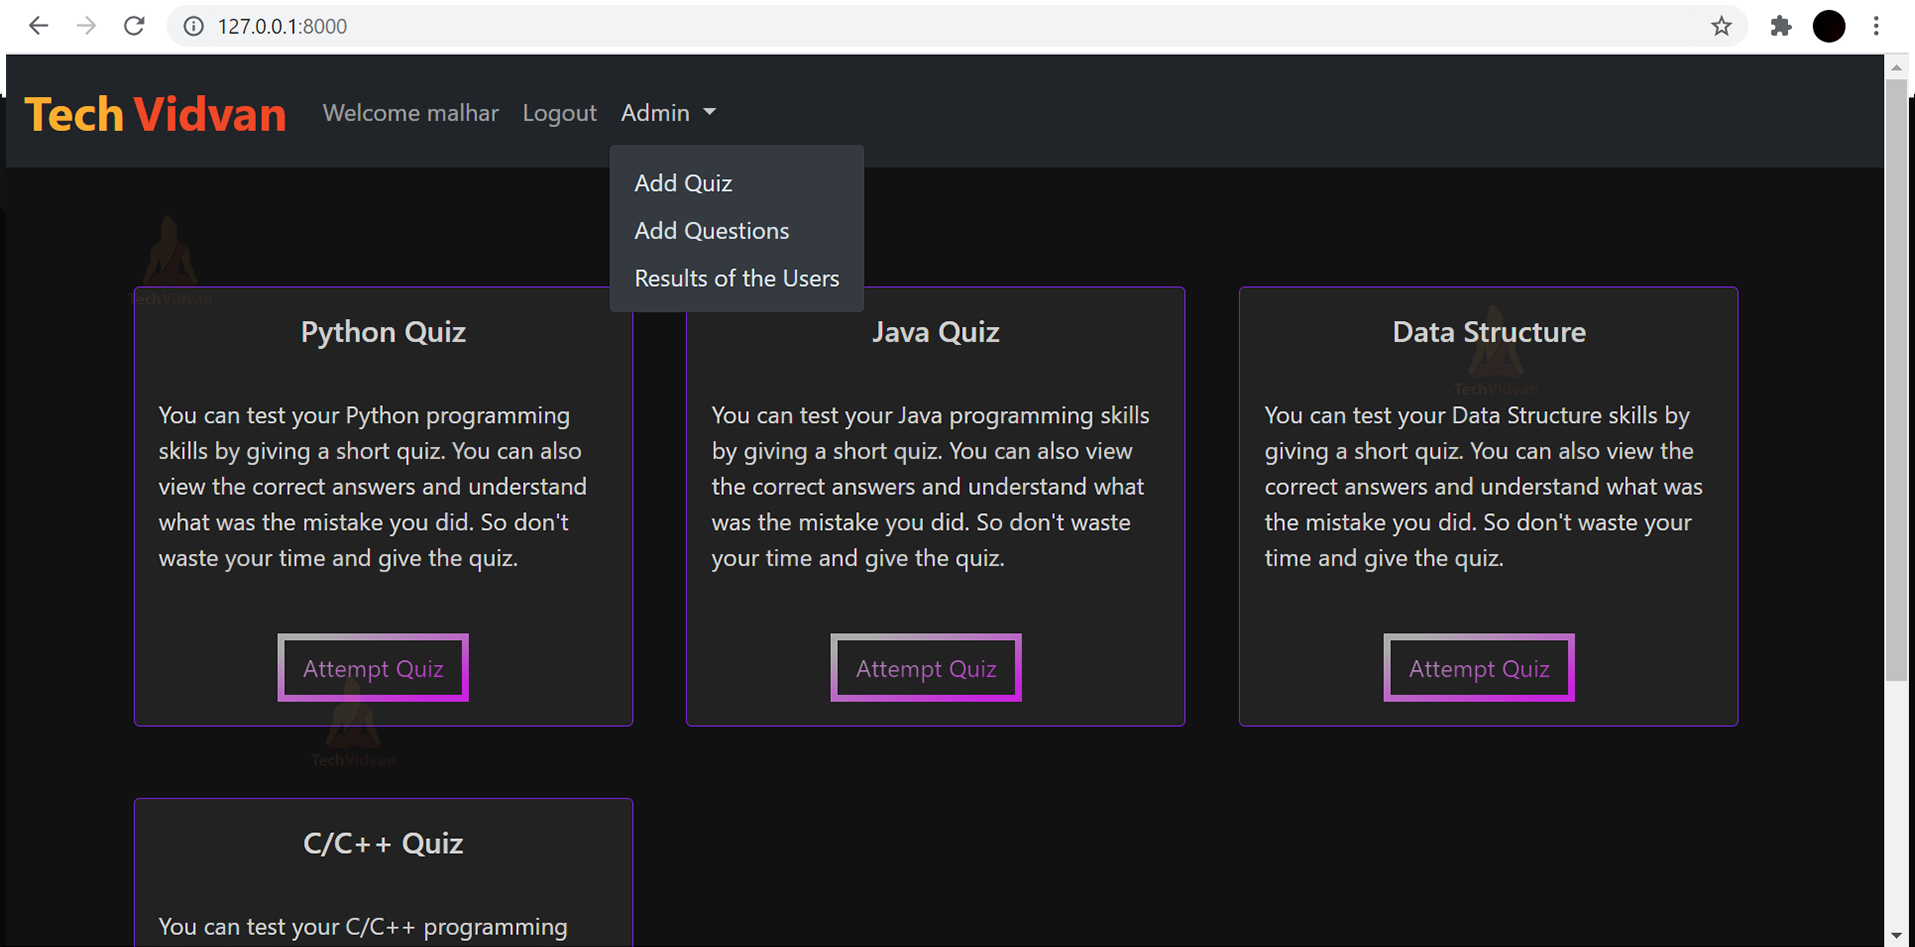
When the user is logged in (the admin option is only visible to the admin that is the superuser):
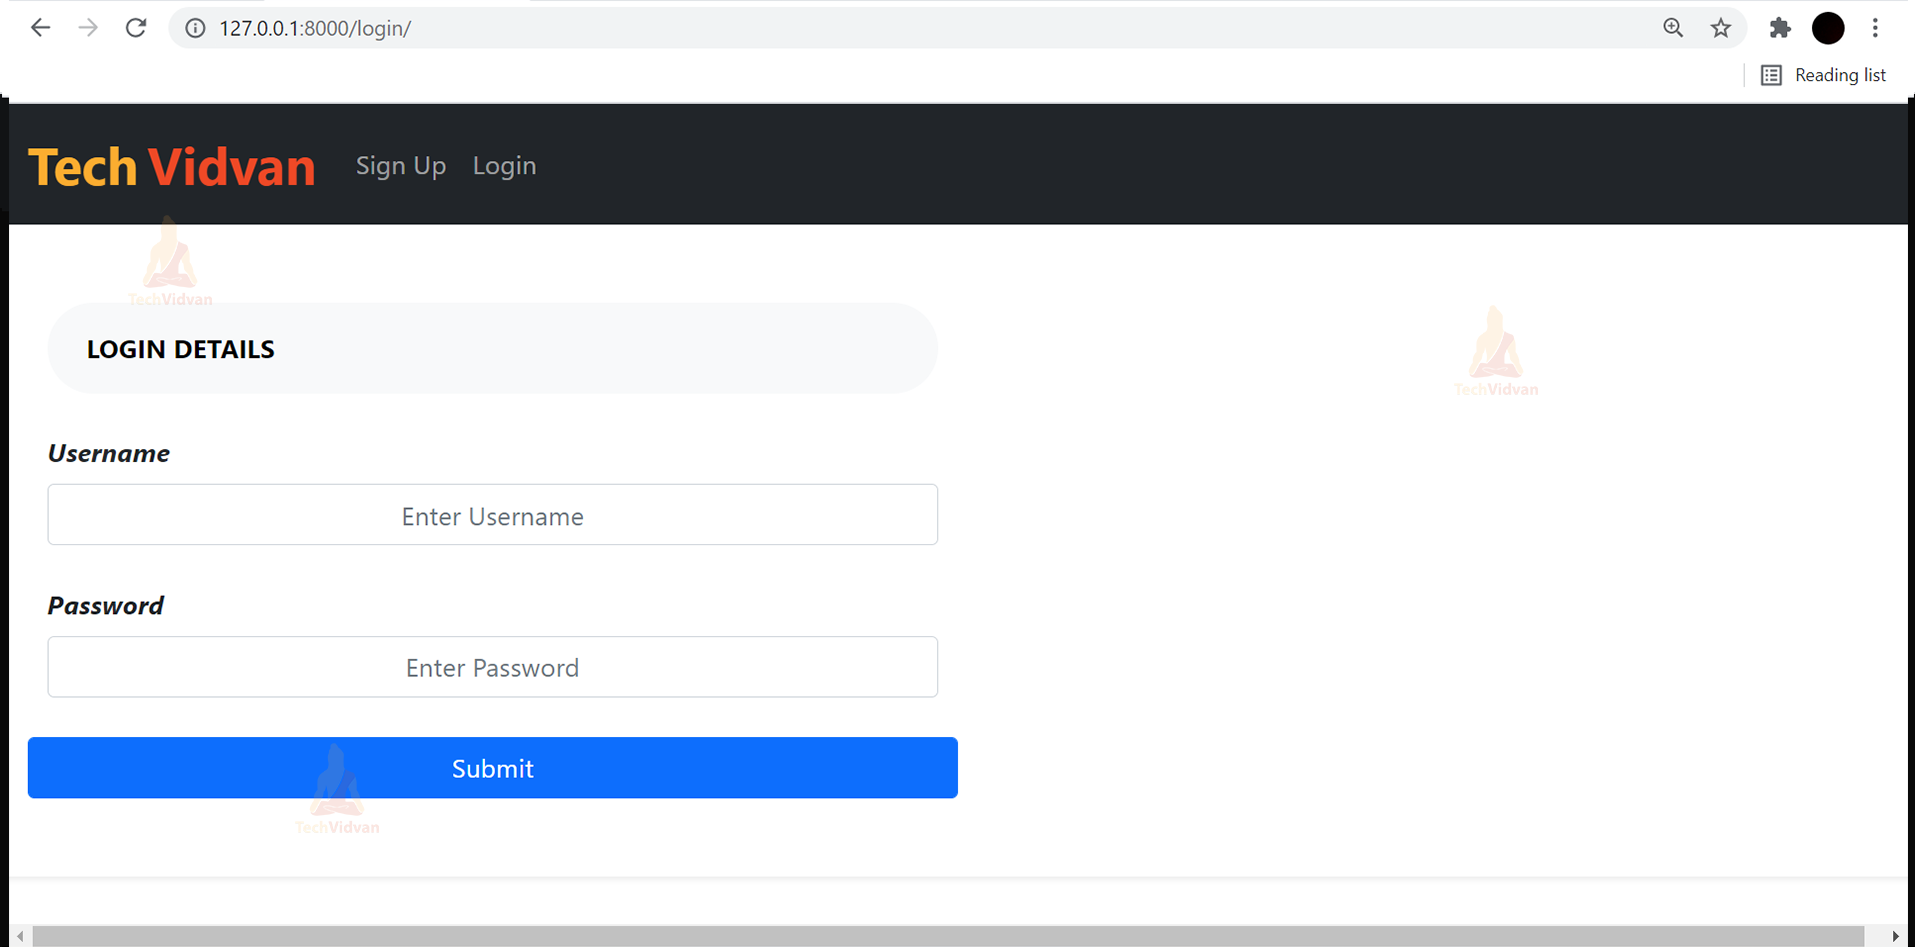
Login page:
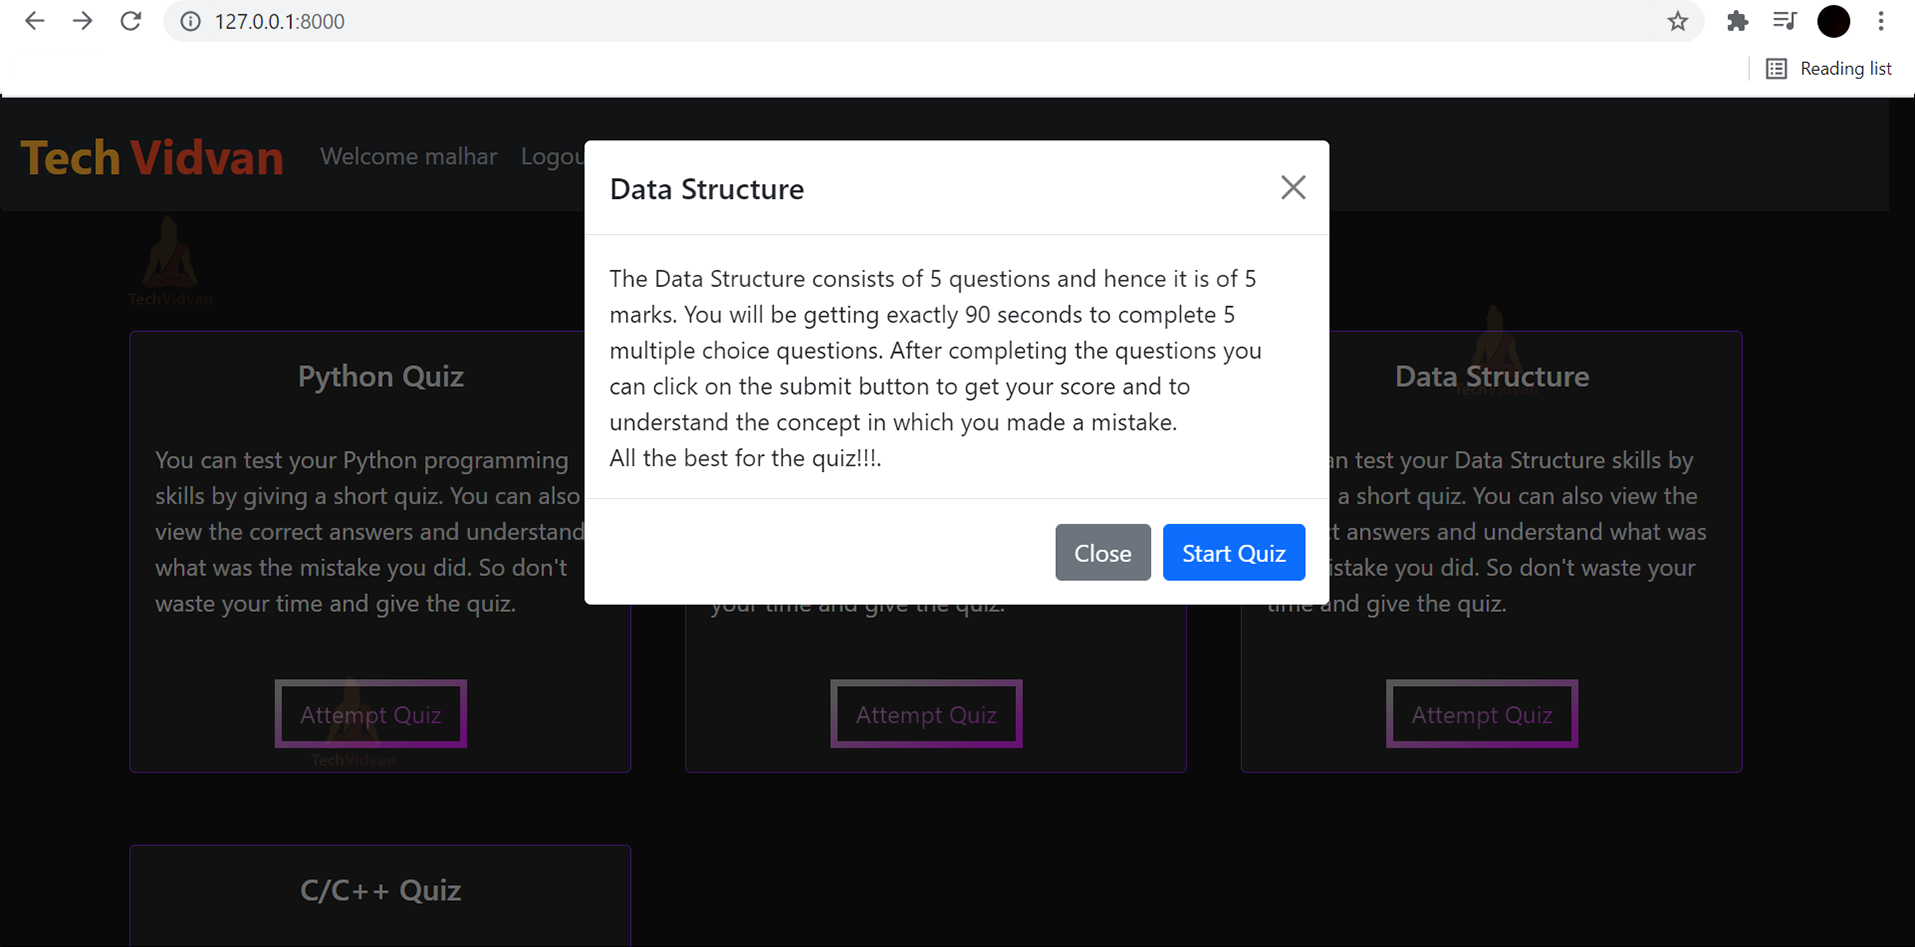
After clicking on attempt quiz button a modal will get open where instructions of the quiz will be displayed:
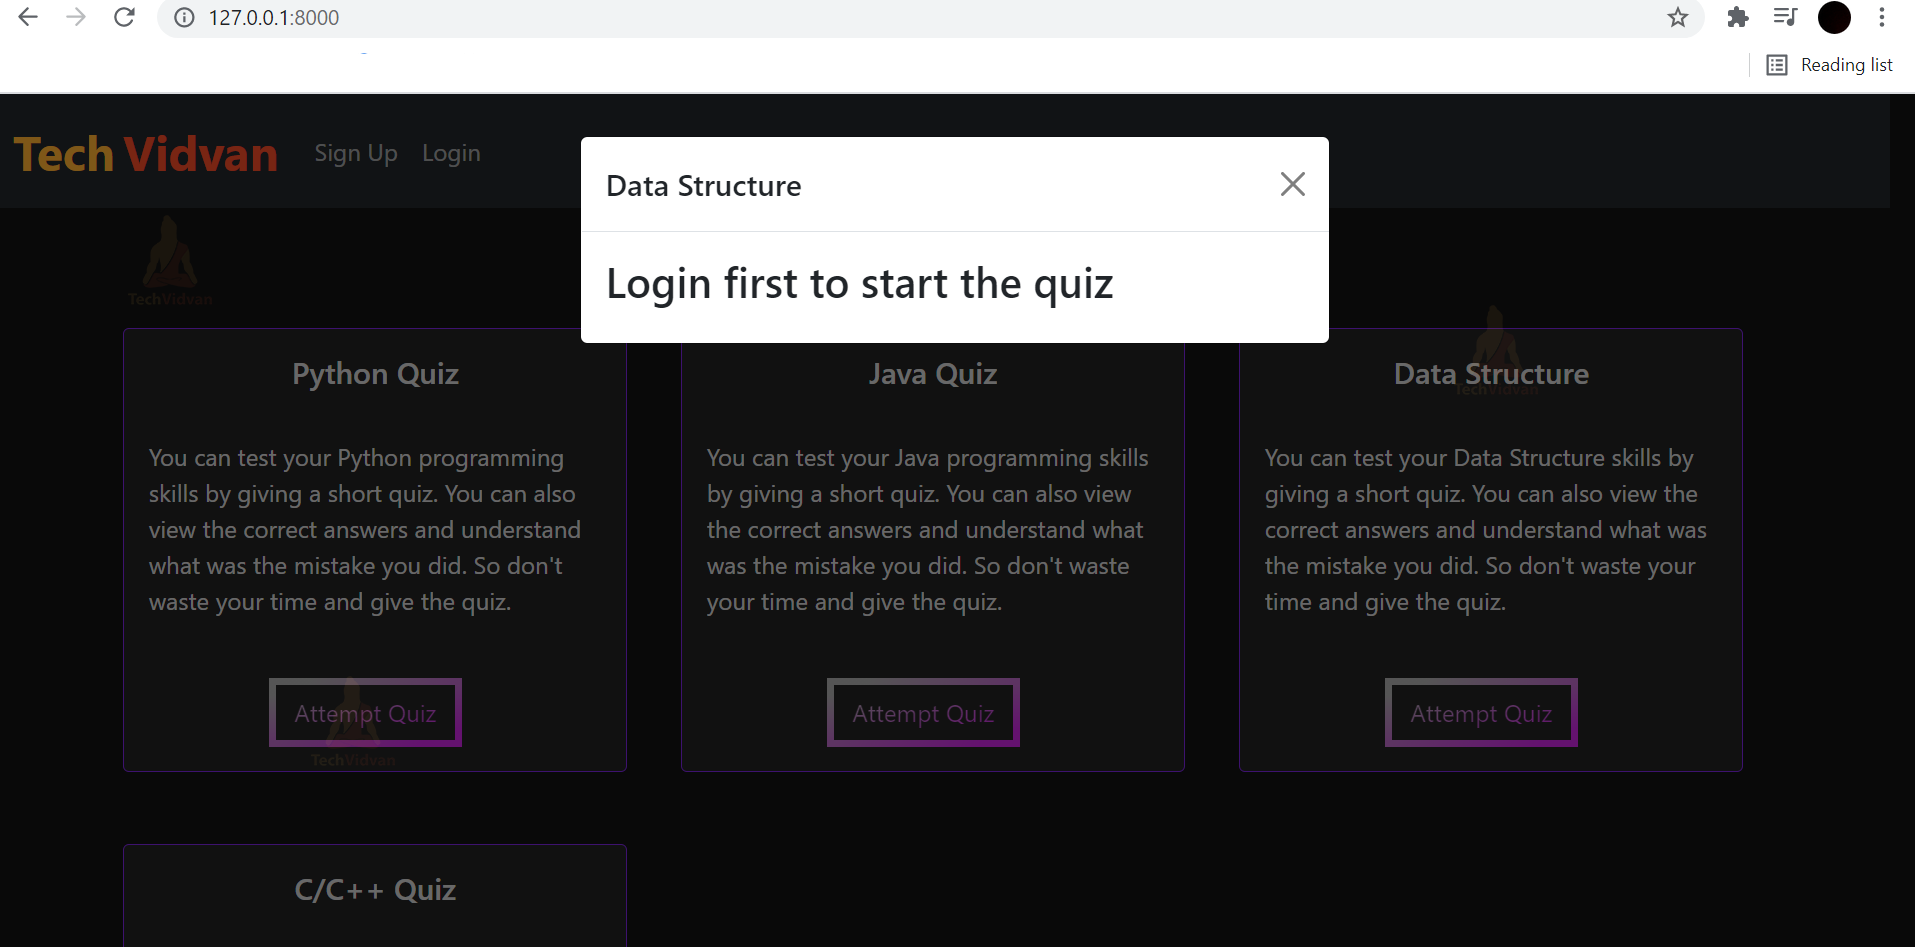
If the user is not logged in, the user is not allowed to give the quiz:
If the user is logged in:
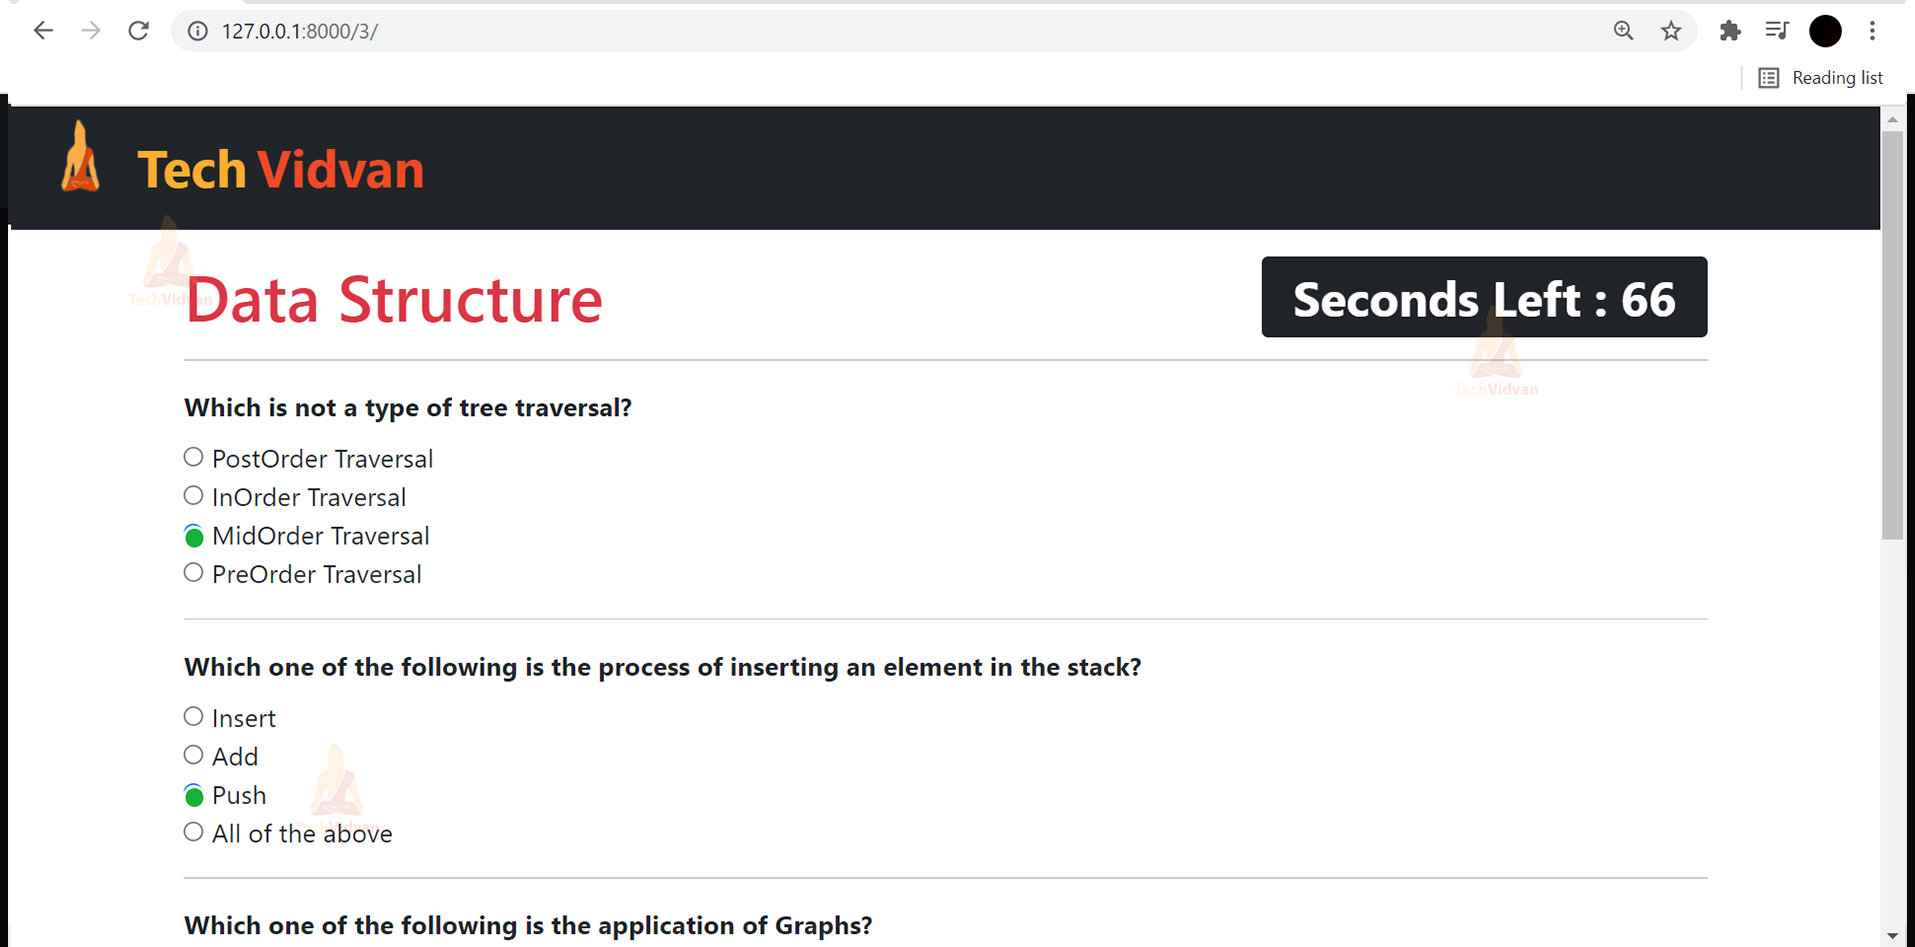
Then the quiz will get started so as the timer:
After completing the quiz and clicking on the submit button the total score will be displayed:
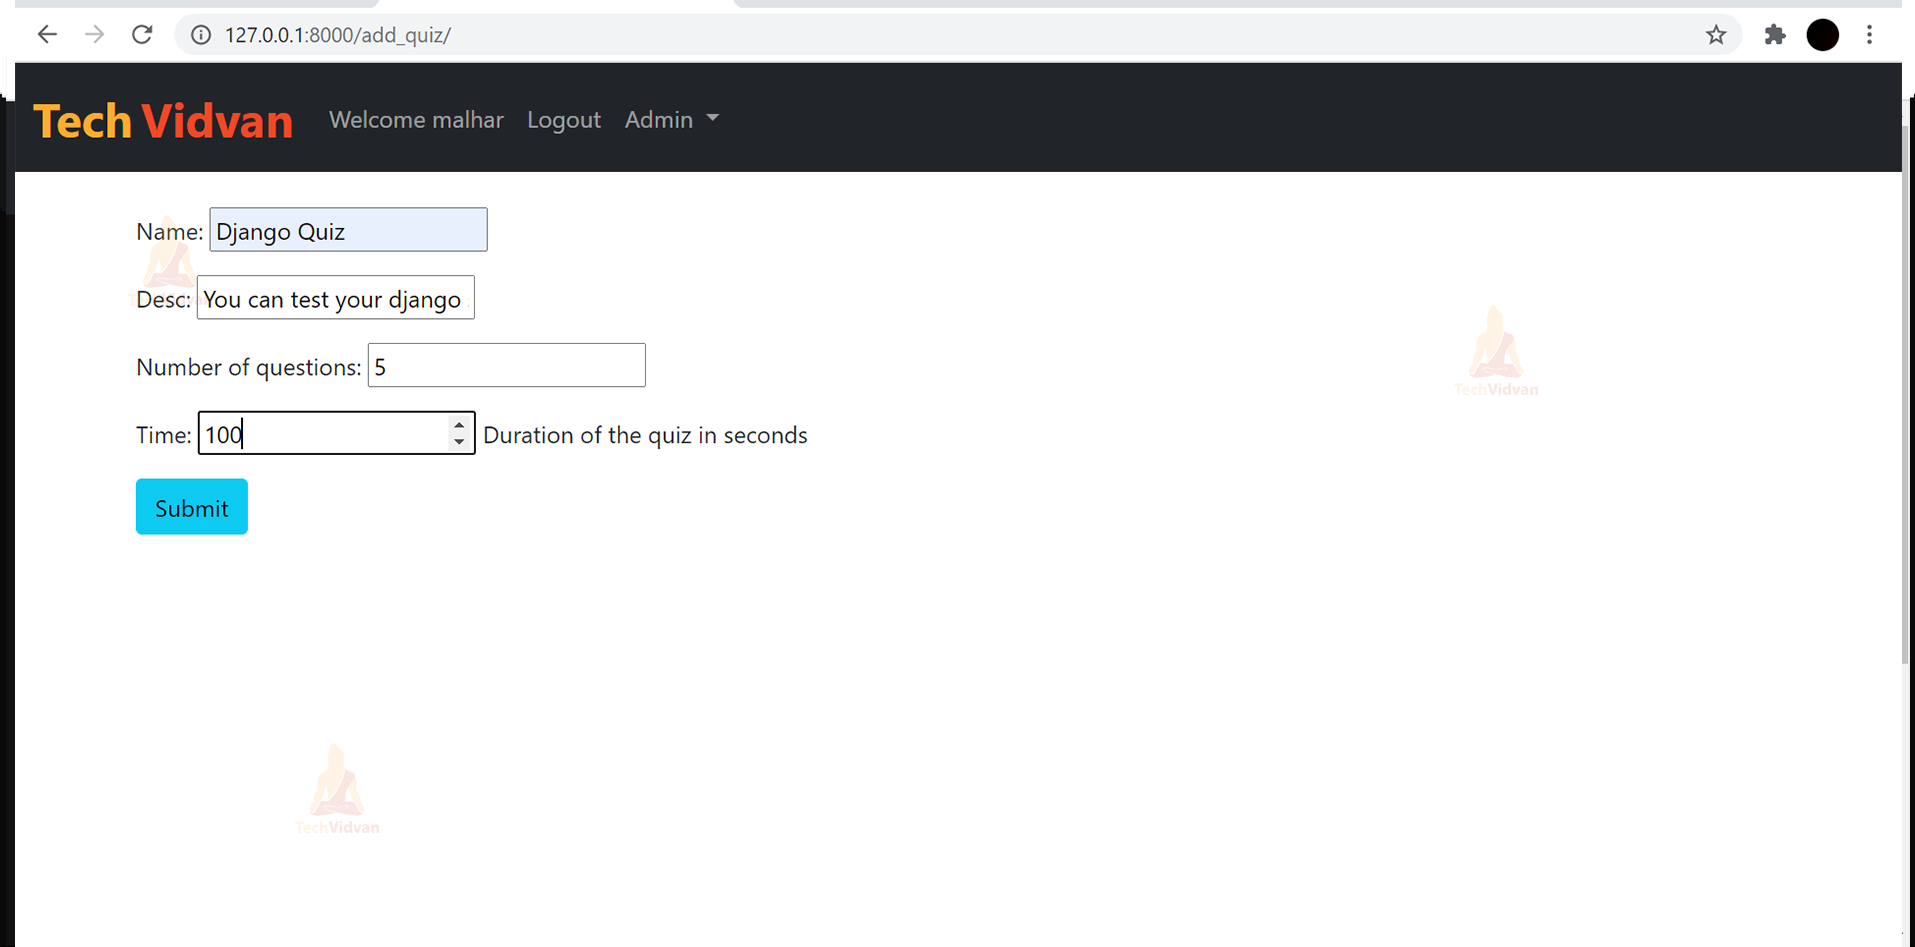
Admin can add a new quiz:
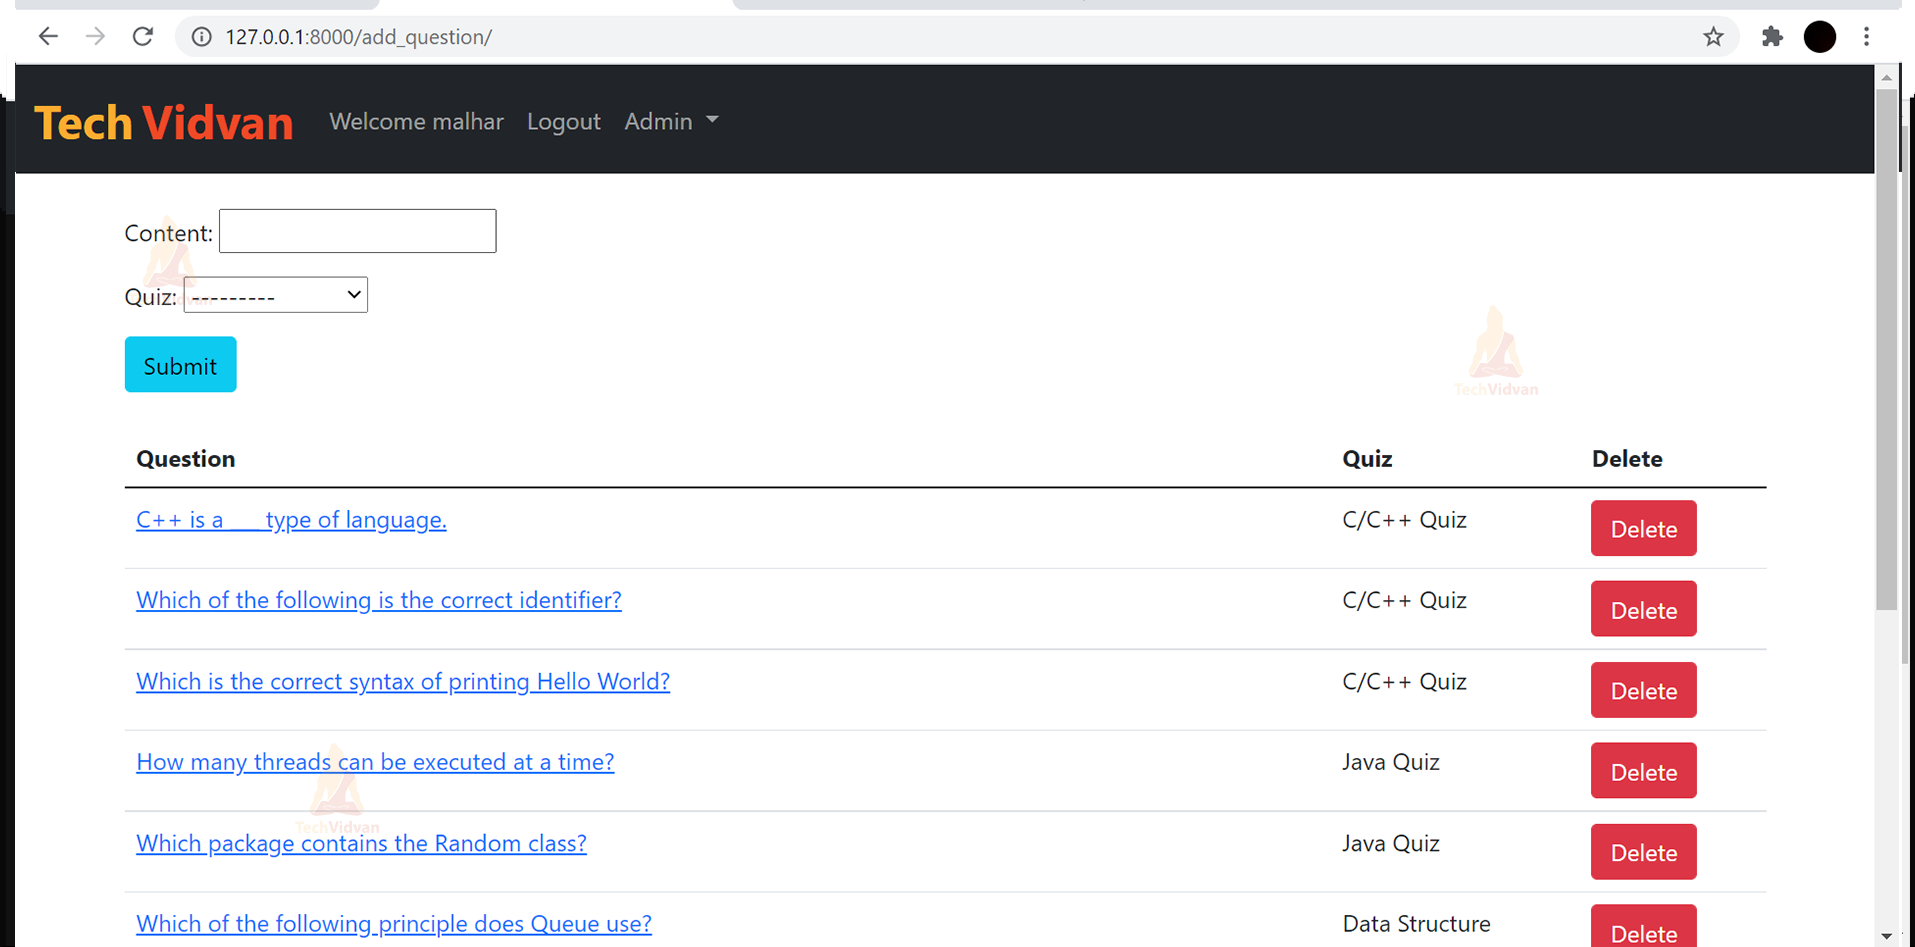
Add new Question and delete question:
Summary
With this Quiz App Project in Django, we have successfully developed the Quiz App. We have used front-end to design the pages and also back-end databases for storing and fetching data. Now I hope you all have a basic idea of Django and all the front-end designing tools.