Create Contact Book in Python
In this Python project, we will build a GUI-based Contact Book using the Tkinter and sqlite libraries and the messagebox module. It is an advanced level project, and you will learn so many things that you will be able to apply in real life. Let’s get started!😊
About Contact Books:
Do you remember those books where your parents used to store all their contacts’ names, phone numbers, addresses, and even where they remember them from? Oh, those paper-y days.
Today, we are going to create the same thing, except this one will be on your computer, with the data corresponding to the data from a database where you will store it.
About the project:
The objective of this is to create a GUI based Contact Book. To build this, you will need intermediate understanding of Tkinter and SQLite libraries, and only a basic understanding of the messagebox module. You will also need to have knowledge about the SQL commands: SELECT, INSERT, CREATE TABLE and DELETE.
Project Prerequisites:
To build this project, we will need the following libraries:
1. Tkinter – To create the GUI
2. SQLite (sqlite) – To connect to a SQL database and perform operations on the contacts.
The Tkinter library comes pre-installed with Python, however the SQLite library does not. To install it, you will need to run the following command on your terminal.
python -m pip install sqlite3
We need to “3” after sqlite to specify that we need the 3.x version (newer) of the sqlite library that corresponds with Python 3.x
Download Python Contact Book Project
Download source code of python contact book: Python Contact Book Project Code
Project File Structure:
Here are the steps you will need to execute to build python address book project:
1. Connecting to the database and initializing it.
2. Initializing the GUI window, placing the frames and header label and creating some commonly used variables [of this project].
3. Placing the components in the three frames.
4. Creating the functions for the buttons in the frames.
Let’s take a closer look at these steps:
1. Importing the necessary libraries and modules:
from tkinter import *
import tkinter.messagebox as mb
import sqlite3
2. Connecting to the database and initializing it:
# Connecting and Initializing the Database where we will store all the data
connector = sqlite3.connect('contacts.db')
cursor = connector.cursor()

cursor.execute(
"CREATE TABLE IF NOT EXISTS CONTACT_BOOK (S_NO INTEGER PRIMARY KEY AUTOINCREMENT NOT NULL, NAME TEXT, EMAIL TEXT, PHONE_NUMBER TEXT, ADDRESS TEXT)"
)
Explanation:
- In this step, we will use the sqlite3.connect(‘<database>.db’) function to create a database and connect it to the script and assign it to the variable connector.
- We will then create a cursor by using the connector.cursor() function and assigning it to the cursor variable.
- After that, using the CREATE TABLE statement of the sqlite3 API and the .execute() method of the cursor, we will create a database with the extension “.db”. The format for creating a new table is:
"CREATE TABLE IF NOT EXISTS {Table Name} ({COLUMN1} {TYPE}, {COLUMN2} {TYPE} ....)"
3. Initializing the GUI window, placing the frames and header label and creating some commonly used variables:
# Initializing the GUI window
root = Tk()
root.title("TechVidvan Contact Book")
root.geometry('700x550')
root.resizable(0, 0)

# Creating the color and font variables
lf_bg = 'Gray70'  # Lightest Shade
cf_bg = 'Gray57'
rf_bg = 'Gray35'  # Darkest Shade
frame_font = ("Garamond", 14)

# Creating the StringVar variables
name_strvar = StringVar()
phone_strvar = StringVar()
email_strvar = StringVar()

# Creating and placing the components in the window
Label(root, text='CONTACT BOOK', font=("Noto Sans CJK TC", 15, "bold"), bg='Black', fg='White').pack(side=TOP, fill=X)


# Frame on the left
left_frame = Frame(root, bg=lf_bg)
left_frame.place(relx=0, relheight=1, y=30, relwidth=0.3)


# Frame in the center
center_frame = Frame(root, bg=cf_bg)
center_frame.place(relx=0.3, relheight=1, y=30, relwidth=0.3)


# Frame on the right
right_frame = Frame(root, bg=rf_bg)
right_frame.place(relx=0.6, relwidth=0.4, relheight=1, y=30)
Explanation:
- In this step, we will initialise the main GUI window and place some components in it. We will need to initialise some Tkinter elements and components.
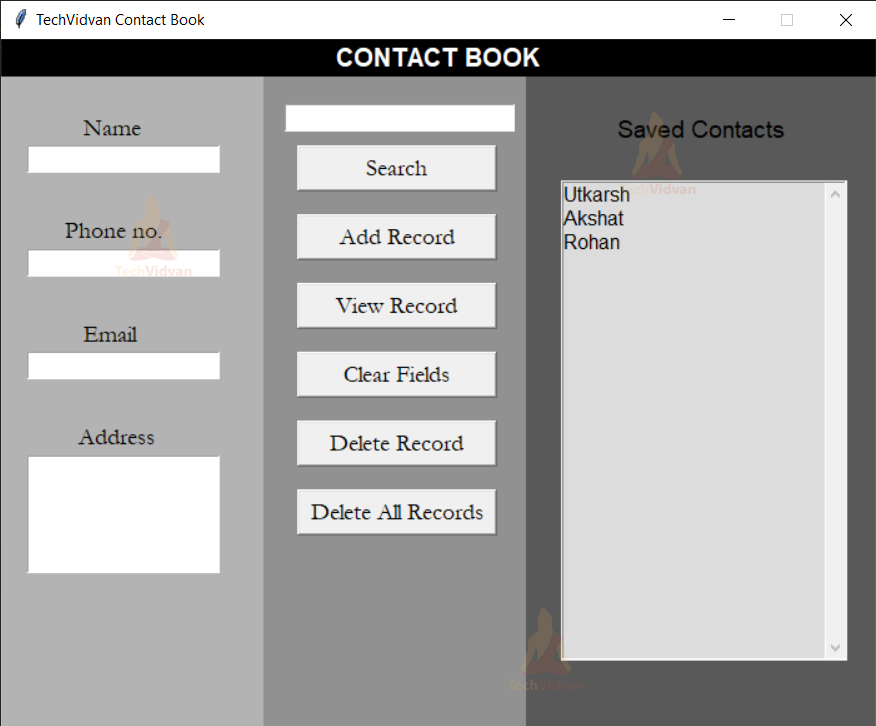
- The left_frame will be the frame on the left which contains all the fields, namely “Name”, “Phone no”, “Email”, and “Address” (this will be a Text widget) and the labels that act as a heading to these entry fields.
- The center_frame will be the frame where we place all the buttons to add a record, view a selected record, delete a record, clear all the entry fields in the left_frame, and delete all records.
- The right_frame will be the frame on the right side of the window which contains a Label saying “Saved Contacts” and a listbox that contains all the saved contacts in the database.
4. Placing the components in the three frames:
# Placing components in the left frame
Label(left_frame, text='Name', bg=lf_bg, font=frame_font).place(relx=0.3, rely=0.05)

name_entry = Entry(left_frame, width=15, font=("Verdana", 11), textvariable=name_strvar)
name_entry.place(relx=0.1, rely=0.1)

Label(left_frame, text='Phone no.', bg=lf_bg, font=frame_font).place(relx=0.23, rely=0.2)

phone_entry = Entry(left_frame, width=15, font=("Verdana", 11), textvariable=phone_strvar)
phone_entry.place(relx=0.1, rely=0.25)

Label(left_frame, text='Email', bg=lf_bg, font=frame_font).place(relx=0.3, rely=0.35)

email_entry = Entry(left_frame, width=15, font=("Verdana", 11), textvariable=email_strvar)
email_entry.place(relx=0.1, rely=0.4)

Label(left_frame, text='Address', bg=lf_bg, font=frame_font).place(relx=0.28, rely=0.5)

address_entry = Text(left_frame, width=15, font=("Verdana", 11), height=5)
address_entry.place(relx=0.1, rely=0.55)

# Placing components in the Middle Frame
search_entry = Entry(center_frame, width=18, font=("Verdana", 12), textvariable=search_strvar).place(relx=0.08, rely=0.04)

Button(center_frame, text='Search', font=frame_font, width=15, command=search).place(relx=0.13, rely=0.1)
Button(center_frame, text='Add Record', font=frame_font, width=15, command=submit_record).place(relx=0.13, rely=0.2)
Button(center_frame, text='View Record', font=frame_font, width=15, command=view_record).place(relx=0.13, rely=0.3)
Button(center_frame, text='Clear Fields', font=frame_font, width=15, command=clear_fields).place(relx=0.13, rely=0.4)
Button(center_frame, text='Delete Record', font=frame_font, width=15, command=delete_record).place(relx=0.13, rely=0.5)
Button(center_frame, text='Delete All Records', font=frame_font, width=15, command=delete_all_records).place(relx=0.13, rely=0.6)

# Placing components in the Right Frame
Label(right_frame, text='Saved Contacts', font=("Noto Sans CJK TC", 14), bg=rf_bg).place(relx=0.25, rely=0.05)

listbox = Listbox(right_frame, selectbackground='SkyBlue', bg='Gainsboro', font=('Helvetica', 12), height=20, width=25)
scroller = Scrollbar(listbox, orient=VERTICAL, command=listbox.yview)
scroller.place(relx=0.93, rely=0, relheight=1)
listbox.config(yscrollcommand=scroller.set)
listbox.place(relx=0.1, rely=0.15)

list_contacts()
Explanation:
- In the left frame, we will go from top-to-bottom. We place the name label and entry field (manipulated by the name_strvar object) first, then we place the phone and email labels and entry fields (manipulated by phone_strvar and email_strvar objects respectively) respectively and address label and Text widget at the last.
- In the center frame, we will again go from top-to-bottom defining the buttons and search entry field.
- And in the right frame, we will add the “Saved Contacts” label first. Then we will add a listbox with a scrollbar packed to the right side of it. This controls the up and down movement of the listbox.
5. Creating the functions for the buttons in the frames:
# Defining the functions
def submit_record():
    global name_strvar, email_strvar, phone_strvar, address_entry
    global cursor
    name, email, phone, address = name_strvar.get(), email_strvar.get(), phone_strvar.get(), address_entry.get(1.0, END)

    if name=='' or email=='' or phone=='' or address=='':
        mb.showerror('Error!', "Please fill all the fields!")
    else:
        cursor.execute(
        "INSERT INTO CONTACT_BOOK (NAME, EMAIL, PHONE_NUMBER, ADDRESS) VALUES (?,?,?,?)", (name, email, phone, address))
        connector.commit()
        mb.showinfo('Contact added', 'We have stored the contact successfully!')
        listbox.delete(0, END)
        list_contacts()
        clear_fields()


def list_contacts():
    curr = connector.execute('SELECT NAME FROM CONTACT_BOOK')
    fetch = curr.fetchall()

    for data in fetch:
        listbox.insert(END, data)


def delete_record():
    global listbox, connector, cursor

    if not listbox.get(ACTIVE):
        mb.showerror("No item selected", "You have not selected any item!")

    cursor.execute('DELETE FROM CONTACT_BOOK WHERE NAME=?', (listbox.get(ACTIVE)))
    connector.commit()

    mb.showinfo('Contact deleted', 'The desired contact has been deleted')
    listbox.delete(0, END)
    list_contacts()


def delete_all_records():
    cursor.execute('DELETE FROM CONTACT_BOOK')
    connector.commit()

    mb.showinfo("All records deleted", "All the records in your contact book have been deleted")

    listbox.delete(0, END)
    list_contacts()


def view_record():
    global name_strvar, phone_strvar, email_strvar, address_entry, listbox

    curr = cursor.execute('SELECT * FROM CONTACT_BOOK WHERE NAME=?', listbox.get(ACTIVE))
    values = curr.fetchall()[0]

    name_strvar.set(values[1]); phone_strvar.set(values[3]); email_strvar.set(values[2])

    address_entry.delete(1.0, END)
    address_entry.insert(END, values[4])


def clear_fields():
    global name_strvar, phone_strvar, email_strvar, address_entry, listbox

    listbox.selection_clear(0, END)

    name_strvar.set('')
    phone_strvar.set('')
    email_strvar.set('')
    address_entry.delete(1.0, END)

def search():
   query = str(search_strvar.get())

   if query != '':
       listbox.delete(0, END)

       curr = connector.execute('SELECT * FROM CONTACT_BOOK WHERE NAME LIKE ?', ('%'+query+'%', ))
       check = curr.fetchall()

      for data in check:
        listbox.insert(END, data[1])
Explanation:
- In the submit_record() function, we will first get all the necessary variables from the main script in the global scope. Then we will check whether or not all the entry fields were empty or not.
If they are, we will display an error dialogue box. If they are not, we will move forward with dynamically inserting the entry fields’ data using the INSERT statement of the SQLite3 API, executing it using the global scope cursor and then committing it to the connector using the .commit() method.
After that, we remove all the contacts in the listbox, only to replace them with an updated list that we will insert using the user-defined list_contacts() function we will discuss later. - In the list_contacts() function, we get all the “Name” values using the connector.execute() and the .fetchall() methods.
After this, we take all the values we got from the .fetchall() method and put them one-by-one in the listbox. - In the delete_record() function, we delete the record from the database where the “Name” is the same as the active/selected element in the listbox.
- In the delete_records() function, we execute the “DELETE FROM {Table Name}” statement using the cursor.execute() and connector.commit() commands to delete the entire table and then delete everything in the listbox in the right frame.
- We use the SELECT command in the view_record() function to get the record that has the same “Name” value as the selected element in the listbox.
Then we get the values in that record and one-by-one, set them in the suitable fields using the StringVar.set(f‘{value}’) or the Text.insert(END, value) commands. - In the clear_fields() function, we will simply get all StringVar objects and the Text widget and clear them all using either the StringVar.set(‘’) or the Text.delete(1.0, END) methods.
- In the search() function, we will get the data to be searched from the entry field in the center frame, see if it is empty and if it isn’t, we will use the SELECT command of the SQLite API to see if the data we have searched is present in the database or not.
If the data is present, we will fetch it using the .fetchall() method of the curr object. Then we will list the names of the contacts in our database into our listbox that we cleared earlier.
Python Address Book Output
Summary
Congratulations! You have now created your own Contact Book using the Tkinter and SQLite libraries. Now you can have a copy of all the contact details of a person. You can use it in case you need to send them a postal mail, electronic mail or even a message.