Python Image Format Converter – Say Goodbye to Format Woes
Many times we need different formats of image as their size differs. Image format converters convert one form of image to another by changing their extensions, like.jpg to.png or.png to.jpg, etc. So we’ll make a graphical user interface for it, covering a few extensions like .jpg ,.png, and .web.
What is Tkinter?
Python offers various utilities to design the GUI wiz Graphical User Interface, and one such utility is Tkinter which is most commonly used. It is one of the fastest and easiest ways to build GUI applications. Moreover, Tkinter is cross-platform. As a result, the same code works on macOS, Windows, and Linux.
Prerequisites for Image Format Converter using Python
- Basic knowledge of the Python programming language, how functions are defined,
- How the window is created in Tkinter GUI, as well as the frame.
- Understand the Pillow library for editing, creating, and saving images.
Download Python Image Format Converter Project
Please download the source code of Python Image Format Converter Project from the following link: Python Image Format Converter Project Code
Steps to Create Image Format Converter Project using Python
Following are the steps for developing the Python Image Format Converter Project:
Step 1: Importing the necessary modules
Step 2: Making a window for our project
Step 3: Functions
Step 4: Making Frames and Mapping the Buttons to Their Functionalities
Step 1: Importing the necessary modules
To use Tkinter, we need to import the Tkinter module. We are also going to import the Image, messagebox and filedialog module
Code
#import packages
from PIL import Image
import tkinter as tk
from tkinter import filedialog
from tkinter import messagebox
Step 2: Making a window for our project
This code sets the title of the window as ‘TechVidvan Image Format Converter’, and sets the dimensions ‘width x length’.
Code
root = tk.Tk()
root.geometry("300x300")
root.title("TechVidvan Image Format Converter")
Step 3: Functions
These functions convert an input image to the required format and save it at the location where the user wants to store it.
Step 3.1: select():
Code
def select():
   global img_1
   img = filedialog.askopenfilename(title="Select a Image")
   entry1.delete(0, tk.END)
   entry1.insert(0, img)
   img_1 = Image.open(img)
Explanation:
Image.open is used to open an image, and filedialog.askopenfilename is used to select an image from the device.
Step 3.2: jpg(), png(), webp():
Code
def jpg():
global img_1
img_2 = filedialog.asksaveasfilename(
defaultextension='.jpg')
img_1 = img_1.convert('RGB')
img_1.save(img_2)
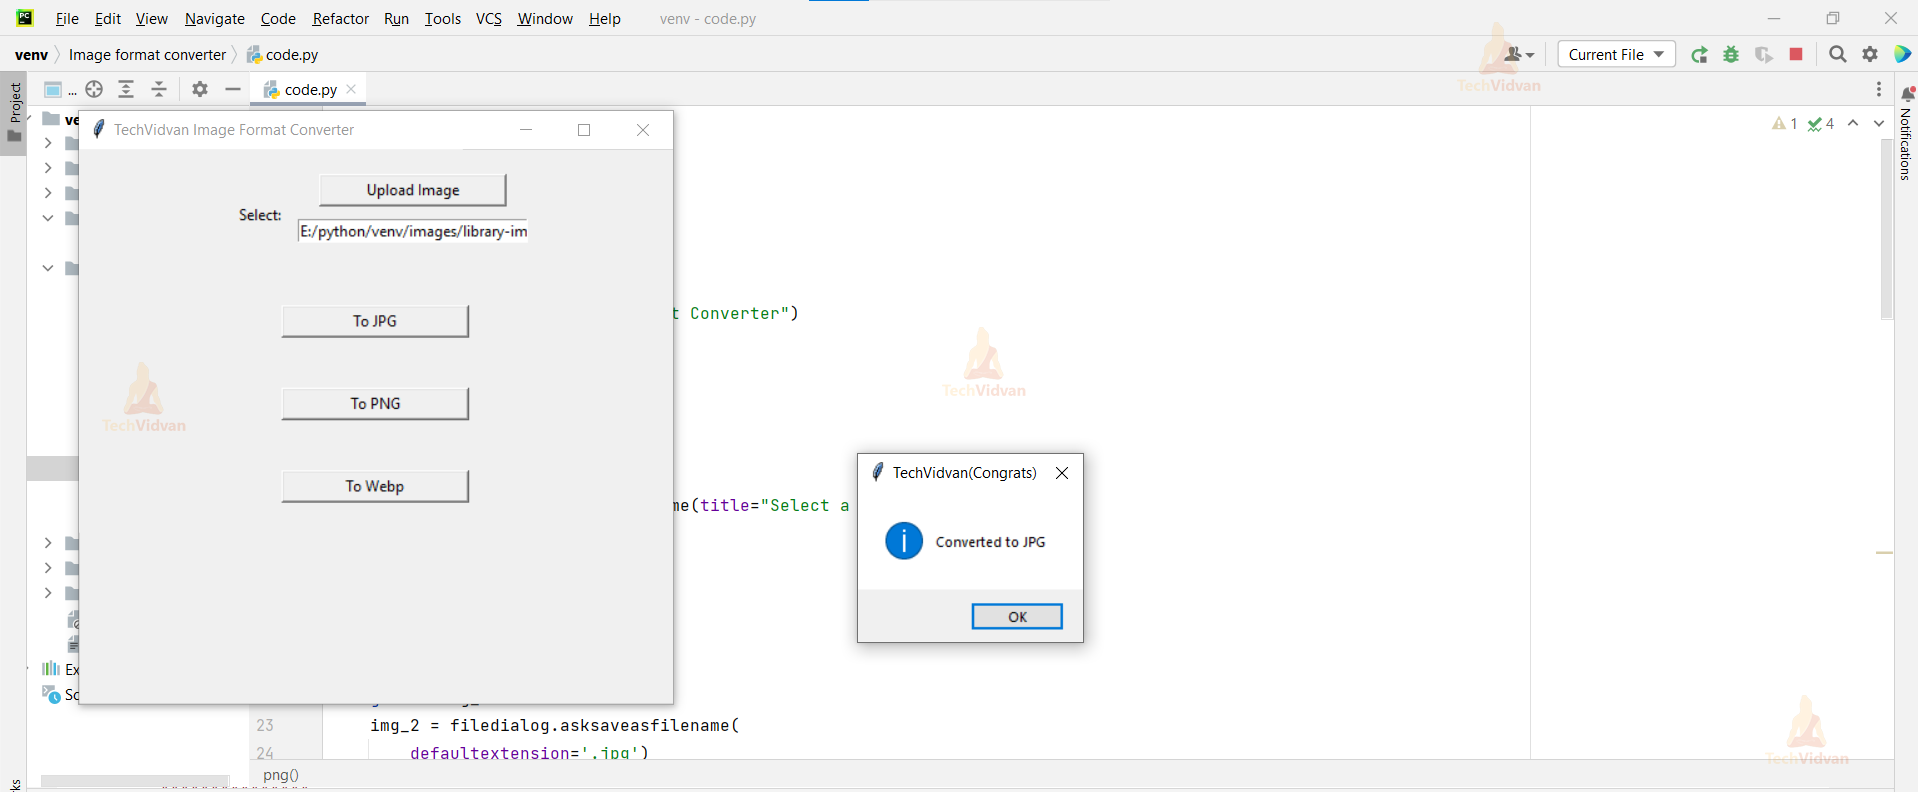
messagebox.showinfo("TechVidvan(Congrats)", "Converted to JPG")
def png():
global img_1
img_2 = filedialog.asksaveasfilename(
defaultextension='.png')
img_1.save(img_2)
messagebox.showinfo("TechVidvan(Congrats)", "Converted to PNG")
def webp():
global img_1
img_2 = filedialog.asksaveasfilename(
defaultextension='.webp')
img_1.save(img_2)
messagebox.showinfo("TechVidvan(Congrats)", "Converted to Webp")
Explanation:
Filedialog.asksaveasfilename is used to create a new file of the required format, and in each function, we mention the default extension in which we want to convert the image, and img_1.save is used to save the converted image.
Step 4: Making Frames and Mapping the Buttons to Their Functionalities
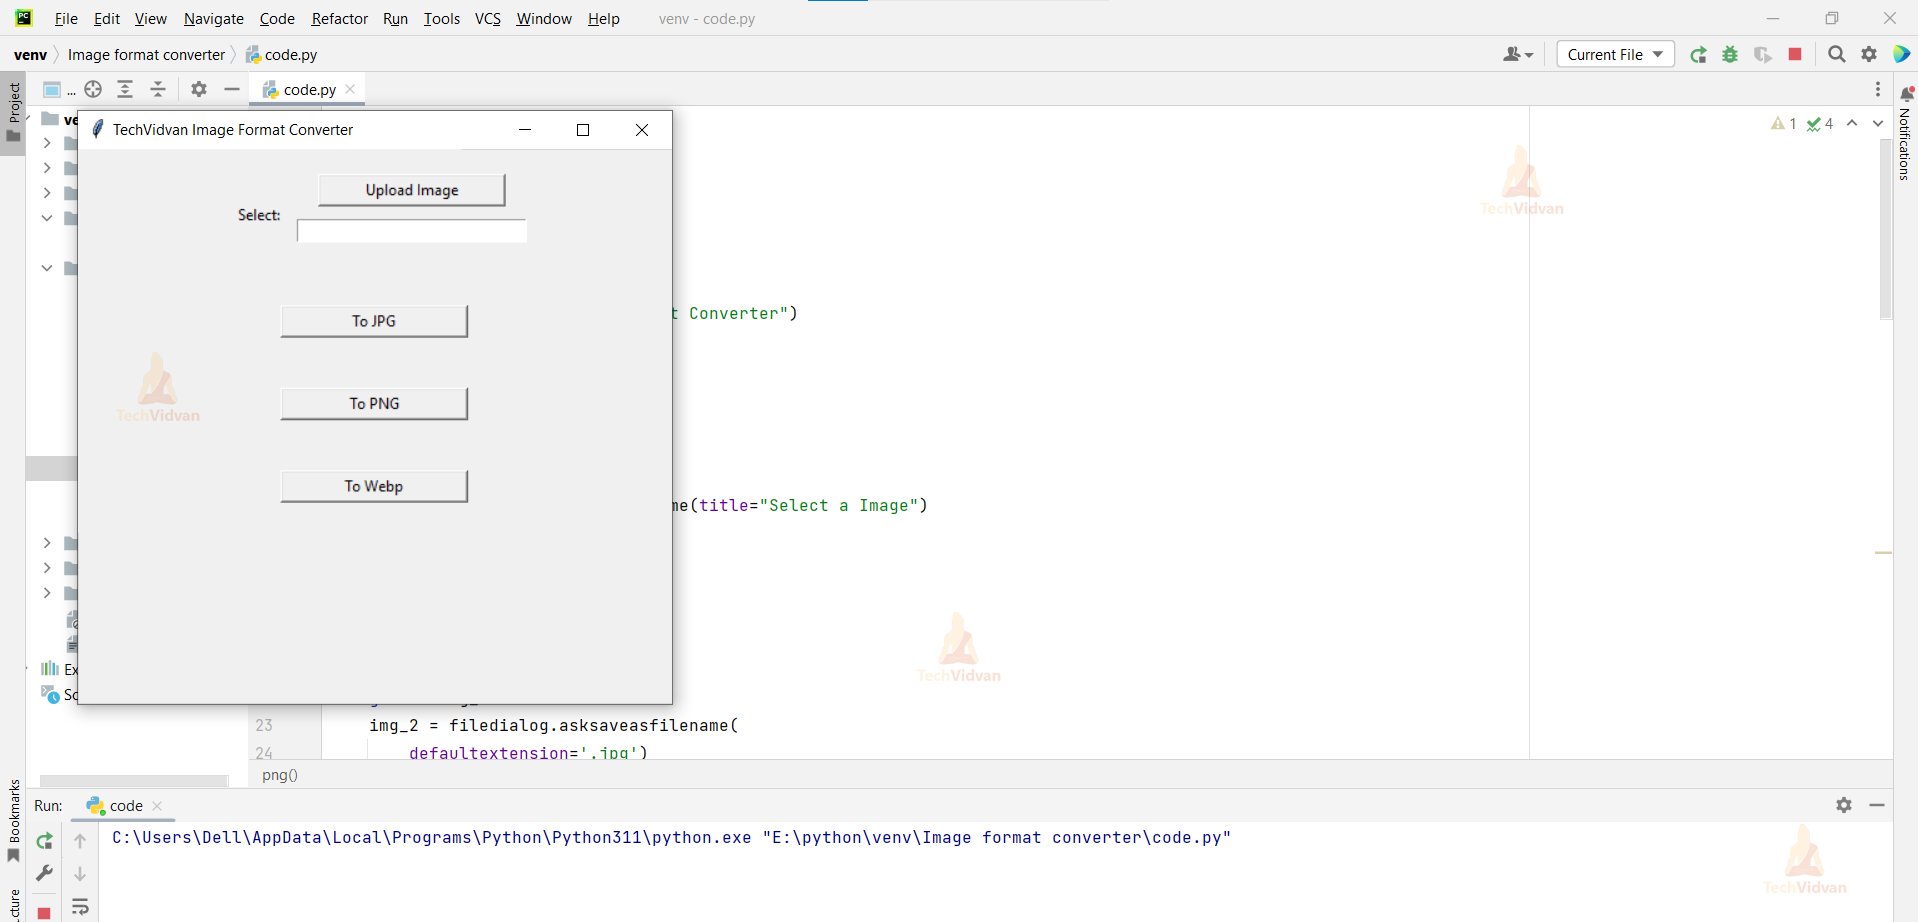
We make four frames, and in each frame we give button modules; in frame 1, we get input from the user, i.e., the input image; and in the remaining frames, we give options of different formats from which the user can select whichever output image format they want.
Code
#make four frames and button function for each frame
frame1 = tk.Frame(root)
frame1.pack(pady=20)


l1 = tk.Label(frame1, text="Select:")
l1.pack(side="left", padx=10)
button1 = tk.Button(frame1, text="Upload Image", width=20, command=select)
button1.pack(padx=10)
entry1 = tk.Entry(frame1, width=30)
entry1.pack(side="left",pady=10)


frame2 = tk.Frame(root)
frame2.pack(pady=20)


button2 = tk.Button(frame2, text="To JPG", width=20, command=jpg)
button2.pack(padx=10)


frame3 = tk.Frame(root)
frame3.pack(pady=20)


button3 = tk.Button(frame3, text="To PNG", width=20, command=png)
button3.pack(padx=10)


frame4 = tk.Frame(root)
frame4.pack(pady=20)


button4 = tk.Button(frame4, text="To Webp", width=20, command=webp)
button4.pack(padx=10)


root.mainloop()
Full Code
from PIL import Image
import tkinter as tk
from tkinter import filedialog
from tkinter import messagebox


root = tk.Tk()
root.geometry("300x300")
root.title("TechVidvan Image Format Converter")


global img_1


def select():
   global img_1
   img = filedialog.askopenfilename(title="Select a Image")
   entry1.delete(0, tk.END)
   entry1.insert(0, img)
   img_1 = Image.open(img)


def jpg():
   global img_1
   img_2 = filedialog.asksaveasfilename(
       defaultextension='.jpg')
   img_1 = img_1.convert('RGB')
   img_1.save(img_2)
   messagebox.showinfo("TechVidvan(Congrats)", "Converted to JPG")


def png():
   global img_1
   img_2 = filedialog.asksaveasfilename(
       defaultextension='.png')
   img_1.save(img_2)
   messagebox.showinfo("TechVidvan(Congrats)", "Converted to PNG")


def webp():
   global img_1
   img_2 = filedialog.asksaveasfilename(
       defaultextension='.webp')
   img_1.save(img_2)
   messagebox.showinfo("TechVidvan(Congrats)", "Converted to Webp")


frame1 = tk.Frame(root)
frame1.pack(pady=20)


l1 = tk.Label(frame1, text="Select:")
l1.pack(side="left", padx=10)
button1 = tk.Button(frame1, text="Upload Image", width=20, command=select)
button1.pack(padx=10)
entry1 = tk.Entry(frame1, width=30)
entry1.pack(side="left",pady=10)


frame2 = tk.Frame(root)
frame2.pack(pady=20)


button2 = tk.Button(frame2, text="To JPG", width=20, command=jpg)
button2.pack(padx=10)


frame3 = tk.Frame(root)
frame3.pack(pady=20)


button3 = tk.Button(frame3, text="To PNG", width=20, command=png)
button3.pack(padx=10)


frame4 = tk.Frame(root)
frame4.pack(pady=20)


button4 = tk.Button(frame4, text="To Webp", width=20, command=webp)
button4.pack(padx=10)


root.mainloop()
Python Image Format Converter Output
Summary
We can now easily convert our images into the required formats, such as jpg, png, webp, etc. by using the Python Tkinter GUI. This project provides practical exposure to various Python libraries, such as tkinter, filedialog, and Pillow to open our images and change their format.