Python Project – Create a File Manager in Python
Do you want to master Python? If yes, work on projects. In this article, we are presenting another project – “File Manager in Python” for beginners to gain expertise.
Managing files is an easy task. So, today let’s head over building a file manager. This is a pretty easy application. To make it more interactive and interesting, we will use Tkinter along with Python.
Steps to build File Manager in Python
Our aim in this article is to come up with our own file manager or file explorer, which can perform operations like opening a file, copying it, renaming, moving, and deleting. Also, we will include options for making and deleting a folder. Along with listing all the files present in the folder.

Download Project Code
Before proceeding ahead, please download file manager project code: File Manager in Python
Step 1: Importing required modules
We will import the following modules:
- Tkinter: It provides wide APIs for GUI functionalities.
- Shutil: This module offers a number of high-level operations on files and collections of files.
- Os: utility module for OS interaction in programs.
- easygui: It allows us to select any file from the system
- Filedialog: This library is used for folder selection
- Imageio: Used to read the file which is chosen by file box using a path
Code:
from tkinter import *
import shutil
import os
import easygui
from tkinter import filedialog
from tkinter import messagebox as mb
Any File Manager has several functions. Today, we will provide every possible feature to our file manager. Thus, every button will have certain functions to exhibit.
So, let’s begin with defining the functions.
Step 2: Defining functionalities
In this step, we will define all the functions which will be linked afterward to different buttons
Step 2.1: Opening a file box
# open a file box window
# when we want to select a file
def open_window():
    read=easygui.fileopenbox()
    return read
Explanation:
The above code opens the file box, i.e the pop-up box to choose the file from the device, which opens every time you run the code. fileopenbox() is the method in easyGUI module which returns the path of the chosen file as a string.
We will call this function every time we want to select any file.
Step 2.2: Opening a file
Opening a file when Open a file button is clicked
Code:
# open file function
def open_file():
    string = open_window()
    try:
        os.startfile(string)
    except:
        mb.showinfo('confirmation', "File not found!")
Explanation:
The above code calls open_window() function and stores the returned path of file chosen in variable “string”. If a file is chosen os.startfile(string) function opens the file. Otherwise it opens a popup message box using mb.showinfo(‘confirmation’, “File not found!”).
Step 2.3: Copying a file
Copying a file when copy a file button is clicked
Code:
# copy file function
def copy_file():
    source1 = open_window()
    destination1=filedialog.askdirectory()
    shutil.copy(source1,destination1)
    mb.showinfo('confirmation', "File Copied !")
Explanation:
The above code calls open_window() function and stores the returned path of file chosen in variable “source1”. Variable “destination 1” stores the address of the folder returned by askdirectory() function in filedialog module.
shutil.copy(source1, destination1) copies a file present at source1 to destination1 address. As a result, it opens a popup message box using mb.showinfo(‘confirmation’, “File Copied !”).
Step 2.4: Deleting a file
Deleting a file when Delete a file button is clicked
Code:
# delete file function
def delete_file():
    del_file = open_window()
    if os.path.exists(del_file):
        os.remove(del_file)
    else:
        mb.showinfo('confirmation', "File not found !")
Explanation:
The above code calls open_window() function and stores the returned path of file chosen in variable “string”. If a file is chosen os.remove(string) function deletes the file. Otherwise, it opens a popup message box using mb.showinfo(‘confirmation’, “File not found!”).
Step 2.5: Renaming a file
Renaming a file when Rename a file button is clicked
Code:
# rename file function
def rename_file():
    chosenFile = open_window()
    path1 = os.path.dirname(chosenFile)
    extension=os.path.splitext(chosenFile)[1]
    print("Enter new name for the chosen file")
    newName=input()
    path = os.path.join(path1, newName+extension)
    print(path)
    os.rename(chosenFile,path)
    mb.showinfo('confirmation', "File Renamed !")
Explanation:
The above code calls open_window() function and stores the returned path of file chosen in variable “chosenFile”. Then, variable path1 is used to store the path of directory of the file chosen. os.path.splitext() splits the path into root and extensions. As we rename the file, we keep the same extension but need to manipulate only the name of the file mentioned in the root part.
Now, program asks the new name of the file. Once entered, the new name of file is stored in “newName” variable. Finally, we join newname to root and join it to extension, forming the path of the file with a new name.
os.rename(chosenFile,newName) function renames the chosen file. And, there appears a popup message box using mb.showinfo(‘confirmation’, “File Renamed !”) for confirmation.
Step 2.6: Moving a file
Moving a file when Move a file button is clicked
Code:
# move file function
def move_file():
    source = open_window()
    destination =filedialog.askdirectory()
    if(source==destination):
        mb.showinfo('confirmation', "Source and destination are same")
    else:
        shutil.move(source, destination)
        mb.showinfo('confirmation', "File Moved !")
Explanation:
The above code calls open_window() function and stores the returned path of file chosen in variable “source”. And, the variable “destination” stores the address of destination folder address using filedialog.askdirectory().
If source and destination are the same, it opens a pop up box saying “Source and destination is same”. Else, the file is moved and opens a popup message box using mb.showinfo(‘confirmation’, “File Moved !”).
Step 2.7: Making a folder
Making a file when Make a folder button is clicked
Code:
# function to make a new folder
def make_folder():
    newFolderPath = filedialog.askdirectory()
    print("Enter name of new folder")

    newFolder=input()
    path = os.path.join(newFolderPath, newFolder)

    os.mkdir(path)
    mb.showinfo('confirmation', "Folder created !")
Explanation:
Above code uses askdirectory function to open pop up box to select the folder and stores the returned path of the folder chosen in the variable “newFolderPath”.
Now, the program asks for the name of the new folder and stores it in the “new/folder” variable.
os.path.join() method in Python is used to join one or more path components intelligently. This method concatenates various newFolderPath and nerFolder with exactly one directory separator (‘/’) following non-empty parts except the last path component. Once the appended path is stored in “path” variable, mkdir() method creates a folder at the chosen folder. Finally, a popup message box is displayed using mb.showinfo(‘confirmation’, “Folder Created !”).
Step 2.8: Deleting a folder
Deleting when Delete a folder button is clicked
Code:
# function to remove a folder
def remove_folder():
    delFolder = filedialog.askdirectory()
    os.rmdir(delFolder)
    mb.showinfo('confirmation', "Folder Deleted !")
Explanation:
The above code uses askdirectory function to open pop up box to select the folder and stores the returned path of folder chosen in the variable “delFolder”.
Now, rmdir() method deletes the folder selected. Finally, a popup message box is displayed using mb.showinfo(‘confirmation’, “Folder Created !”).
Step 2.9: Listing files in a folder
Listing files in a folder when List all files in a directory button is clicked.
Code:
# function to list all the files in folder
def list_files():
    folderList = filedialog.askdirectory()
    sortlist=sorted(os.listdir(folderList))
    i=0
    print("Files in ", folderList, "folder are:")
    while(i<len(sortlist)):
        print(sortlist[i]+'\n')
        i+=1
Explanation:
The above code uses askdirectory function to open pop up box to select the folder and stores the returned path of the folder chosen in the variable “folderList”.
Now, lstdir() method returns the list of all the files present in the folder selected. The list is sorted, and displayed using a while loop.
Step 3: Building File Manager UI using Tkinter
Code:
root = Tk()
# creating a canvas to insert image
canv = Canvas(root, width=500, height=420, bg='white')
canv.grid(row=0, column=2)

img = ImageTk.PhotoImage(Image.open("D:\\learn\\TechVidvan\\TechVidvan.png"))
canv.create_image(20, 20, anchor=NW, image=img)

# creating label and buttons to perform operations
Label(root, text="TechVidvan File Manager", font=("Helvetica", 16), fg="blue").grid(row = 5, column = 2)

Button(root, text = "Open a File", command = open_file).grid(row=15, column =2)

Button(root, text = "Copy a File", command = copy_file).grid(row = 25, column = 2)

Button(root, text = "Delete a File", command = delete_file).grid(row = 35, column = 2)

Button(root, text = "Rename a File", command = rename_file).grid(row = 45, column = 2)

Button(root, text = "Move a File", command = move_file).grid(row = 55, column =2)

Button(root, text = "Make a Folder", command = make_folder).grid(row = 75, column = 2)

Button(root, text = "Remove a Folder", command = remove_folder).grid(row = 65, column =2)

Button(root, text = "List all Files in Directory", command = list_files).grid(row = 85,column = 2)

root.mainloop()
Explanation:
The above code is used to create a tkinter UI.
root=TK() is used to make a window. We use canvas() to create a canvas, and an image is applied in the background of our window using ImageTk.
Tkinter has two types of layout managers, grid and pack. For layout simplicity, we use a grid layout manager. Simply, using grid, we place every button in a single column.
Label() is used to place text label in the root window, with defined font, font size, and color. Row and column are also specified at the end.
Button() function placed in root window with text specified as text=”..” . The next parameter, “command” specifies the function which gets executed whenever a button is clicked. Please note, the function is specified without brackets in the statement. Similar to label, in every grid widget, we can specify row and column. To place the buttons one below the other, we specify the same column number, but change the row according to our need.
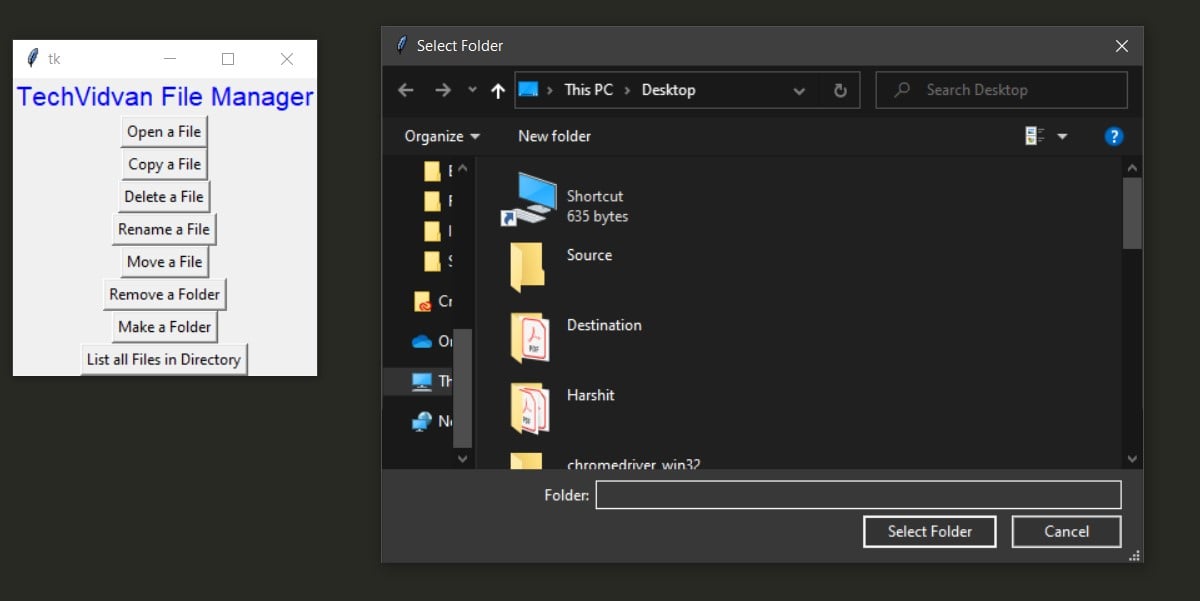
File Manager Output
Summary
Some people might also follow simple hardcoded way asking a user to input the address of file, folder for operation. But, don’t you think, it would be more cumbersome for a user to copy a path, paste it, and then wait for the operation. To avoid this, a user will simply never wish to use such file managers.
Thus, we tried something new and built a file manager or file explorer with Tkinter and filebox. That’s it.! We are done with our file manager. We not only learn managing files but basic Tkinter. Learning tkinter was the most amazing part of this tutorial.
Want to make your hands dirty on shutil and os modules? Try building a simple, hardcoded file manager, the one described in the first paragraph. This would be fun, you will learn and will realize the need of using Tkinter in this post. Happy coding.!!