How to Create Your First Django App in 5 Easy Steps
In this tutorial, we will learn how to create, install and deploy our first Django app effortlessly. We will be working with some of the app and project files. We will learn the basics of how these files interact among themselves and finally create our first web page.
Let’s dive into the steps for creating a Django app.
How to Create Your First Django App?
Django provides the feature of code reusability, which enables the users to migrate the pre-built apps in their project and also customize their web applications.
Before we begin creating our first app just execute this command inside the project directory.
python manage.py makemigrations
Once you are completed with the above command execute this command:
python manage.py migrate
Steps to Create the Django Applications
Step 1: Open your Command Prompt or Window PowerShell.
Move to the directory where you have made the setup for the Virtual environment.
Activate your Virtual environment by typing the following command:
(virtual-environment-name)\Scripts\activate.bat

Your virtual environment is activated.
Change the directory to your project folder. Here it is named “TechVidvan”.
Step 2: Initialising the Django Application
Type the following command in the Command prompt:
Django-admin startapp application-name
The command execution is shown below:
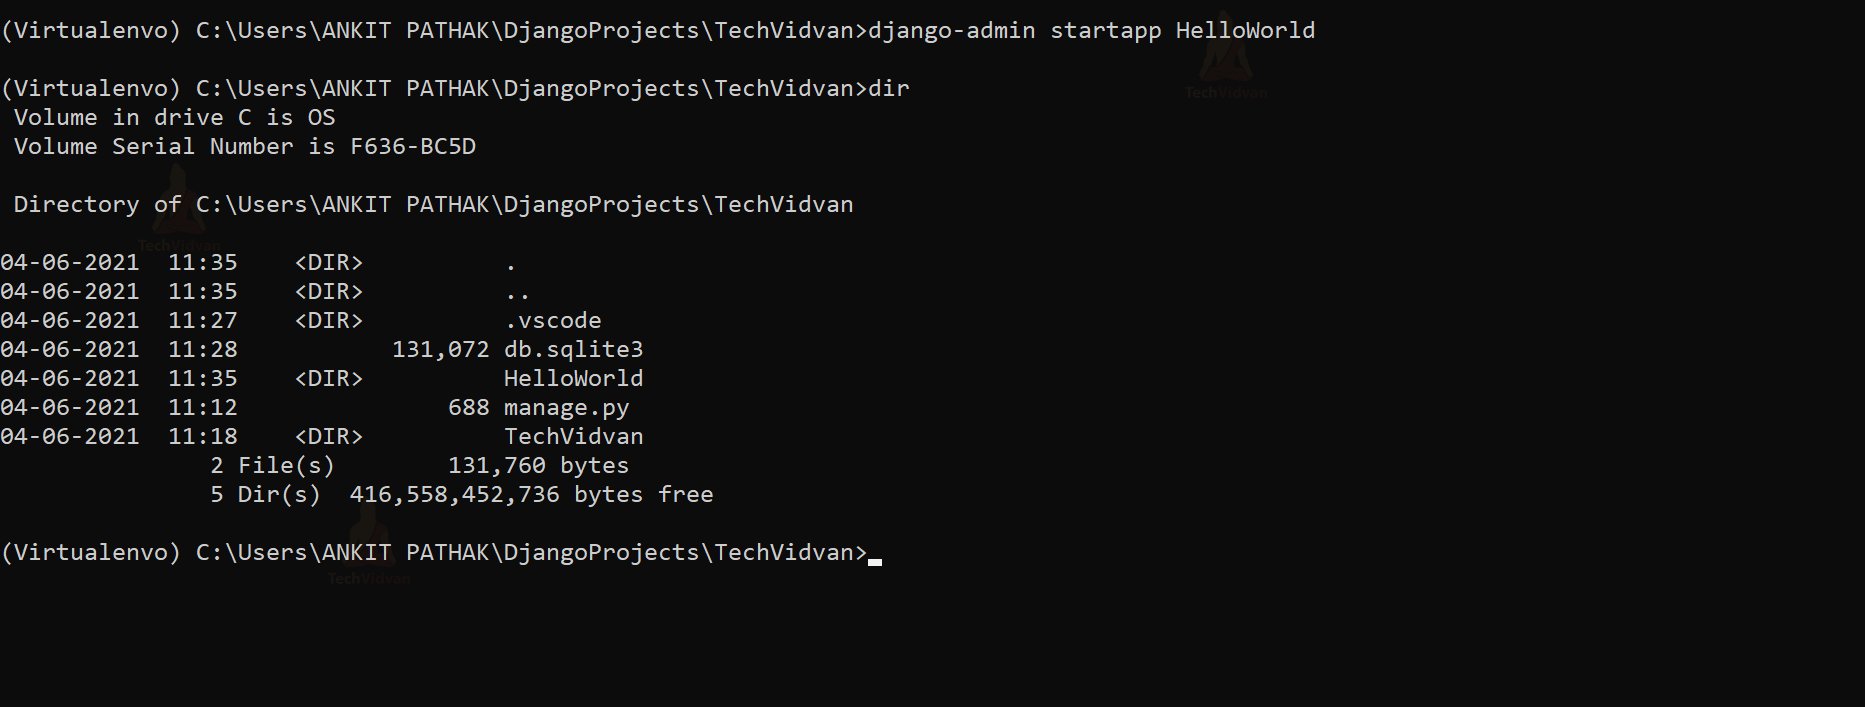
So, in our root directory, we have a new directory named HelloWorld( application-name). This directory contains all the files that our application will need and we will modify them accordingly to accomplish our desired goals.
- Name your application suitably, according to the task it performs.
- Create an application only when the task it performs can not be fulfilled by any other existing applications. That means avoid redundancy.
Following the above-mentioned tips will help you to build your projects easily. You can be very specific about which app you want to add to your project and the one that you should avoid. This will increase your development speed and decrease your workload.
The app comes with some pre-installed files which are as follows:
- migrations
- admin.py
- apps.py
- models.py
- tests.py
- views.py
- _init_.py
Step 3: Installing Django App
The app we have just created ”HelloWorld”( App name) is in the same project folder “TechVidvan”( Project name), but we need to install the application.
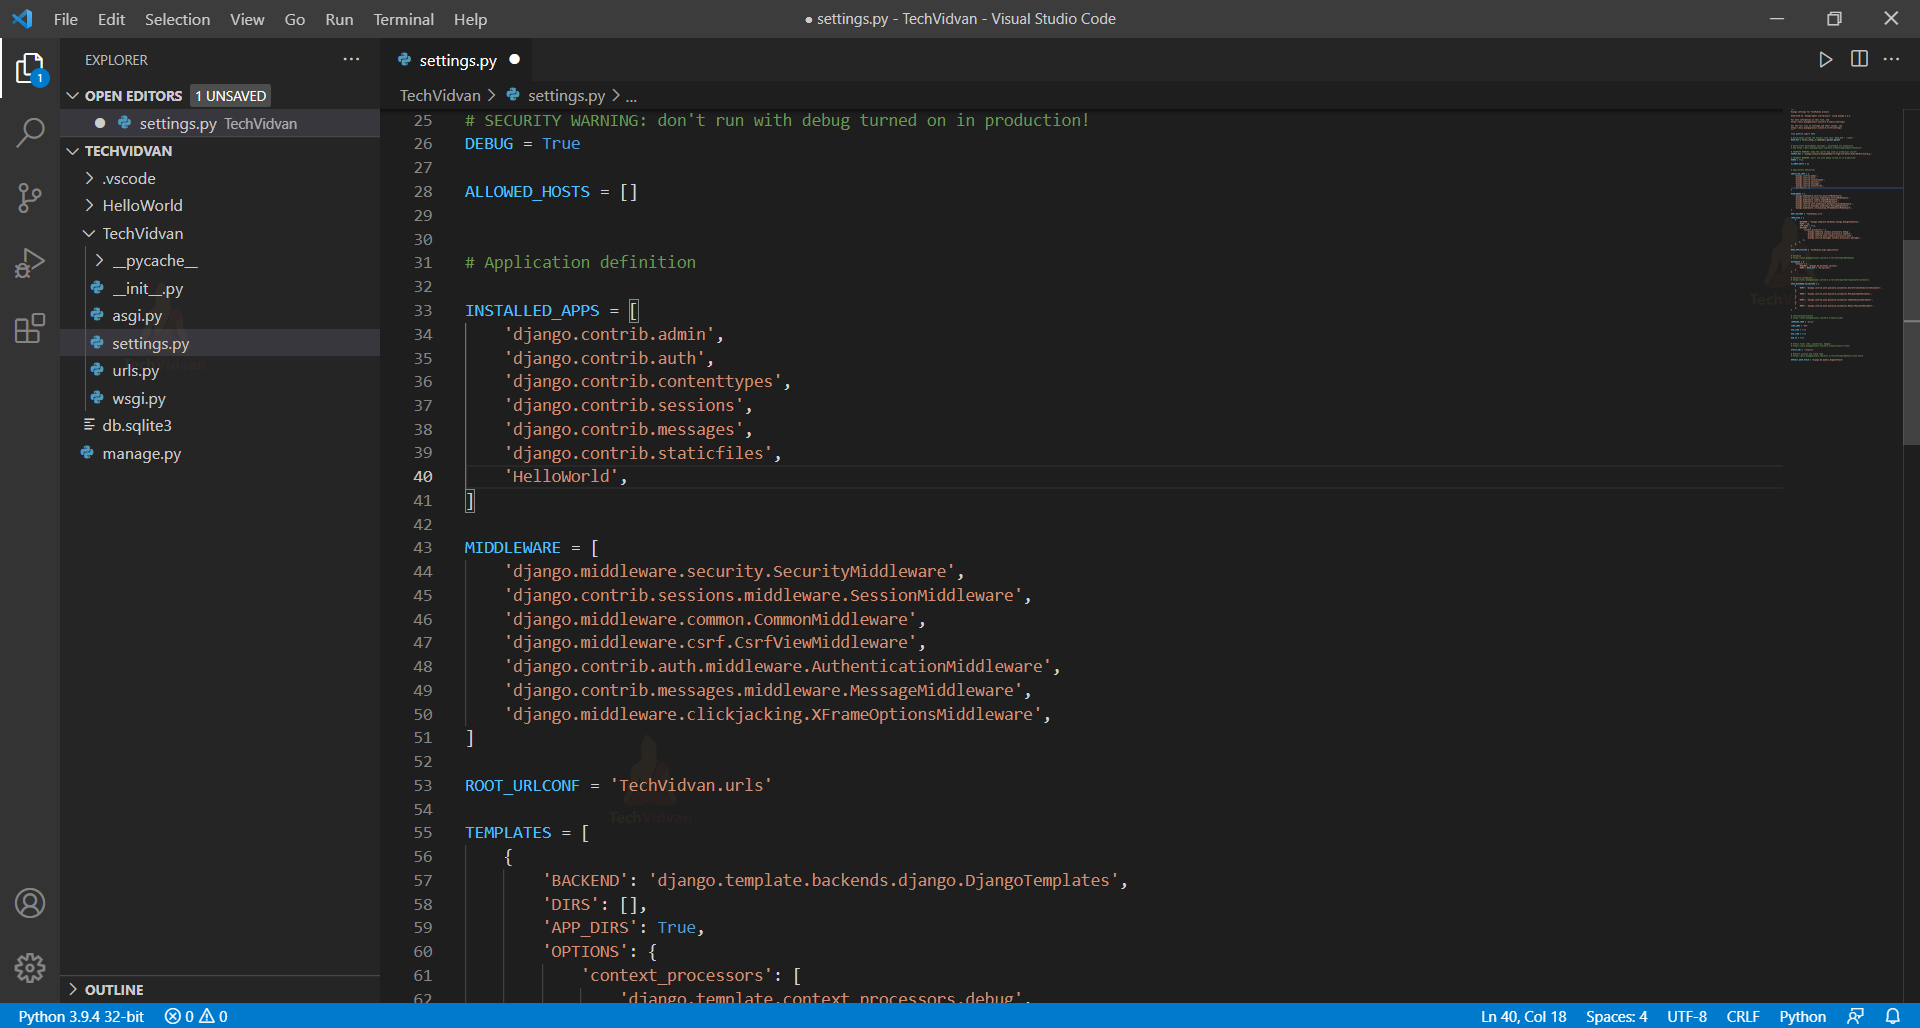
Switch on the Visual Studio code. Move to the settings.py file of the project. Remember, we are working on the setting.py file of our project, not the one under the app directory.
We have to just type the name of our application under the INSTALLED_APPS. Remember to put a comma after the app name.
Step 4: Adding App in urls.py File
The reason to add the app to our urls.py file is that, if anyone will search the URL of the app it will display this app.
We will first work with our app. We need to create a new python file in our HelloWorld directory( App directory). To do so, click on the new file logo, just above your app name. This will open a search bar. Write urls.py in it and it will create a new file under your app directory.
Just paste the following command in your newly created urls.py file:
from django.urls import path
from.import views
urlpatterns = [
path('', views.index, name='index'),
]
This code is directing our Django project to initiate this function in the views.py file. We will make changes in views.py too.
We have imported both the django.urls package and path function from views.py file.
Here we have passed two arguments in the path function. The first is the URL that was searched, the second argument is to execute the file which is the index file in our case.
The next step is to modify the urls.py file of our project.
Paste the following code in your urls.py file:
from django.contrib import admin
from django.urls import include, path
urlpatterns = [
path('HelloWorld/', include('HelloWorld.urls')),
path('admin/', admin.site.urls),
]
This tells the system to direct the server to check the URL for the HelloWorld keyword. This will again direct the URL to the urls.py file inside the HelloWorld app directory.
Step 5: Constructing the Views.py file
Views.py is responsible for displaying the text on our web application.
Paste the following code in the views.py file under the HelloWorld directory( app directory):
from django.http import HttpResponse
def index(request):
    return HttpResponse("Welcome to TechVidvan Django Tutorial")
Here, we have imported a HttpResponse, and we have created a function named index which takes an argument request. We have used this index function in the urls.py file.
This function takes an argument as a request and we are returning the HttpResponse ().
Run the following command in the Visual Studio Code’s terminal:
python manage.py runserver
This will run your app, and you will see the following output.
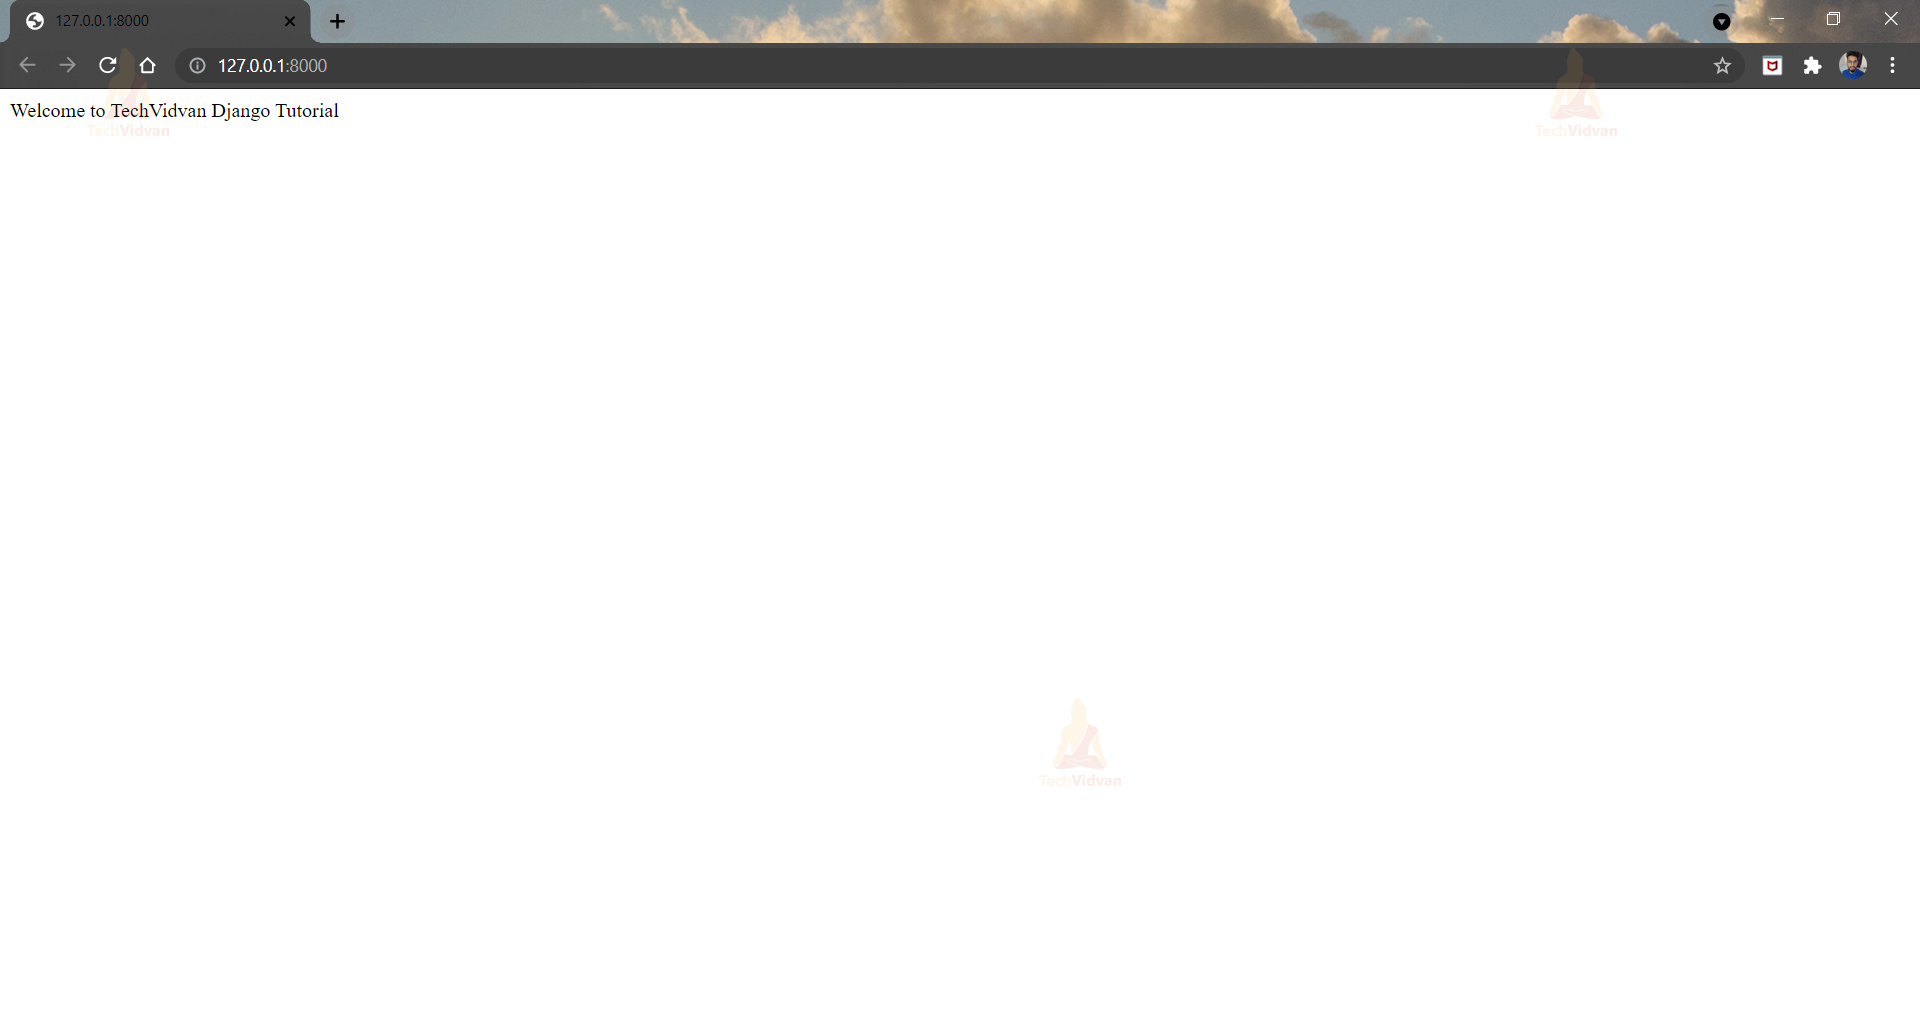
So, we have just created our first Django app and also our first web page.
Summary
In this tutorial, we have learned to create our first Django app and launch our first web page. We have also worked with some of Django’s files and learned more about the file structure.
Always remember to activate the virtual environment before creating your app, otherwise, your app will not start. Carefully follow every single step mentioned in the article to create your app simply and effortlessly.