Step by Step Procedure to Install Django
As you have decided to start your journey with Django, let’s discuss the steps to install it.
Django is an open-source web framework of Python. It is designed for building complex and dynamic websites with utmost ease. This framework provides the features of DRY, free flow coding, and Object Relational mapping which ensures the rapid development of the applications. So it is a great web framework to start with.
So follow the steps mentioned below to have an error-free installation.
Steps to Install Django
Get ready with a stable internet connection and your desktop/laptop to dive into the journey.
Step 1: Installing Python version(3.9.5)
Step 1.1:
As you know, Django is Python’s web framework, so you first need to install Python on your system.
Click the Downloads button shown below and choose the operating system installed on your computer. Below installation is performed for windows users.
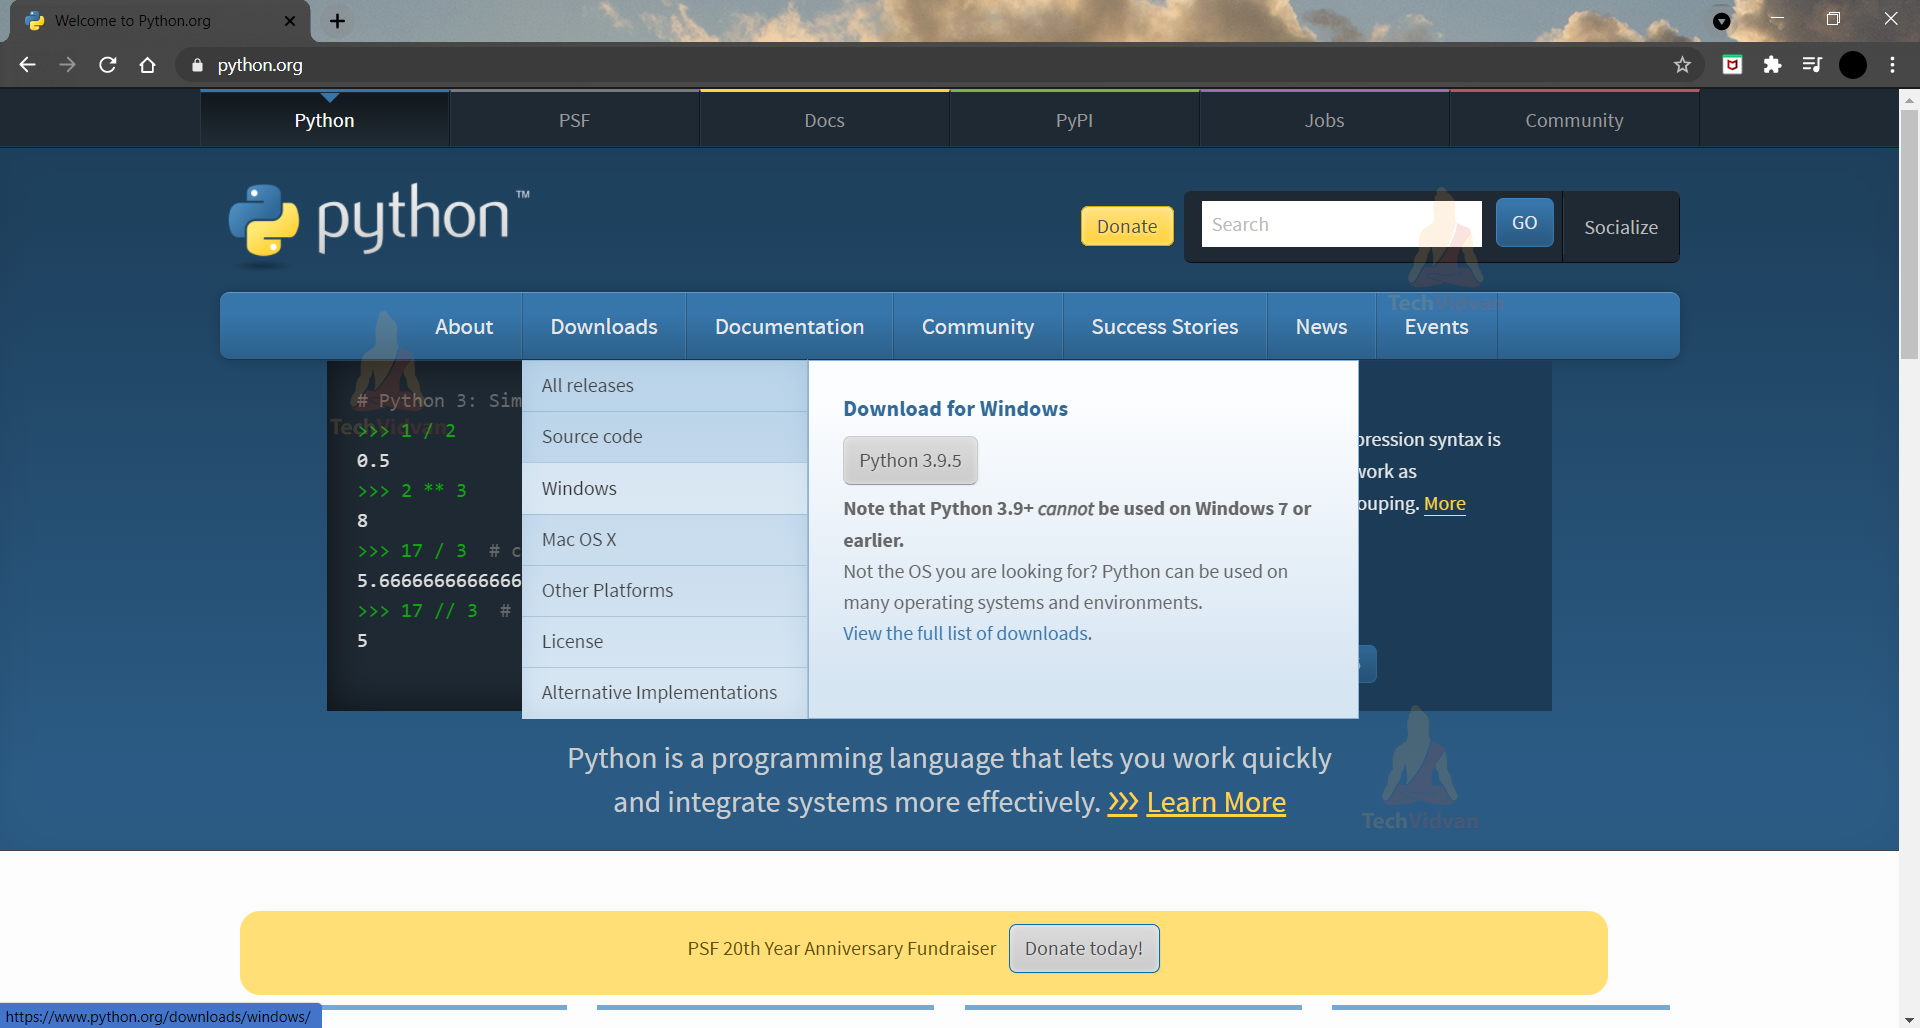
Step 1.2:
It will take you to the next page, where on the top you will find the Latest Python 3 release(highlighted in blue).
Click the link to download version 3.9.5. This is the latest version of Python available now.
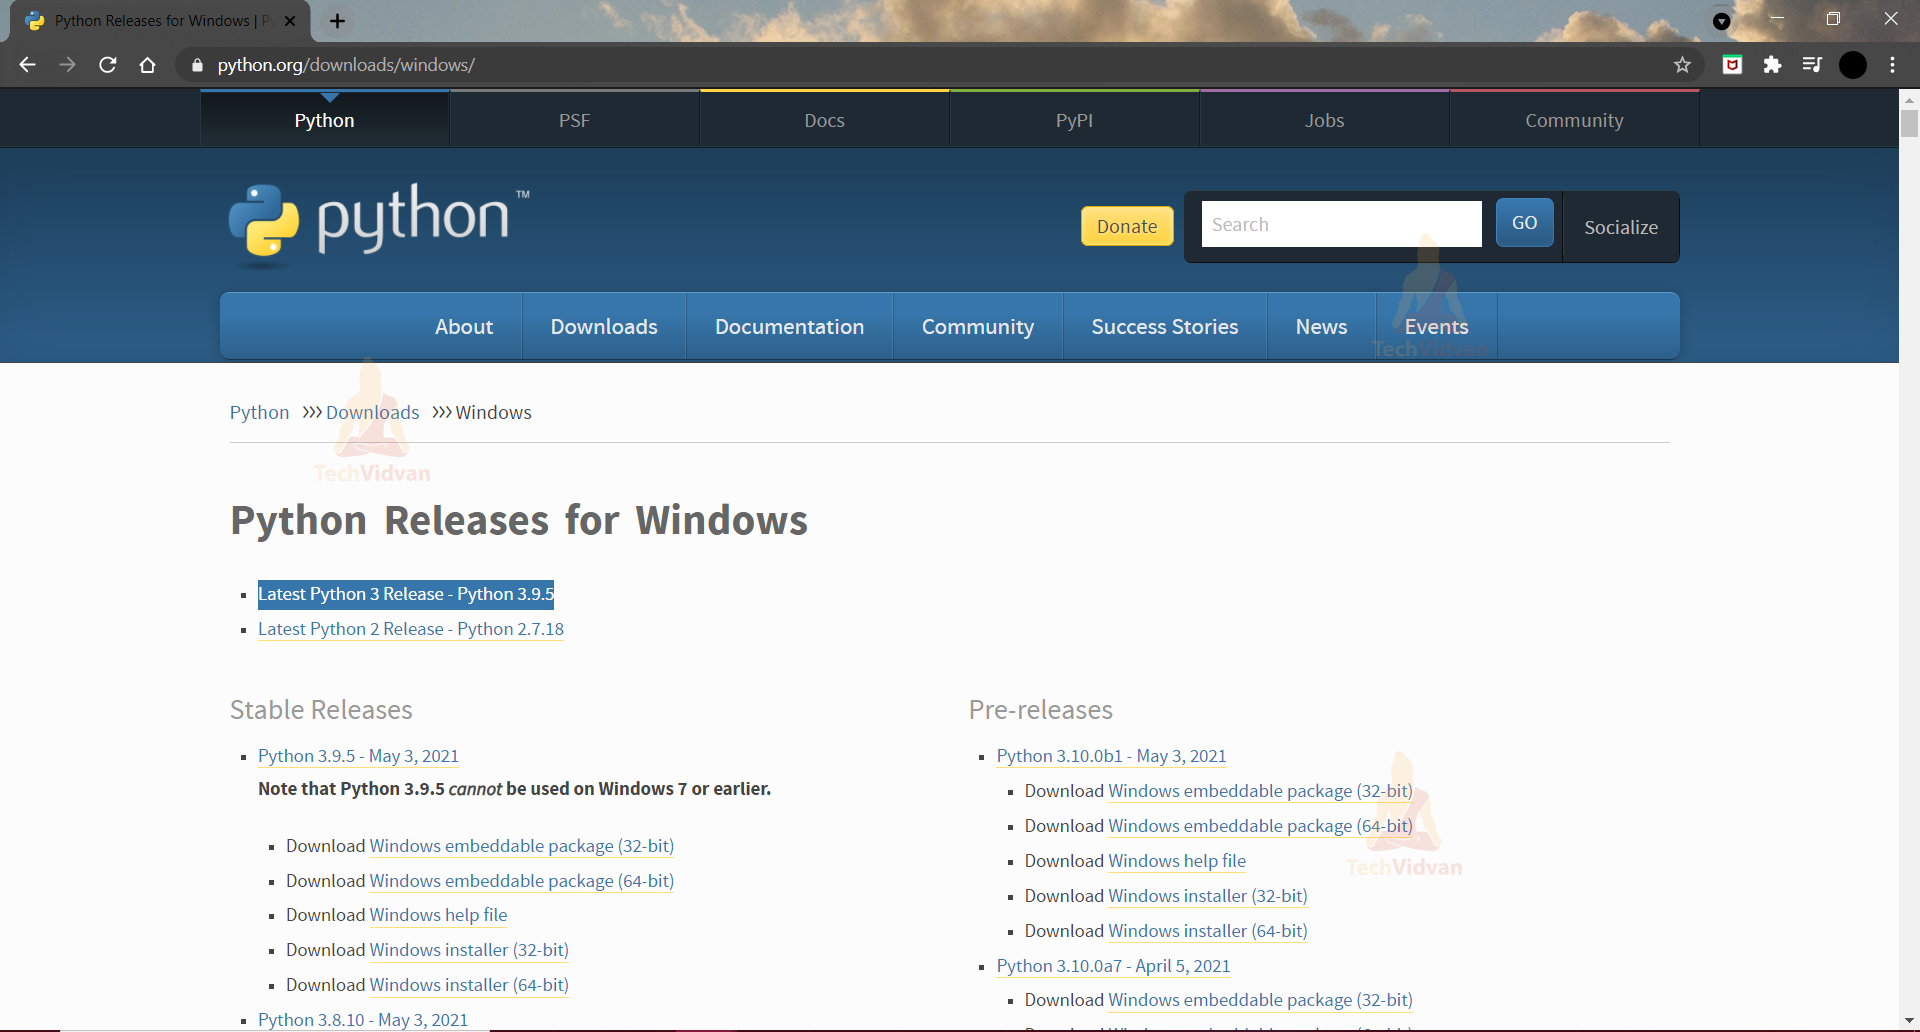
Step 1.3:
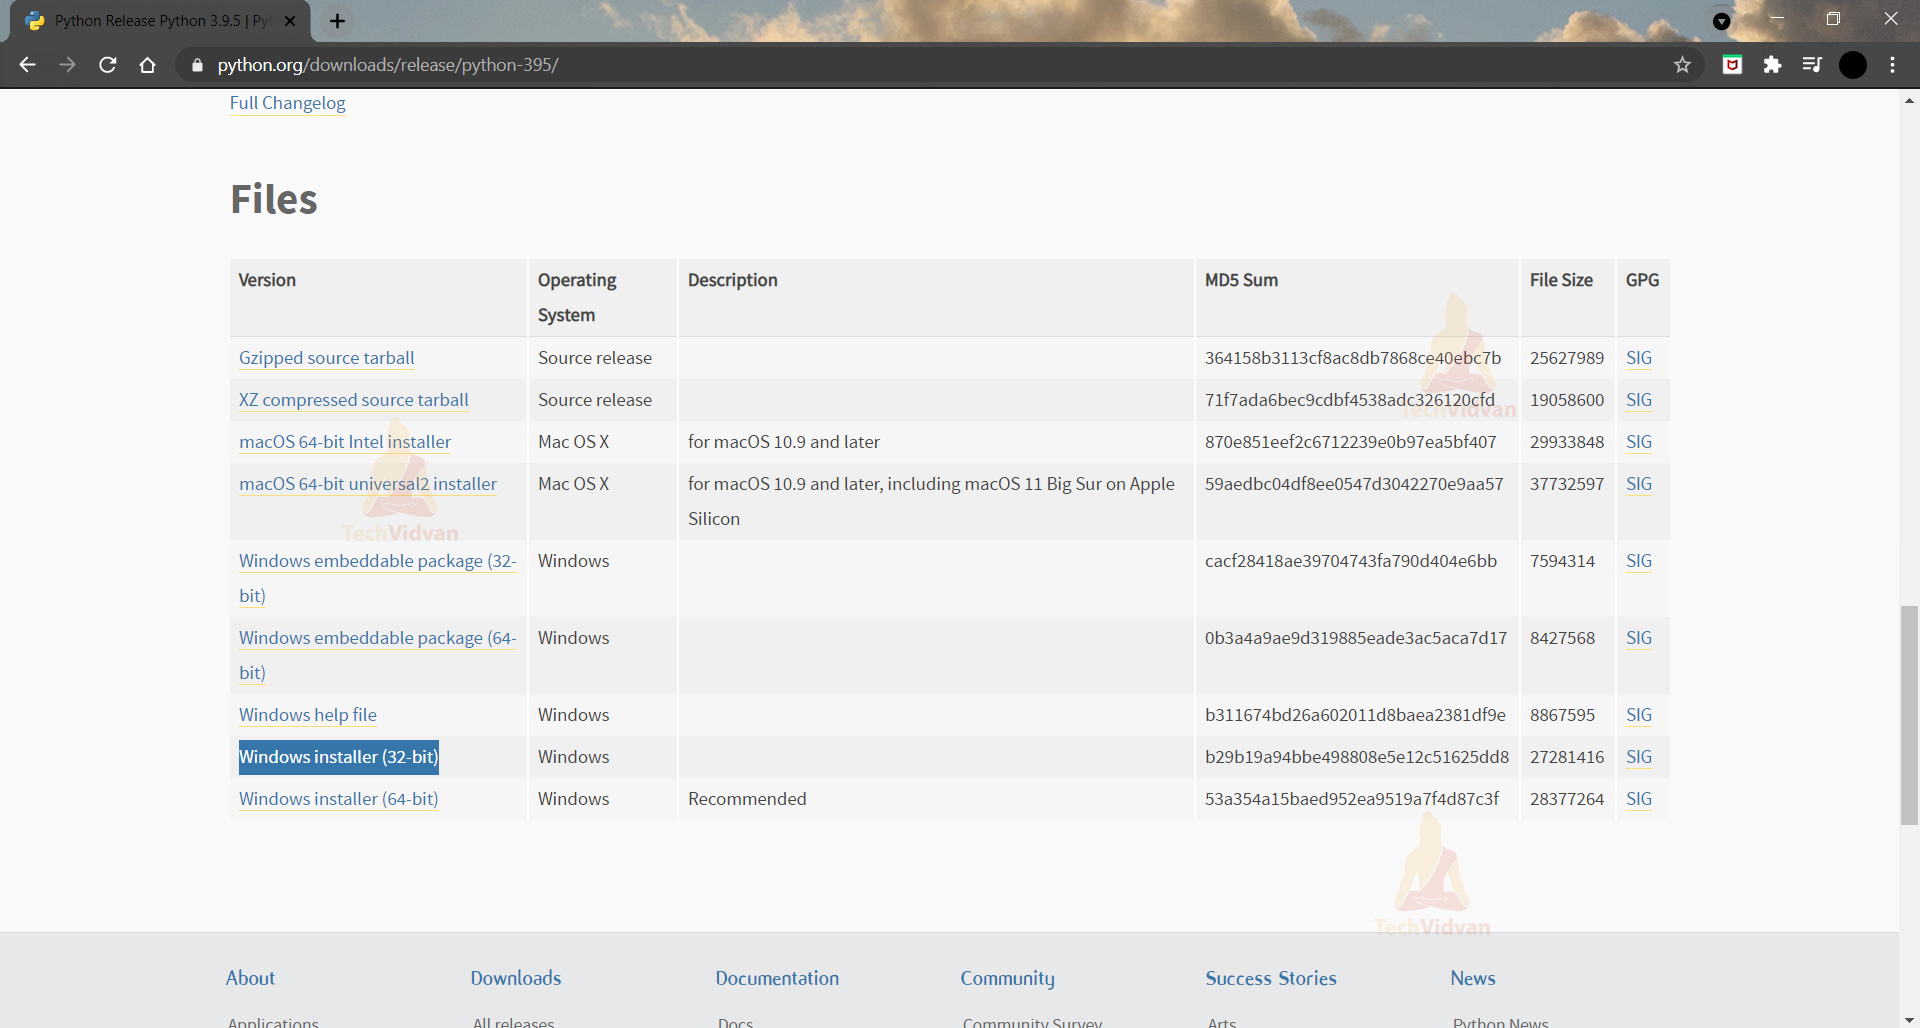
After clicking on that link, it will take you to the next page. Just scroll down and you will find “Files”. You will find multiple download options.
If you are using a Windows 64-bit system choose the last option( Windows installer (64-bit)), and choose Windows installer (32-bit) if you are using a 32-bit system.
Step 1.4:
It will take a few seconds for the downloads.
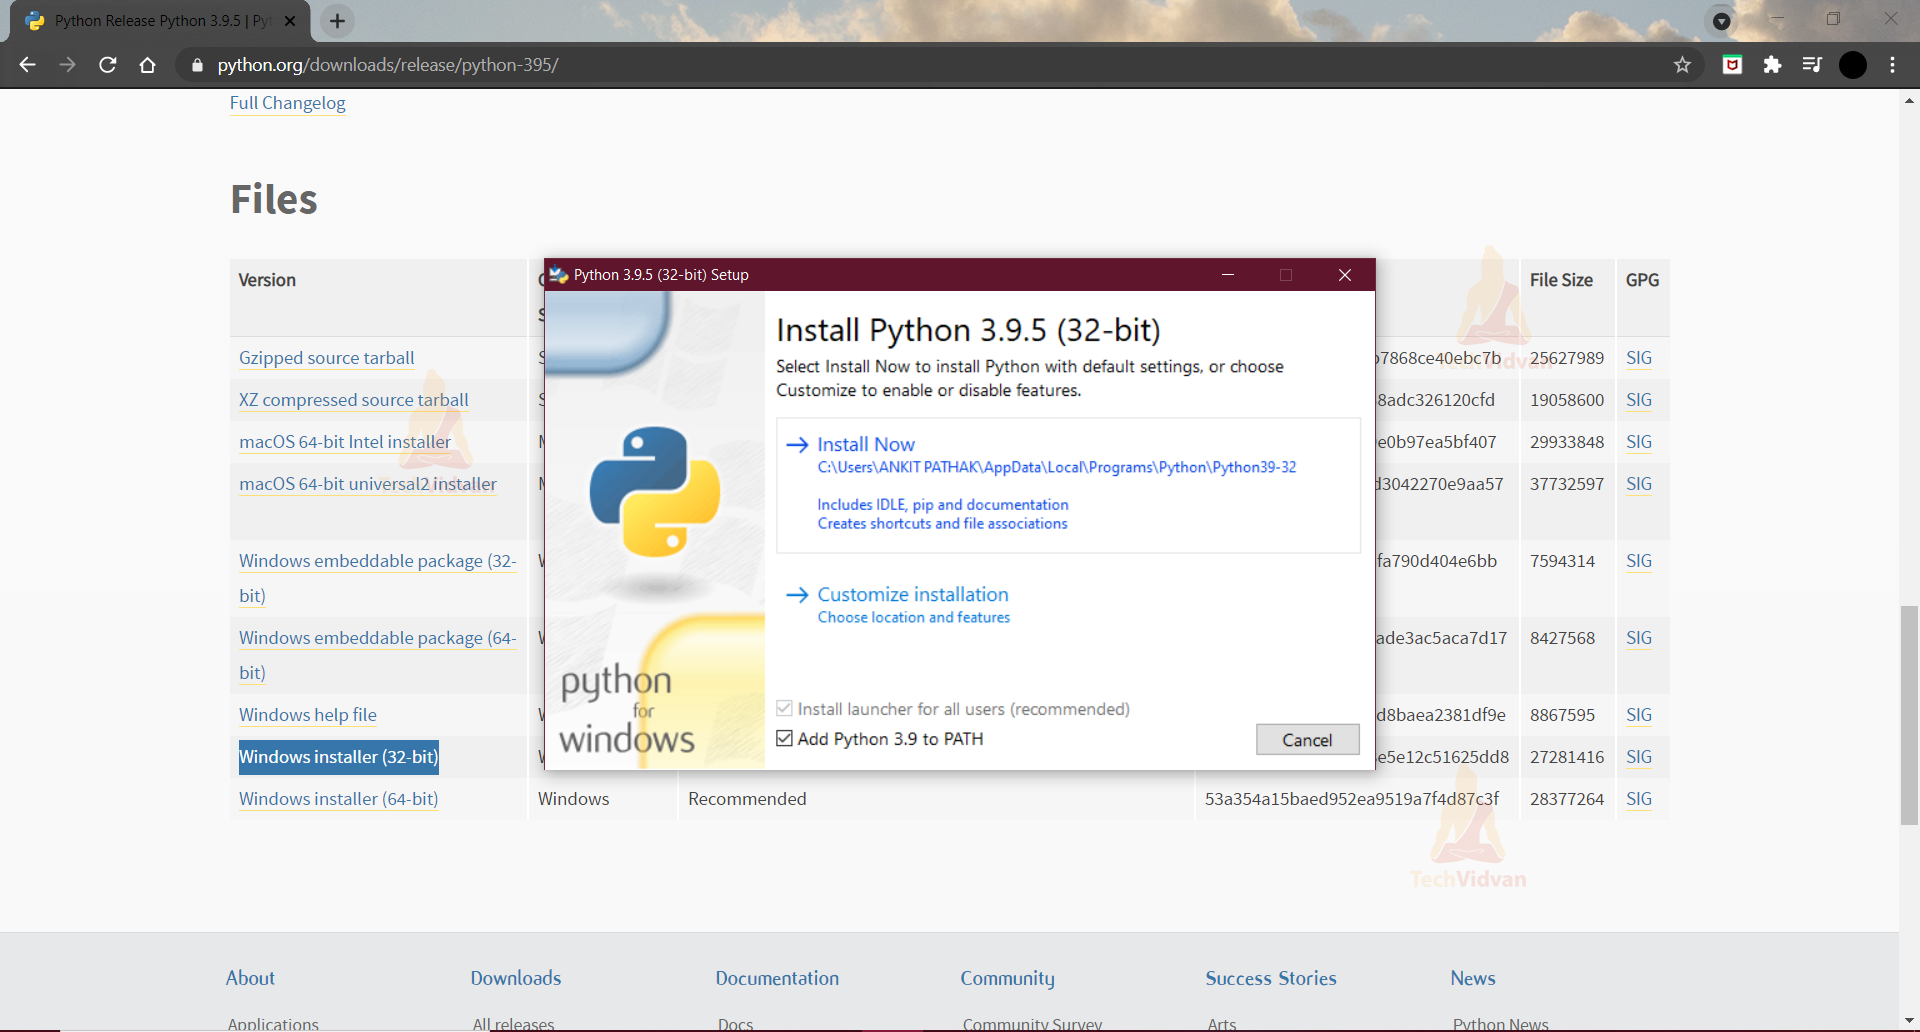
Once the download is complete, it will launch a setup window. Here, make sure to tick the checkbox given extreme below, showing “Add Python 3.9 to PATH”.
Then click on the “Install Now” option as shown below in the image.
Step 1.5:
After clicking the “Install Now” option a warning message will appear on your screen, “Do you want to make changes in your system”, click on yes.
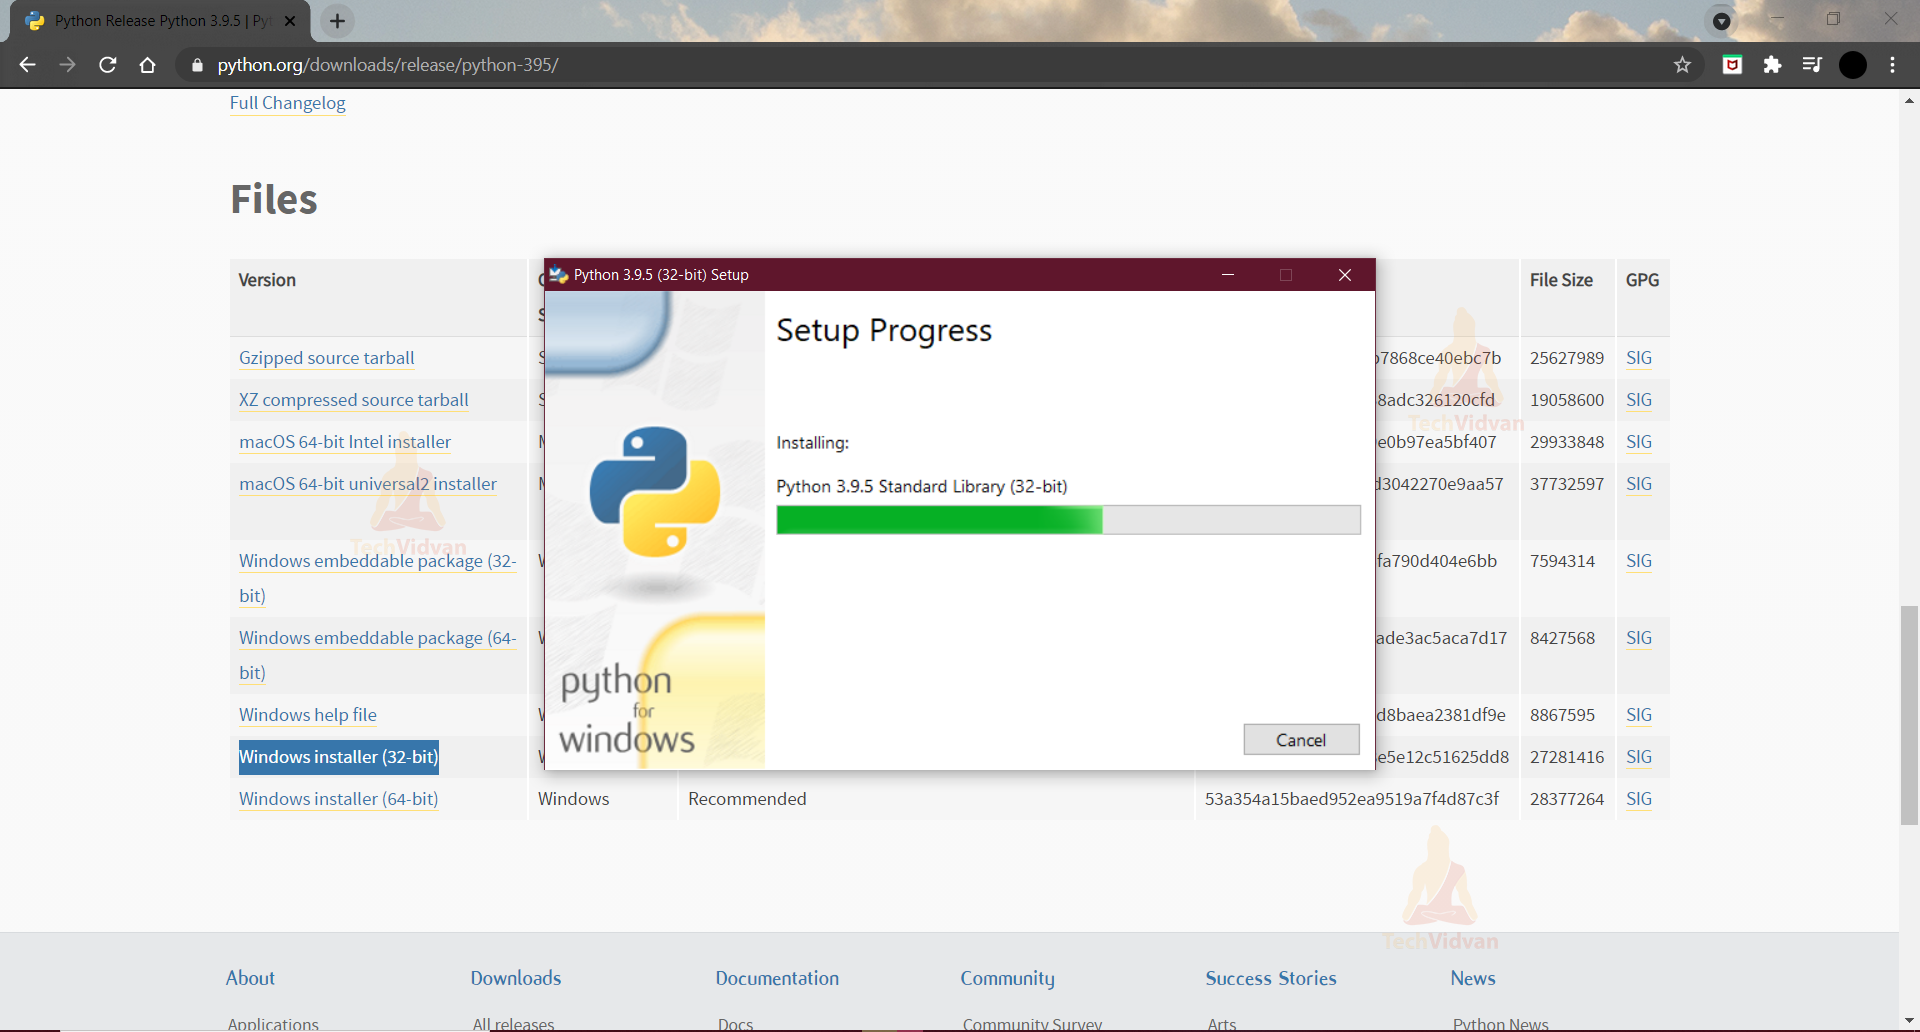
After that this window will appear as shown below. It will take some time for installation.
Step 1.6:
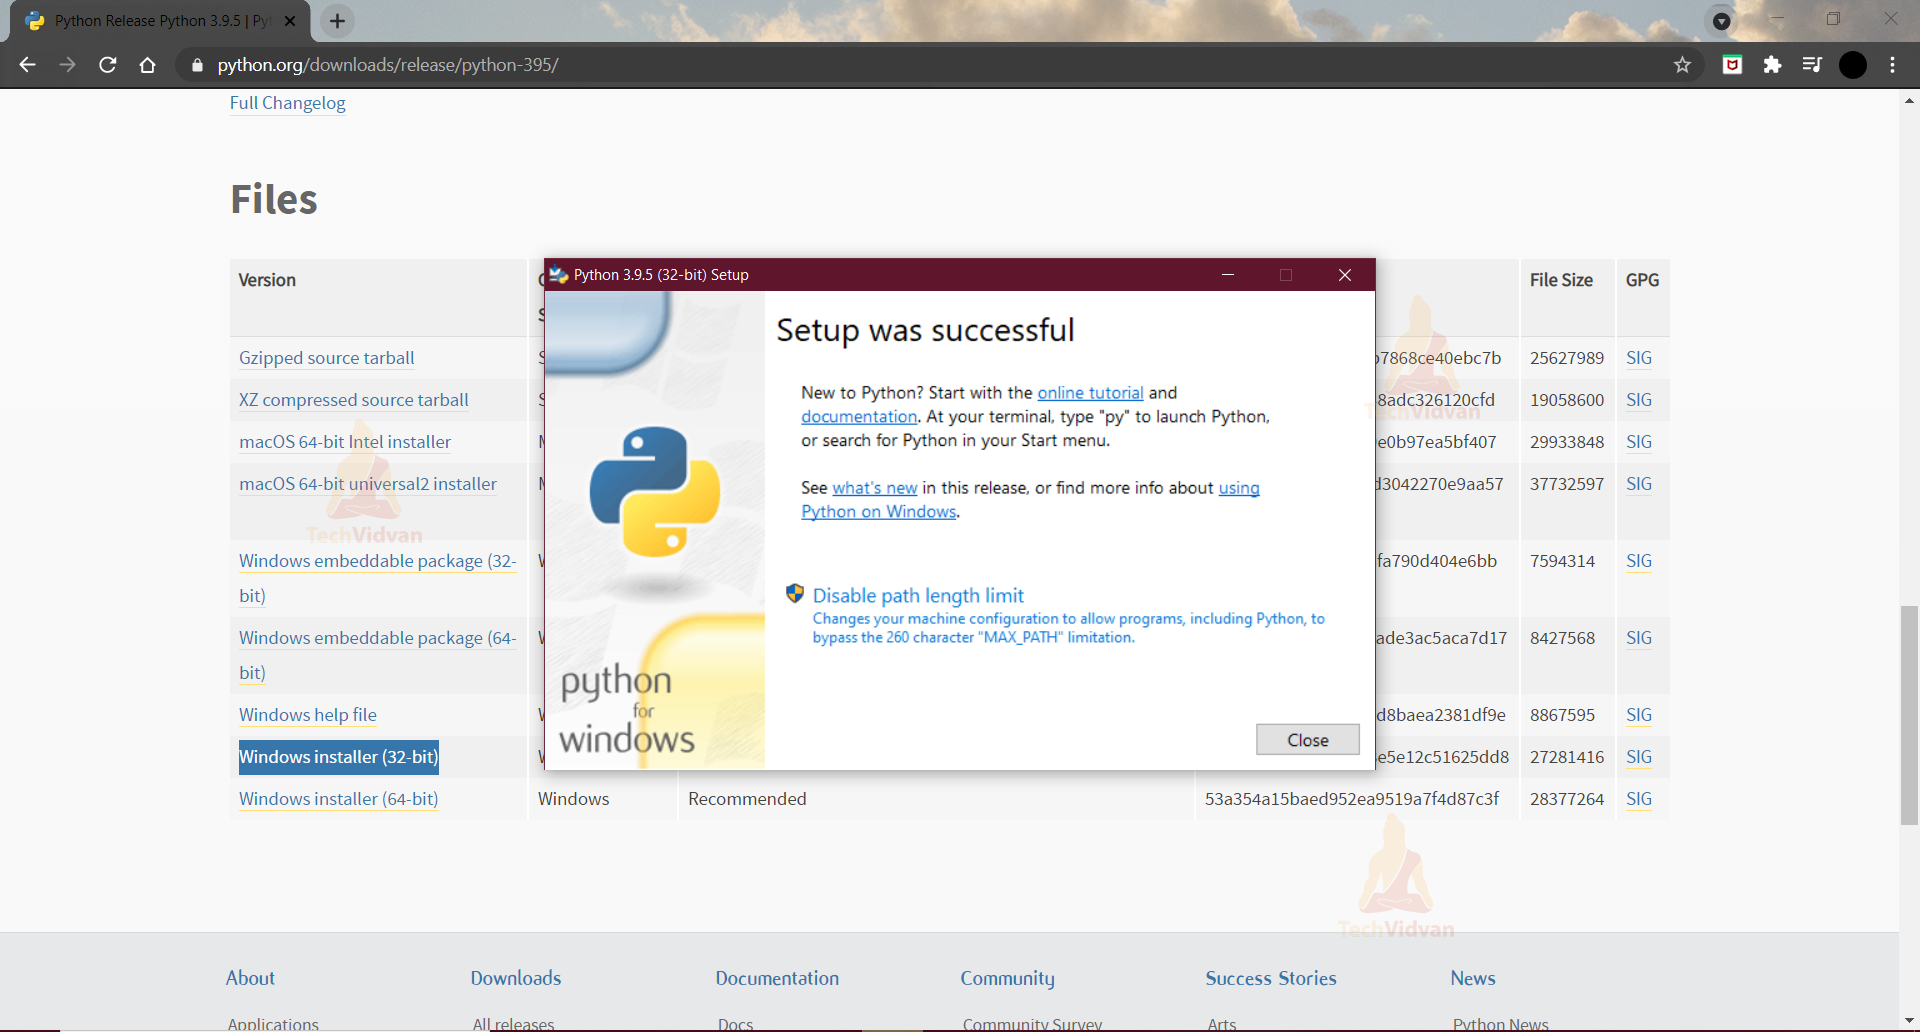
Congratulations!, your setup is complete. You will see the below window.
Step 1.7:
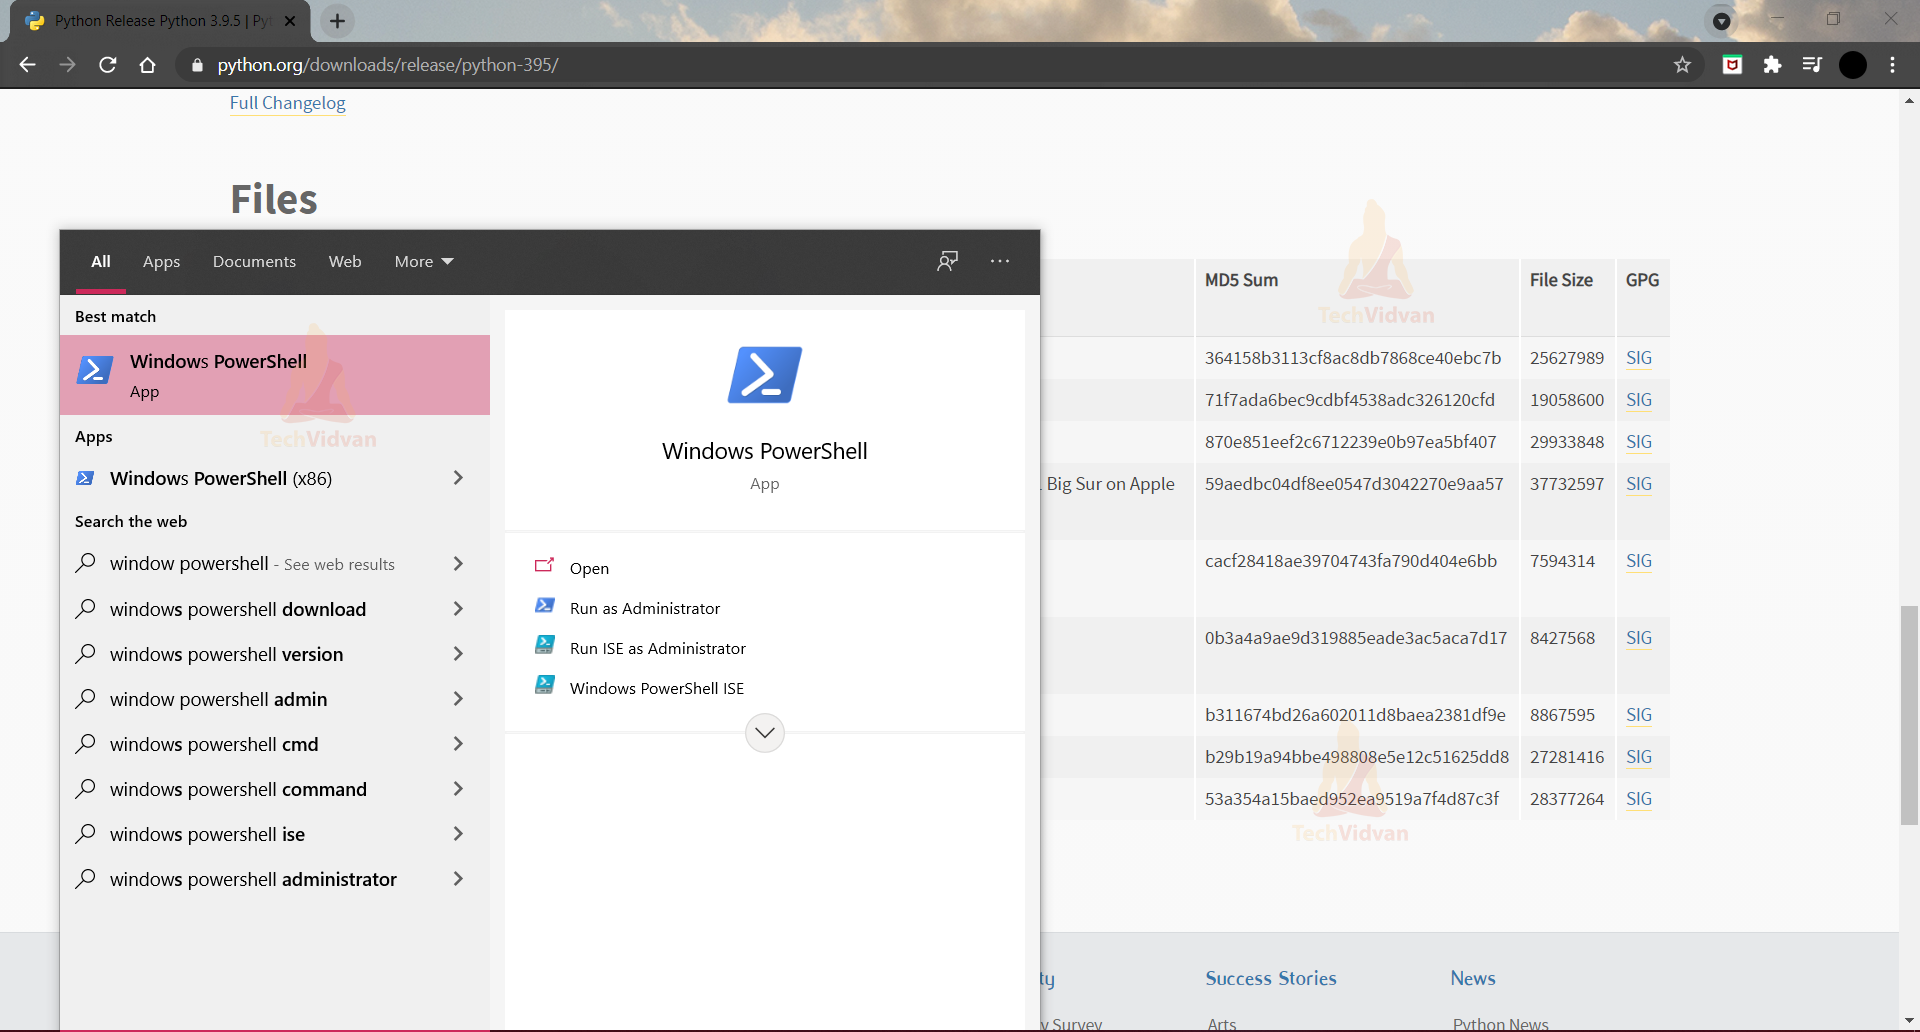
To check whether Python is successfully installed or not, open the Window PowerShell. You can search it by typing the same in the window search(as shown below).
Step 1.8:
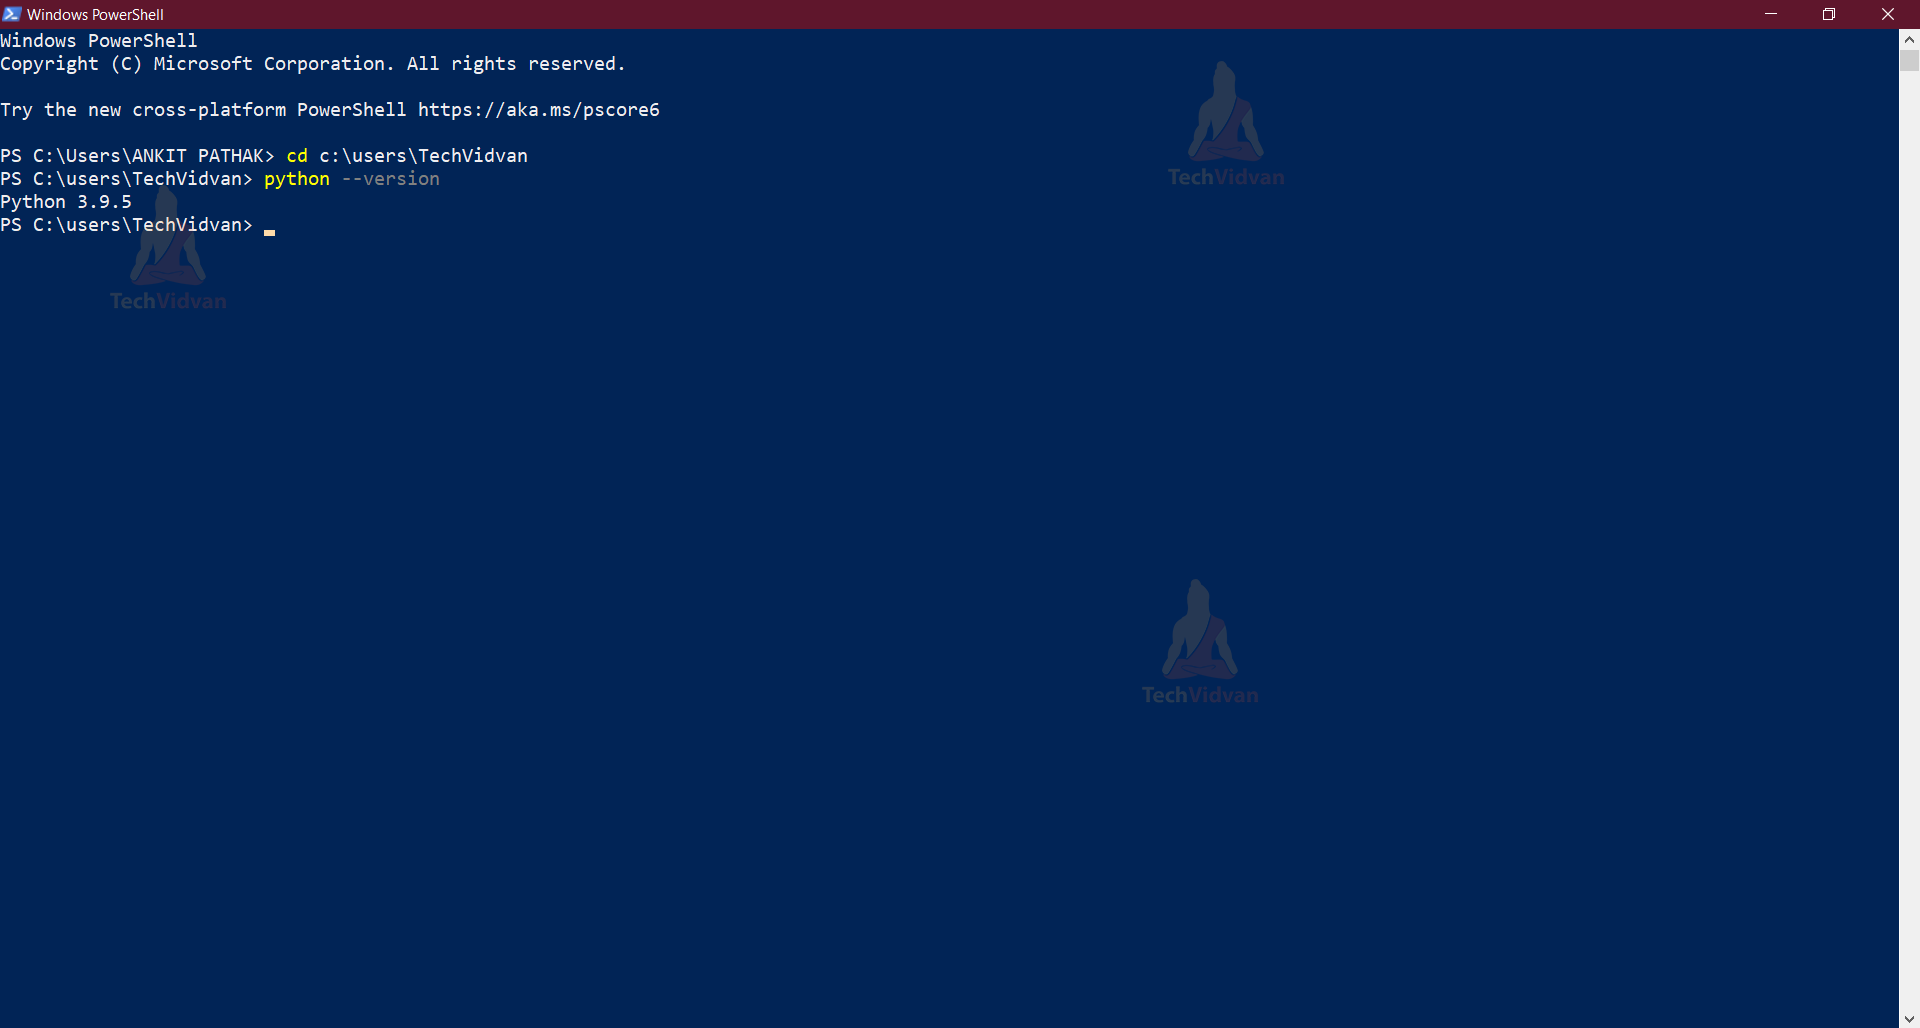
Type python –version in PowerShell. As shown below it will display the latest downloaded version i.e. “Python 3.9.5”.
You can also check the version of pip installed by typing pip –version, it will display the pip version.
Pip is used to download other packages in the Python environment. We will use it while working with Django too.
Step 2: Setting up Virtual Environment and Installing Django
Step 2.1
The virtual environment creates an isolated environment for Python projects, which means every project can have its dependencies. Whatever installation you do in the virtual environment will not affect the rest of the system.
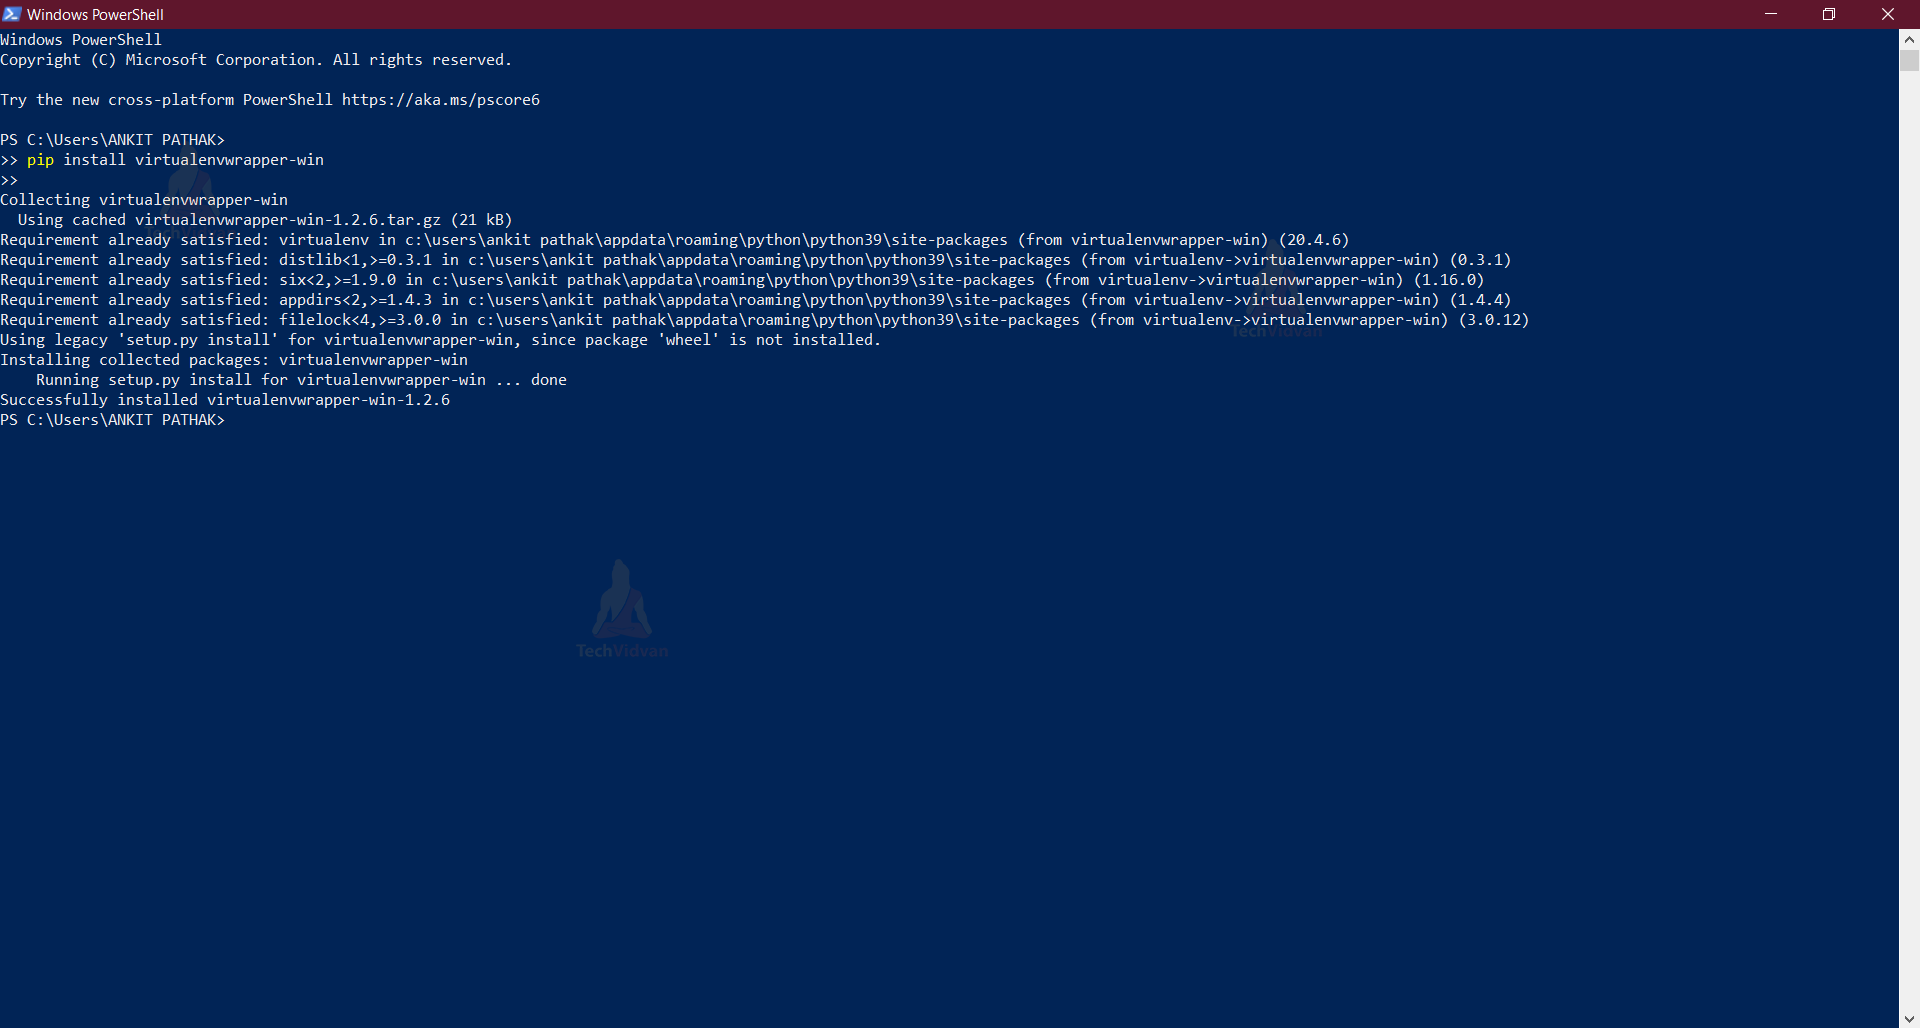
Restart the Window PowerShell window and type pip install virtualenvwrapper-win. It will take some time to install the virtual wrapper environment in windows or display the message shown below if it is already installed.
Step 2.2
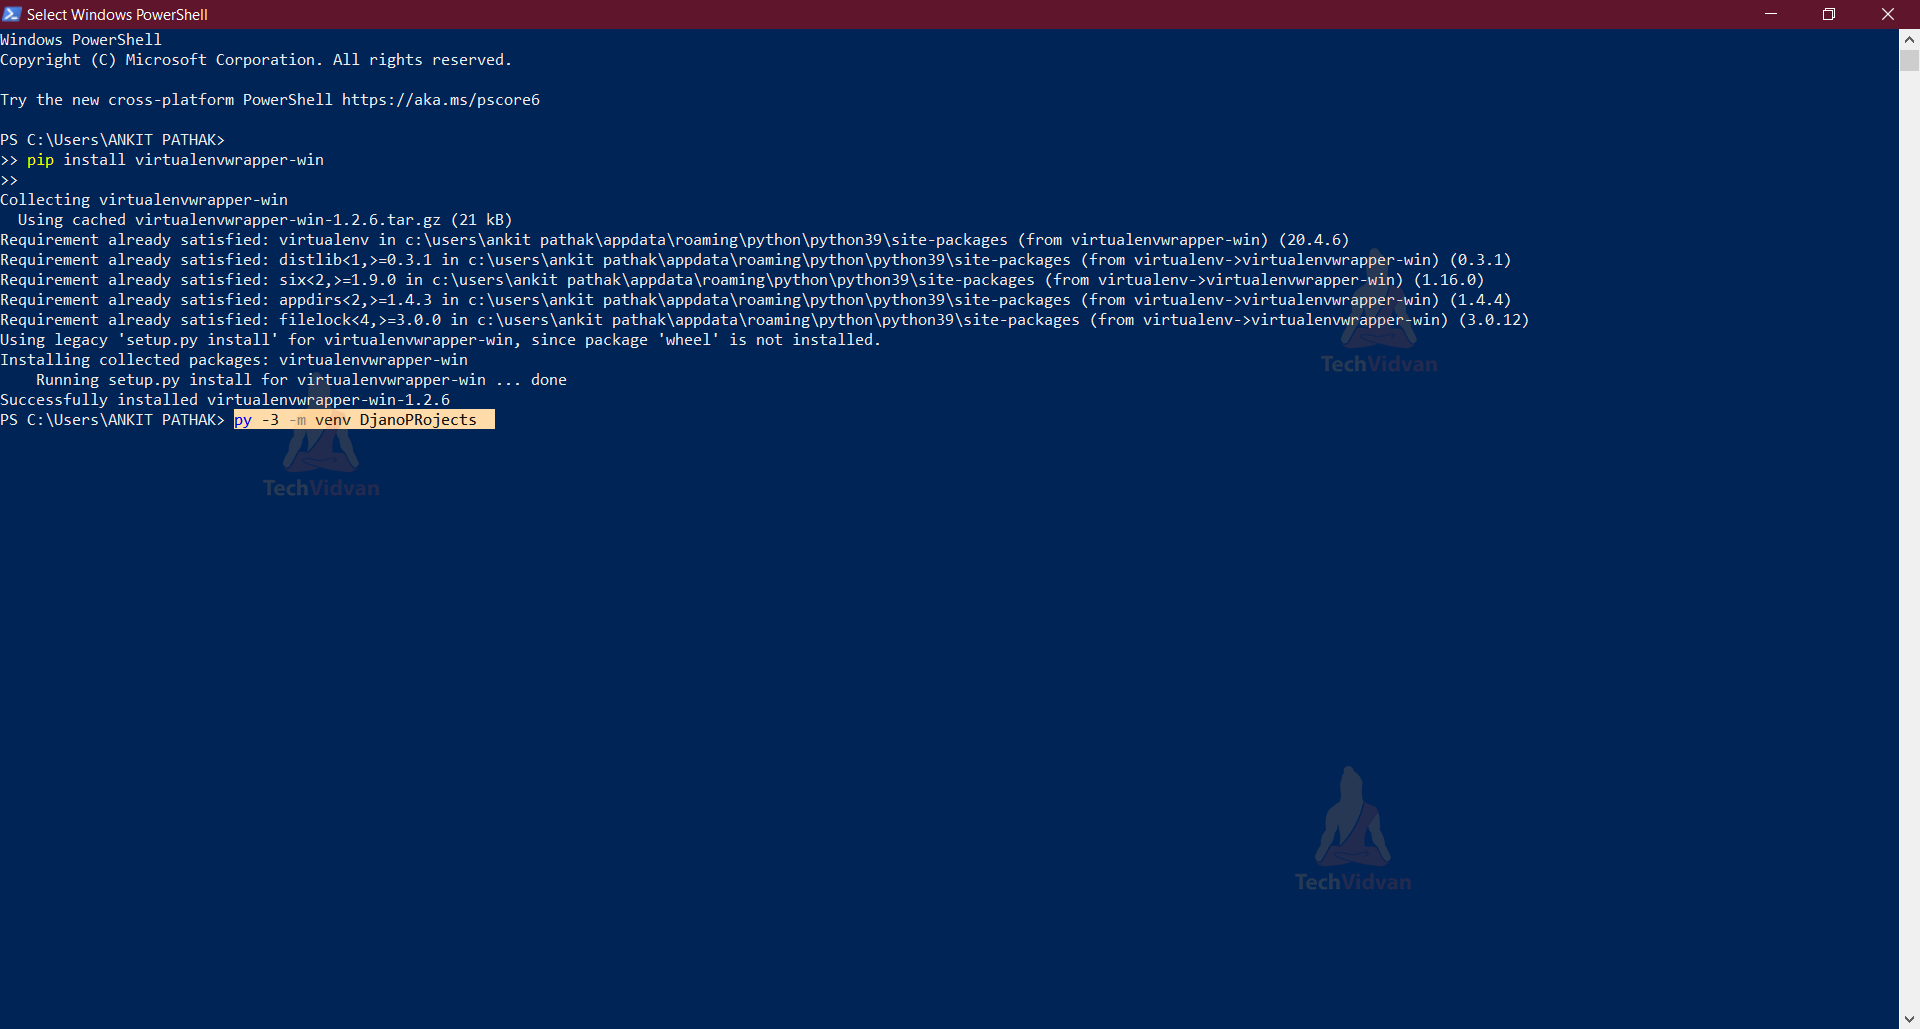
The next step is to create a virtual environment for your Django project.
Type “ mkvirtualenv DjangoPRoject” or “py -3 -m venv DjangoProject”, whatever works for your system.
It will create a virtual environment.
Step 3: Install Django
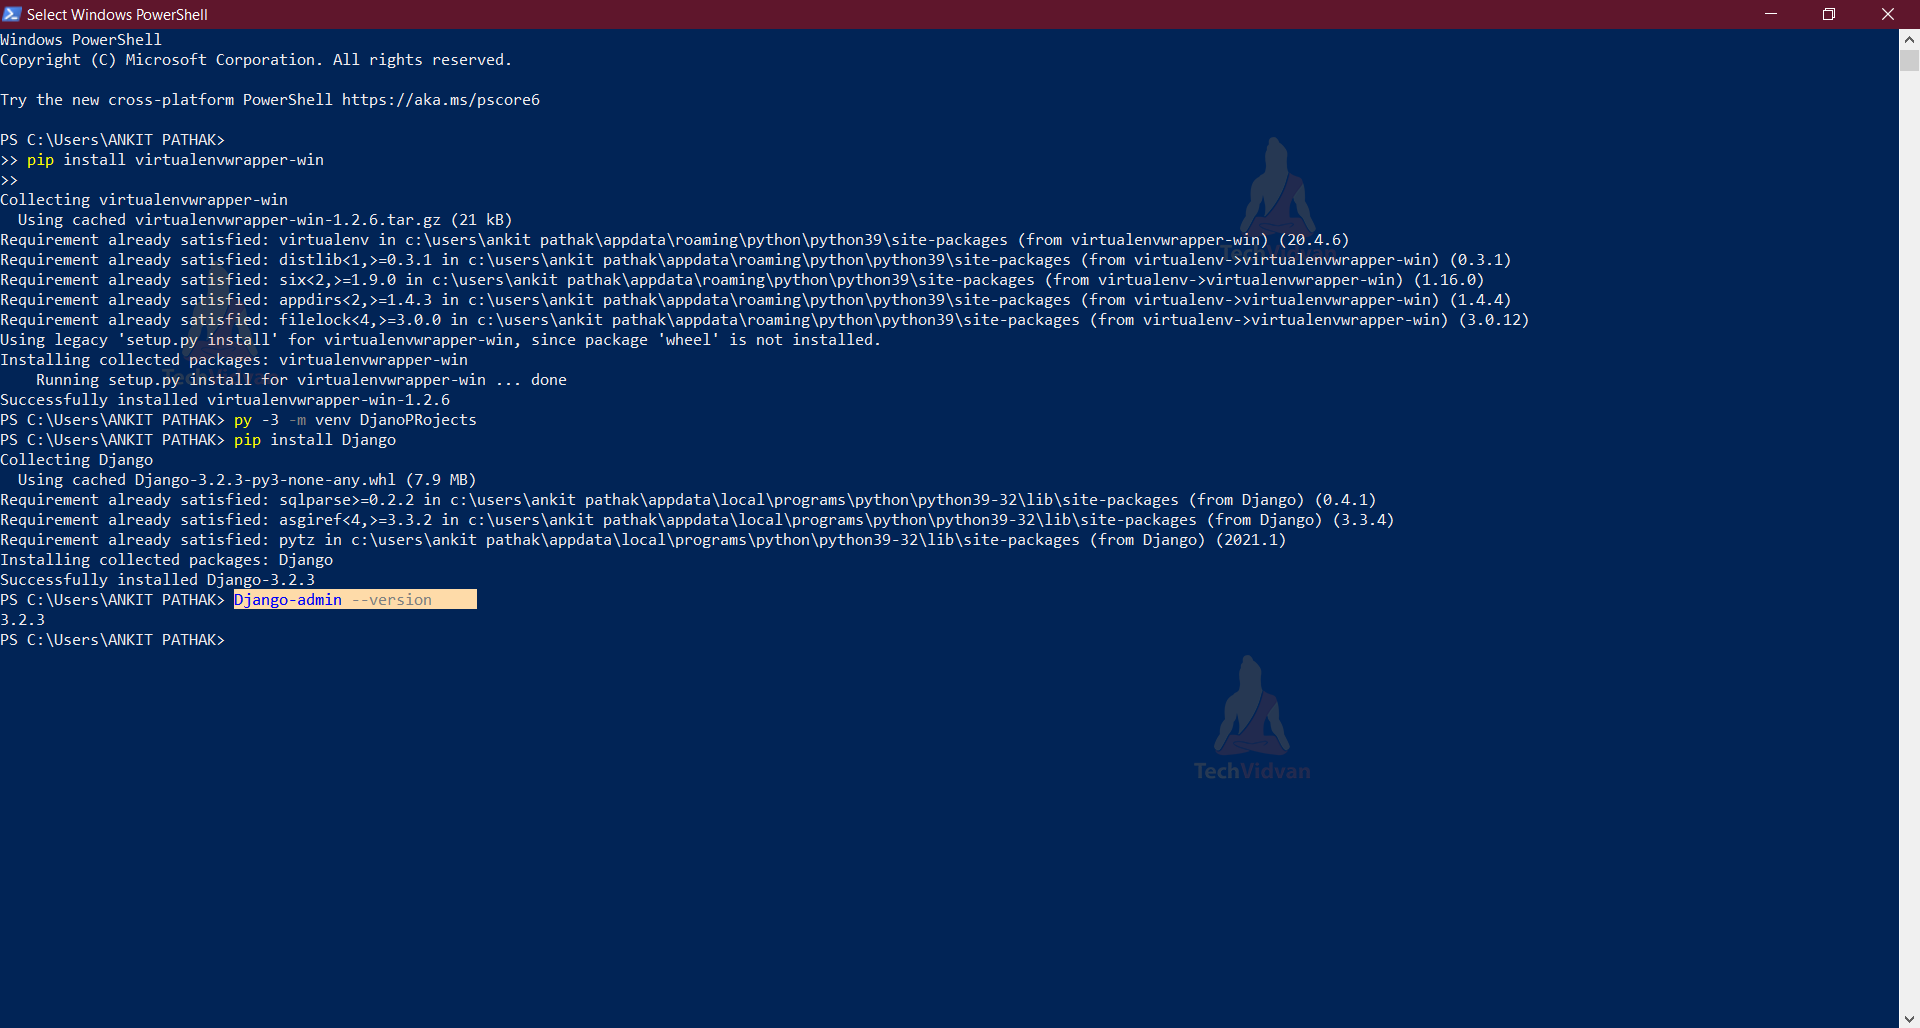
Now finally it’s time to download Django.
Type pip install Django in the PowerShell as shown below.
Now Django is installed on your system. You can check the version of Django by typing Django -admin –version
Summary
So that was it. Now you are all set to use this fantastic framework to build your projects. Turn your imaginations into reality.