Django Templates: Create your First Template in easy steps
The third and most significant aspect of Django’s MVT Structure is templates. In Django, a template is a .html file that is prepared in HTML, CSS, and Javascript. The Django framework efficiently manages and generates dynamically generated HTML web pages for end-user viewing. Django is mostly a backend framework, thus we use templates to offer a frontend and a layout for our website.
All static objects in a web page developed with Django hold the templates for generating the static entities, which are important to understand and run the process of Django applications. In other words, the templates are in charge of constructing the skeleton of a webpage. These templates allow you to set up an MVT-oriented architecture in Django. A Django view is used to render the templates used in a Python setup.
What are Django Templates?
Django templates combine a static HTML layout with Django Syntax, which is Python code. Both of these components aid in the dynamic generation of HTML pages, making your website more user-friendly. The basic goal of Django templates is to keep the data representation distinct from the data itself.
Need of Templates in Django
We can’t put python code in an HTML file since the code is only interpreted by the Python interpreter, not the browser. HTML is a static markup language, but Python is a dynamic programming language.
The Django template engine separates the design from the python code, allowing us to create dynamic web pages.
Rendering Django Views using Templates.
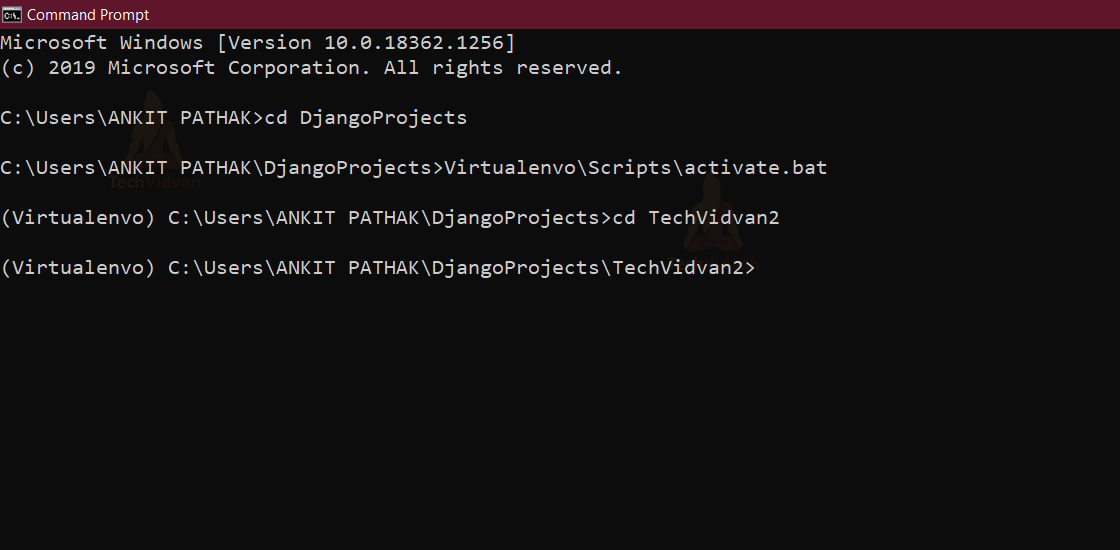
Step 1: Activate the virtual environment
Navigate to the location where the Virtual Environment setup was built.
To activate your virtual environment, type the following command:
(virtual-environment-name)\Scripts\activate.bat
The virtual environment is active now.
To get to your project folder, change the directory. Here it is “TechVidvan2.”
Step 2: Create an application.
We will be working with the same application “Employee” that we used in the previous tutorial of Models and Views.
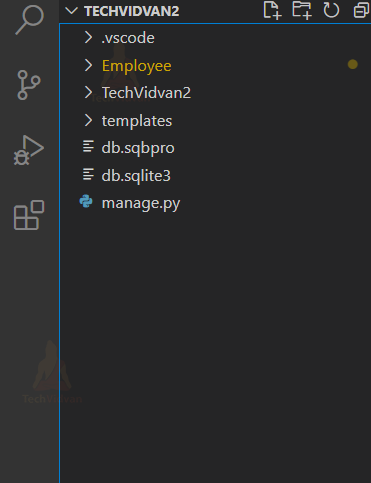
Step 3: Make a template folder under Root Project.
This folder could be used to store all template-related HTML code. Under the root project folder, a template folder should be created.
Step 4: Tag the template folder in the settings.py file
The settings.py file is used to link these templates to the views they belong to. When the tagging procedure is complete, any HTML content included within the folder will fall under this template area.
Code for making changes in the settings.py file:
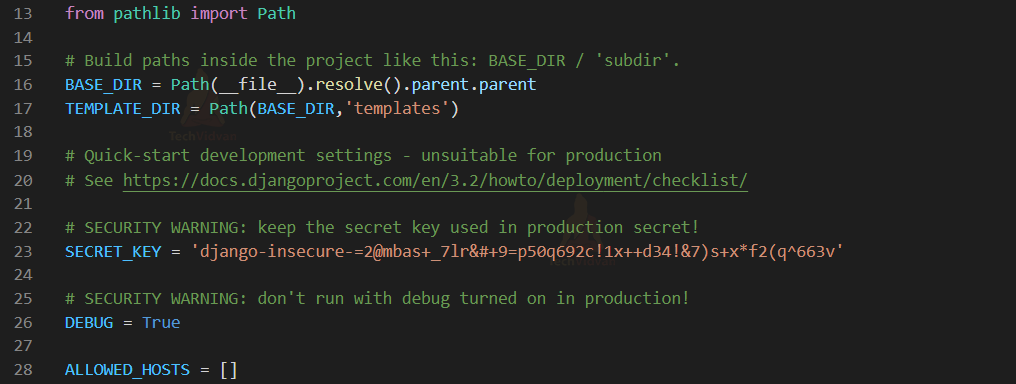
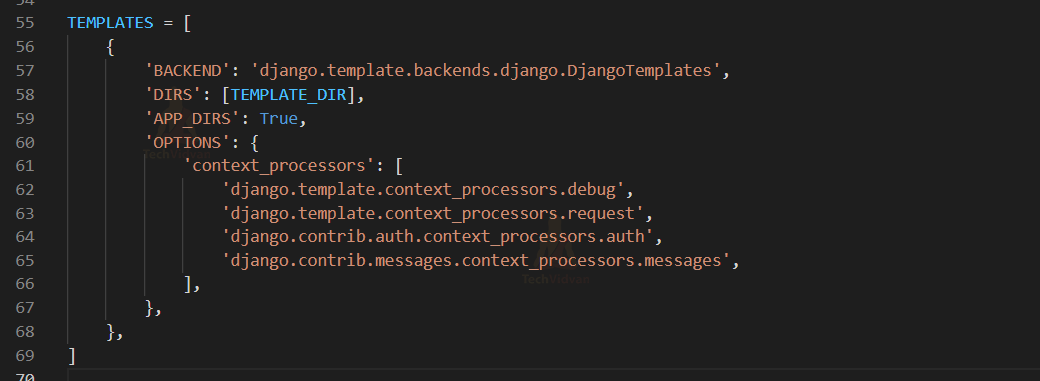
The python path in the BACKEND key is used to implement the Django template’s API backend.
django.template.backends.django.DjangoTemplates and django.template.backends.jinja2.Jinja2 are two examples of Django built-in backends.
- The DIRS directory contains the directory where the template engine needs to look for template-related search files.
- On the other hand, APP DIRS is useful for indicating the location where the engine must verify the templates within the installed applications. Each defined backend assigns a standard name to each subdirectory within the apps.
Step 5: Put the HTML file in the templates directory
Now we will work with the newly created Employee_details.html file. This is the file where the actual design of the web application happens. We can do much stuff in here, from changing the background colour to inserting some of the images.
Being this is our initial module, we will do some basic tasks here.
Code for the newly created Employee_details.html file:
<!DOCTYPE html>
<html>
<head>
    <style>
        body{
            background-color:burlywood;
        }
    </style>
    <title>Employee_details</title>
</head>
<body>
<h1>The Employees Here at TechVidvan</h1>
Employee name: {{ first_name }}
</body>
</html>
Step 6: Making changes in the views.py file
To load the template, call the Employee_Details() method and pass the .html file that we just created.
from django.shortcuts import render
from django.http import HttpResponse

# Create your views here.

def Employee_Info(request):
    return HttpResponse('<h1>Welcome to TechVidvan Employee Portal</h1>')

def Employee_Details(request):
    return render (request,'Employee_details.html')
Step 7: Modifying the urls.py file
Set a URL to use in the browser to access the template.
Initially make changes to the urls.py file under the application (Employee).
from django.urls import path
from Employee import views

urlpatterns = [
    path('TechVidvan2/', views.Employee_Info),
    path('TechVidvan/', views.Employee_Details),
]
Then make some changes to the urls.py file under the root project directory.
from django.contrib import admin
from django.urls import path
from Employee import views

urlpatterns = [
    path('admin/', admin.site.urls),
    path('TechVidvan2/', views.Employee_Info),
    path('TechVidvan/', views.Employee_Details),
]
Step 8: Start the server.
Run the following command and go to localhost:8000/TechVidvan in your browser to see the template.
python manage.py runsever
You will see the following output on the browser.
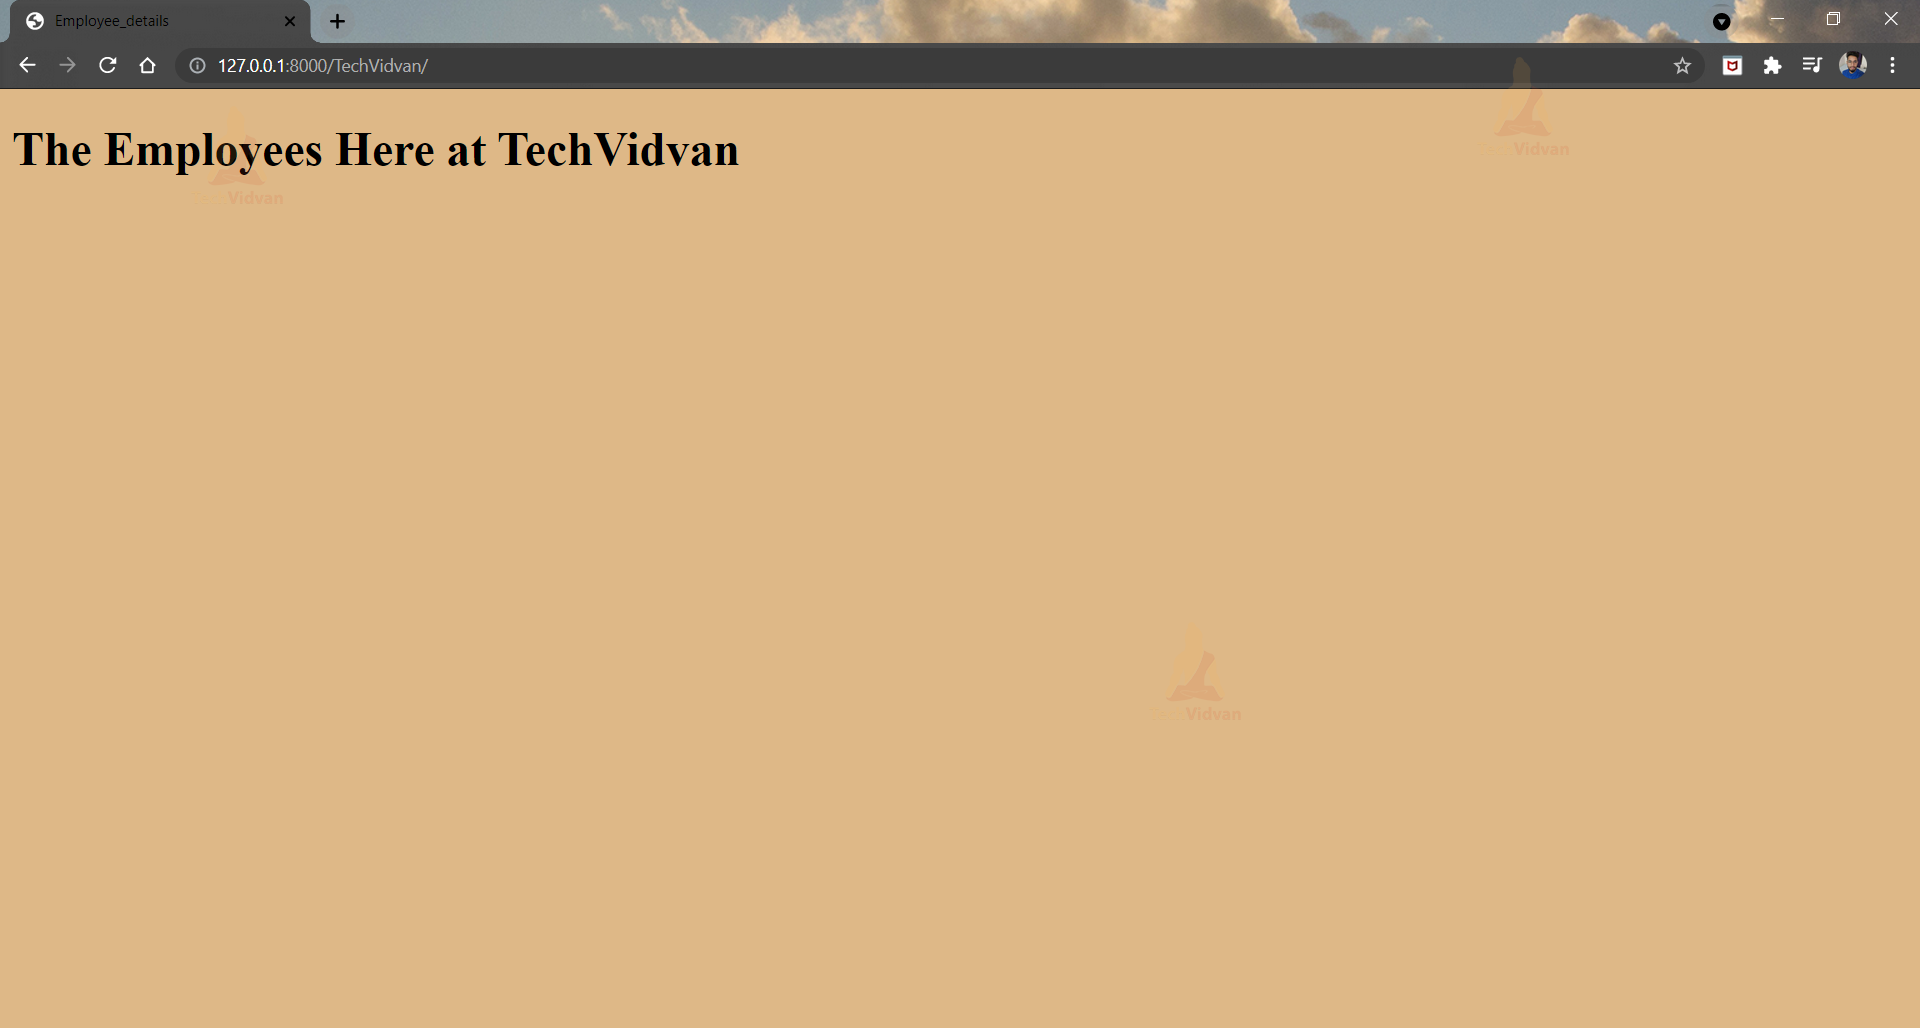
That’s it, you’ve just finished making your first Django Template.
Django template language
Django Templates provides this as one of its most important features. A Django template is a text file or a Python string that has been marked up with the Django template language. The template engine understands and recognises certain constructs. Variables and tags are the most common.
There are four major constructs in the Django template language’s syntax.
1. Variables in Django
Variables return a value from the context, a dict-like object that maps keys to values. The context object sent by the view can be accessed in the template using Django Template variables.
Syntax of variable:
{{ variable_name }}
Example of Using a variable in the code:
Now create a view through which we will pass the context dictionary, in Employees/views.py,
from django.shortcuts import render
def Employee_Details(request):
# create a dictionary
context = {
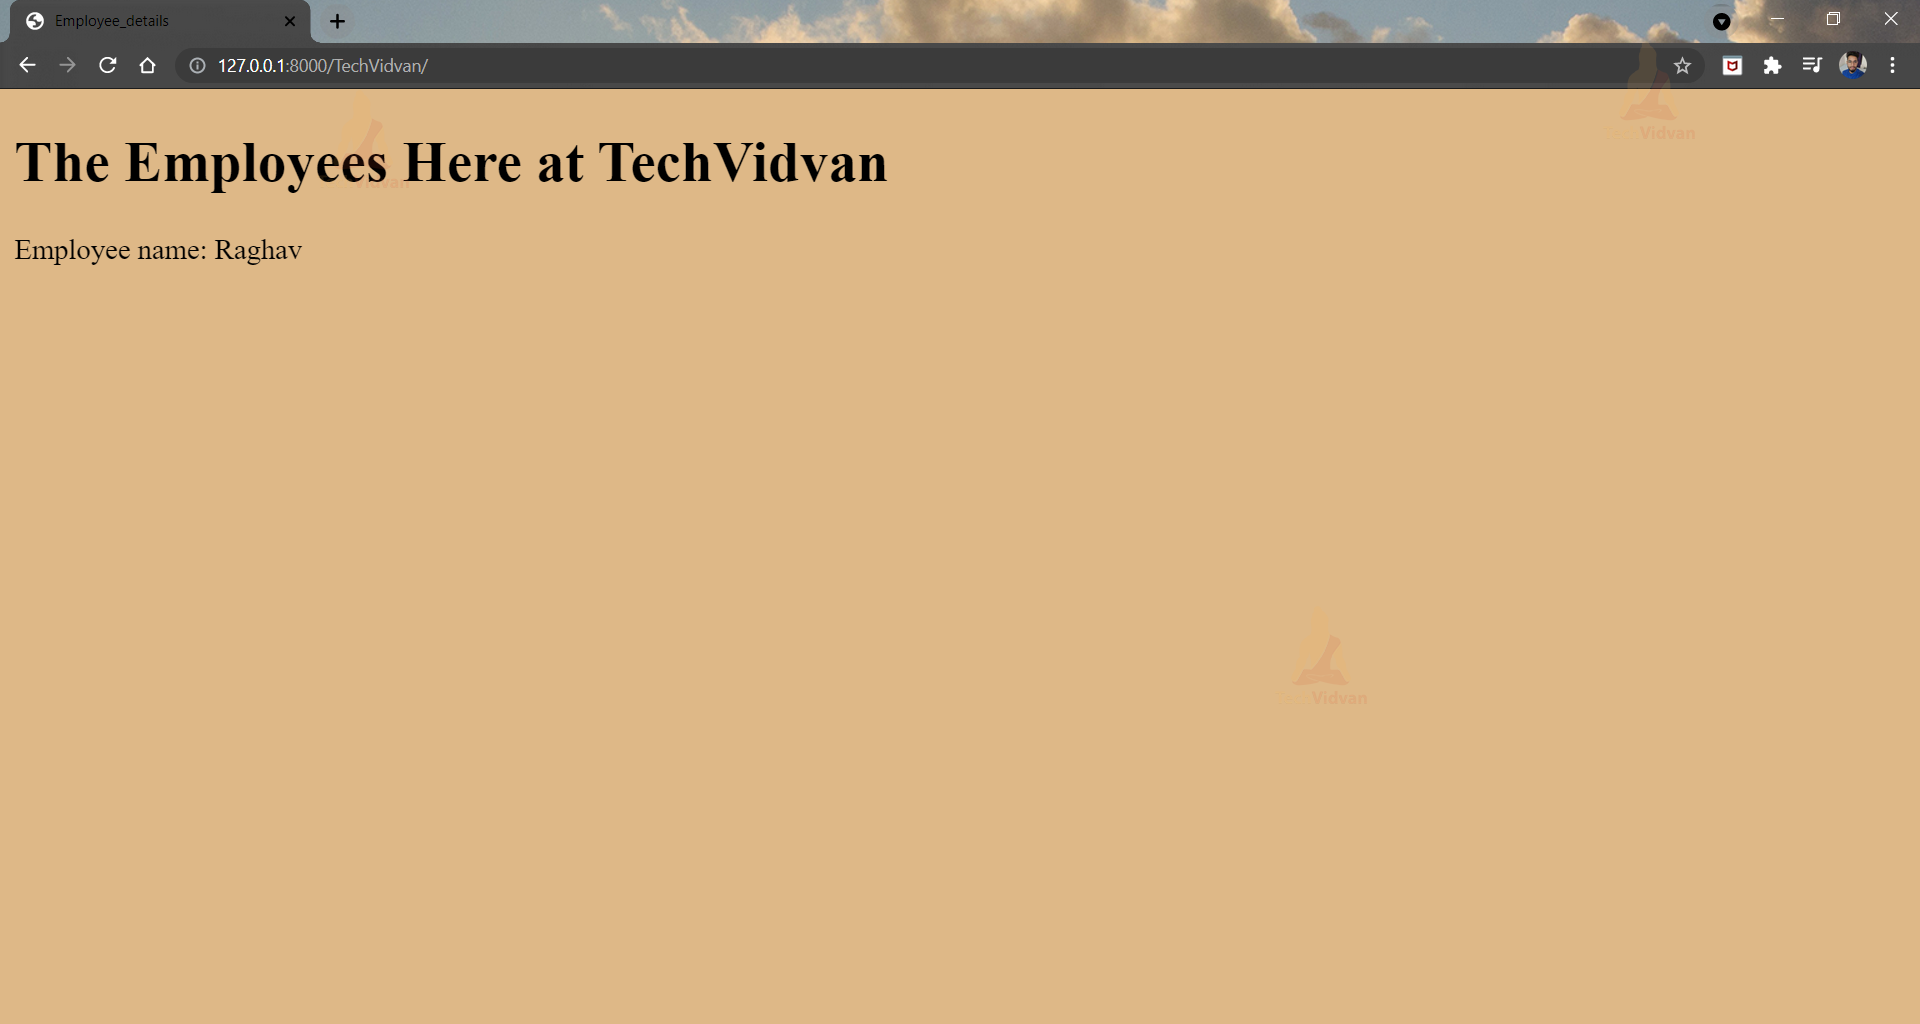
"first_name" : "Raghav",
}
return render(request, "Employee_details.html", context)
Create a url path to map to this view, in Employees/urls.py,
from django.urls import path

# importing views from views..py
from .views import Employee_Details

urlpatterns = [
  path('', Employee_Details),
]
Make changes in Employee_details.html
Employee name: {{ first_name }}.
This brings the following Output:
2. Tag in Django
Tags allow arbitrary logic in the rendering process in a template.
Syntax of Tag:
{% tag_name %}
Using Tag in the code:
Tags are surrounded by {% and %} like this:
{% csrf_token %}
In templates, there are numerous tags that are used. Here are a few examples:
-
Using if/else:
{% if condition %}
  renders if body
{% else %}
    renders else body
{% endif %}
-
By Using For loop:
{% for odd in odds %}
{{odd}}
{% endfor %}
-
Putting Include in the code:
This is used to load and render a template in the current context. It’s great for developing multiple components, such as navbars, footers, and so on, and then combining them into multiple templates.
{% include template_name %}
- Making the use of block:
This is the block that the child template will override. When we talk about template inheritance, you’ll get a better understanding of blocks.
{% block content %}
{% endblock %}
List of Commonly Used Tags
| Comment | cycle | extends |
| if | For loop | For…empty loop |
| Boolean Operators | firstof | Include |
| lorem | now | url |
3. Filters / {{ metadata | response }} in Django
As Django is a web framework, it will also provide content based on metadata, which is where the filters come in handy.
These filters are particularly useful when working on a large project where the site’s metadata is vital; otherwise, they aren’t as useful for smaller blog websites.
The variable’s and tag argument’s values are transformed using the filter.
Syntax of using Django Filters:
{{ variable_name | filter_name }}
Example of using Filters:
{{ my_date|date:"d-m-y" }}
Major Template Filters in Django
| add | addslashes | capfirst |
| center | Cut | date |
| default | dictsort | divisibleby |
| escape | filesizeformat | first |
| Join | last | length |
4. Comments in Django
Comments are one of the most effective ways to improve code reusability and readability. As a result, the Django framework includes a special tag for commenting in the template language.
The general syntax of Comments is:
{# this will not be rendered by the browser #}
Example of using comments:
{# Comment here. It won't be rendered #}
Django Templates are made up of four core structures. To improve the appearance of our website, we will implement the same in many methods.
Django Template inheritance
The most powerful and, as a result, most complex aspect of Django’s template engine is template inheritance. You can create a “skeleton” template that contains all of your site’s common elements and defines blocks that child templates can override. In Django, the extends tag is used to inherit templates.
Syntax of Template Inheritance:
{% extends 'template_name.html' %}
Let’s have a look at template inheritance with an example:
<!DOCTYPE html>
<html lang="en">
<head>
    <link rel="stylesheet" href="style.css">
    <title>{% block title %}Employee Portal{% endblock %}</title>
</head>

<body>
    <div id="sidebar">
        {% block sidebar %}
        <ul>
            <li><a href="/">Home</a></li>
            <li><a href="/About/">About</a></li>
        </ul>
        {% endblock %}
    </div>

    <div id="content">
        {% block content %}{% endblock %}
    </div>
</body>
</html>
This template, called base.html, creates an HTML skeleton document that you can use to create a two-column page. The “child” templates’ responsibility is to fill up the empty blocks with content.
The block tag in this example defines three blocks that child templates can fill up. The block tag simply informs the template engine that those elements of the template may be overridden by a child template.
The following is an example of a child template:
{% extends "base.html" %}

{% block title %}Welcome to the About Page{% endblock %}

{% block content %}
{% for entry in Employee_Info%}
    <h2>{{ entry.title }}</h2>
    <p>{{ entry.body }}</p>
{% endfor %}
{% endblock %}
The extends tag is crucial in this case. It informs the template engine that this template “extends” another template. The template system locates the parent – in this case, “base.html” – before evaluating the template.
When the template engine notices the three-block tags in base.html, it will replace them with the contents of the child template.
The result could look like this, depending on the value of Employee_Info:
<!DOCTYPE html>
<html lang="en">
<head>
    <link rel="stylesheet" href="style.css">
    <title>Welcome to the About Page</title>
</head>

<body>
    <div id="sidebar">
        <ul>
            <li><a href="/">Home</a></li>
            <li><a href="/About/">About</a></li>
        </ul>
    </div>

    <div id="content">
        <h2>Entry one</h2>
        <p>This is my first entry.</p>

        <h2>Entry two</h2>
        <p>This is my second entry.</p>
    </div>
</body>
</html>
Since this sidebar block was not defined by the child template, the value from the parent template was used instead. Content within a parent template’s {% block %} tag is always utilised as a fallback.
You can use as many inheritance levels as you want. The following three-level approach is a standard way to use inheritance:
- Make a base.html template that contains your site’s overall appearance and feel.
- Each “section” of your site should have its base_SECTIONNAME.html template. base_news.html and base_sports.html are two examples. All of these templates are built on top of base.html and include section-specific styling and design.
- Create unique templates for each page type, such as a news item or a blog post.
This method maximises code reuse and aids in the addition of things to shared content sections like section-wide navigation.
Summary
We covered the three most important aspects of web programming, along with Django.
- Models, as we learnt, are used to transmit data between the database and the view, and they hold the data definition for our website.
- Views serve as a link between models and templates, as well as a gateway for server data. They are where the business logic is kept.
- Django uses templates extensively, and they are currently the greatest implementation of loosely coupled architectures.
A Django template is a basic building piece of a dynamic Django application that deals with delivering information from a Django view to the browser.
If you have any queries, please leave them in the comments section below.