Django URLs and URL Mapping
We’ll learn about Django URL mapping and how to connect the URL request to the corresponding view in this tutorial.
Since Django is a web application framework, it receives user requests and answers them via a URL locator. The framework uses the django.urls module to handle URLs.
So, first, let’s create a URL, and then we’ll go on to mapping.
What is a Uniform Resource Locator (URL)?
The URL stands for Uniform Resource Locator. It is the address that your server uses to find the correct webpage.
All servers take the URL you typed into your browser and deliver the right result to you via that server; if they don’t locate anything that matches the URL, they will display a “404 FILE NOT FOUND ERROR”.
How Do Django Server Handle URLs?
The URLs in Django are in the format of regular expressions, which are easier to read by humans than the typical URLs of PHP frameworks.
Regular Expression
A Regular Expression, often known as RegEx, is a search pattern format that is considerably simpler and easier to comprehend for humans and extremely logical.
This is significant since it simplifies the SEO process compared to the old URL strategy, which has far more special characters.
Prerequisites:
You should go through the previous article on Views in Django.
How to make Django URLs?
The following instructions will show you how to make a Django URL:
1. Using PATH to create a URL ()
This function returns a urlpatterns element that must be included. Path, in other words, serves as a link between an element (for example, Views) and its URL.
Syntax:
path(route, view, kwargs=None, name=None)
1. route
This is the URL for a certain view. For example, a route is ‘/’.
As a result, when we go to the URL for this page, the server will return the associated view.
2. View
Here we must specify the name of the view to which we wish to link. To add another urls.py file, use the “include” method. (This is similar to the project/urls.py file.)
3. *args and **kwargs
The variable input parameter list is represented by args in python function definitions.
A single asterisk is put in use. If we need to pass any variable number of arguments to a function, we use *args.
Example of using *args in the code:
def myFun(*args):
    for arg in args:
        print(arg)


myFun("Hi there!")
So we may pass any number of arguments here, and *args will take them all. We can imagine that arg saves all of the arguments as a list and that when we use the line for arg in args, we are extracting each element from the list.
The * separates the list into elements, so *args returns all of the elements individually, while args returns the elements as a list.
kwargs
In Python, we use kwargs to define a list of keyworded variable arguments. It’s written with two asterisks.
If we need to input any variable number of arguments (keyworded) for a function, we utilise **kwargs. Consider the following example to gain a better understanding of what key-worded means.
Example of using **kwargs in the code:
def myFun(**kwargs):
    for item,price in kwargs.items():
        print(f"{item}={price}")

myFun(paper=10,Pen=10)
We can pass entire values, as shown in the preceding example. Using the assignment operator, you may get the names of the variables and their values.
The kwargs save the arguments as a Python dictionary, therefore by using the line for the item, price in kwargs. items(), we are taking up the item(Paper, Pen) and its associated price (10,10).
The ** divides the dictionary into its constituent parts. As a result, **kwargs returns all keyworded elements separately, whereas kwargs returns the keyworded elements as a dictionary.
4. name
The name is used to specify the name of the view to which the URL refers.
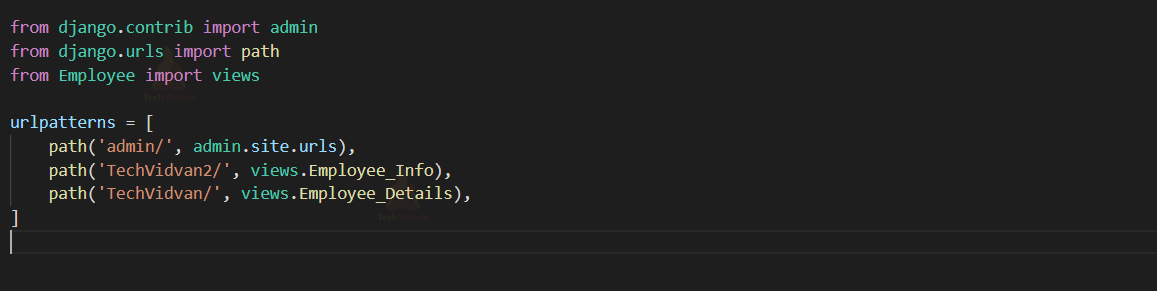
Example of using PATH to create a URL
from django.contrib import admin
from django.urls import path
from Employee import views

urlpatterns = [
    path('admin/', admin.site.urls),
    path('TechVidvan2/', views.Employee_Info),
    path('TechVidvan/', views.Employee_Details),
]
Let’s have a look at the output of the using PATH in the code:

2. Using Re PATH to create a Django URL ()
The re path() method allows you to use regular expressions in URLs written in Python.
Syntax:
path(route, view, kwargs=None, name=None)
Example of using Re PATH to create a URL
Copy the following code under the urls.py file under the project directory:
from django.contrib import admin
from django.urls import re_path
from Employee import views

urlpatterns = [
    re_path('admin/', admin.site.urls),
    re_path('TechVidvan2/', views.Employee_Info),
    re_path('TechVidvan/', views.Employee_Details),
]
Take a look at the output of the using Re PATH in the code:
3. Using INCLUDE to create a Django URL
Within each app, this strategy entails generating URL patterns. When the app needs to be plugged into another app, this will provide it with more flexibility. Simply including these URLs in the main project’s urls.py file will allow you to quickly access the web pages linked with that Django app. The procedures for setting up an include-oriented Django urls.py are outlined below.
Django app urls.py: First, a urls.py file must be generated within the application. As a result, every Django application that was planned to be created as part of the Django project is thought to have its urls.py file. This separate urls.py file will give the applications more flexibility, allowing them to be quickly plugged in and out of the main project.
This urls.py file will serve as the application’s primary URLs for linking to the library. All of the URLs from the Django application can be placed here, allowing advanced access to any page addressed in those apps. The include method is imported from the django.conf.urls library, which is the first important consideration. This is the first and most important thing to take care of.
After that, make sure the admin class is imported as well. The auto-discover method can be set using this admin class. Finally, make sure that the Django application’s urls.py file is added to the urlpatterns tuple. When you include this, all of the urls from the appropriate application will be imported automatically.
URL Error Codes in Django
Here are some additional and interesting facts about URL error codes.
| Error Code | Meaning |
| 400 | Bad request |
| 403 | Permission denied |
| 404 | Page not found |
| 500 | Server Error |
How is the URL searched and the file is delivered?
When we use the URL Bar to look for a URL like this:
After DNS connects us to the proper server, the same URL is sent to the server. While your Django-server is operating, it will get the URL and look in the urls.py file or the ROOT URLCONF variable for the exact URL.
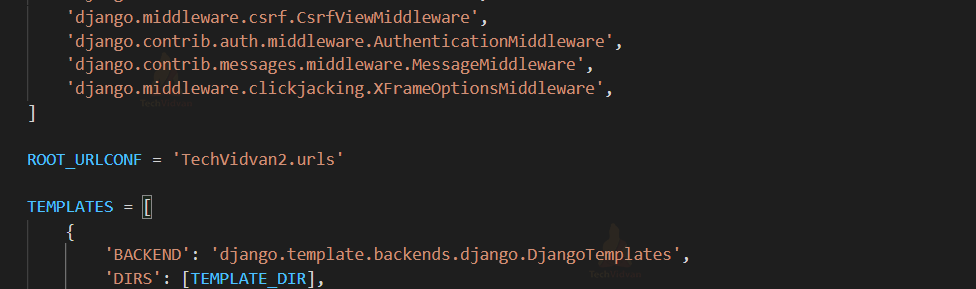
The address of the urls.py file is stored in this variable, as its name suggests.

The server will now search for the URL patterns in the urls.py file under the project directory.
You will find this code and a very useful comment section, inside the file.
This is a collection of URL patterns, with the name being the standard that should not be modified. All of the urls and patterns that will be searched on our website will be added to this list.
The Regular Expression is matched with the specified URL in this file, such as ‘admin/’ in the path function parameter.
The page is now redirected to the specified homepage or the python file ‘admin.site.urls’ in the second parameter, which leads to views such as functions and class objects, or even additional urls that return appropriate templates.
Django Path convertors:
Path convertors capture integer and string values, respectively.
We haven’t used any path convertors in the above code, but Django provides the following path convertors types.
int – To match zero or any positive integer.
str – This function matches any non-empty string excluding the path separator(‘/’).
slug — Matches any slug string, which includes alphabets, digits, hyphens, and underscores.
path — Includes the path separator(‘/’) and matches any non-empty text.
UUID — Represents a UUID (Universal unique identifier).
URL mapping in Django Project:
We’ll go through some of the most widely used URL handling and mapping functions here.
Modifying urls.py file:
The urls.py file in Django is similar to your Django website’s address book. It saves all of your website’s web addresses. It links to a view component or any other urls-conf file for a specific application.
Importing the views function:
We’ll go over how to import the view functions and how to connect several url-conf files to the main urls.py file.
For a Django-powered website, a URLconf is similar to a table of contents. It’s a relationship between URL patterns and the view functions that must be called when those URLs are accessed.
To begin, we must import the view function that our server will use when the URL is matched. We’ll need to import the function from the views.py file for this.
We will be understanding this concept with the same Django application (Employee) we have created in our last tutorials.
Go to the urls.py file under the project directory.
We’ll start by importing the views function from our application file(Employee) into urls.py. Then we can add another element to the list with certain parameters in the following step.
Make some changes in the urls.py file:
from Employee import views
This will import the view function from the Employee file.
Then add this item to the urlpatterns list as:
path('TechVidvan/', views.Employee_Details)
Since we are passing a view function directly as we have imported it, this method has distinct parameters for different cases. The first argument is the URL you wish to search for, which can be anything you want.
This is what your urls.py file should look like:
All that’s left to do now is start your Django server.
We’re all familiar with the command.
python manage.py runserver
Then open your browser and type in the following URL:
localhost:8000/TechVidvan/
The output after making the above changes:
Now, let’s construct multiple views and link them to different endpoints.
Variable Endpoint URL Mapping
Let’s create a view that accepts the Employee ID as a request and returns a single line with the ID.
Let’s create a new view in views.py with an endpoint of <Employee/number>’.
Make the following changes in the views.py file:
def EmployeeID(request,Employeeid):
    return HttpResponse(f"The Employee Id is:{Employeeid}")

The endpoint must now be added to the apps/urls.py file.
path('TechVidvan/<int:Employeeid>/', views.EmployeeID),
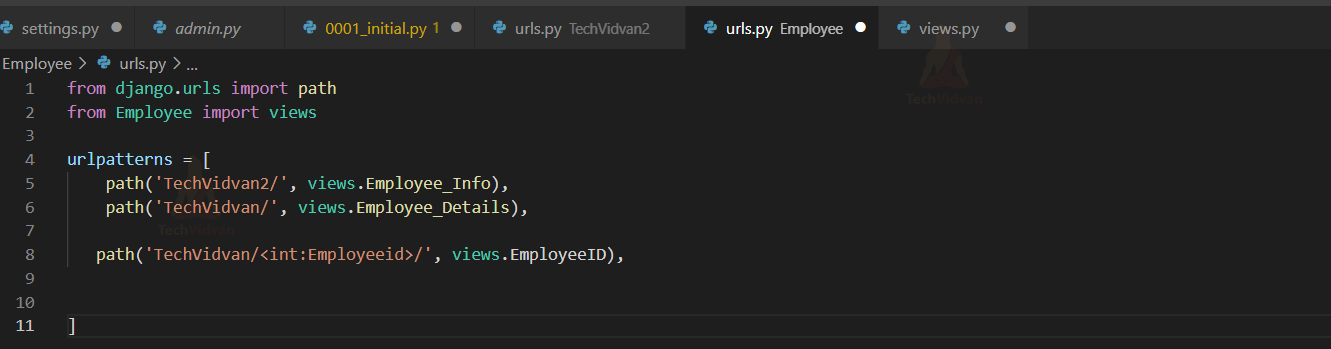
Here we have mentioned using the following syntax <int: Employeeid>
Let’s run the following code:
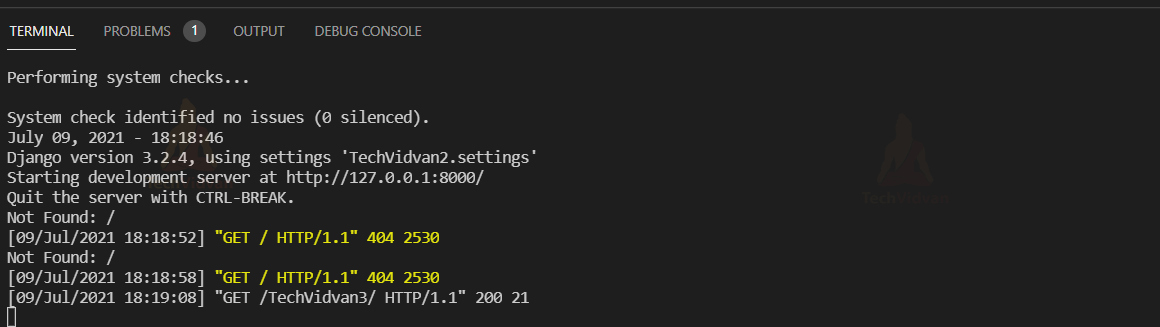
Let’s open the browser and go to the website.127.0.0.1:8000/TechVidvan/<int:bookid>/
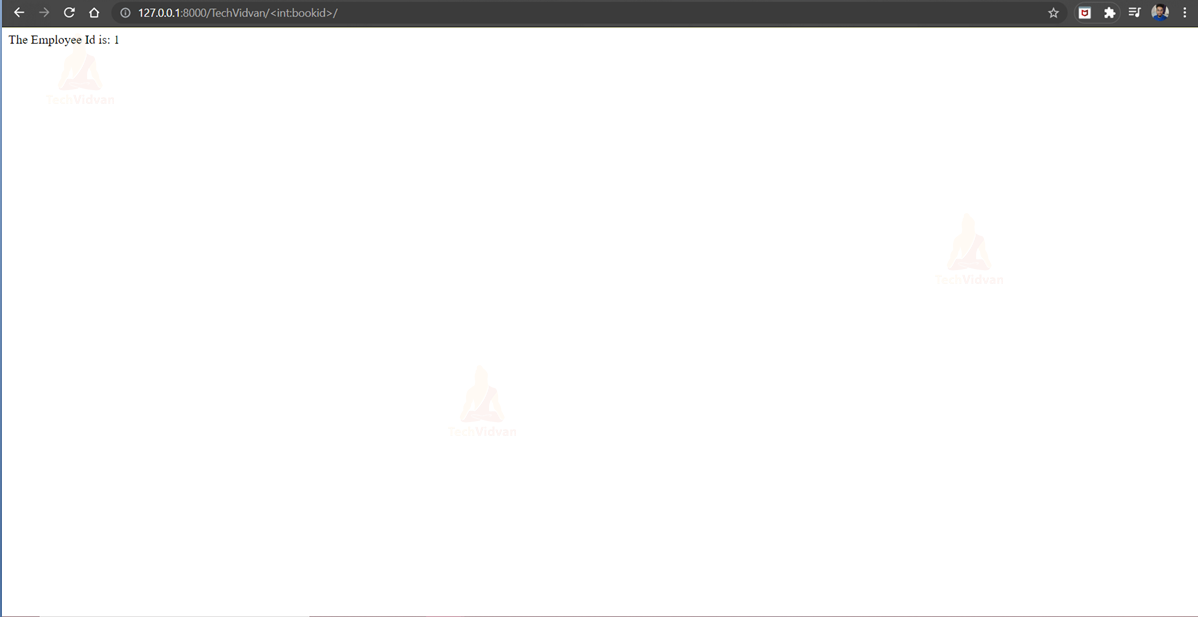
Our website appears to be operational. As a result, we can now use the knowledge above to map any of the Views to the URLs.
Summary
That concludes our discussion. We learned how to connect Django views to Django URLs in this article and created a small webpage as a result.
In future tutorials, we’ll look at how to handle page redirects and cookies in Django. You can leave a comment if you have any queries about the Django URLs tutorial.