Create MP3 Music Player using Python
Music washes away the dust of everyday life from the soul. The saying was indeed true. We all love music. We don’t prefer any kind of disturbance or ads in between but this seems impossible without a paid subscription. So let’s try to design a music player just like the way we want using Python modules.
Python Music Player
In our daily life, everyone has a hobby of listening to music. In order to listen to music we all need a music player. So let’s build our own music player in python.
Python Music Player- Project Details
In this project, we will create a music player in which we can play the music, pause, stop or resume the music.
We are creating a project using the tkinter and pygame module. Using the Tkinter library we are creating a GUI for the music player.
Project Prerequisite
This project requires good knowledge of python and the Tkinter library. Tkinter is the python binding to the Tk toolkit which is used across many programming languages for building Graphical user interface which is GUI. To work on this project basic understanding of the pygame module is also required.
Download Python Music Player Code
Please download the source code of mp3 music player in python from the following link: Music Player Project
Steps to Build a Python MP3 Music Player
Below are the steps to create Python MP3 Player:
- Import modules
- Initializing root window
- Create a function for adding and playing music
- Make icon and logo
- Create music player buttons
Step 1- Importing Modules
#TechVidvan- Import Modules
from tkinter import *
from tkinter import Tk
from tkinter import filedialog
from pygame import mixer
import os
Code Explanation-
- import mixer – It will import pygame. Use for manipulation of the song tracks.
- Tkinter module – Tkinter is the standard interface in python for creating a GUI that is Graphical User Interface.
- tkinter import * – import everything from the module.
- import os – This is the functional module in order to get the data from your computer.
Step 2- Initializing root window
#TechVidvan- creating the root window for python mp3 music player
root=Tk()
root.title('Music player project by TechVidvan')
root.geometry("920x670+290+85")
root.configure(bg= "#0f1a2b")
root.resizable(False, False)
mixer.init()
Code Explanation-
- root tk() – Initializing the main window
- root.title() – for setting the title of the music player which will display on the top of the window.
- root.configure() – for setting background color.
- mixer.init() – Initializing the pygame mixer module. window
- For displaying directly to the GUI here we use string variable.
Step 3- Create music player functions to player mp3
def Add_Music():
    path = filedialog.askdirectory()
    if path:
        os.chdir(path)
        songs = os.listdire(path)

        for song in songs:
            if song.endswith(".mp3"):
                Playlist.insert(END, song)

def Play_Music():
    Music_Name= Playlist.get(ACTIVE)
    print(Music_Name[0:-4])
    mixer.music.load(Playlist.get(ACTIVE))
    mixer.music.play()
Code Explanation
- Add music() – Function for adding the music from the directory.
- Here we have created an if loop in which we have given the path of the directory, so we can open any folder from our directory where our music files are saved.
- After choosing the music file from the directory , select the particular song and play the music using play music function.
Step 4 – Make icon and logo
#icon
Icon_Image = PhotoImage(file="logo.png")
root.iconphoto(False,Icon_Image = PhotoImage(file="logo.png"))

Top_Image = PhotoImage(file="top.png")
Label(root, image=Top_Image, bg="#0f1a2b").pack()

#logo
logo_Image = PhotoImage(file="logo.png")
Label(root, image=logo_Image, bg="#0f1a2b").place(x=65, y=115)
Code Explanation
- Icon image() – for adding an image to the icon.
- Photoimage – this method returns the image.
Step 5 – Create music player buttons
# Button
Button_Play = PhotoImage(file="play.png")
Button(root, image=Button_Play, bg="#0f1a2b", bd=0, command=Play_Music).place(x=100, y=400)

Button_Stop = PhotoImage(file="stop.png")
Button(root, image=Button_Stop, bg="#0f1a2b", bd=0, command=mixer.music.stop).place(x=30, y=500)

Button_Resume = PhotoImage(file="resume.png")
Button(root, image=Button_Resume, bg="#0f1a2b", bd=0, command=mixer.music.unpause).place(x=115, y=500)

Button_Pause = PhotoImage(file="pause.png")
Button(root, image=Button_Pause, bg="#0f1a2b", bd=0, command=mixer.music.pause).place(x=200, y=500)

#music
Menu = PhotoImage(file="menu.png")
Label(root, image=Menu, bg="#0f1a2b").pack(padx=10, pady=50, side=RIGHT)

Frame_Music = Frame(root, bd=2, relief = RIDGE)
Frame_Music.place(x=330, y=350, width=560, height=250)

Button(root, text="Add Music", width=15, height=2, font=("times new roman",12,"bold"),fg="Black", bg="#21b3de", command= Add_Music).place(x=330, y=300)

Scroll = Scrollbar(Frame_Music)
Playlist = Listbox(Frame_Music, width=100, font=("Times new roman",10), bg="#333333", fg="grey", selectbackground="lightblue", cursor="hand2", bd=0, yscrollcommand=Scroll.set)
Scroll.config(command=Playlist.yview)
Scroll.pack(side=RIGHT, fill=Y)
Playlist.pack(side=LEFT, fill=BOTH)

root.mainloop()
Code Explanation
- Buttons are created using the tkinter module.
- Here we have created a play, pause, stop and resume button.
- Root – We want the buttons in our main window so we are calling root here.
- Text – Specified text will display on the button.
- Command – Command function which will be called when the button is clicked.
- We are calling config for setting font, font color, background color, border width and padding.
- place() – For placing the button at the proper position.
- scroll – Here we are creating a frame at the right side of the window which will show our playlist. And the scrollbar controls the up and down moment of the listbox.
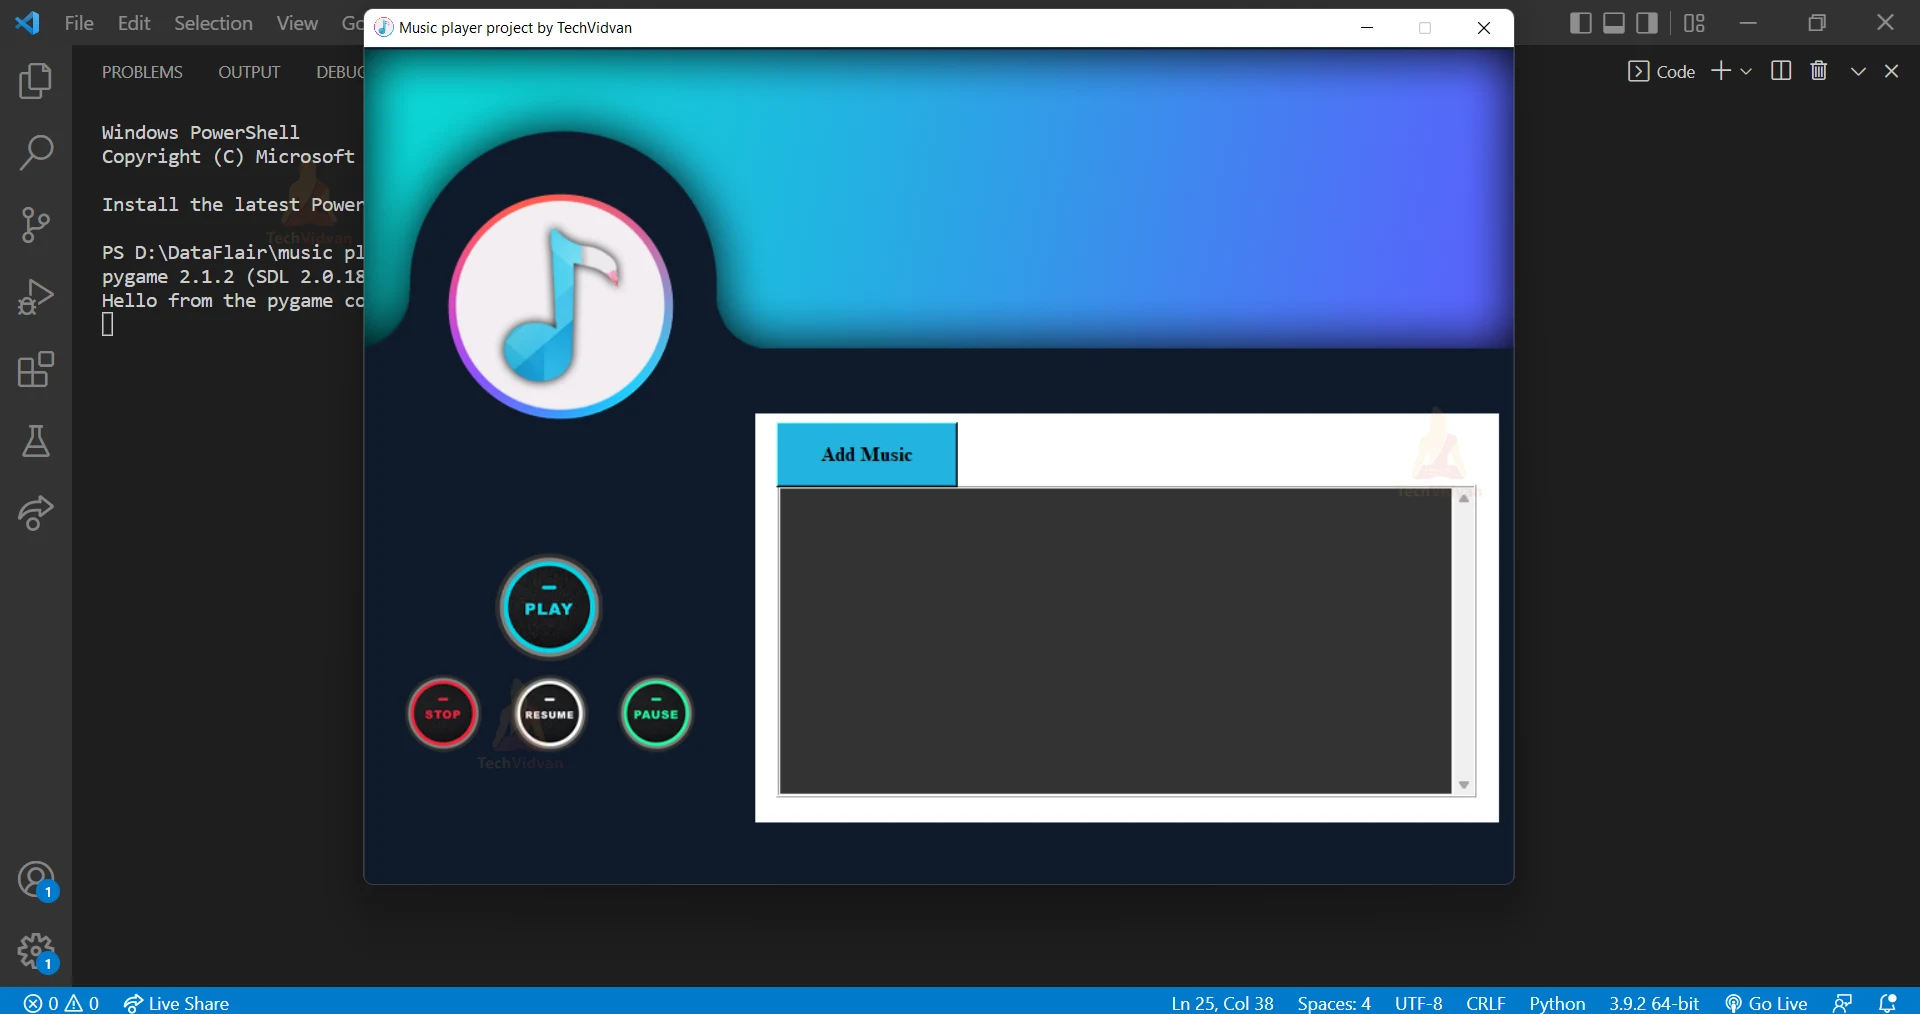
Python Music Player Output
Summary
Congratulations!! We have successfully created a Music Player in python using Graphical user Interface(GUI). We have learned about the Tkinter module and the function that module provides as well as the pygame module.