Download and Install Turbo C++ | Learn to Install Code::Blocks
There are many compilers available for C++, you can download any one of your choices. Here we are going to use Code::Blocks and TurboC++. They both work with C and C++. We at TechVidvan will guide you on how to download, install and work with Code::Blocks and TurboC++ on your PC.
Why Code::Blocks?
As we know that there are many IDEs available, one might ask why choose Code::Blocks?
Code::Blocks is a free C/C++ open-source cross-platform Integrated Development Environment (IDE). It itself supports many compilers including Microsoft Visual C++ and GNU GCC. Besides being versatile it supports easy-to-use debugging.
To meet the needs of the various users, it is built around a plug-in framework. Plug-ins allow the IDE to be extensible and you can configure it according to your needs.
How to install Code::Blocks?
Step 1: Download the CodeBlocks installer
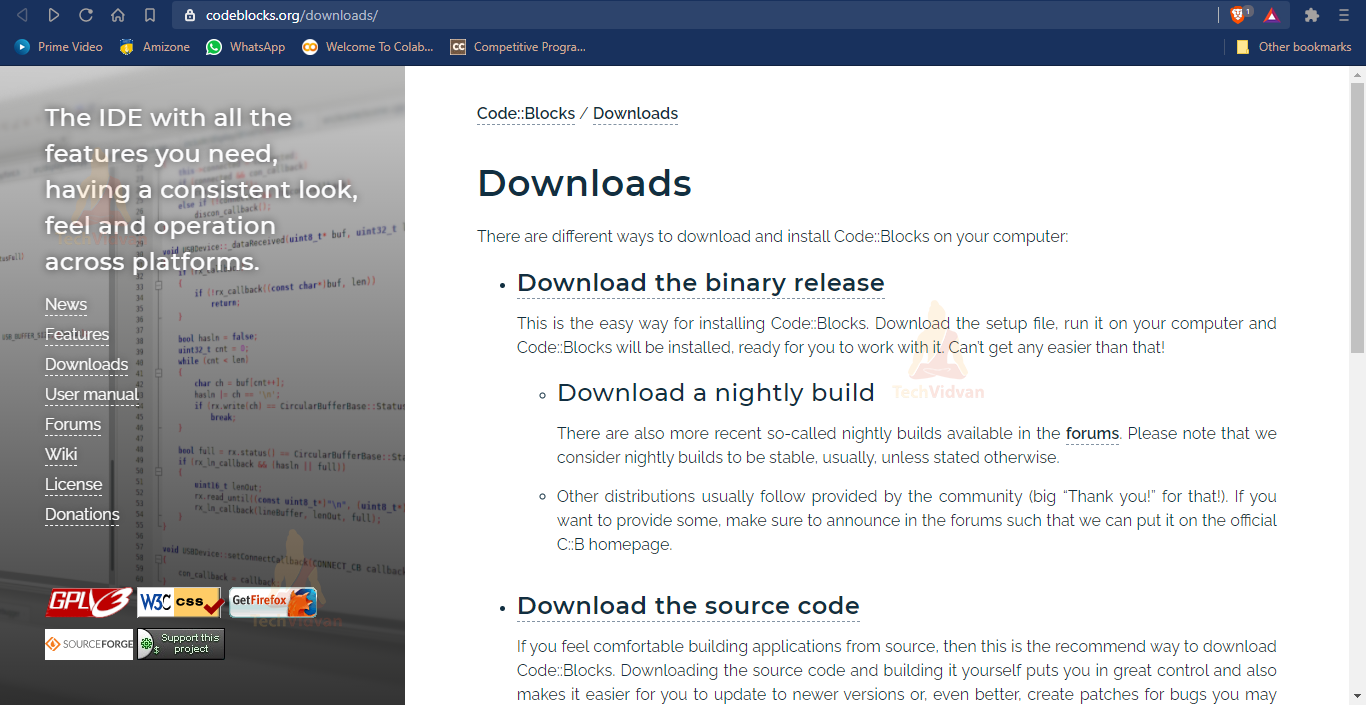
Click on “Download the binary release”.
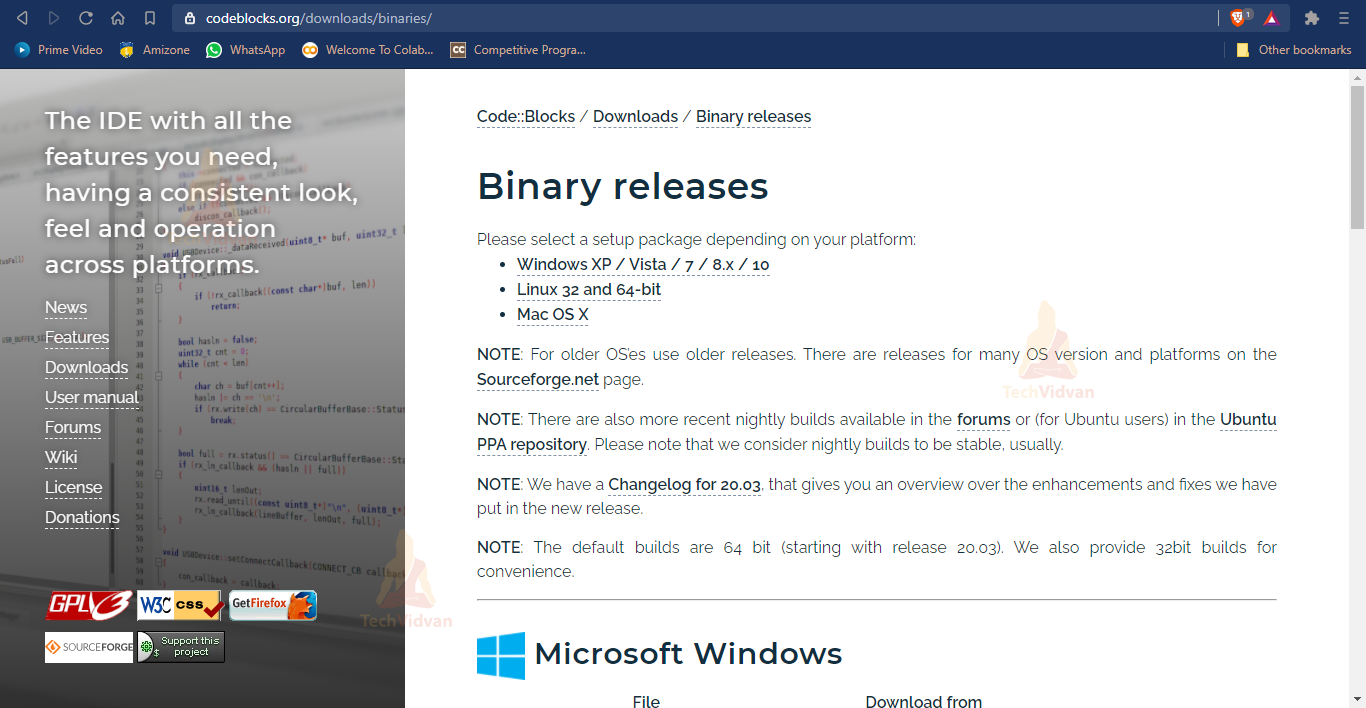
Now, select your Operating System among the given options and then choose the setup file accordingly.
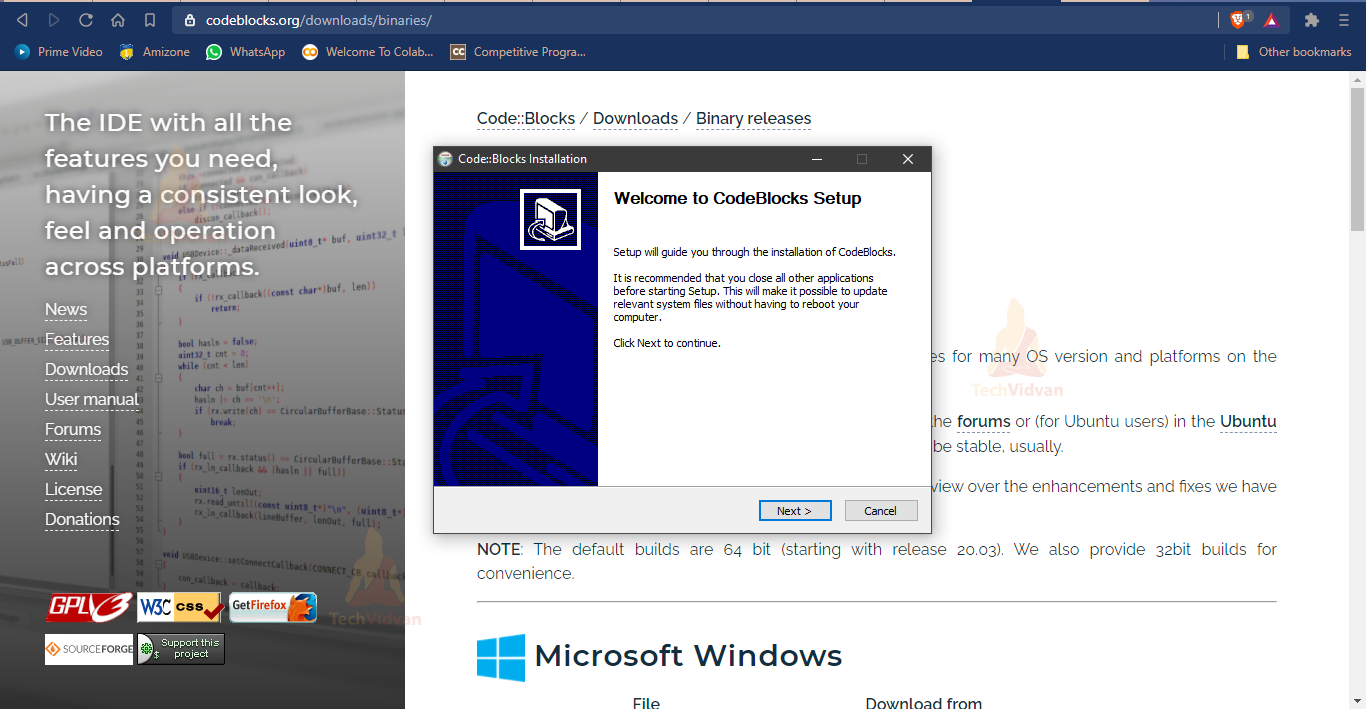
Step 2: Now run the installed .exe file.
Click next.
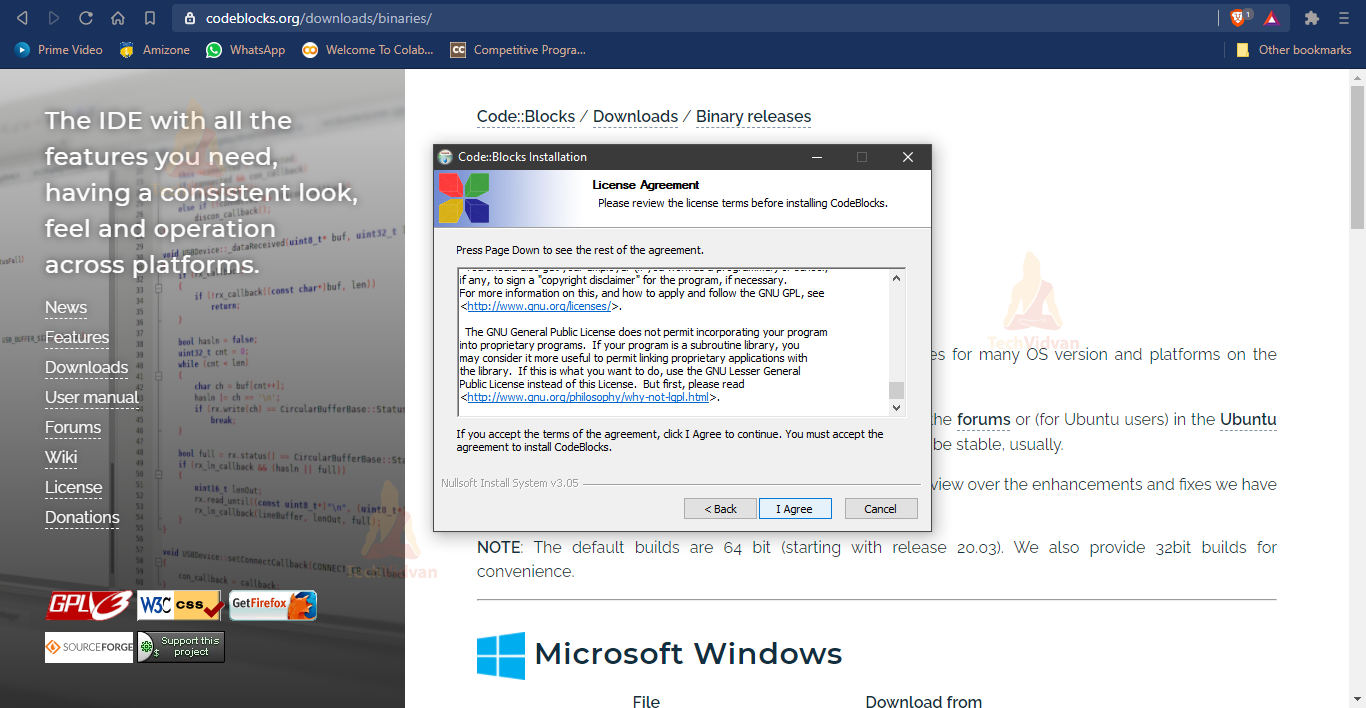
Click “I agree”.
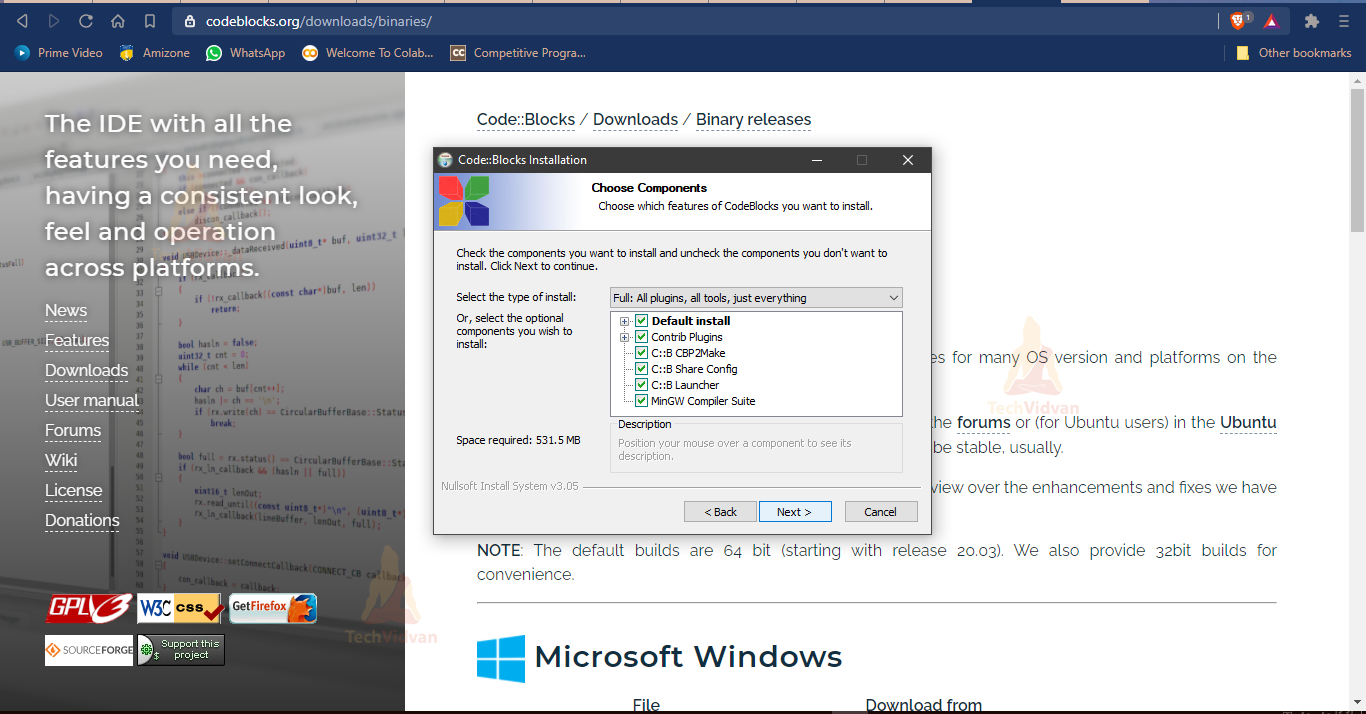
Choose the default options and click “Next”.
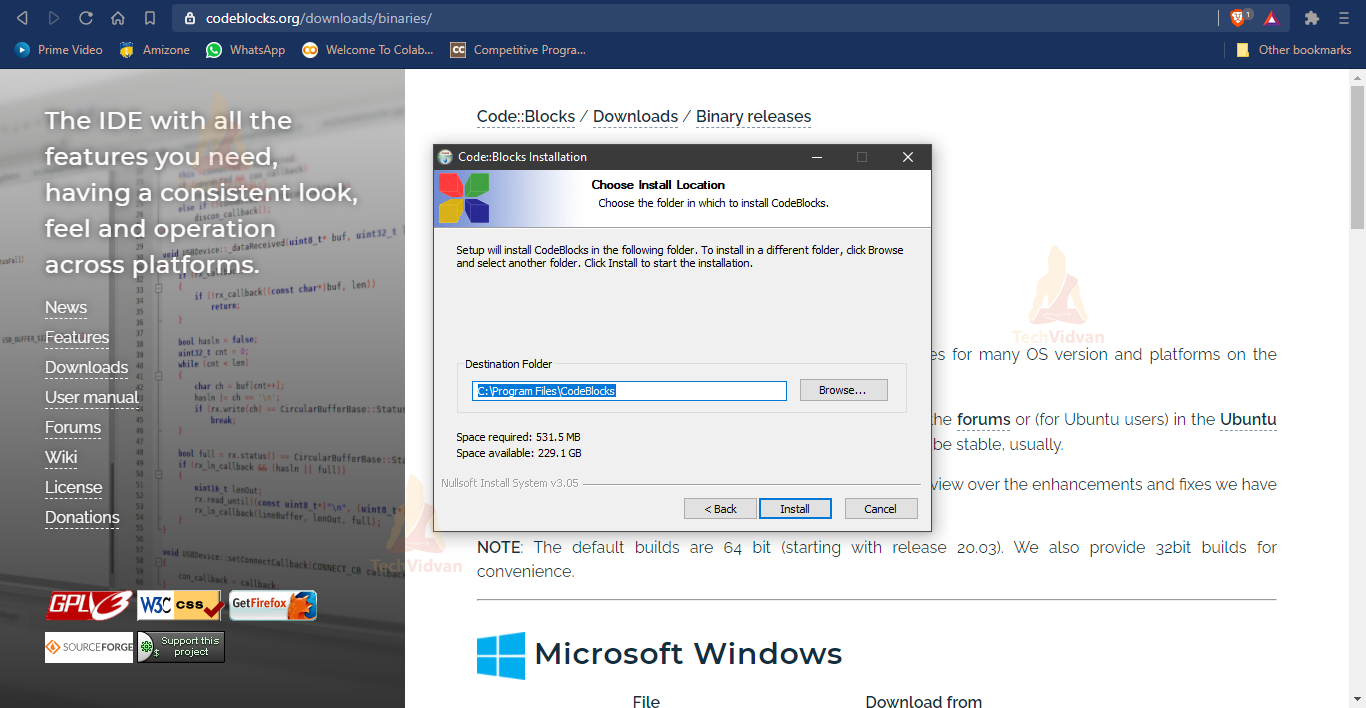
Then click “Install” on the next window and then select “Yes”.
Writing C++ program in Code::Blocks
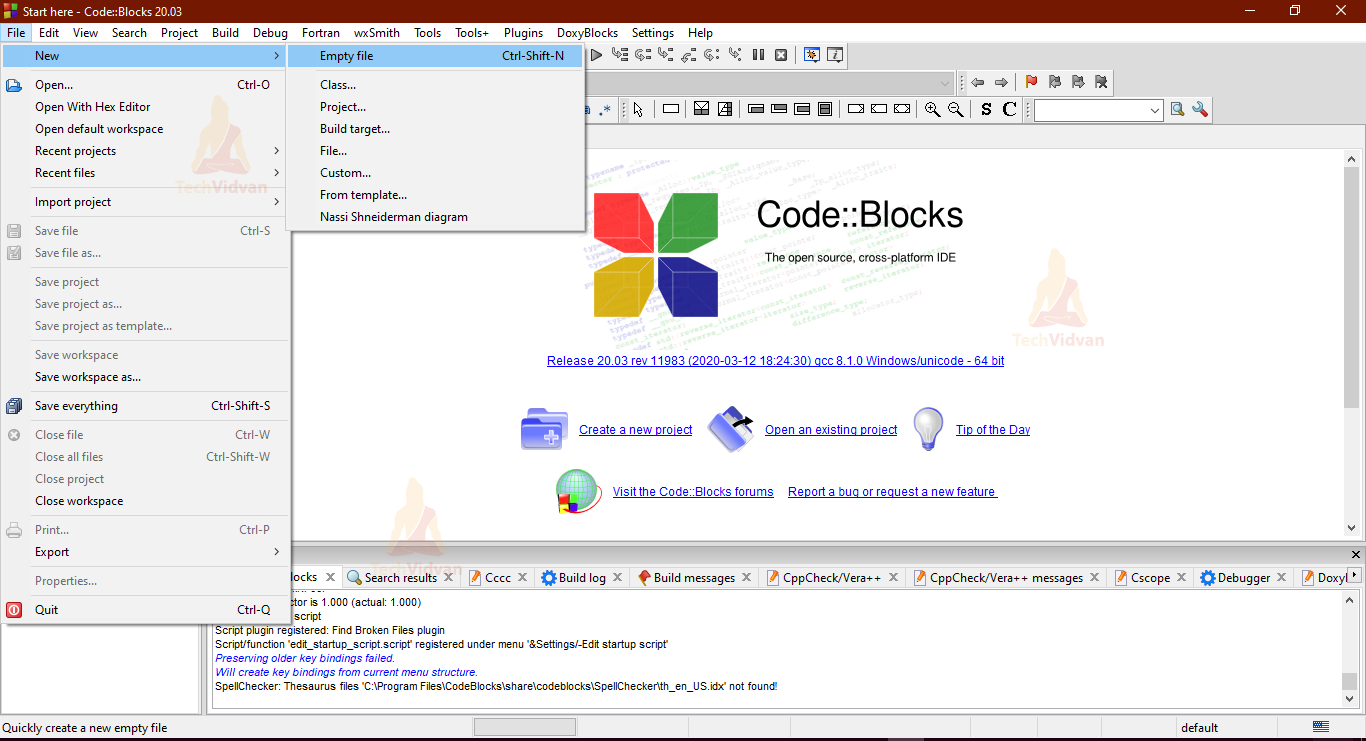
Step 1: Go to File → New → Empty File or just enter Ctrl+Shift+N from your Keyboard.
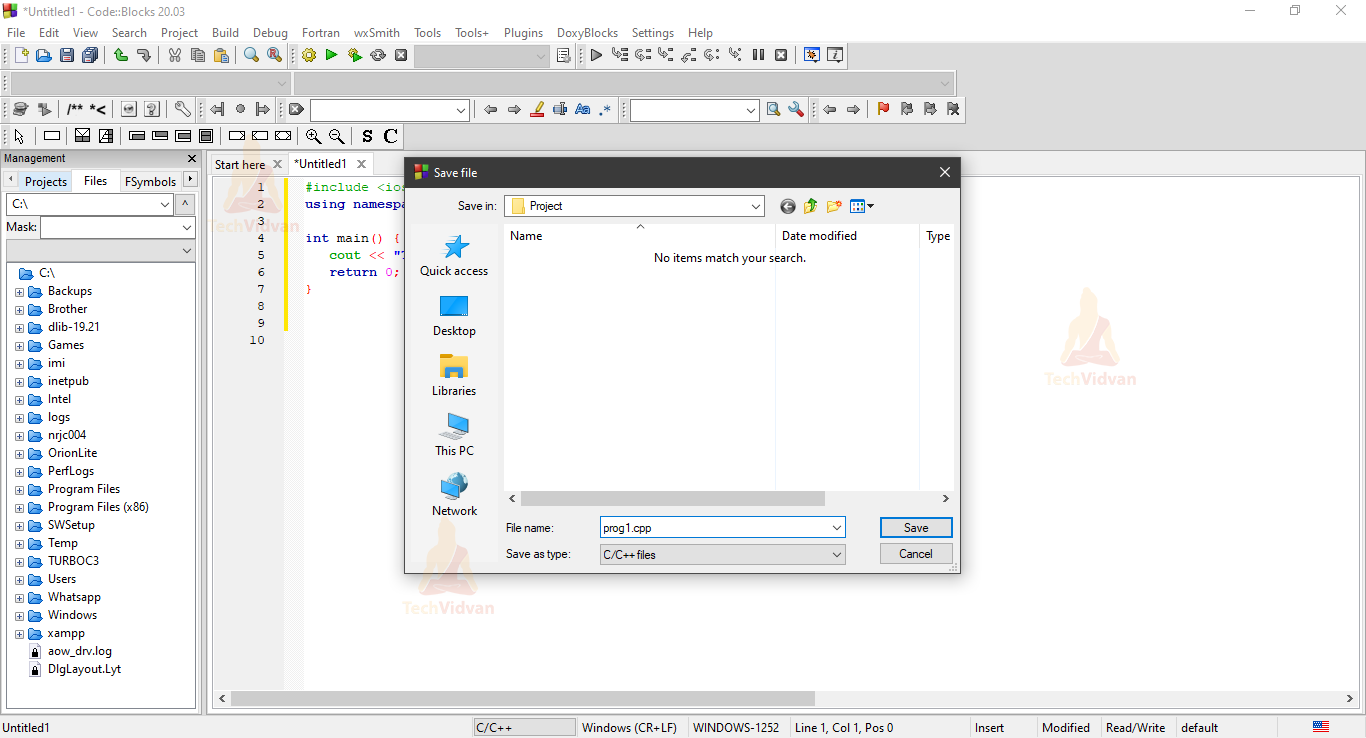
Step 2: Enter any basic code, for example
#include <iostream>
using namespace std;

int main() {
   cout << "TechVidvan" << endl;
   return 0;
}
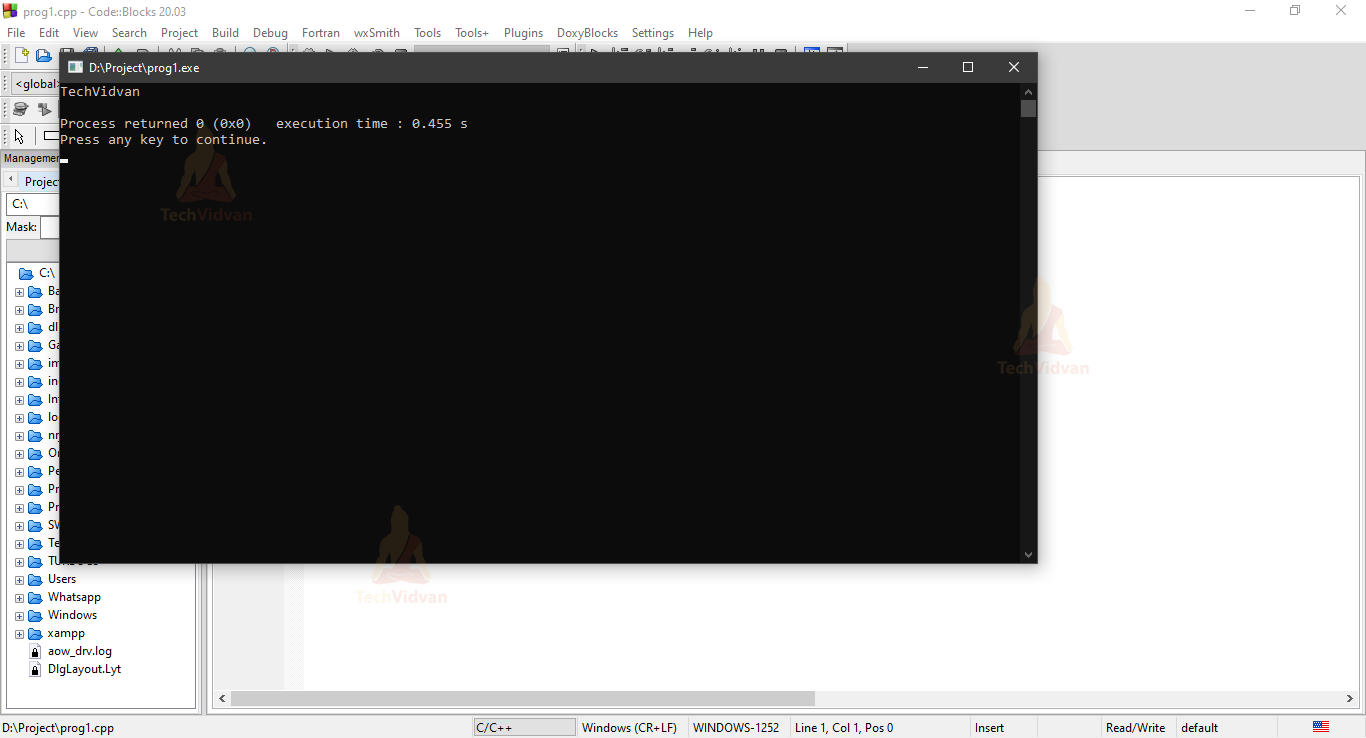
Step 3: Save the file under any name, we will save it as “Prog1.cpp” under D://Project
Step 4: Build the code Ctrl-F9 and then run Ctrl-F10.
Output:
Lets us now see Turbo C++ Installation.
Why Turbo C++?
We all have heard the phrase “Old is Gold”, this holds true for TurboC++. Even after being discontinued back in 2006, students still use this IDE for their schooling. Reasons being:
- Light and small in size.
- Easy to install, unlike modern IDEs as there is no complex information.
- It has both the compiler and IDE together.
How to install TurboC++?
Step 1: Firstly, download the TurboC++ software on your desktop.
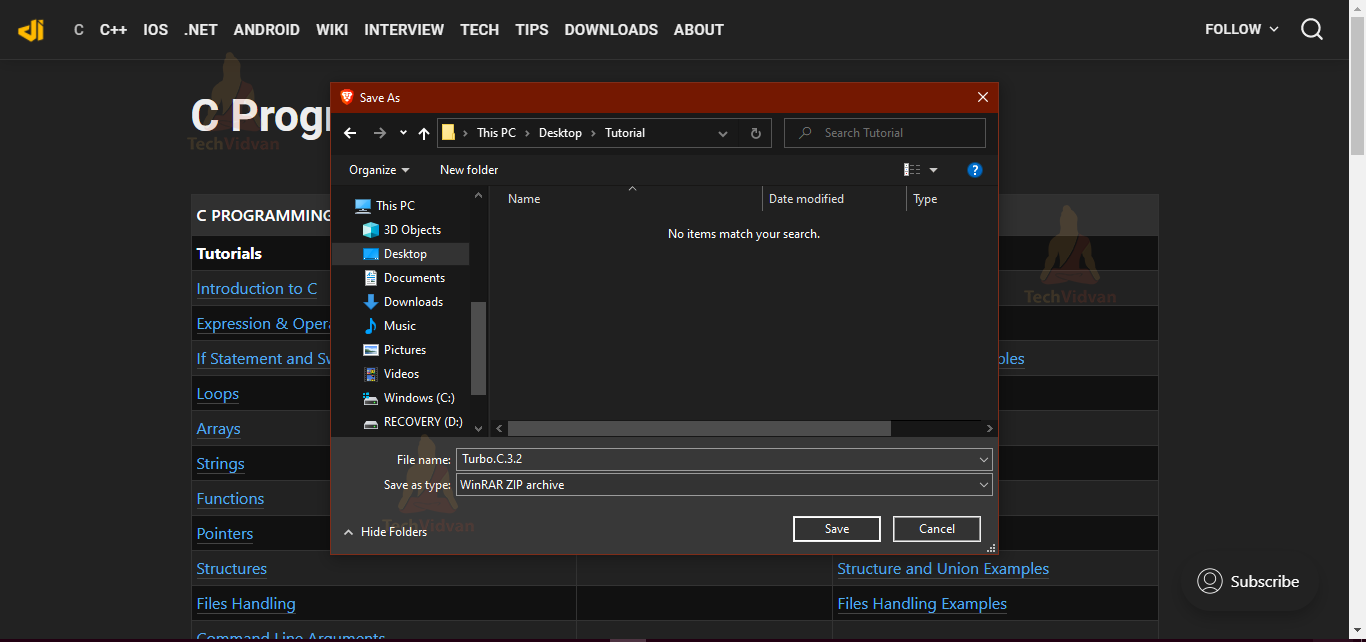
Click the ‘save’ button and it will be downloaded to your mentioned directory.
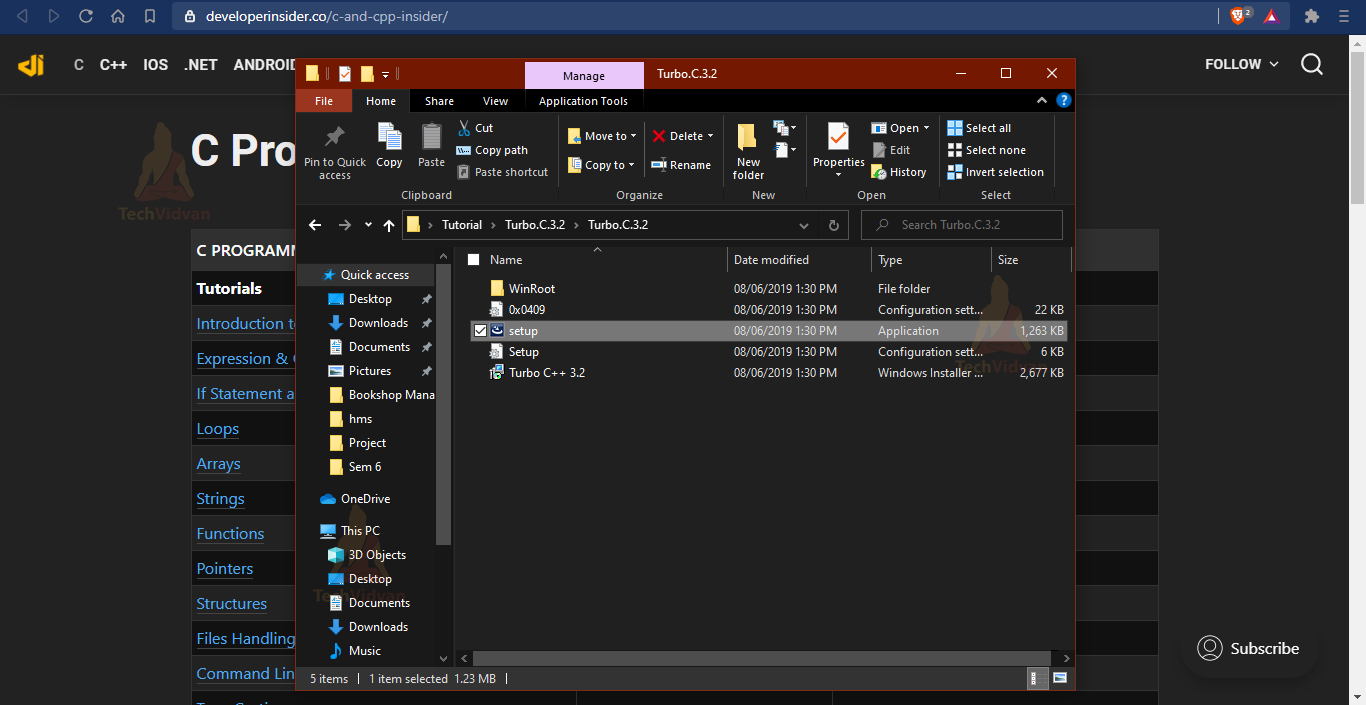
Step 2: Extract the zip file.
Step 3: Double click on the setup.exe file from the folder.
Step 4: Accept the terms & conditions and click ‘install’
Then, click ‘finish’.
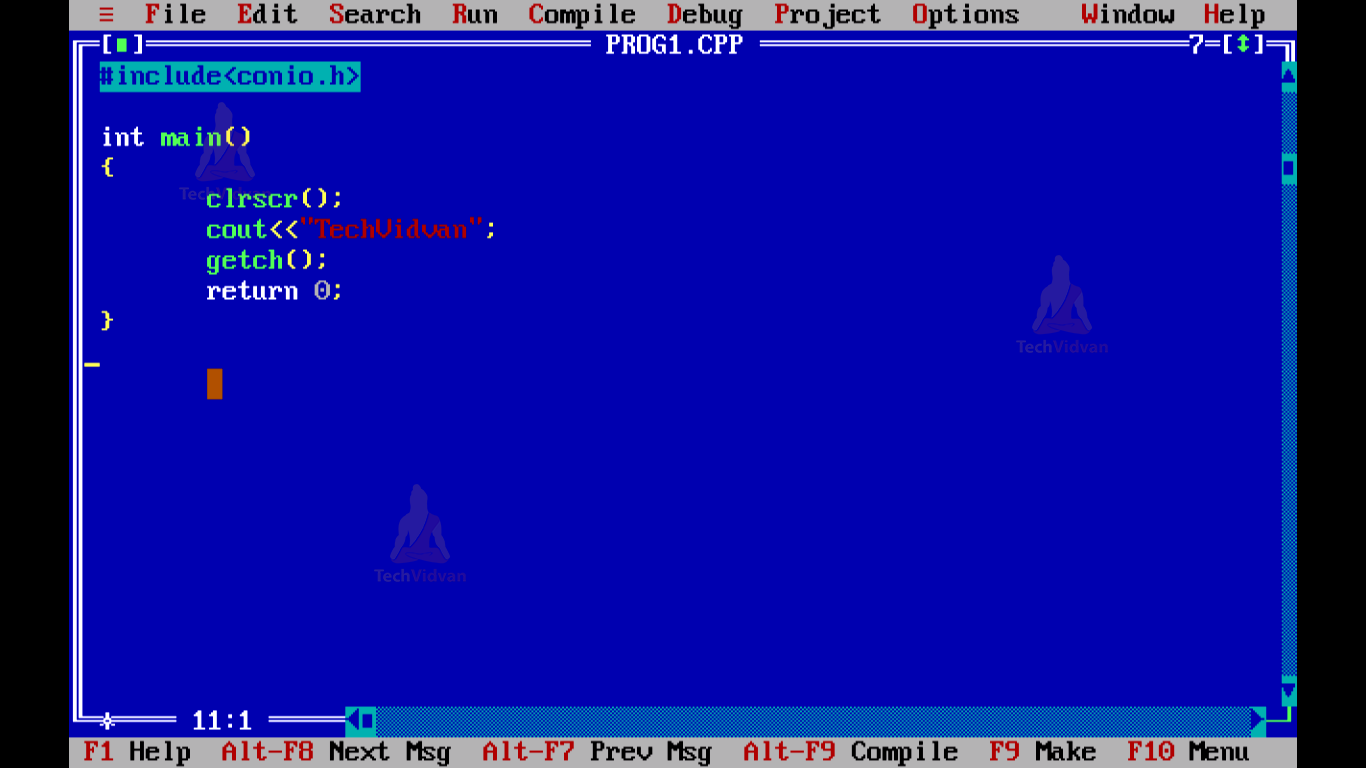
Writing a program in TurboC++
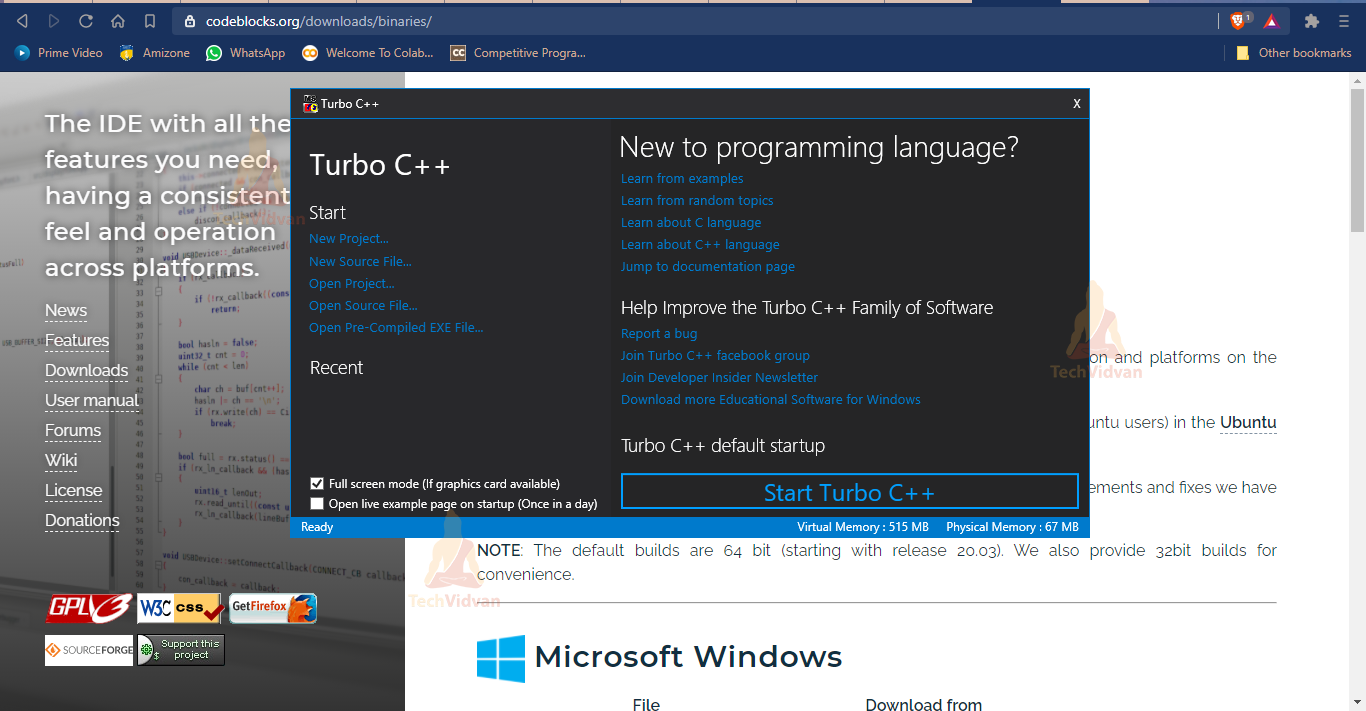
Step 1: Double click on the TurboC++ icon and then click on “Start Turbo C++”
Step 2: Go to File → New.
Write your code and then remember to save it as a .CPP file, because the default is .C. Like here we have saved it as Prog1.CPP.
Step 3: First compile the code and when it is free of errors, then run.
To compile, we need to click on ‘Compile’ from the menu and then ‘Compile’ from the sub-menu. Similarly, to run we need to choose the ‘Run’ submenu from the ‘Run’ menu.
Or, we can just use the shortcut Ctrl+f9 to compile and run the program.
Output:

Conclusion
In this tutorial, we got to know how to install Code::Blocks and TurboC++ in Windows. We even discussed some of the reasons why TurboC++ is preferred and why Code::Blocks is preferred.
We can infer that as a beginner you can work with both IDEs without any problems. But, if you need additional features like a plug-in framework and cross-platform IDE, Code::Blocks is your IDE for that.